Page 5629 of 6020
9-24 ACCESSORIES
AUDIO
REMOVAL AND INSTALLATION
1
2
4
3
5
6
RTW 790LF000101
Removal
1. Remove the ash try (6).
2. Remove the center cluster cover assembly (4).
3. Disconnect the connector for the clock, the 4 ×4 switch, the
hazard switch.
4. Remove the 4 screws on the Audio.
5. Disconnect the connector for Audio (2).
6. Disconnect the Antenna feeder plug (1).
7. Pull out the audio (2 DIN: 5, 1 DIN: 3).
Installation
To install, follow the removal steps in the reverse order.
BACK TO CHAPTER INDEX TO MODEL INDEXISUZU KB P190 2007
Page 5634 of 6020
ACCESSORIES 9-29
CLOCK
REMOVAL AND INSTALLATION
1
2
RTW 790SH000101
Removal
1. Remove the center cluster ASM (2).
2. Disconnect the connector.
3. Remove the clock (1).
Installation
To install, follow the removal steps in the reverse order.
BACK TO CHAPTER INDEX TO MODEL INDEXISUZU KB P190 2007
Page 5789 of 6020

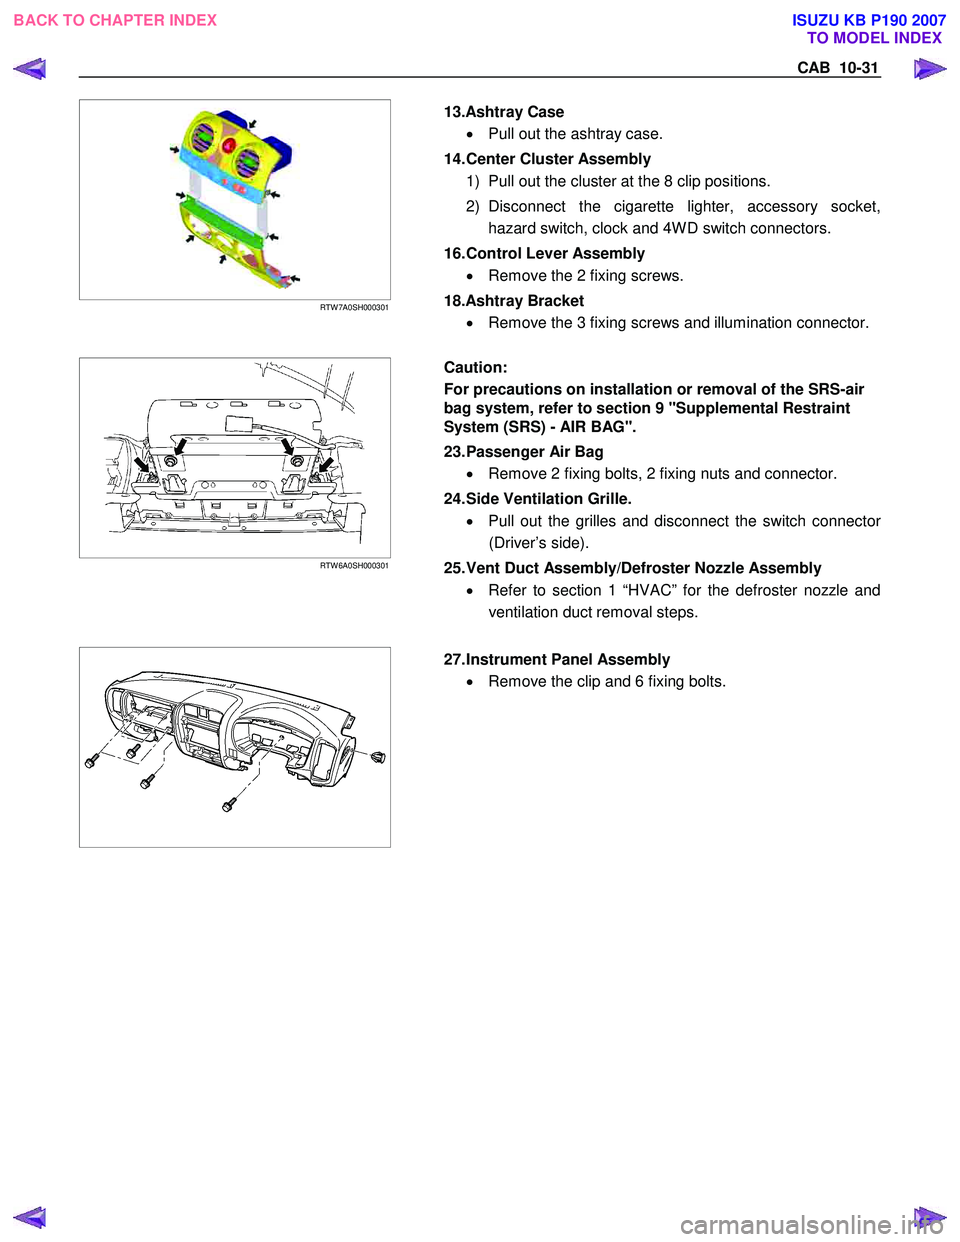
CAB 10-31
RTW 7A0SH000301
13.Ashtray Case
• Pull out the ashtray case.
14. Center Cluster Assembly 1) Pull out the cluster at the 8 clip positions.
2) Disconnect the cigarette lighter, accessory socket, hazard switch, clock and 4W D switch connectors.
16. Control Lever Assembly • Remove the 2 fixing screws.
18.Ashtray Bracket • Remove the 3 fixing screws and illumination connector.
RTW 6A0SH000301
Caution:
For precautions on installation or removal of the SRS-air
bag system, refer to section 9 "Supplemental Restraint
System (SRS) - AIR BAG".
23. Passenger Air Bag
• Remove 2 fixing bolts, 2 fixing nuts and connector.
24. Side Ventilation Grille. • Pull out the grilles and disconnect the switch connecto
r
(Driver’s side).
25. Vent Duct Assembly/Defroster Nozzle Assembly • Refer to section 1 “HVAC” for the defroster nozzle and
ventilation duct removal steps.
27. Instrument Panel Assembly
• Remove the clip and 6 fixing bolts.
BACK TO CHAPTER INDEX TO MODEL INDEX
ISUZU KB P190 2007
Page 5818 of 6020
10-60 CAB
Important Operations - Removal
1. Front Sill Plate
• Pull out the 4 clip positions.
2. Fuel Filler Lid Opener Cover
• Pull out the 3 clip positions.
3. Fuel Filler Lid Opener Lever
• Remove the 2 opener fixing bolts and disconnect the
cable.
5. Fuel Filler Lid Cable Assembly
• Remove some fixing clips, turn the cable holder on the
side of the recess at 90 °counterclockwise and remove it
from the recess. Pull out the grommet in the direction o
f
the front of the vehicle and remove the cable assembly.
BACK TO CHAPTER INDEX TO MODEL INDEXISUZU KB P190 2007
Page 5821 of 6020
CAB 10-63
Important Operations - Removal
1. Front Sill Plate
• Pull out the 4 clip positions.
2. Rear Sill Plate • Pull out the 2 clip positions.
4. Fuel Filler Lid Opener Cover
• Pull out the 3 clip positions.
5. Fuel Filler Lid Opener Lever
• Remove the 2 opener fixing bolts and disconnect the
cable.
7. Fuel Filler Lid Cable Assembly
• Remove some fixing clips, turn the cable holder on the
side of the recess at 90 °counterclockwise and remove it
from the recess. Pull out the grommet in the direction o
f
the front of the vehicle and remove the cable assembly.
BACK TO CHAPTER INDEX TO MODEL INDEXISUZU KB P190 2007