Page 17 of 58

When the message “FAD” appears
on the display:
– turn the knob (4) clockwise to
enhance the sound from the front
speakers;
– turn the knob (4) anticlockwise to
en")
16
Front/rear balance (Fader)
When the message “FAD” appears
on the display:
– turn the knob (4) clockwise to
enhance the sound from the front
speakers;
– turn the knob (4) anticlockwise to
enhance the sound from the rear
speakers.
Right/left balance (Balance)
When the message “BAL” appears
on the display:
– turn the knob (4) clockwise to
enhance the sound from the right
speakers;
– turn the knob (4) anticlockwise to
enhance the sound from the left
speakers.Automatic volume correction
This function is used to automatical-
ly adjust the volume according to the
vehicle speed. Simply turn the knob
(4)) to switch the function on and off.
Musical ambiance
This function is used to set the requi-
red ambiance (classical/jazz/rock/
pop/techno/vocal/none).
Select the required sound using the
knob (16 - 40) and press the knob to
confirm.
After making the required settings,
turn and press the knob (16 - 40) to
select and confirm the setting and go
back to the previous menu.RADIO MODE
Listening to the radio
Select radio mode and repeatedly
press SOURCE (3) or SRC(30) to
display “Radio”.
Frequency band selection
Press BAND/AST(22) to select the
frequency bands: FM1, FM2, FMAST or
AM.
Page 18 of 58
 or ˜(14)
to select either the previous or the
next station.
Hold the button corresponding the
chosen direction pressed to change
frequency continuo")
17
Automatic station search
Briefly press ÷(19) or ˜(14)
to select either the previous or the
next station.
Hold the button corresponding the
chosen direction pressed to change
frequency continuously.
Tuning will stop at the first recei-
veable station when the button is re-
leased.
Only the stations transmitting traf-
fic information will be selected if the
TA function is on.
Station search is firstly run with “LO”
sensitivity (most powerful stations)
and then with “DX” sensitivity
(weaker stations).
To perform a search with “DX” sen-
sitivity directly, press ÷(19) or
˜(14) twice.Manual station search
Briefly press
▲ (10) or ▼(17). Hold
the button corresponding the chosen
direction pressed to change frequency
continuously. Tuning will end as soon
as the button is released.
Manual stations store
Proceed as follows to manually sto-
re stations:
– tune to the required station;
– press one of the buttons from 1to
6(20) and hold the button pressed
until you hear the acoustic tone.
Automatic FM station store
(Autostore)
Hold BAND/AST(22) pressed to
activate the “Autostore” function.
When this function is on, the radio will
automatically store the six FM band
stations with the strongest signal.The message “FMAST” will appear
on the display during automatic tuning.
The stations will be automatically sa-
ved under buttons from 1 to 6 of key-
pad (20). After saving, the radio will
be automatically tuned to the first sta-
tion in the FMAST band, correspon-
ding to the frequency stored under se-
lection button 1 of keypad (20).
Each station is stored only one. Re-
gional programmes may be stored twi-
ce.
The system will work as follows
when the Autostore function is on:
– all other functions are off when Au-
tostore starts;
– Autostore is stopped when the
source is changed (radio, CD, CD
changer) during the function;
– volume adjustments will not ap-
pear on the display.
Page 19 of 58

18
IMPORTANTIf Autostore cannot
find six strong stations only the sta-
tions found will be stored.
IMPORTANTWhen the Auto-
store function is activated, the stations
that were previously stored in the
FMAST band are deleted.
TA (Traffic Announcement)
function
Press TA/PTY(23) to switch the
function on and off.
Traffic announcements may be recei-
ved with the TA function on.
When a traffic announcement is
broadcast, the radio will automatical-
ly tune to the station broadcasting the
announcement. The radio will switch
back to the audio source being played
when the traffic announcement is
over.The message “TA” appears on the di-
splay when the TA function is on. The
wording “TA” will appear shaded in
grey if the function is not available on
the tuned display. All traffic announ-
cements will have higher priority over
any only sound system use (RADIO,
CD or CD Changer).
IMPORTANTThe volume of traf-
fic announcements is independent
from the normal playing volume of the
sound system. The volume may be
adjusted using the knob during play-
back. This setting will be stored and
used for the next traffic announce-
ment. Press TA/PTY(23) while re-
ceiving a traffic announcement to stop
the announcement and switch the TA
function off. PTY (Type Program) function
The PTY function (where present)
may be used to give higher priority to
stations broadcasting specific pro-
gramme types. The PTY function in-
cludes emergency messages and va-
rious topics (music, news, etc.).
IMPORTANTThe PTY function is
available on the FM band only.
Proceed as follows to access the PTY
program list:
– Hold the TA/PTY(23) button
pressed. The PTY programme list will
appear on the display.
– Turn the knob (16- 40) to scroll
the list.
– Select the programme type and
press the knob (16- 40) to confirm.
The message “PTY” will appear on
the “Radio” page when the PTY func-
tion is on.
Page 20 of 58

19
PTY programme list:
– News
– Information
– Services
– Sport
– Education
– Drama
– Culture
– Science
– Entertainment
– Pop music
– Rock music
– Easy listening
– Light classics
– Other music
– Weather
– Economics
– Children
– Current affairs
– Religion
– Phone in
– Travel & Touring
– Leisure & hobby
– Jazz music
– Country music
– National music
– Oldies music
– Folk music
– Documentary.The previously tuned station will be
selected if there are no available sta-
tions with the selected programme ty-
pe. Select a programme type or ESC
(9- 36) to quit the PTY programme
list.
EON (Enhanced Other
Networks) function
This function connects the stations
belonging to a network. The function
allows to receive traffic announcement
or PTY programmes broadcast by a
station belonging to the same network
as the tuned station. This service is au-
tomatically activated when TA or PTY
is selected.LIST function
This function displays a list of the re-
ceiveable local stations with the stron-
gest signal. Press LIST(15) to swit-
ch the function on. Turn and press the
knob (16 - 40) to select and confirm
the required station.
CD MODE
To guarantee best sound playback,
we recommend using original CDs. If
CD-R/RW are used, we recommend
using good quality media that are bur-
ned at the slowest speed possible.
Page 21 of 58

20
IMPORTANTDo not use 8-cm
audio CDs or MP3 CDs even with a
specific adapter. This type of disk may
damage the system.
Playback will start automatically after
a CD is correctly inserted (printed si-
de facing upwards).
Press SOURCE (3) if a CD is al-
ready inserted in the player and you
are listening to another source: play-
back will start automatically.
How to extract a CD
Press ˚(2) to extract the CD.How to select a track
Proceed as follows to select a track:
– briefly press ˜(14) to select
the next track;
– briefly press ÷(19) to go back
to the beginning of the current track;
press if again to select the previous
track.
Fast search
Hold ˜(14) or ÷(19) press
to play the CD tracks at fast speed
either forwards or backwards. Relea-
se the button to return to normal
playback speed.
CD mode menu
Repeatedly press MODE(25- 35)
to display audio mode.Press (16 - 40) until the following
menu appears on the display:
– “Activate random”: select the func-
tion to play the CD tracks in random
order. The message RDM will appear
on the display when the function is on.
Press the knob (16 - 40) and select
“Deactiv. random” and confirm to swit-
ch the function off.
– “Activate Introscan”: select and con-
firm this function to play all tracks from
the beginning in the order they appear
on the CD. Press the knob (16 - 40),
select “Deactivate Introscan” and con-
firm to switch the function off.
Page 22 of 58

21
– “Program tracks”: this function is
used to play the tracks on the CD. Se-
lect and confirm the function. A keypad
will appear on the display for entering
the number of tracks to be program-
med: “reset” cancels all selected tracks,
“delete” cancels the last selected track,
“OK” confirms the selection.
LIST function
This function is used to display the li-
st of tracks on the CD. Press LIST
(15) while playing a CD to activate the
function. Turn and press the knob (16
- 40) to select and start playback.CD CHANGER MODE
(where provided)
(not compatible with MP3 CDs)
To guarantee best sound playback,
we recommend using original CDs. If
CD-R/RW are used, we recommend
using good quality media that are bur-
ned at the slowest speed possible.
IMPORTANT Do not use 8-cm
audio CDs even with a specific adap-
ter. This type of disk may damage the
system.
Select radio mode and repeatedly
press SOURCE(3) o SRC(30) to
select CD changer mode.
How to select a CD
Press buttons from 1 to 6 on the
keypad (20) to select the required
CD.How to select a track
Proceed as follows to select a track
on a CD in the CD changer:
– briefly press ˜(14) to select
the next track;
– briefly press ÷(19) to play the
current track from the beginning and
press it again to go to the previous
track.
Fast track search
(forward/backward)
Hold ˜(14) or ÷(19) press
to play the CD tracks at fast speed
either forwards or backwards. Relea-
se the button to return to normal
playback speed.
CD changer mode menu
Repeatedly press MODE(25- 35)
to display audio mode.
Press (16 - 40) until the following
menu appears on the display:
Page 23 of 58

22
fig. 3
F0B0199m
fig. 4
F0B0213m
fig. 6
F0B0215m
fig. 5
F0B0214m
– “Activate random”: this function
is used to play the tracks on the se-
lected CD in random order.
– “Activate Introscan”: this function
is used to listen to the beginning of all
the tracks on the selected CD.
– “Activate repeat”: allows to listen
to the last played track.
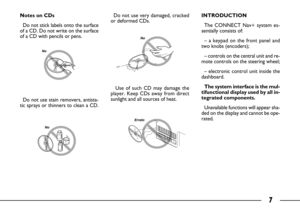
CD CHARGER
How to extract the changer
The CD charger is fitted inside the
oddment compartment on passenger
side - fig. 3. The changer may contai-
ner up to six CD.
Proceed as follows to access the
charger:
– open the oddment compartment
on passenger side;– open the sliding hatch A-fig. 4.
– press CD charger eject button
B-fig. 4.
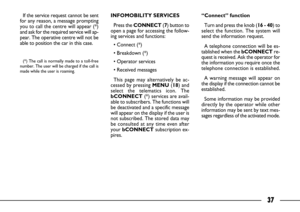
How to insert a CD in the
charger
Proceed as follows to insert the CDs
in the charger:
– pull the tab D-fig. 5to open one
of the six charger compartments C;
– insert the CD with the printed si-
de and label facing upwards;
– close the compartment;
– repeat the procedure for the other
CDs.How to introduce the CD
changer
Proceed as follows to insert the CD
changer in the device:
– Introduce charger C-fig. 6into the
CD changer device and push it until
you hear the click.
– Close the sliding hatch A-fig. 6.
Page 24 of 58

23
MP3 MODE
IMPORTANT Do not use 8-cm au-
dio CDs or MP3 CDs even with a spe-
cific adapter. This type of disk may da-
mage the system. Playback will start im-
mediately after inserting a CD with the
printed side facing upwards. Press
SOURCE(3) is a CD is already inser-
ted in the player and you are listening
to another source: playback will start
automatically.
How to extract a CD
Press ˚(2) to extract the CD.
How to select a folder
Proceed as follows to select a folder:
– press Nto select the next folder;
– press Oto select the previous fol-
der.How to select a track
Proceed as follows to select a track:
– briefly press ˜(14) to select
the next track;
– briefly press ÷(19) to go back
to the beginning of the current track;
press if again to select the previous
track.
CD mode menu
Repeatedly press MODE (25 - 35)
to display AUDIO mode.
Press (16-40) until the following me-
nu appears on the display:
– “Activate Random”: select the
function to play the CD tracks in ran-
dom order. The message RDM will ap-
pear on the display when the function
is on. Press the knob (16 - 40) and se-
lect “Deactiv. random” and confirm to
switch the function off.– “Activate Introscan”: select and con-
firm this function to play all tracks from
the beginning in the order they appear
on the CD. Press the knob (16 - 40),
select “Deactivate Introscan” and con-
firm to switch the function off.
– “Activate repeat”: select and con-
firm the function to play the last track
again (repeat track).
LIST function
This function is used to display the li-
st of folders on the CD. Press LIST
(15) while playing a MP3 CD to acti-
vate the function. Turn and press the
knob (16 - 40) to select the list of
tracks in the folder. Turn and press
the knob (16 - 40) to select and start
playback.