2007 BMW MOTORRAD K 1200 GT steering
[x] Cancel search: steeringPage 4 of 173
Table of ContentsYou can also consult the index at
the end of this Rider's Manual if
you want to find a particular topic
or item of information.
1 General instructions . . . . . 5
Overview ...................... 6
Abbreviations and symbols . . . . 6
Equipment . . . . . . .............. 7
Technical data . . .............. 7
Currency . ..................... 7
2 General views . . . . . . . . . . . . . 9
General view, left side . . . . . . . . 11
General view, right side . . . . . . 13
Underneath the seat ......... 15
Handlebar fitting, left ......... 16
Handlebar fitting, right . . . . . . . . 17
Instrument cluster . . . ......... 18
Headlight . .................... 19 3 Status indicators . . . . . . . 21
Standard status
indicators .
.................... 22
Status indicators with on-
board computer
OE
........... 23
Status indicators with
tyre-pressure monitoring
(RDC)
OE...................... 24
Status indicators with seat
heatingOE
.................... 24
Telltale light with cruise con-
trol
OE
........................ 25
Standard warnings . . ......... 25
Warnings issued by the on-
board computer
OE
........... 30
ABS warnings . . . ............. 32
ASC warnings
OE
............. 34
RDC warnings
OE
............. 36
Anti-theft alarm
warnings
OE................... 41 4 Operation . . . . . . . . . . . . . . . . 45
Ignition switch and steering
lock . .
........................ 47
Electronic immobiliser . . . . . . . . 48
Clock . . . . . .................... 49
Odometer and tripmeters . . . . 49
Multifunction display ......... 51
On-board computer
OE
....... 51
Tyre pressure monitoring
RDC
OE
....................... 54
Lights . . . . .................... 55
Turn indicators . . ............. 56
Hazard warning flashers . . . . . . 57
Emergency off switch (kill
switch) . . . .................... 58
Grip heating
OE
............... 59
Seat heatingOE............... 60
Automatic Stability Control
ASC
OE
....................... 61
Seat height . . . . . . ............. 62
Windscreen . . . . . ............. 63
Cruise-control system
OE
..... 63
Stowage compartment . . . . . . . 66
Clutch . . . . .................... 66
Page 47 of 173
Operation
Operation
Ignition switch and steering lock..... 47
Electronic immobiliser . . . ............ 48
Clock ................................ 49
Odometer and tripmeters ............ 49
Multifunction display ................. 51
On-board computer
OE
............... 51
Tyre pressure monitoring
RDC
OE
.............................. 54
Lights ................................ 55
Turn indicators ....................... 56
Hazard warning flashers . . ............ 57
Emergency off switch (kill switch) . . . . 58
Grip heating
OE
....................... 59
Seat heatingOE
...................... 60 Automatic Stability Control
ASC
OE
.............................. 61
Seat height . . . ....................... 62
Windscreen . . . ....................... 63
Cruise-control system
OE
............. 63
Stowage compartment . ............. 66
Clutch . . ............................. 66
Brakes . . ............................. 67
Handlebars . . . ....................... 67
Mirrors . . ............................. 68
Spring preload ....................... 68
Damping ............................. 69
Electronic Suspension Adjustment
ESA
OE
............................... 69
Tyres . . . ............................. 72
445zOperation
Page 49 of 173
Ignition switch and
steering lockKeysYou receive one master key and
one spare key. Please consult
the information on the electronic
immobiliser (EWS) if a key is lost
or mislaid ( 48).
Ignition switch and steering lock,
tank filler cap lock and the seat
and case locks are all operated
with the same key.
with OA Topcase:
If you wish you can arrange to
have the topcase fitted with a
lock that can be opened with this
key as well. Consult a specialist
workshop, preferably an author-
ised BMW Motorrad dealer.
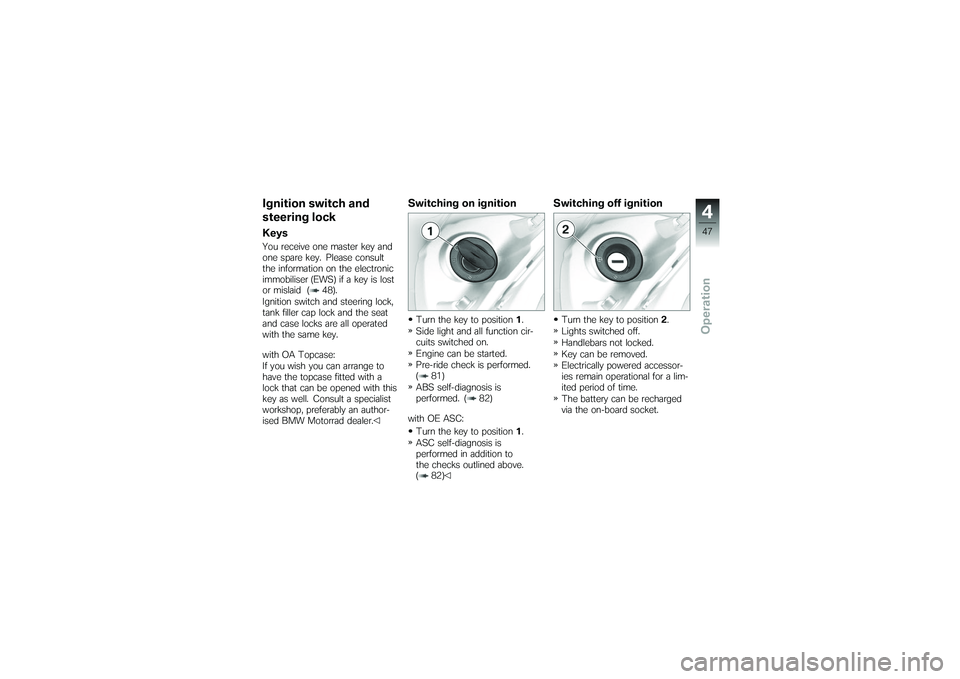
Switching on ignitionTurn the key to position1.
Side light and all function cir-
cuits switched on.
Engine can be started.
Pre-ride check is performed.
( 81)
ABS self-diagnosis is
performed. ( 82)
with OE ASC: Turn the key to position 1.
ASC self-diagnosis is
performed in addition to
the checks outlined above.
( 82)
Switching off ignitionTurn the key to position 2.
Lights switched off.
Handlebars not locked.
Key can be removed.
Electrically powered accessor-
ies remain operational for a lim-
ited period of time.
The battery can be recharged
via the on-board socket.
447zOperation
Page 50 of 173
Locking handlebars
If the motorcycle is on the
side stand, the surface of
the ground will determine wheth-
er it is better to turn the handle-
bars to the left or right. However,
the motorcycle is more stable on
a level surface with the handle-
bars turned to the left than with
the handlebars turned to the
right.
On level ground, always turn the
handlebars to the left to set the
steering lock.
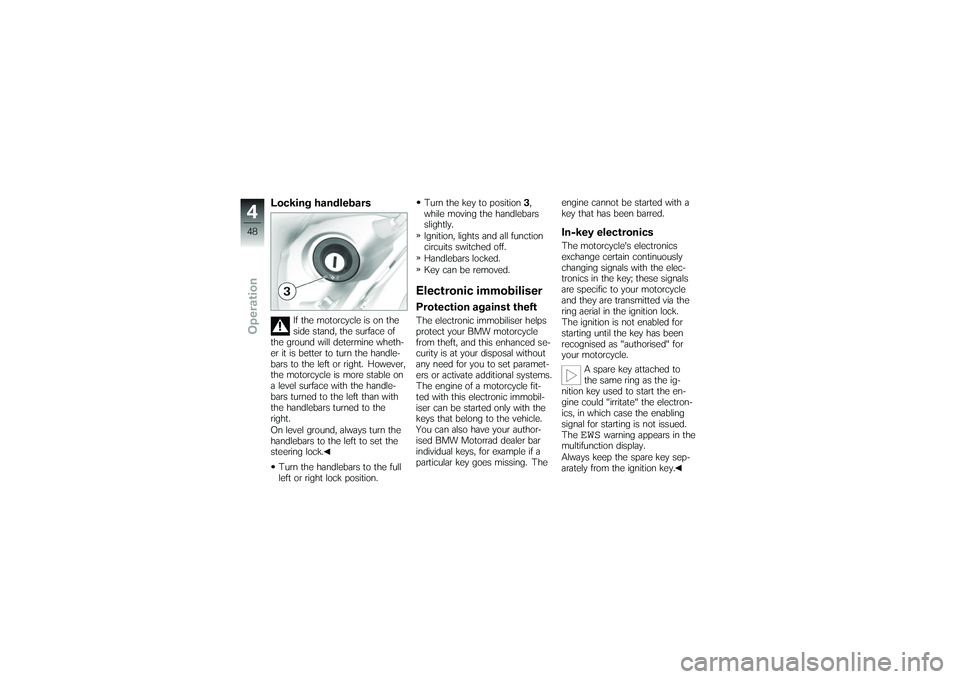
Turn the handlebars to the full
left or right lock position. Turn the key to position
3,
while moving the handlebars
slightly.
Ignition, lights and all function
circuits switched off.
Handlebars locked.
Key can be removed.
Electronic immobiliserProtection against theftThe electronic immobiliser helps
protect your BMW motorcycle
from theft, and this enhanced se-
curity is at your disposal without
any need for you to set paramet-
ers or activate additional systems.
The engine of a motorcycle fit-
ted with this electronic immobil-
iser can be started only with the
keys that belong to the vehicle.
You can also have your author-
ised BMW Motorrad dealer bar
individual keys, for example if a
particular key goes missing. The engine cannot be started with a
key that has been barred.
In-key electronicsThe motorcycle's electronics
exchange certain continuously
changing signals with the elec-
tronics in the key; these signals
are specific to your motorcycle
and they are transmitted via the
ring aerial in the ignition lock.
The ignition is not enabled for
starting until the key has been
recognised as "authorised" for
your motorcycle.
A spare key attached to
the same ring as the ig-
nition key used to start the en-
gine could "irritate" the electron-
ics, in which case the enabling
signal for starting is not issued.
The
EWS
warning appears in the
multifunction display.
Always keep the spare key sep-
arately from the ignition key.
448zOperation
Page 87 of 173
Oil or grease on brakes
Oil and grease on the brake
discs and pads considerably
diminish braking efficiency.
Especially after repair and main-
tenance work, make sure that the
brake discs and brake pads are
free of oil and grease.
Dirt or mud on brakes
When riding on loose sur-
faces or muddy roads, the
brakes may fail to take effect
immediately because of dirt or
moisture on the discs or brake
pads.
Apply the brakes in good time
until the brakes have been
cleaned.
Parking your
motorcyclePlacing motorcycle on
side stand
If the ground is soft or un-
even, there is no guaran-
tee that the motorcycle will rest
firmly on the stand.
Always check that the ground
under the stand is level and
firm.
Switch off the engine.
Pull the handbrake lever.
Hold the motorcycle upright
and balanced.
Use your left foot to extend the
side stand fully. The side stand is designed
to support only the weight
of the motorcycle.
Do not lean or sit on the
motorcycle with the side stand
extended. Slowly lean the motorcycle to
the side until its weight is taken
by the stand and dismount to
the left.
If the motorcycle is on the
side stand, the surface of
the ground will determine wheth-
er it is better to turn the handle-
bars to the left or right. However,
the motorcycle is more stable on
a level surface with the handle-
bars turned to the left than with
the handlebars turned to the
right.
On level ground, always turn the
handlebars to the left to set the
steering lock.
Turn the handlebars to full left
or right lock.
Check that the motorcycle is
standing firmly. On a gradient, the motor-
cycle should always face
uphill; select 1st gear.
Lock the steering lock.
585zRiding
Page 88 of 173
Removing motorcycle
from side standUnlock the steering lock.
From the left, grip the handle-
bars with both hands.
Pull the handbrake lever.
Swing your right leg over the
seat and lift the motorcycle to
the upright position.
Hold the motorcycle upright
and balanced.An extended side stand can
catch on the ground when
the motorcycle is moving and
lead to a fall.
Retract the side stand before
moving the motorcycle.
Sit on the motorcycle and use
your left foot to retract the side
stand.
Placing motorcycle on
centre stand
If the ground is soft or un-
even, there is no guaran-
tee that the motorcycle will rest
firmly on the stand.
Always check that the ground
under the stand is level and
firm.
Switch off the engine.
Dismount and keep your left
hand on the left handlebar grip.
With your right hand, grip the
rear grab handle or the rear
frame.
Use your right foot on the pin
of the centre stand to press
the stand down until its curved
feet touch the ground.
Place your full body weight on
the centre stand and at the
same time pull the motorcycle
to the rear. Excessive movements
could cause the centre
stand to retract, and the
motorcycle would topple in
consequence.
Do not lean or sit on the mo-
torcycle with the centre stand
extended.
Check that the motorcycle is
standing firmly.
Lock the steering lock.
Removing motorcycle
from centre standUnlock the steering lock.
Place your left hand on the left
handlebar grip.
With your right hand, grip the
rear grab handle or the rear
frame.
Push the motorcycle forward
off the centre stand.
Check that the centre stand
has fully retracted.
586zRiding
Page 101 of 173
the on-board power supply sys-
tem is minimised, the supply to
the power socket is cut off ap-
proximately 15 minutes after the
ignition is switched off, and it is
also temporarily interrupted dur-
ing the start procedure.Cable routingThe cables from the power sock-
et to the auxiliary device must be
routed in such a way that they:Do not impede the rider
Do not restrict or obstruct the
steering angle and handling
characteristics
Cannot be trapped
Incorrectly routed cables
can impede the rider.
Route the cables as described
above.
LuggageCorrect loading
Overloading and imbal-
anced loads can adversely
affect the motorcycle's handling.
Do not exceed the permissible
gross weight and be sure to
comply with the instructions on
loading.
Set spring preload, damping
characteristic and tyre pres-
sures to suit total weight.
Adjust the spring preload for
rear wheel ( 68)
Check the tyre pressure
( 72)
Adjust the damping for rear
wheel ( 69)
Ensure that the case volumes
on the left and right are equal.
Make sure that the weight is
uniformly distributed between
right and left. Pack heavy items at the bot-
tom and toward the inboard
side.
Note the maximum permissible
payload of the cases and the
speed limit for riding with cases
on the motorcycle.
Payload of cases
8kg Maximum permissible
speed for riding with
cases fitted to the motorcycle
180 km/h
Note the maximum permiss-
ible payload of the topcase and
the speed limit for riding with a
topcase on the motorcycle.
Payload of topcase
with OA Topcase:
799zAccessories
Page 170 of 173
Seat, 15Adjust the seat height, 62
Seat heating, 60
Seat lock, 11
Seats Install the front seat, 75
Install the rear seat, 75
Remove the front seat, 74
Remove the rear seat, 73
Service, 156 Status indicators on the
display, 22
Service Card, 156
Side stand For starting, 80
Spark plugs, 151
Speedometer, 18
Spring preload Adjusting for rear wheel, 68
Spring preload, rear Adjusting, 11
Starter, 17
Starting, 80 Steering lock
Locking, 48
Stowage compartment, 13, 66
Suspension damping, rear Adjusting, 11
T
Technical data Battery, 151
Brakes, 149
Bulbs, 151
Clutch, 147
Dimensions, 152
Electrics, 150
Engine, 145
Engine oil, 146
Frame, 152
Fuel, 146
Rear-wheel drive, 148
Running gear, 148
Spark plugs, 151
Standards, 7
Transmission, 147
Weights, 153 Wheels and tyres, 149
Telltale lights, 18
Toolkit, 15 Service kit, 106
Standard kit, 106
Topcase Closing, 102
Installing, 103
Opening, 102
Removing, 103
Torques, 141
Transmission For starting, 80
Technical data, 147
Troubleshooting chart, 142
Turn indicators Left, 16
Right, 17
Switching off, 17, 57
Switching on left, 56
Switching on right, 57
12168zIndex