2007 BMW MOTORRAD K 1200 GT torque
[x] Cancel search: torquePage 8 of 173
OverviewChapter 2 of this Rider's Manu-
al will provide you with an initial
overview of your motorcycle. All
maintenance and repair work on
the motorcycle is documented in
Chapter 11. This record of the
maintenance work you have had
performed on your motorcycle is
a precondition for generous treat-
ment of goodwill claims.
When the time comes to sell
your BMW, please remember
to hand over this Rider's Manu-
al; it is an important part of the
motorcycle.Abbreviations and
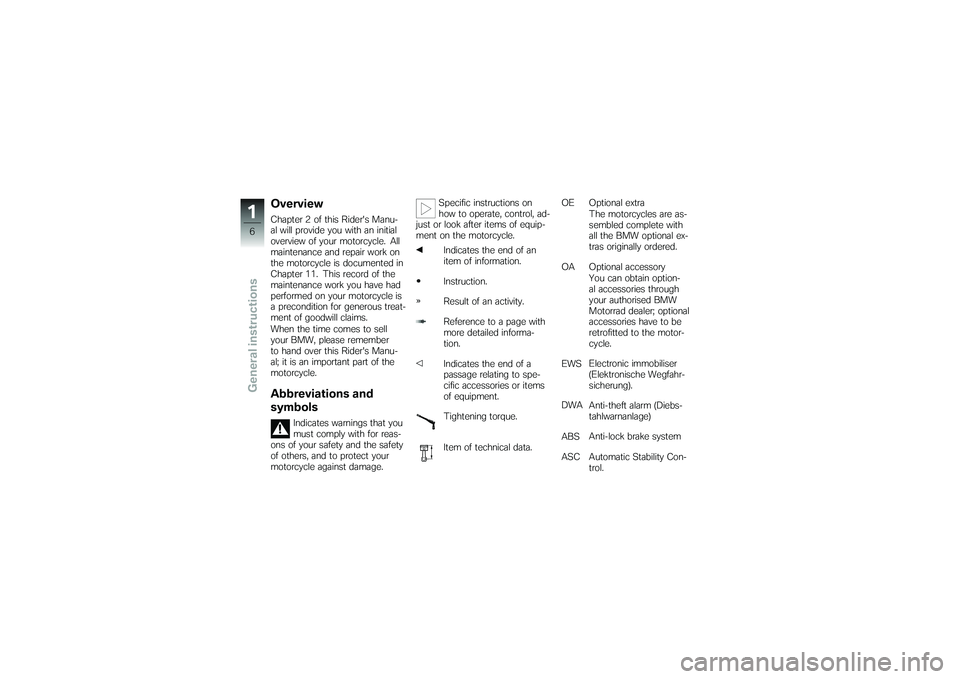
symbols
Indicates warnings that you
must comply with for reas-
ons of your safety and the safety
of others, and to protect your
motorcycle against damage. Specific instructions on
how to operate, control, ad-
just or look after items of equip-
ment on the motorcycle.
Indicates the end of an
item of information.
Instruction.
Result of an activity.
Reference to a page with
more detailed informa-
tion.
Indicates the end of a
passage relating to spe-
cific accessories or items
of equipment.
Tightening torque.
Item of technical data. OE Optional extra
The motorcycles are as-
sembled complete with
all the BMW optional ex-
tras originally ordered.
OA Optional accessory You can obtain option-
al accessories through
your authorised BMW
Motorrad dealer; optional
accessories have to be
retrofitted to the motor-
cycle.
EWS Electronic immobiliser
(Elektronische Wegfahr-
sicherung).
DWA Anti-theft alarm (Diebs-
tahlwarnanlage)
ABS Anti-lock brake system
ASC Automatic Stability Con- trol.
16zGeneral instructions
Page 38 of 173
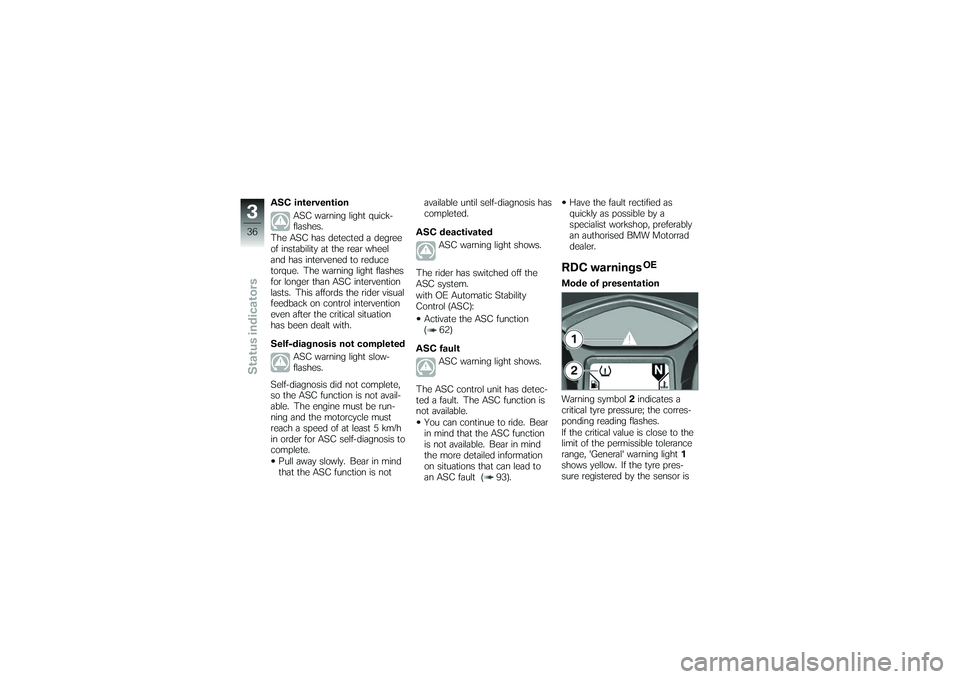
ASC interventionASC warning light quick-
flashes.
The ASC has detected a degree
of instability at the rear wheel
and has intervened to reduce
torque. The warning light flashes
for longer than ASC intervention
lasts. This affords the rider visual
feedback on control intervention
even after the critical situation
has been dealt with.
Self-diagnosis not completed
ASC warning light slow-
flashes.
Self-diagnosis did not complete,
so the ASC function is not avail-
able. The engine must be run-
ning and the motorcycle must
reach a speed of at least 5 km/h
in order for ASC self-diagnosis to
complete. Pull away slowly. Bear in mind
that the ASC function is not available until self-diagnosis has
completed.
ASC deactivated ASC warning light shows.
The rider has switched off the
ASC system.
with OE Automatic Stability
Control (ASC): Activate the ASC function
( 62)
ASC fault ASC warning light shows.
The ASC control unit has detec-
ted a fault. The ASC function is
not available. You can continue to ride. Bear
in mind that the ASC function
is not available. Bear in mind
the more detailed information
on situations that can lead to
an ASC fault ( 93). Have the fault rectified as
quickly as possible by a
specialist workshop, preferably
an authorised BMW Motorrad
dealer.
RDC warnings
OE
Mode of presentation
Warning symbol 2indicates a
critical tyre pressure; the corres-
ponding reading flashes.
If the critical value is close to the
limit of the permissible tolerance
range, 'General' warning light 1
shows yellow. If the tyre pres-
sure registered by the sensor is
336zStatus indicators
Page 94 of 173
exceptional riding conditions can
lead to a fault message being
issued.
Exceptional riding
conditions:Heating up with the motorcycle
on the centre stand or an auxil-
iary stand, engine idling or with
a gear engaged.
Rear wheel locked by the en-
gine brake for a lengthy period,
for example while descending
off-road.
If a fault message is issued on
account of exceptional riding
conditions as outlined above, you
can reactivate the ABS function
by switching the ignition off and
on again.
What significance
devolves on regular
maintenance?
Invariably, a technical sys-
tem cannot perform beyond
the abilities dictated by its level
of maintenance.
In order to ensure that the BMW
Motorrad ABS is always main-
tained in optimum condition, it
is essential for you to comply
strictly with the specified inspec-
tion intervals.
Reserves for safetyThe potentially shorter braking
distances which BMW Motorrad
Integral ABS permits must not be
used as an excuse for careless
riding. ABS is primarily a means
of ensuring a safety margin in
genuine emergencies.
Take care when cornering. When
you apply the brakes on a corner,
the motorcycle's weight and momentum take over and even
BMW Motorrad Integral ABS is
unable to counteract their effects.
Electronic engine
management with BMW
Motorrad ASC
OE
How does ASC work?The BMW Motorrad ASC com-
pares the speed of rotation of the
front wheel and the rear wheel.
The differential is used to com-
pute slip as a measure of the
reserves of stability available at
the rear wheel. If slip exceeds a
certain limit the electronic engine
management system intervenes,
adapting engine torque accord-
ingly.
692zEngineering details
Page 96 of 173
If the front wheel lifts clear of the
ground under severe accelera-
tion, the ASC reduces engine
torque until the front wheel re-
gains contact with the ground.
Under these circumstances,
BMW Motorrad recommends
rolling the throttle slightly closed
so as to restore stability with the
least possible delay.
When riding on a slippery sur-
face, never snap the throttle
twistgrip fully closed without
pulling the clutch at the same
time. Engine braking torque can
cause the rear wheel to lock, with
a corresponding loss of stability.
The BWM Motorrad ASC is un-
able to control a situation of this
nature.
Tyre pressure
monitoring RDC
OE
FunctionA sensor integrated into each
tyre measures the air temperat-
ure and the air pressure inside
the tyre and transmits this in-
formation to the control unit.
Each sensor has a centrifugal-
force tripswitch that does not
enable transmission of the meas-
ured values until the motorcycle
has accelerated to about 30 km/
h. The display shows
--
for
each tyre until the tyre-pressure
signal is received for the first
time. The sensors continue to
transmit the measured-value sig-
nals for approximately 15 minutes
after the motorcycle comes to a
stop.
The control unit can adminis-
trate four sensors, so two dif-
ferent sets of wheels with RDC
sensors can be alternated on the motorcycle. An error mes-
sage is issued if wheels without
sensors are fitted to a motorcycle
equipped with an RDC control
unit.
Temperature
compensationThe tyre-pressure readings
shown by the multifunction
display are temperature-
compensated; the reference tyre
temperature for these readings
is always 20 °C. The air lines
available to the public in petrol
stations and motorway service
areas almost invariably show
temperature-dependent tyre
pressures, so in most instances
these gauge readings will not
tally with the readings shown by
the multifunction display.
694zEngineering details
Page 108 of 173
General instructionsThe Maintenance chapter de-
scribes straightforward proced-
ures for checking and replacing
certain wear parts.
Special tightening torques are lis-
ted as applicable. The tightening
torques for the threaded fasten-
ers on your motorcycle are listed
in the section entitled "Technical
data".
You will find information on more
extensive maintenance and re-
pair work in the Repair Manual
on DVD/CD-ROM (RepROM) for
your motorcycle, which is avail-
able from your authorised BMW
Motorrad dealer.
Some of the work calls for spe-
cial tools and a thorough know-
ledge of motorcycles. If you
are in doubt consult a specialist
workshop, preferably your author-
ised BMW Motorrad dealer.
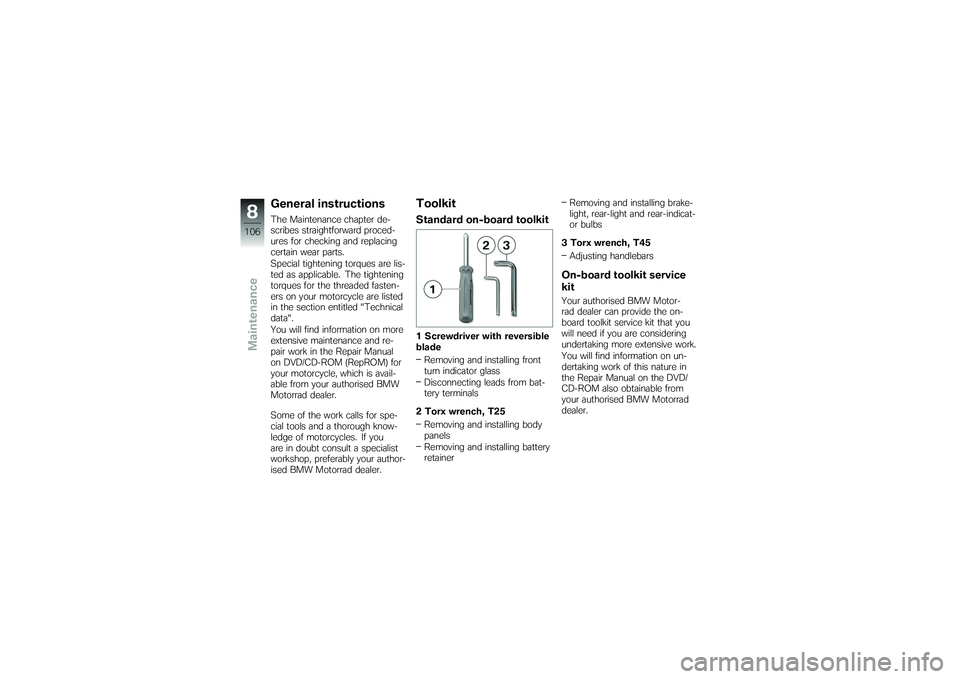
ToolkitStandard on-board toolkit1 Screwdriver with reversible
bladeRemoving and installing front
turn indicator glass
Disconnecting leads from bat-
tery terminals
2 Torx wrench, T25 Removing and installing body
panels
Removing and installing battery
retainer Removing and installing brake-
light, rear-light and rear-indicat-
or bulbs
3 Torx wrench, T45 Adjusting handlebars
On-board toolkit service
kitYour authorised BMW Motor-
rad dealer can provide the on-
board toolkit service kit that you
will need if you are considering
undertaking more extensive work.
You will find information on un-
dertaking work of this nature in
the Repair Manual on the DVD/
CD-ROM also obtainable from
your authorised BMW Motorrad
dealer.
8106zMaintenance
Page 118 of 173
the routing of the sensor cable
of the brake-pad wear detector.
Raise front of motorcycle until
the front wheel can turn freely.
BMW Motorrad recommends
the BMW Motorrad front-wheel
stand for lifting the motorcycle.
Install the front-wheel stand
( 122)
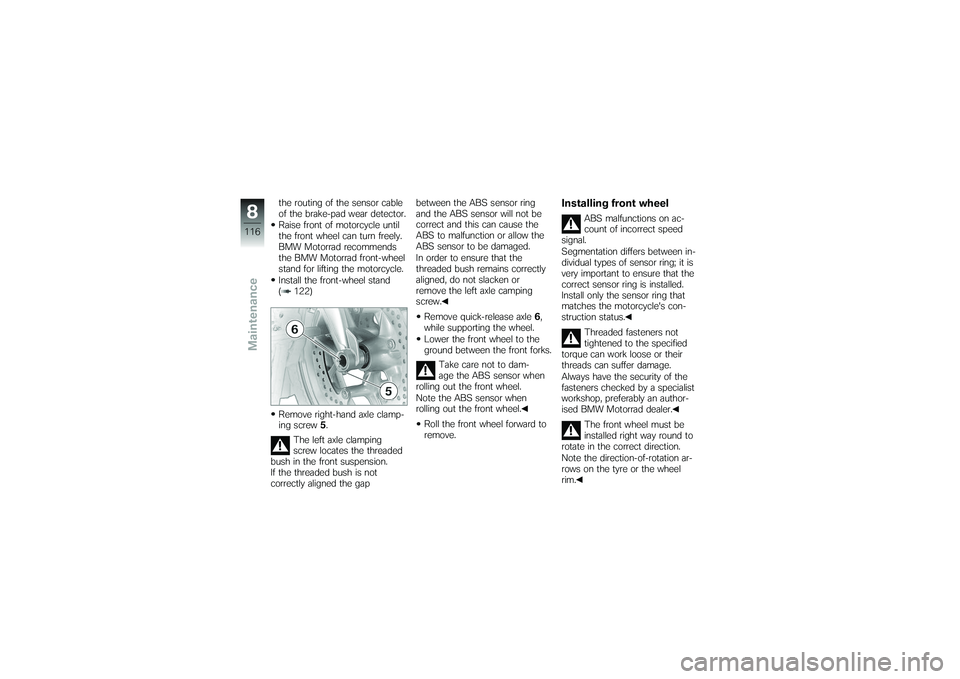
Remove right-hand axle clamp-
ing screw5.
The left axle clamping
screw locates the threaded
bush in the front suspension.
If the threaded bush is not
correctly aligned the gap between the ABS sensor ring
and the ABS sensor will not be
correct and this can cause the
ABS to malfunction or allow the
ABS sensor to be damaged.
In order to ensure that the
threaded bush remains correctly
aligned, do not slacken or
remove the left axle camping
screw.
Remove quick-release axle 6,
while supporting the wheel.
Lower the front wheel to the
ground between the front forks.
Take care not to dam-
age the ABS sensor when
rolling out the front wheel.
Note the ABS sensor when
rolling out the front wheel.
Roll the front wheel forward to
remove.
Installing front wheel
ABS malfunctions on ac-
count of incorrect speed
signal.
Segmentation differs between in-
dividual types of sensor ring; it is
very important to ensure that the
correct sensor ring is installed.
Install only the sensor ring that
matches the motorcycle's con-
struction status.
Threaded fasteners not
tightened to the specified
torque can work loose or their
threads can suffer damage.
Always have the security of the
fasteners checked by a specialist
workshop, preferably an author-
ised BMW Motorrad dealer.
The front wheel must be
installed right way round to
rotate in the correct direction.
Note the direction-of-rotation ar-
rows on the tyre or the wheel
rim.
8116zMaintenance
Page 119 of 173
There is a risk of damaging
parts of the front brake,
particularly the BMW Motorrad
Integral ABS, in the course of the
procedure described below.
Take care not to damage the
brake system, in particular the
ABS sensor with cable and the
ABS sensor ring.
Take care not to dam-
age the ABS sensor when
rolling in the front wheel.
Note the ABS sensor when
rolling in the front wheel.
Roll the front wheel into posi-
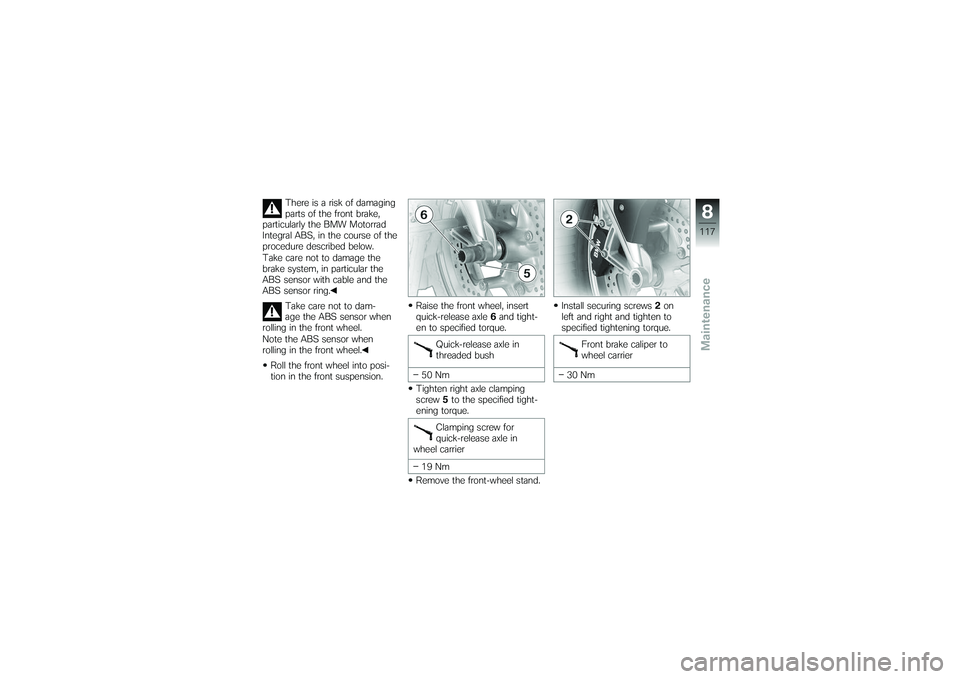
tion in the front suspension. Raise the front wheel, insert
quick-release axle
6and tight-
en to specified torque.
Quick-release axle in
threaded bush
50 Nm
Tighten right axle clamping
screw 5to the specified tight-
ening torque.
Clamping screw for
quick-release axle in
wheel carrier
19 Nm
Remove the front-wheel stand. Install securing screws
2on
left and right and tighten to
specified tightening torque.
Front brake caliper to
wheel carrier
30 Nm
8117zMaintenance
Page 121 of 173
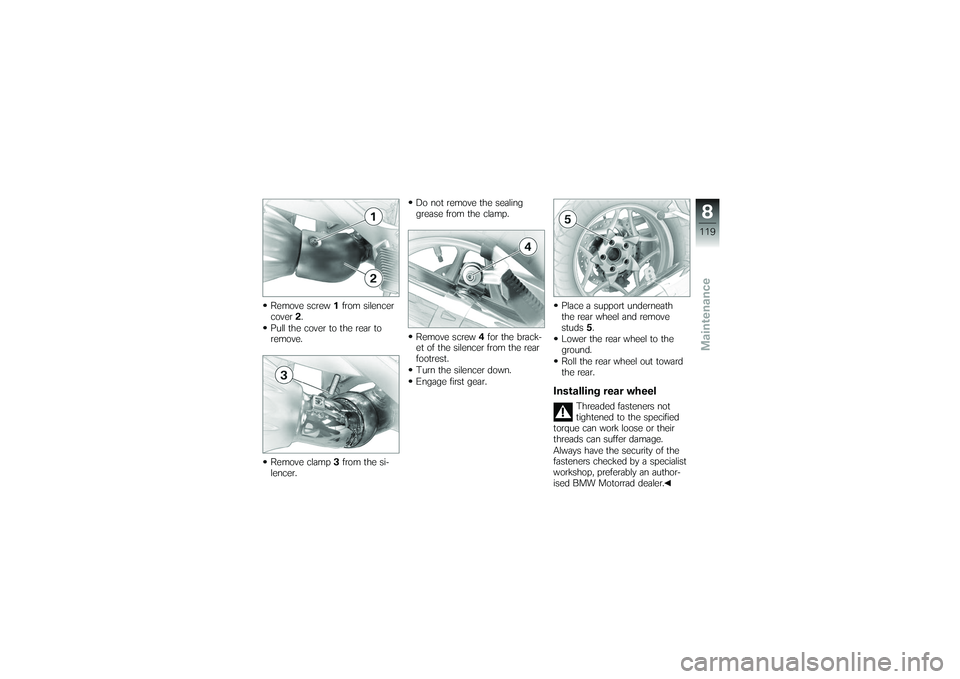
Remove screw1from silencer
cover 2.
Pull the cover to the rear to
remove.
Remove clamp 3from the si-
lencer. Do not remove the sealing
grease from the clamp.
Remove screw
4for the brack-
et of the silencer from the rear
footrest.
Turn the silencer down.
Engage first gear. Place a support underneath
the rear wheel and remove
studs
5.
Lower the rear wheel to the
ground.
Roll the rear wheel out toward
the rear.
Installing rear wheel
Threaded fasteners not
tightened to the specified
torque can work loose or their
threads can suffer damage.
Always have the security of the
fasteners checked by a specialist
workshop, preferably an author-
ised BMW Motorrad dealer.
8119zMaintenance