Page 50 of 173

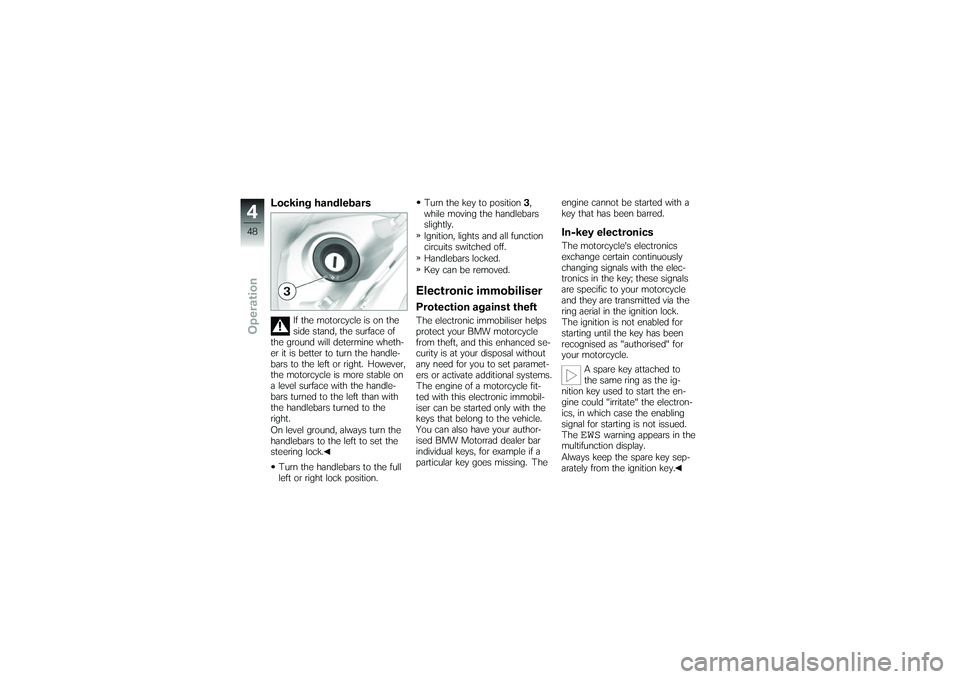
Locking handlebars
If the motorcycle is on the
side stand, the surface of
the ground will determine wheth-
er it is better to turn the handle-
bars to the left or right. However,
the motorcycle is more stable on
a level surface with the handle-
bars turned to the left than with
the handlebars turned to the
right.
On level ground, always turn the
handlebars to the left to set the
steering lock.
Turn the handlebars to the full
left or right lock position. Turn the key to position
3,
while moving the handlebars
slightly.
Ignition, lights and all function
circuits switched off.
Handlebars locked.
Key can be removed.
Electronic immobiliserProtection against theftThe electronic immobiliser helps
protect your BMW motorcycle
from theft, and this enhanced se-
curity is at your disposal without
any need for you to set paramet-
ers or activate additional systems.
The engine of a motorcycle fit-
ted with this electronic immobil-
iser can be started only with the
keys that belong to the vehicle.
You can also have your author-
ised BMW Motorrad dealer bar
individual keys, for example if a
particular key goes missing. The engine cannot be started with a
key that has been barred.
In-key electronicsThe motorcycle's electronics
exchange certain continuously
changing signals with the elec-
tronics in the key; these signals
are specific to your motorcycle
and they are transmitted via the
ring aerial in the ignition lock.
The ignition is not enabled for
starting until the key has been
recognised as "authorised" for
your motorcycle.
A spare key attached to
the same ring as the ig-
nition key used to start the en-
gine could "irritate" the electron-
ics, in which case the enabling
signal for starting is not issued.
The
EWS
warning appears in the
multifunction display.
Always keep the spare key sep-
arately from the ignition key.
448zOperation
Page 54 of 173

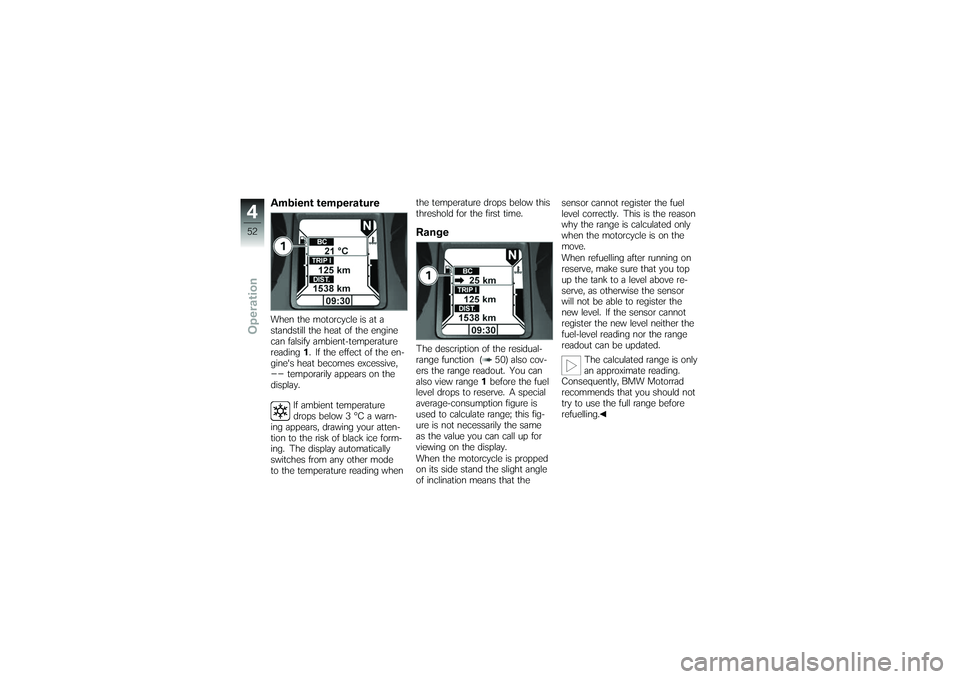
Ambient temperatureWhen the motorcycle is at a
standstill the heat of the engine
can falsify ambient-temperature
reading1. If the effect of the en-
gine's heat becomes excessive,--
temporarily appears on the
display.
If ambient temperature
drops below 3 °C a warn-
ing appears, drawing your atten-
tion to the risk of black ice form-
ing. The display automatically
switches from any other mode
to the temperature reading when the temperature drops below this
threshold for the first time.
RangeThe description of the residual-
range function ( 50) also cov-
ers the range readout. You can
also view range
1before the fuel
level drops to reserve. A special
average-consumption figure is
used to calculate range; this fig-
ure is not necessarily the same
as the value you can call up for
viewing on the display.
When the motorcycle is propped
on its side stand the slight angle
of inclination means that the sensor cannot register the fuel
level correctly. This is the reason
why the range is calculated only
when the motorcycle is on the
move.
When refuelling after running on
reserve, make sure that you top
up the tank to a level above re-
serve, as otherwise the sensor
will not be able to register the
new level. If the sensor cannot
register the new level neither the
fuel-level reading nor the range
readout can be updated.
The calculated range is only
an approximate reading.
Consequently, BMW Motorrad
recommends that you should not
try to use the full range before
refuelling.
452zOperation
Page 57 of 173
The tyre pressures are shown,
accompanied by the wordingRDC
. The front tyre pressure
is on the left; the reading on the
right is the rear tyre pressure.
-- --
appears directly after the
ignition is switched on, because
the sensors do not transmit tyre
pressures until the motorcycle
accelerates to 30 km/h.
Indicates the reading for
tyre pressures. with OE On-board computer:
Repeatedly press button 1until
the tyre pressures appear in
the on-board computer panel
of the display. The tyre pressures are displayed
as an additional set of readings
by the on-board computer.
LightsSide lightThe side lights switch on auto-
matically when the ignition is
switched on.
The side lights place
a strain on the battery.
Do not switch the ignition
on for longer than absolutely
necessary.
455zOperation
Page 58 of 173

Low-beam headlightThe low-beam headlight switches
on automatically when you start
the engine.When the engine is not
running you can switch on
the lights by switching on the ig-
nition and either switching on the
high-beam headlight or operating
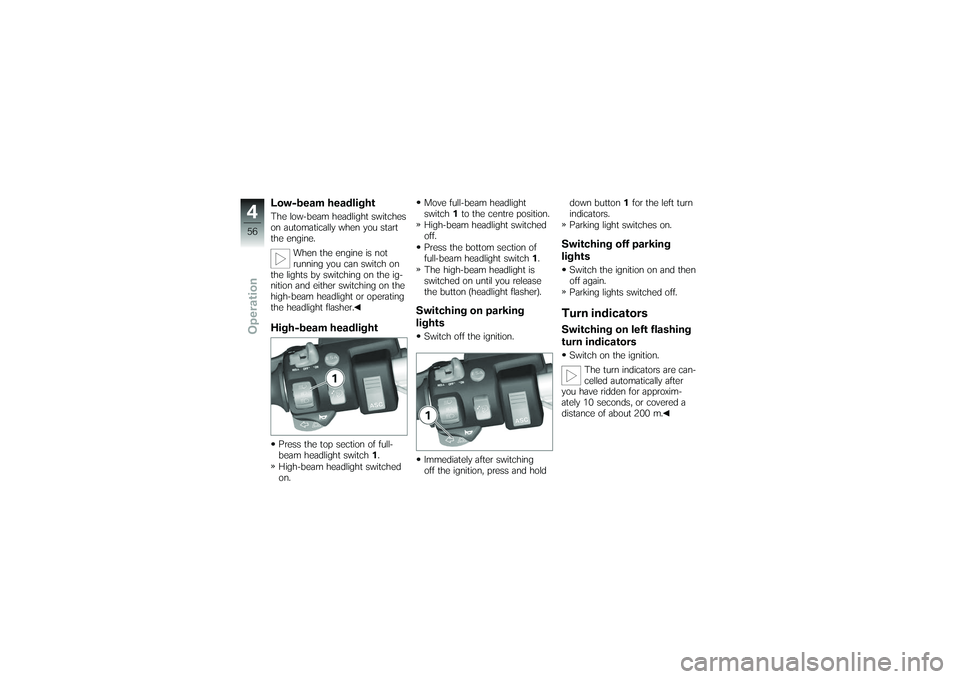
the headlight flasher.High-beam headlightPress the top section of full-
beam headlight switch 1.
High-beam headlight switched
on. Move full-beam headlight
switch
1to the centre position.
High-beam headlight switched
off.
Press the bottom section of
full-beam headlight switch 1.
The high-beam headlight is
switched on until you release
the button (headlight flasher).
Switching on parking
lightsSwitch off the ignition.
Immediately after switching
off the ignition, press and hold down button
1for the left turn
indicators.
Parking light switches on.
Switching off parking
lightsSwitch the ignition on and then
off again.
Parking lights switched off.Turn indicatorsSwitching on left flashing
turn indicatorsSwitch on the ignition.
The turn indicators are can-
celled automatically after
you have ridden for approxim-
ately 10 seconds, or covered a
distance of about 200 m.
456zOperation
Page 59 of 173
Press button1for the left-
hand turn indicators.
Left-hand turn indicators
switched on.
Telltale light for left-hand turn
indicators flashes.Switching on right
flashing turn indicatorsSwitch on the ignition.
The turn indicators are can-
celled automatically after
you have ridden for approxim-
ately 10 seconds, or covered a
distance of about 200 m. Press button
2for the right-
hand turn indicators.
Right-hand turn indicators
switched on.
Telltale light for right-hand turn
indicator flashes.
Cancelling turn indicatorsPress cancel button 3.
Flashing turn indicators
switched off.
Turn indicator telltale light is
off.Hazard warning
flashersSwitching on hazard
warning flashersSwitch on the ignition.
The hazard warning flash-
ers place a strain on the
battery. Do not use the hazard
457zOperation
Page 60 of 173

warning flashers for longer than
absolutely necessary.If you press a turn-indicat-
or button with the ignition
switched on, the turn-indicator
function is activated instead of
the hazard warning flashers, and
remains active until you release
the button. The hazard warning
flashers recommence flashing as
soon as the button is released.
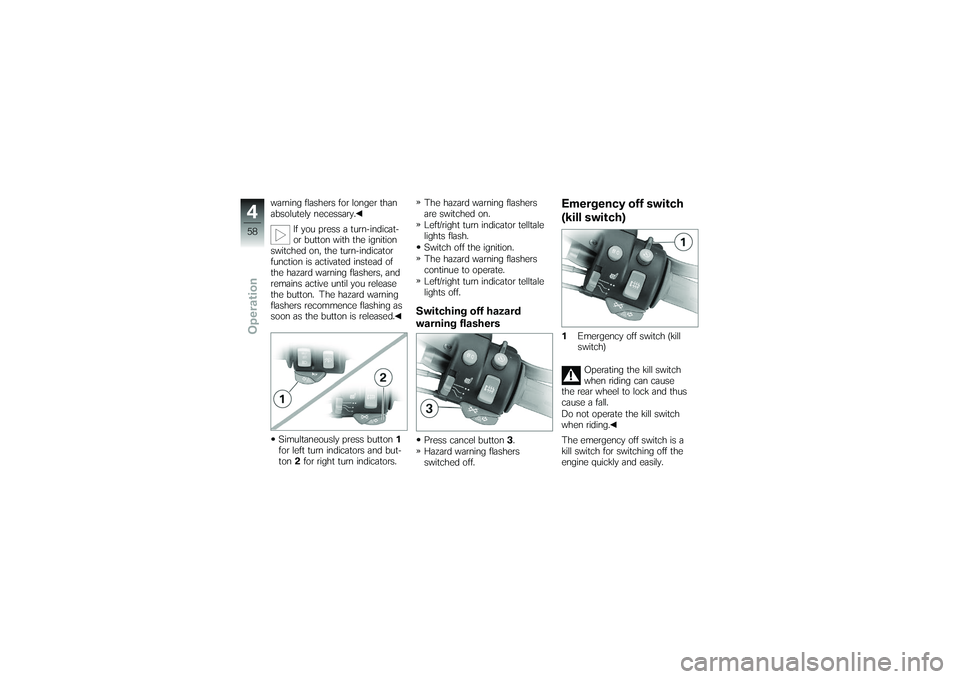
Simultaneously press button 1
for left turn indicators and but-
ton 2for right turn indicators. The hazard warning flashers
are switched on.
Left/right turn indicator telltale
lights flash.
Switch off the ignition.
The hazard warning flashers
continue to operate.
Left/right turn indicator telltale
lights off.
Switching off hazard
warning flashersPress cancel button
3.
Hazard warning flashers
switched off.
Emergency off switch
(kill switch)1 Emergency off switch (kill
switch)
Operating the kill switch
when riding can cause
the rear wheel to lock and thus
cause a fall.
Do not operate the kill switch
when riding.
The emergency off switch is a
kill switch for switching off the
engine quickly and easily.
458zOperation
Page 63 of 173
2Switch centred: Heating off.
3 Switch pushed to right:
50% heat output.
4 Switch pushed to left:
100% heat output.Indicator in multifunction
displaySwitch on the front-seat or
rear-seat heating. The symbols shown below ap-
pear on the display to indicate
which heating stage has been
selected:
Front seat, 50 % heating
power
Front seat, 100 % heating
power
Rear seat, 50 % heating
power
Rear seat, 100 % heating
power
Automatic Stability
Control ASC
OE
Deactivating ASC functionSwitch on the ignition.
You have the option of de-
activating the ASC function
while the motorcycle is on the
move.
Press and hold down ASC but-
ton 1.
ASC warning light starts to
show.
461zOperation
Page 64 of 173
When the ASC symbol ap-
pears, release the ASC button
within three seconds.ASC warning light remains
ON.
The ASC function is deactiv-
ated.Activating ASC functionPress and hold down ASC but-
ton 1.
ASC warning light goes out;
if self-diagnosis has not
completed the ASC warning light
starts flashing. When the ASC symbol disap-
pears, release the ASC button
within three seconds.
The ASC warning light re-
mains off or continues to
flash.
The ASC function is activated.
Instead of pressing the ASC
button, you have the option of
switching the ignition off and
then on again. An ASC fault has occurred
if the ASC warning light
shows when the motorcycle ac-
celerates to a speed in excess
of 10 km/h after the ignition was
switched off and then on again.
Seat heightAdjusting seat heightRemove the front seat ( 74) Pull seat-height adjuster
1to
the limit position.
Push the seat height adjuster
fully forward and up or down,
as applicable.
462zOperation