2006 SKODA ROOMSTER buttons
[x] Cancel search: buttonsPage 109 of 274

Heating and air conditioning system
108
Switch off the blowers, the Climatronic is switched off and in the display
shows OFF.
The set blower speed is displayed next to the control dial when the
respective number of warning lights come on.
WARNING
•“Stale air” may result in fatigue in the driver and occupants,
reduce attention levels and also cause the windows to mist up. The
risk of having an accident increases.
•Do not switch the Climatronic system off for longer than neces-
sary.
•Switch the Climatronic system on as soon as the windows mist
up.
Air outlet vents
Fig. 97 Air outlet vents
Open air outlet vents
– Turn the rotary knob into the upper position.
Close air outlet vents
– Turn the rotary knob into the lower position.
Redirecting air flow
– The horizontal as well as the vertical direction of the air flow is set with the handle in the middle of the air outlet vents.
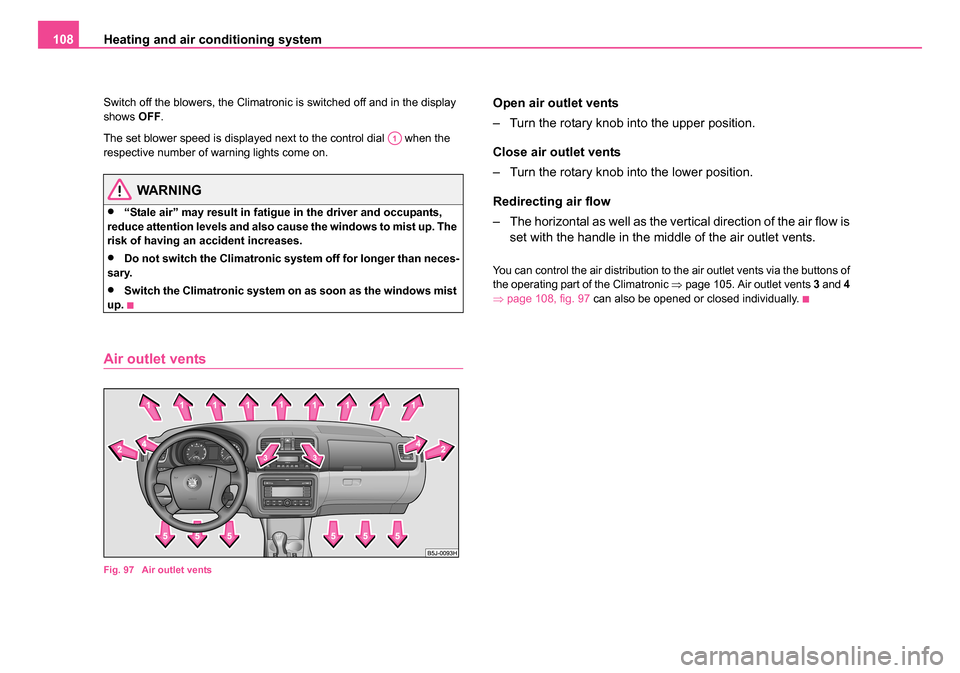
You can control the air distribution to the air outlet vents via the buttons of
the operating part of the Climatronic ⇒page 105. Air outlet vents 3 and 4
⇒ page 108, fig. 97 can also be opened or closed individually.
A1
NKO 20 A05.book Page 108 Wednesday, June 21, 2006 1:42 PM
Page 127 of 274

Communication
126
Communication
Operating the radio
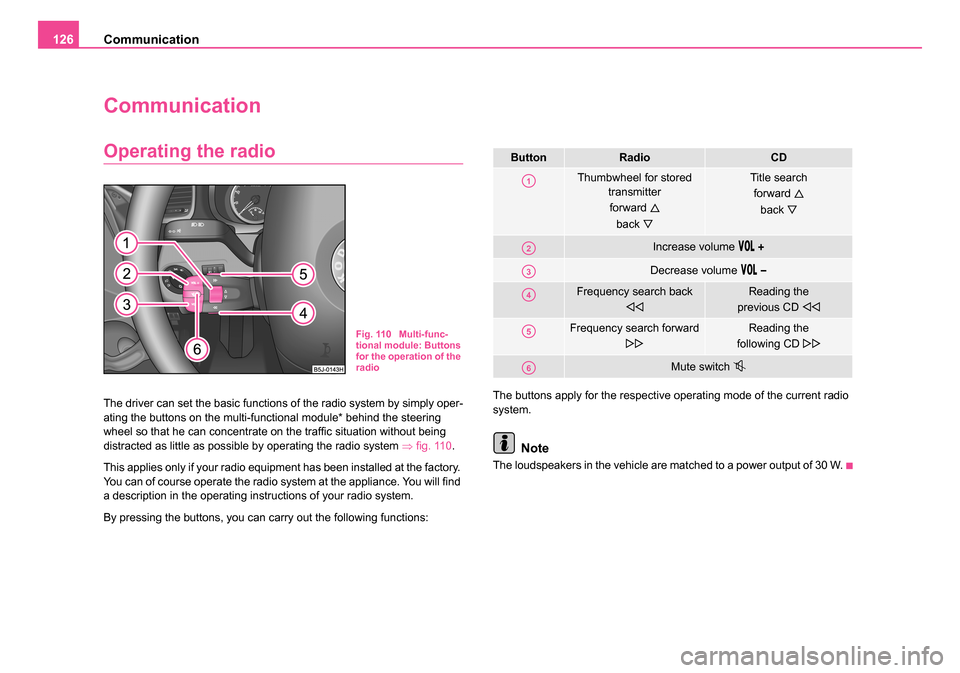
The driver can set the basic functions of the radio system by simply oper-
ating the buttons on the multi-functional module* behind the steering
wheel so that he can concentrate on the traffic situation without being
distracted as little as possible by operating the radio system ⇒fig. 110 .
This applies only if your radio equipment has been installed at the factory.
You can of course operate the radio system at the appliance. You will find
a description in the operating instructions of your radio system.
By pressing the buttons, you can carry out the following functions: The buttons apply for the respective operating mode of the current radio
system.
Note
The loudspeakers in the vehicle are matched to a power output of 30 W.
Fig. 110 Multi-func-
tional module: Buttons
for the operation of the
radio
ButtonRadioCD
Thumbwheel for stored
transmitter
forward
back
Title search forward
back
Increase volume
Decrease volume
Frequency search back
Reading the
previous CD
Frequency search forward
Reading the
following CD
Mute switch
A1
A2
A3
A4
A5
A6
NKO 20 A05.book Page 126 Wednesday, June 21, 2006 1:42 PM
Page 128 of 274

Communication127
Using the systemSafetyDriving TipsGeneral MaintenanceBreakdown assistanceTechnical Data
Radio and mobile phone operation
The driver can set the basic functions of the radio and telephone system
by simply operating the buttons on the multi-functional module* behind the
steering wheel so that he can concentrate on the traffic situation without
being distracted as little as possible by operating the radio system
⇒fig. 111 .
This applies only if your radio and mobile phone equipment has been
installed at the factory. You can of course operate the radio and mobile
system at the appliance. You will find a description in the operating instruc-
tions of your radio system.
By pressing the buttons, you can carry out the following functions:
The buttons apply for the respective operating mode of the current radio system.
Fig. 111 Multi-func-
tional module: Buttons
for the radio and
mobile phone opera-
tion
ButtonRadioCDPhone
Thumbwheel for stored transmitter
forward
back
Title search forward
back
Scroll through with the aid of the thumbwheel
Increase volume
Decrease volume
Switching over between radio system and mobile phone
without functionReceive, accept a call, call up menu telephone, confirm menu selection
/
without functionActivation/deactivation button for voice control
(button PTT)
A1
A2
A3
A4
A5
A6
NKO 20 A05.book Page 127 Wednesday, June 21, 2006 1:42 PM
Page 129 of 274

Communication
128
Note
The operation of the mobile phone fitted with multi-functional module* is
only possible on certain models of mobile phone. More detailed informa-
tion is available from your Škoda Service Partner.
Universal telephone preinstallation with
voice control*
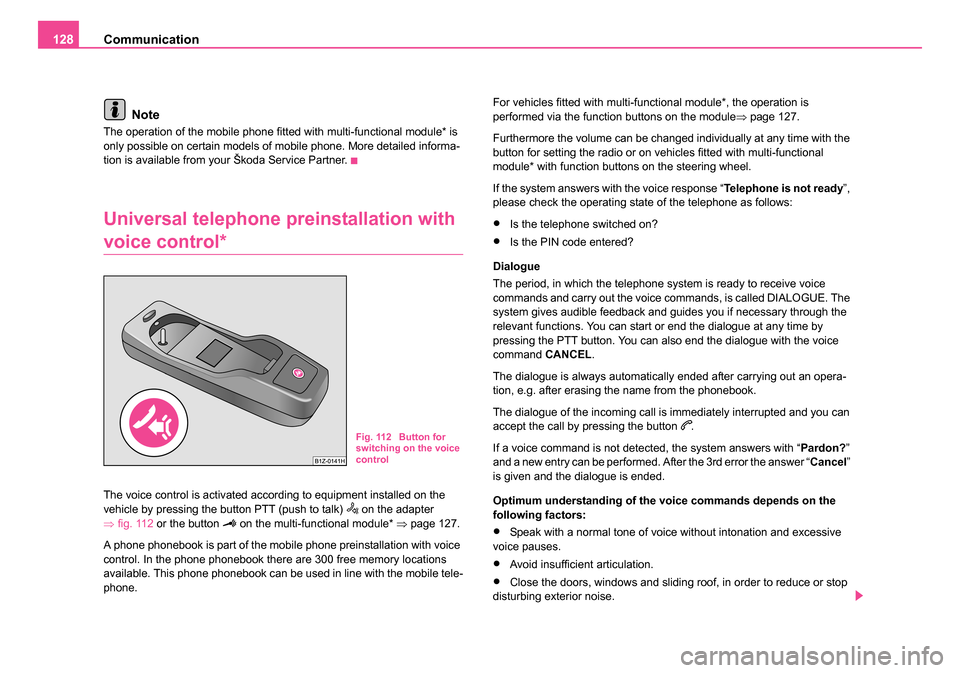
The voice control is activated according to equipment installed on the
vehicle by pressing the button PTT (push to talk) on the adapter
⇒ fig. 112 or the button on the multi-functional module* ⇒page 127.
A phone phonebook is part of the mobile phone preinstallation with voice
control. In the phone phonebook there are 300 free memory locations
available. This phone phonebook can be used in line with the mobile tele-
phone. For vehicles fitted with multi-functional module*, the operation is
performed via the function buttons on the module
⇒page 127.
Furthermore the volume can be changed individually at any time with the
button for setting the radio or on vehicles fitted with multi-functional
module* with function buttons on the steering wheel.
If the system answers with the voice response “ Telephone is not ready”,
please check the operating state of the telephone as follows:
•Is the telephone switched on?
•Is the PIN code entered?
Dialogue
The period, in which the telephone system is ready to receive voice
commands and carry out the voice commands, is called DIALOGUE. The
system gives audible feedback and guides you if necessary through the
relevant functions. You can start or end the dialogue at any time by
pressing the PTT button. You can also end the dialogue with the voice
command CANCEL.
The dialogue is always automatically ended after carrying out an opera-
tion, e.g. after erasing the name from the phonebook.
The dialogue of the incoming call is immediately interrupted and you can
accept the call by pressing the button
.
If a voice command is not detected, the system answers with “ Pardon?”
and a new entry can be performed. After the 3rd error the answer “ Cancel”
is given and the dialogue is ended.
Optimum understanding of the voice commands depends on the
following factors:
•Speak with a normal tone of voice without intonation and excessive
voice pauses.
•Avoid insufficient articulation.
•Close the doors, windows and sliding roof, in order to reduce or stop
disturbing exterior noise.
Fig. 112 Button for
switching on the voice
control
NKO 20 A05.book Page 128 Wednesday, June 21, 2006 1:42 PM
Page 131 of 274

Communication
130
This enables you to make full use of the advantages of a normal carphone
(“handsfree system” using a microphone integrated in the vehicle, optimal
transmission of signals using an external aerial etc.). The battery of the
mobile phone is also constantly charged.
Mobile phone operation
If you select the menu PHONE in the information display and the phone is
not in the adapter, INSERT PHONE is shown on the display. After inserting the phone in the adapter, the system begins to load the
phone book from the phone into the information display. The following is
shown one after the other on the display:
PLEASE WAIT
LOADING... LAST CALLS
LOADING... ACCEPTED CALLS
LOADING... MISSED CALLS
LOADING... PHONE BOOK
After loading is completed, phone book, last calls, accepted calls, missed
calls and memory appear in the display.
Using the system
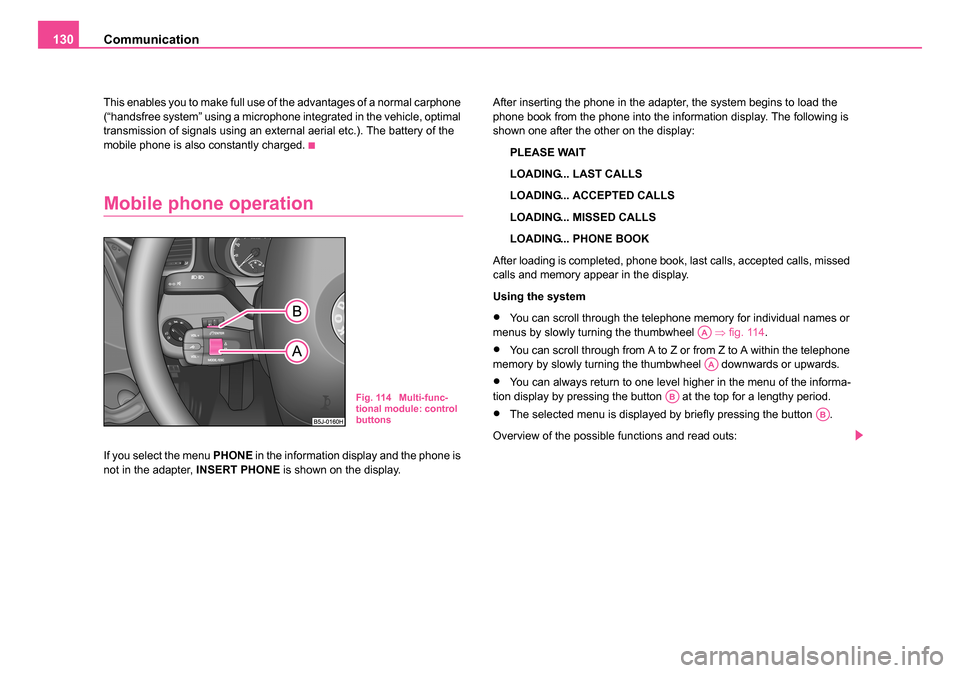
•You can scroll through the telephone memory for individual names or
menus by slowly turning the thumbwheel ⇒fig. 114 .
•You can scroll through from A to Z or from Z to A within the telephone
memory by slowly turning the thumbwheel downwards or upwards.
•You can always return to one level higher in the menu of the informa-
tion display by pressing the button at the top for a lengthy period.
•The selected menu is displayed by briefly pressing the button .
Overview of the possible functions and read outs:
Fig. 114 Multi-func-
tional module: control
buttons
AA
AA
AB
AB
NKO 20 A05.book Page 130 Wednesday, June 21, 2006 1:42 PM
Page 132 of 274

Communication131
Using the systemSafetyDriving TipsGeneral MaintenanceBreakdown assistanceTechnical Data
You can operate the mobile phone via the voice control
⇒page 128 or via
the buttons of the multi-functional module* ⇒page 127.
Note
It a yellow or red warning symbol lights up in the information display, the
menu phonebook cannot be selected.
Voice commands
Voice commands for mobile phone operation
Voice commands for operating the phone phone book
ActivityRead out in display
Call termi-
natedINCOMING CALL TERMINATED
Number
engagedLINE BUSY
No service foundNO SERVICE
Enter PIN
codeENTER PIN
Voice commandActivity
ENTER PIN/PIN CODEAfter this command the PIN code of the mobile
phone can be entered ⇒page 132.
DIAL NUMBERAfter this command a telephone number can
be entered which establishes a connection to
the requested partner ⇒page 133.
REDIALAfter this command the last selected telephone
number is selected again ⇒page 133.
Voice commandActivity
SAVE/STORE
NAMES/NAME/NUMB ERAfter this command a name with its telephone
number can be stored in the phone phone book
⇒page 134.
SELECT
NAMES/NAMEAfter this command a telephone number which
was stored under its given name in the phone
phone book can be selected ⇒page 134.
DELETE
NAMES/NAMEAfter this command a name in the phone phone
book can be erased ⇒page 135.
LISTEN TO/PLAY
PHONEBOOKAfter this command you can listen-in to the
phone phone book ⇒page 135.
DELETE PHONE-
BOOKAfter this command the complete phone book
or a name can be erased ⇒page 135.
NKO 20 A05.book Page 131 Wednesday, June 21, 2006 1:42 PM
Page 140 of 274

Communication139
Using the systemSafetyDriving TipsGeneral MaintenanceBreakdown assistanceTechnical Data
Note
If an external audio source is connected via AUX-IN*, which has a sepa-
rate power supply, this can lead to an interference of the audio signals. It
depends on the properties of the adapter.
CD changer*
Operating the CD changer*
Loading a CD
– Touch the button and guide the CD (compact disc) into the
CD-case . The CD is automatically loaded onto the next
free position in the CD-changer. The LED in the corresponding
button stops flashing. Loading all CDs
– Hold the button pressed and guide all CDs one after the
other into the CD-case . The LEDs in the buttons are no
longer flashing.
Loading a CD to one definite position
– Touch button . The LEDs in the buttons light up at the memory spaces, which are already assigned and flash in the
case of free memory spaces.
– Touch the desired button and guide the CD into the CD- case .
Ejecting a CD
– Touch the button , in order to eject a CD. For assigned memory spaces, now the LEDs light up in the buttons .
– Touch the corresponding button . The CD is ejected.
Ejecting all CDs
– Hold the button pressed for more than 2 seconds, in order to eject the CDs. All CDs in the CD-changer are ejected
consecutively.
Note•Always guide the CD into the CD-case with the printed side
pointing upwards.
•Never push the CD with force into the CD-case as the insertion is
performed automatically.
Fig. 115 The CD
changer
AC
AB
AD
AC
ABAD
ACAD
AD
AB
AA
AD
AD
AA
AB
NKO 20 A05.book Page 139 Wednesday, June 21, 2006 1:42 PM