Page 175 of 242
173 Navigation*
Route guidance
� Route guidance
Route guidance can be started if the
destination input is complete and
Start
route guidance
is displayed at the
bottom of the main area.
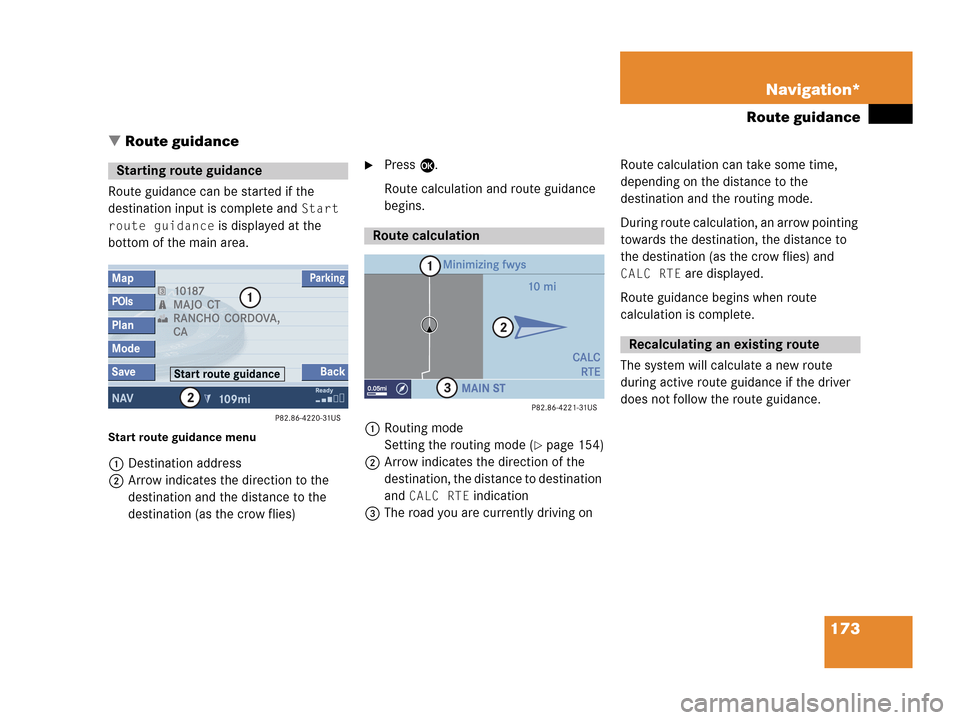
Start route guidance menu
1Destination address
2Arrow indicates the direction to the
destination and the distance to the
destination (as the crow flies)
�Press E.
Route calculation and route guidance
begins.
1Routing mode
Setting the routing mode (
�page 154)
2Arrow indicates the direction of the
destination, the distance to destination
and
CALC RTE indication
3The road you are currently driving onRoute calculation can take some time,
depending on the distance to the
destination and the routing mode.
During route calculation, an arrow pointing
towards the destination, the distance to
the destination (as the crow flies) and
CALC RTE are displayed.
Route guidance begins when route
calculation is complete.
The system will calculate a new route
during active route guidance if the driver
does not follow the route guidance.
Starting route guidance
Route calculation
Recalculating an existing route
Page 176 of 242
174 Navigation*
Route guidance
After route calculation, the system assists
route guidance using pictorial displays
(
�page 175) and voice instructions. Repeating current voice instructions
If you have not understood a navigation
announcement, you can at any time have a
current announcement repeated.
�Press j.
The current navigation announcement
is repeated.
Switching voice instructions On/Off
Switching off
�Press J during a navigation
announcement.
The message
Voice announcements
muted
will appear briefly. Further route guidance takes place
using only the symbols in the display.
If a new route guidance cycle is started,
the announcements are automatically
switched on again.
Switching on again
�Press j.
Voice instructions
WarningG
Voice instructions are intended to direct you
while driving without diverting your attenti-
on from the road and driving.
Always use this feature instead of consulting
the map display for directions. Consulting
the map displays for directions may cause
you to divert your attention from driving and
increase the risk of an accident.
Page 182 of 242
180 Navigation*
During route guidance
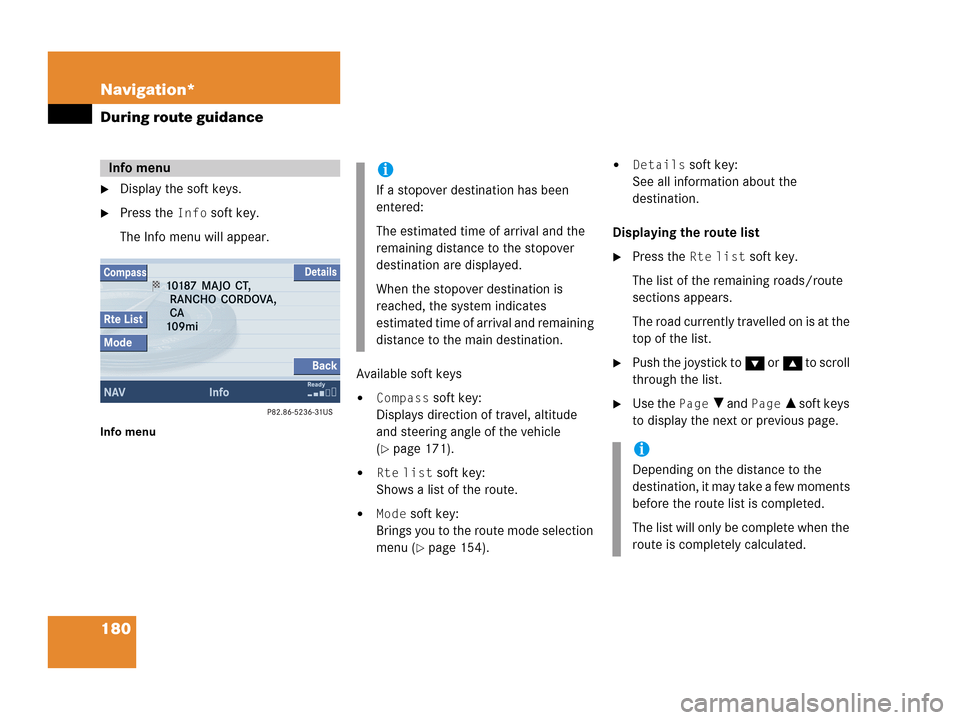
�Display the soft keys.
�Press the Info soft key.
The Info menu will appear.
Info menu
Available soft keys
�Compass soft key:
Displays direction of travel, altitude
and steering angle of the vehicle
(
�page 171).
�Rte list soft key:
Shows a list of the route.
�Mode soft key:
Brings you to the route mode selection
menu (
�page 154).
�Details soft key:
See all information about the
destination.
Displaying the route list
�Press the Rte list soft key.
The list of the remaining roads/route
sections appears.
The road currently travelled on is at the
top of the list.
�Push the joystick to G or g to scroll
through the list.
�Use the Page V and Page v soft keys
to display the next or previous page.
Info menui
If a stopover destination has been
entered:
The estimated time of arrival and the
remaining distance to the stopover
destination are displayed.
When the stopover destination is
reached, the system indicates
estimated time of arrival and remaining
distance to the main destination.
i
Depending on the distance to the
destination, it may take a few moments
before the route list is completed.
The list will only be complete when the
route is completely calculated.
Page 192 of 242
190 Navigation*
During route guidance
�Manual
If you choose this option, the system
only switches to split screen by
pressing c.
The symbol _ indicates the present
setting.
�Move the E joystick in g or G
direction to select the option with the
symbol -.
�Press button E.
The option is changed.
�Press the Back soft key to confirm and
return to the map.Trail settings
With this function is active, the COMAND
records a trail every time the vehicle is in
an OFF ROAD area (more than 0.25 miles
away from a digitized road).
The system places trail dots on the screen
until it matches to a digitized road again.
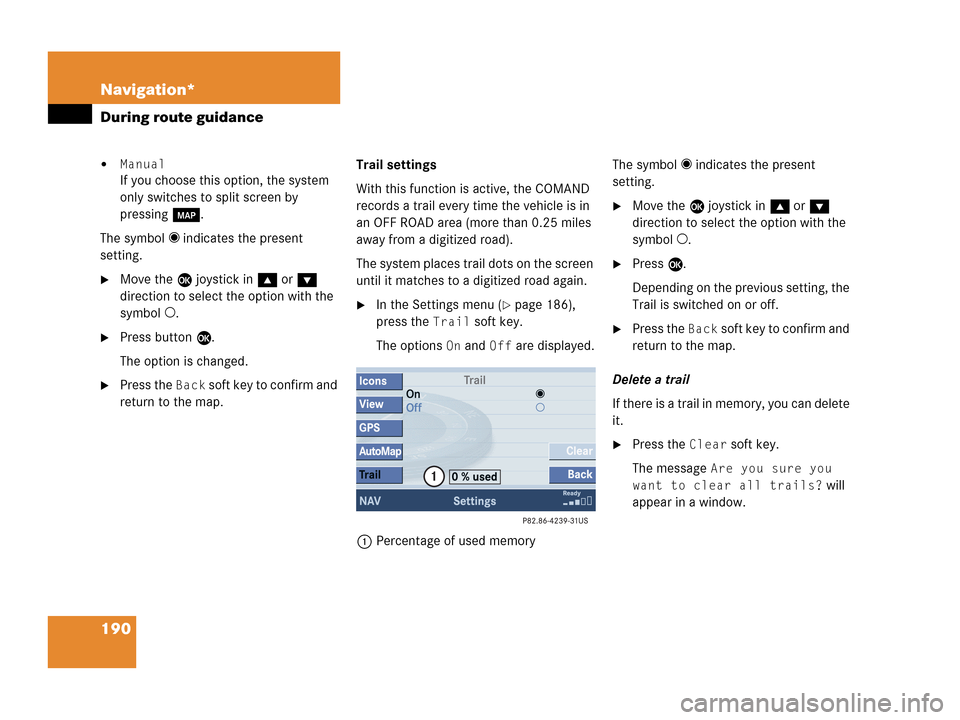
�In the Settings menu (�page 186),
press the
Trail soft key.
The options
On and Off are displayed.
1Percentage of used memoryThe symbol _ indicates the present
setting.
�Move the E joystick in g or G
direction to select the option with the
symbol -.
�Press E.
Depending on the previous setting, the
Trail is switched on or off.
�Press the Back s o f t k e y t o c o n f i rm a nd
return to the map.
Delete a trail
If there is a trail in memory, you can delete
it.
�Press the Clear soft key.
The message
Are you sure you
want to clear all trails?
will
appear in a window.
Page 196 of 242
194 Navigation*
Last destinations and destination memory
Create a new name
�Push the joystick to h, H, g or
G to select the characters. After each
selection, press E.
�Push the joystick to F or f to
select characters diagonally.
�Press E to confirm the entry.
The message
The address has
been saved as
will appear.
After that, the Start route guidance
menu, the
Last destinations
memory or the Today’s plan memory
reappear.Activating the destination memory
�Activate the Navigation main menu
(
�page 152).
�Push the joystick to g or G to
select menu item
Destination
memory
.
�Press E.
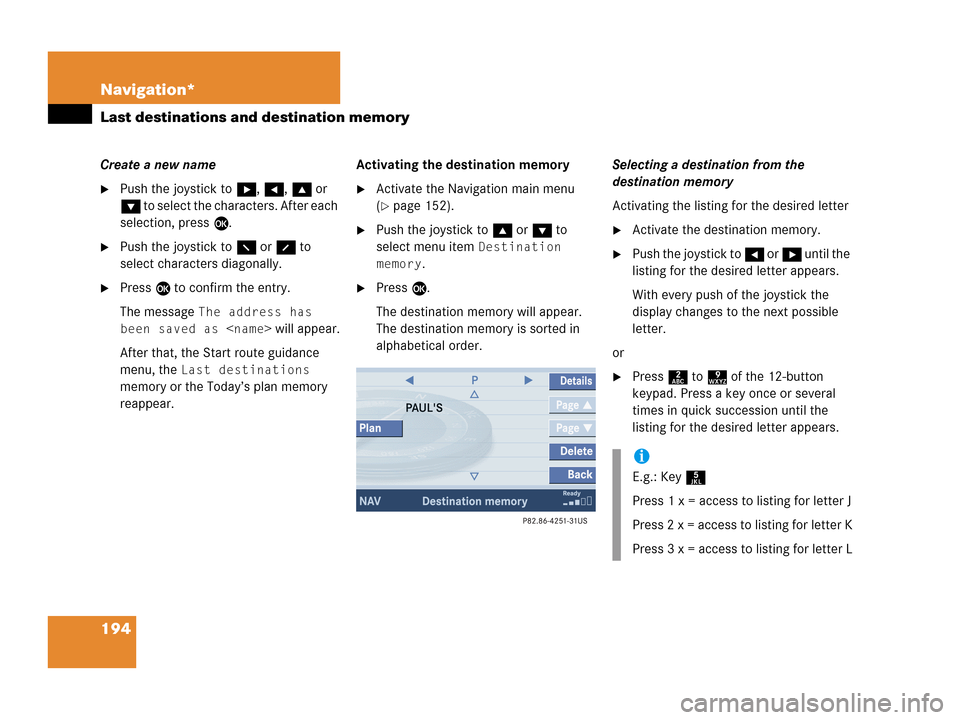
The destination memory will appear.
The destination memory is sorted in
alphabetical order.Selecting a destination from the
destination memory
Activating the listing for the desired letter
�Activate the destination memory.
�Push the joystick to H or h until the
listing for the desired letter appears.
With every push of the joystick the
display changes to the next possible
letter.
or
�Press 2 to 9 of the 12-button
keypad. Press a key once or several
times in quick succession until the
listing for the desired letter appears.
i
E.g.: Key 5
Press 1 x = access to listing for letter J
Press 2 x = access to listing for letter K
Press 3 x = access to listing for letter L
Page 209 of 242
207 Navigation*
Software Updates
Loading
�Insert the new navigation DVD into the
DVD slot with the label side up.
The message
Navigation is
initializing. Please wait.
will
appear.
�Press l on the display unit to return
the display unit to its closed position.
The display unit tilts up and then moves
to the rear.After that, the COMAND loads the
software on the DVD.
Shortly after that, the progress bar
appears. After some time, the progress
bar reaches 100%.
The update is completed. You can now
operate the navigation system again.
i
Inserting a second DVD with another
DVD still loaded will cause damage to
the DVD drive which is not covered by
the Mercedes-Benz Limited Warranty.
i
The message Press EJECT to
close
will appear. If l on the
display unit is not pressed within 20
seconds, eight successive series of two
beep tones will sound to remind you to
return the display to its closed position
by pressing l on the display unit.
If you do not do so, the COMAND
returns the display unit to its closed
position.
Page 213 of 242
211 Service
SMS*
� SMS*
With the SMS Received list, you can
receive SMS messages provided that SMS
messaging is available from your mobile
phone service provider.
�Activate the Service main menu
(
�page 210).
�Press the SMS soft key.
The Received list will appear.The status bar shows date and time of
the message.
One line is provided for each message.
Symbol = = Message unread
Symbol z = SMS message
i
The functions described here apply if
your vehicle is equipped with mobile
phone cradle* and a Mercedes-Benz
specified mobile phone*.
i
If you have received new SMS
messages, n is displayed on the
status bar. Additionally, a message
received tone is played.
i
If another system is active (e.g. radio),
a window with the message
Received
a new SMS
appears when SMS
message is coming in.
SMS Received list
i
If there is no SMS message, the SMS
soft key appears greyed out.
Page 218 of 242
216 System settings
System settings
� System settings
�Press C.
�In the Service main menu
(
�page 210), press the System soft
key.
System settings menu
In the System settings menu you can:
�select the time zone and daylight
savings time settings
�select the language (�page 217)
�switch verification and notification
tones on and off (
�page 218)
�adjust display settings (�page 219)
�activate and deactivate the Voice
control system* help window
(
�page 220)
�start Voice control system*
individualization (
�page 221)
�reset all settings to the factory settings
(
�page 223)You can select the applicable time zone
and daylight saving time settings.
�In the System settings menu, press the
Time soft key.
The available time zones are shown.
�Push the joystick to g or G to
select the time zone.
�Press E.
You can now select the daylight saving
time settings.
Activating the System settings
menu Selecting the time zone