2006 CHEVROLET CORVETTE lock
[x] Cancel search: lockPage 81 of 426
Sun Visors
To block out glare, you can swing down the visors. You
can also swing them to the side.
Lighted Visor Vanity Mirrors
Pull down the sun visor and lift the cover to expose the
lighted vanity mirror. When the cover is lifted, the
lamps will come on automatically, even if the ignition
is off.
Theft-Deterrent Systems
Vehicle theft is big business, especially in some cities.
Although your vehicle has a number of theft-deterrent
features, we know that nothing we put on it can make it
impossible to steal.
Theft-Deterrent System
Your vehicle is equipped with a theft-deterrent alarm
system.
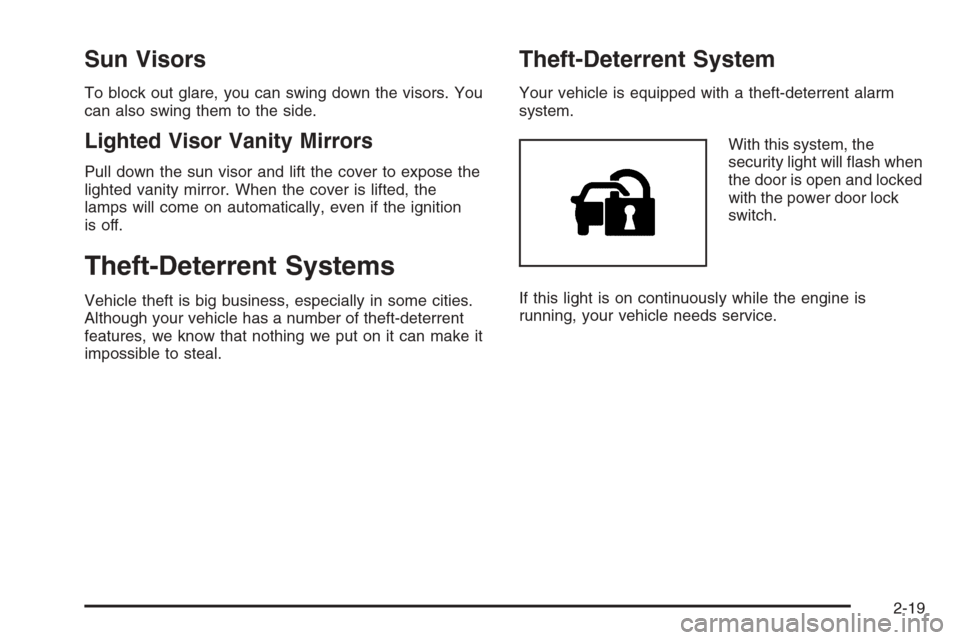
With this system, the
security light will �ash when
the door is open and locked
with the power door lock
switch.
If this light is on continuously while the engine is
running, your vehicle needs service.
2-19
Page 82 of 426

Arming the System
Use one of the three following items listed here to arm
the system:
Press the lock button on the keyless access
transmitter.
Open the door. Lock the door with the power door
lock switch. The security light should �ash.
Remove the keyless access transmitter from inside
the vehicle and close the door. The security light
will stop �ashing and stay on. After 30 seconds, the
light should turn off.
The vehicle can be programmed to automatically
lock the doors and arm the theft-deterrent system
when you exit the vehicle. SeeDIC Vehicle
Personalization on page 3-68.
Now, if a door or the hatch/trunk is opened without
the keyless access transmitter, the alarm will go
off. Your horn will sound for two minutes, then it will go
off to save battery power. Your vehicle will not start
without a keyless access transmitter present.
The theft-deterrent system will not arm if you lock the
driver’s door with the power door lock switch after
the doors are closed.
If your passenger stays in the vehicle when you leave
with the keyless access transmitter, have the passenger
lock the vehicle after the doors are closed. This way the
alarm will not arm, and your passenger will not set it off.
Testing the Alarm
Do the following to test the system:
1. Make sure the trunk lid/hatch is latched.
2. Lower the window on the driver’s door.
3. Manually arm the system.
4. Close the doors and wait 30 seconds.
5. Reach through the open window and manually pull
the release lever on the �oor.
6. Turn off the alarm by pressing the unlock button on
the transmitter.
If the alarm is inoperative, check to see if the horn
works. If not, check the horn fuse. SeeFuses and Circuit
Breakers on page 5-93. If the horn works, but the
alarm doesn’t go off, see your dealer.
Disarming the System
Always use your keyless access transmitter to unlock
a door either by pressing the unlock button on the
transmitter or by squeezing the door handle sensor while
you have the transmitter with you. Unlocking a door
any other way will set off the alarm. If your alarm
sounds, press the unlock button on the keyless access
transmitter to disarm it.
2-20
Page 88 of 426
Automatic Transmission Operation
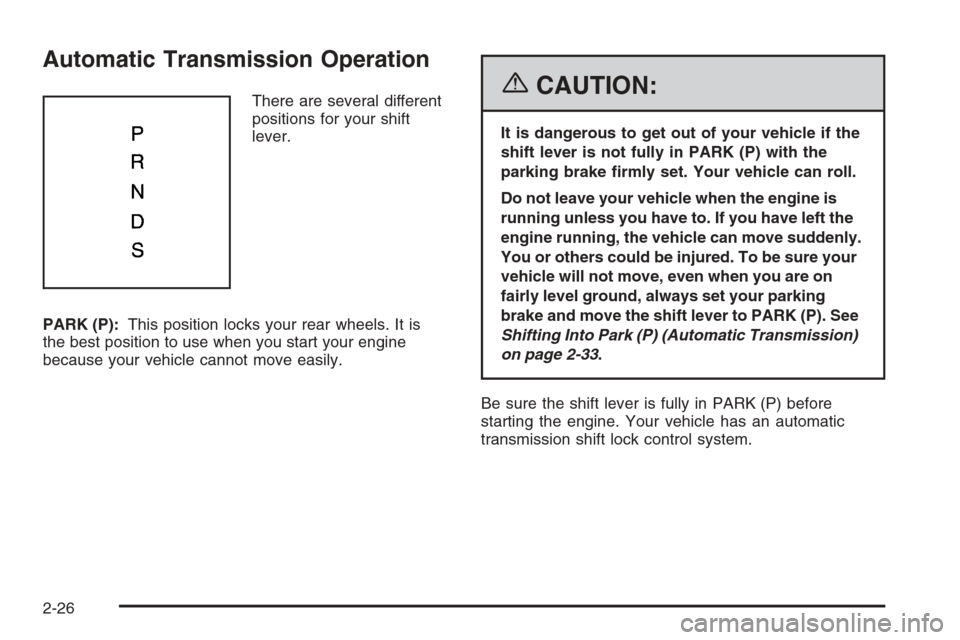
There are several different
positions for your shift
lever.
PARK (P):This position locks your rear wheels. It is
the best position to use when you start your engine
because your vehicle cannot move easily.{CAUTION:
It is dangerous to get out of your vehicle if the
shift lever is not fully in PARK (P) with the
parking brake �rmly set. Your vehicle can roll.
Do not leave your vehicle when the engine is
running unless you have to. If you have left the
engine running, the vehicle can move suddenly.
You or others could be injured. To be sure your
vehicle will not move, even when you are on
fairly level ground, always set your parking
brake and move the shift lever to PARK (P). See
Shifting Into Park (P) (Automatic Transmission)
on page 2-33.
Be sure the shift lever is fully in PARK (P) before
starting the engine. Your vehicle has an automatic
transmission shift lock control system.
2-26
Page 93 of 426

SECOND (2):Press the clutch pedal as you let up on
the accelerator pedal and shift into SECOND (2).
Then, slowly let up on the clutch pedal as you press the
accelerator pedal.
THIRD (3), FOURTH (4), FIFTH (5) and SIXTH (6):Shift
into THIRD (3), FOURTH (4), FIFTH (5) and SIXTH (6)
the same way you do for SECOND (2). Slowly let up on
the clutch pedal as you press the accelerator pedal.
To stop, let up on the accelerator pedal and press the
brake pedal. Just before the vehicle stops, press the
clutch pedal and the brake pedal, and shift to NEUTRAL.
NEUTRAL:Use this position when you start or idle
your engine. Your shift lever is in NEUTRAL when it is
centered in the shift pattern, not in any gear.
REVERSE (R):To back up, press down the clutch
pedal and shift into REVERSE (R). Just apply pressure
to get the lever past FIFTH (5) and SIXTH (6) into
REVERSE (R). Let up on the clutch pedal slowly while
pressing the accelerator pedal.
Your six-speed manual transmission has a feature that
allows you to safely shift into REVERSE (R) while
the vehicle is rolling at less than 3 mph (5 km/h). You
will be locked out if you try to shift into REVERSE (R)
while your vehicle is moving faster than 3 mph (5 km/h).Shift Speeds (Manual Transmission)
{CAUTION:
If you skip a gear when you downshift, you could
lose control of your vehicle. You could injure
yourself or others. Do not shift down more than
one gear at a time when you downshift.
This chart shows when to shift to the next higher gear
for the best fuel economy.
Manual Transmission Recommended
Shift Speeds in mph (km/h)
EngineAcceleration Shift Speed
1to2 2to3 3to4 4to5 5to6
All
Engines15 (24) 25 (40) 40 (64) 45 (72) 50 (80)
If your engine speed drops below 900 rpm, or if the
engine is not running smoothly, you should downshift
to the next lower gear. You may have to downshift
two or more gears to keep the engine running smoothly
or for good engine performance.
Notice:When shifting gears, do not move the
shift lever around unnecessarily. This may damage
the transmission. Shift directly into the next gear.
2-31
Page 96 of 426
Leaving Your Vehicle With the Engine
Running (Automatic Transmission)
{CAUTION:
It can be dangerous to leave your vehicle with
the engine running. Your vehicle could move
suddenly if the shift lever is not fully in
PARK (P) with the parking brake �rmly set.
And, if you leave the vehicle with the engine
running, it could overheat and even catch �re.
You or others could be injured. Do not leave
your vehicle with the engine running.
If you have to leave your vehicle with the engine running,
be sure your vehicle is in PARK (P) and your parking
brake is �rmly set before you leave it. After you have
moved the shift lever into PARK (P), hold down the
regular brake pedal. See if you can move the shift lever
away from PARK (P) without �rst pulling it toward you. If
you can, it means that the shift lever was not fully locked
into PARK (P).
Torque Lock (Automatic Transmission)
If you are parking on a hill and you do not shift your
transmission into PARK (P) properly, the weight of the
vehicle may put too much force on the parking pawl in the
transmission. You may �nd it difficult to pull the shift lever
out of PARK (P). This is called “torque lock.” To prevent
torque lock, set the parking brake and then shift into
PARK (P) properly before you leave the driver’s seat.
To �nd out how, see “Shifting Into PARK (P)” listed
previously in this section.
When you are ready to drive, move the shift lever out of
PARK (P) before you release the parking brake.
If torque lock does occur, you may need to have another
vehicle push yours a little uphill to take some of the
pressure from the transmission parking pawl, so you can
pull the shift lever out of PARK (P).
2-34
Page 97 of 426
Shifting Out of Park (P)
(Automatic Transmission)
Your vehicle has an automatic transmission shift lock
control system which locks the shift lever in PARK (P)
when the ignition is off. In addition, you have to fully
apply your regular brake before you can shift from
PARK (P) when the ignition is on. SeeAutomatic
Transmission Operation on page 2-26.
If you cannot shift out of PARK (P), ease pressure on
the shift lever and push the shift lever all the way
into PARK (P) and release the shift lever button as you
maintain brake application. Then press the shift lever
button and move the shift lever into the gear you wish.
If you ever hold the brake pedal down but still cannot
shift out of PARK (P), try this:
1. Put the vehicle in accessory power mode.
2. Apply and hold the brake until the end of Step 4.
3. Shift to NEUTRAL (N).
4. Start the engine and then shift to the drive gear
you want.
5. Have your vehicle inspected by your dealer as soon
as possible.
Parking Your Vehicle
(Manual Transmission)
Before you get out of your vehicle, move the shift lever
into REVERSE (R) and �rmly apply the parking brake.
Once the shift lever has been placed into REVERSE (R)
with the clutch pedal pressed in, you can turn the ignition
off and release the clutch.
2-35
Page 103 of 426
Cleaning the Mirror
When cleaning the mirror, use a paper towel or similar
material dampened with glass cleaner. Do not spray
glass cleaner directly on the mirror as that may cause
the liquid cleaner to enter the mirror housing.
Automatic Dimming Rearview Mirror
with Compass
If the vehicle has this feature, an automatic dimming
mirror automatically dims to the proper level to minimize
glare at night from lights behind your vehicle.
The mirror also includes a compass display in the upper
right corner of the mirror face.
P(On/Off):This is the on/off button.
Automatic Dimming Mirror Operation
The automatic dimming mirror function is turned on each
time the ignition is started. A light near the on/off button
will come on to indicate the automatic dimming is on.
Press the on/off button for about six seconds to
manually turn the automatic dimming function on or off.
Compass Display
Press the on/off button, located to the far left, brie�y to
turn the compass display on or off.
If the display reads CAL, the compass needs to be
calibrated. For more information, see “Compass
Calibration” later in this section.
To adjust between Fahrenheit and Celsius:
1. Press and hold the on/off button for approximately
four seconds until either a �ashing °F, or °C
appears.
2. Press the button again to change the display to the
desired unit of measurement. After approximately
four seconds of inactivity, the new unit will be locked
in and the compass/temperature display will return.
If an abnormal temperature reading is displayed for an
extended period of time, please consult your dealer.
Under certain circumstances, a delay in updating
the temperature is normal.
2-41
Page 104 of 426
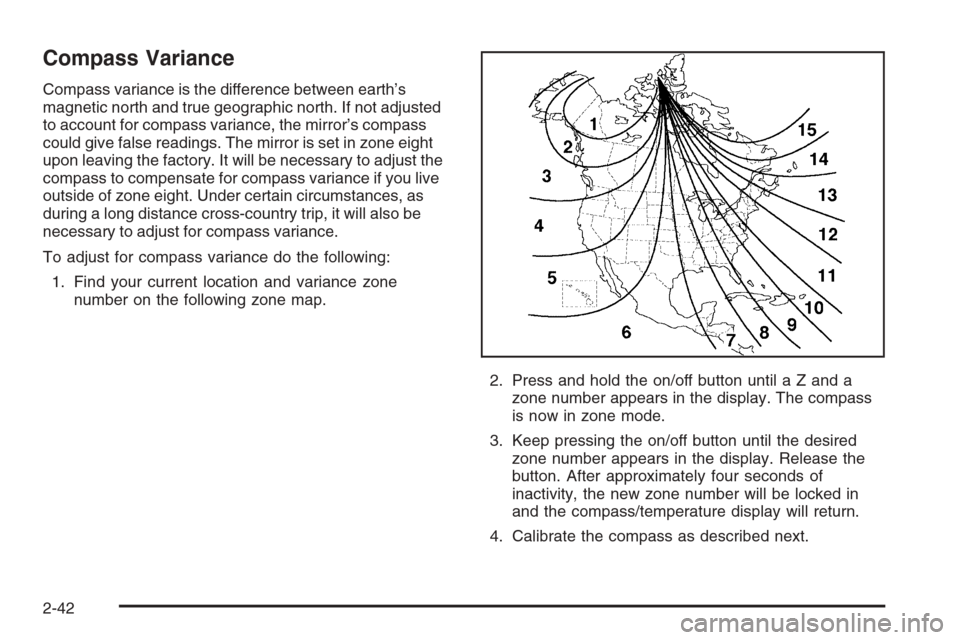
Compass Variance
Compass variance is the difference between earth’s
magnetic north and true geographic north. If not adjusted
to account for compass variance, the mirror’s compass
could give false readings. The mirror is set in zone eight
upon leaving the factory. It will be necessary to adjust the
compass to compensate for compass variance if you live
outside of zone eight. Under certain circumstances, as
during a long distance cross-country trip, it will also be
necessary to adjust for compass variance.
To adjust for compass variance do the following:
1. Find your current location and variance zone
number on the following zone map.
2. Press and hold the on/off button until a Z and a
zone number appears in the display. The compass
is now in zone mode.
3. Keep pressing the on/off button until the desired
zone number appears in the display. Release the
button. After approximately four seconds of
inactivity, the new zone number will be locked in
and the compass/temperature display will return.
4. Calibrate the compass as described next.
2-42