2006 BMW MOTORRAD K 1200 S handbrake
[x] Cancel search: handbrakePage 51 of 163
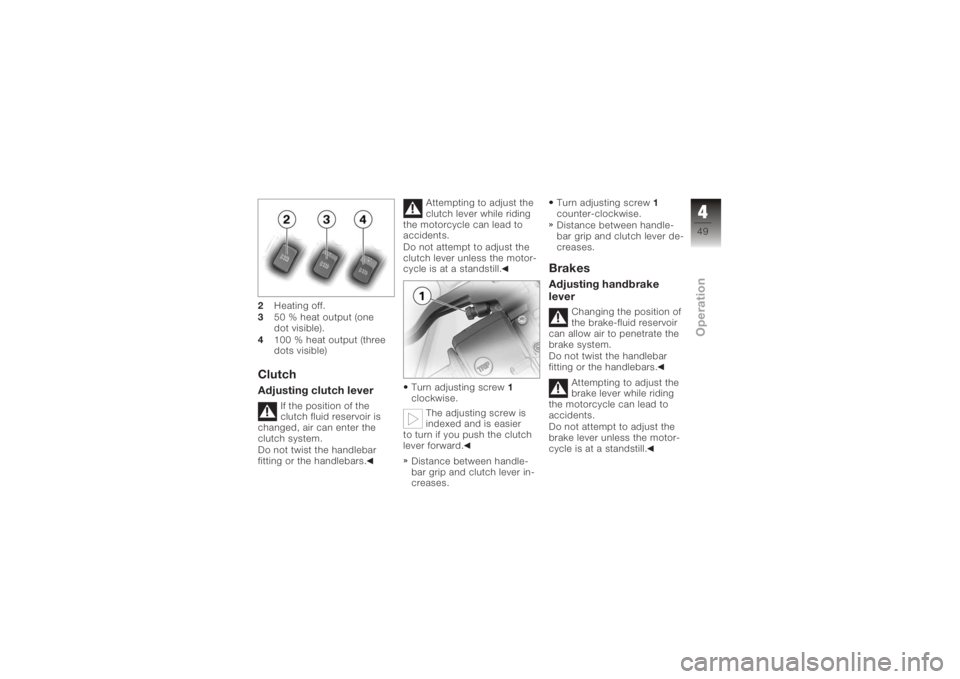
2Heating off.
3 50 % heat output (one
dot visible).
4 100 % heat output (three
dots visible)ClutchAdjusting clutch lever
If the position of the
clutch fluid reservoir is
changed, air can enter the
clutch system.
Do not twist the handlebar
fitting or the handlebars. Attempting to adjust the
clutch lever while riding
the motorcycle can lead to
accidents.
Do not attempt to adjust the
clutch lever unless the motor-
cycle is at a standstill.
Turn adjusting screw 1
clockwise.
The adjusting screw is
indexed and is easier
to turn if you push the clutch
lever forward.
Distance between handle-
bar grip and clutch lever in-
creases. Turn adjusting screw
1
counter-clockwise.
Distance between handle-
bar grip and clutch lever de-
creases.
BrakesAdjusting handbrake
lever
Changing the position of
the brake-fluid reservoir
can allow air to penetrate the
brake system.
Do not twist the handlebar
fitting or the handlebars.
Attempting to adjust the
brake lever while riding
the motorcycle can lead to
accidents.
Do not attempt to adjust the
brake lever unless the motor-
cycle is at a standstill.
449zOperation
Page 52 of 163
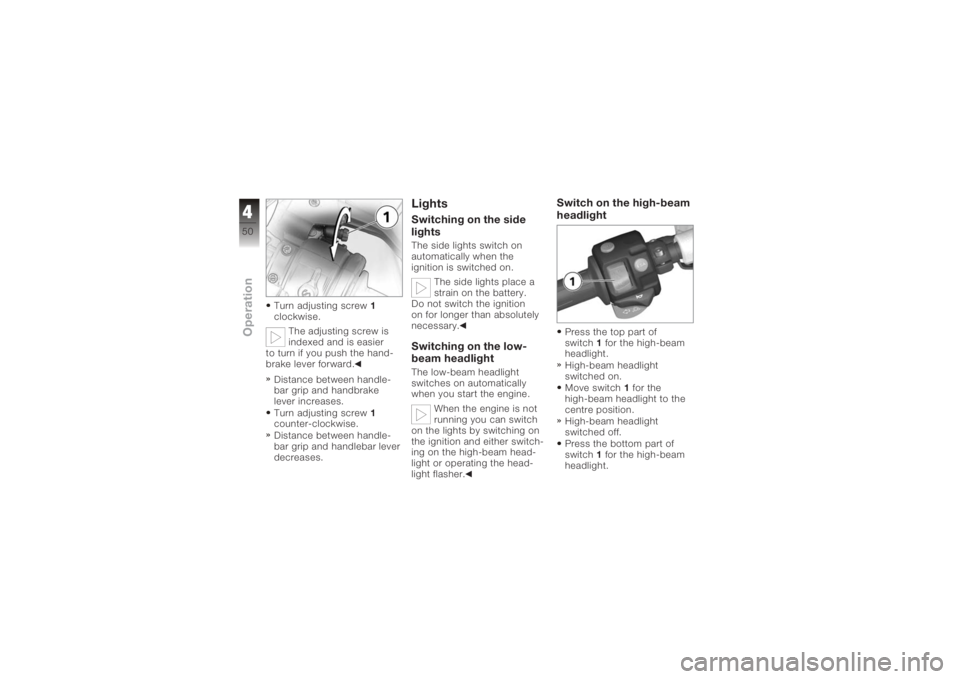
Turn adjusting screw1
clockwise.
The adjusting screw is
indexed and is easier
to turn if you push the hand-
brake lever forward.
Distance between handle-
bar grip and handbrake
lever increases.
Turn adjusting screw 1
counter-clockwise.
Distance between handle-
bar grip and handlebar lever
decreases.
LightsSwitching on the side
lightsThe side lights switch on
automatically when the
ignition is switched on.
The side lights place a
strain on the battery.
Do not switch the ignition
on for longer than absolutely
necessary.Switching on the low-
beam headlightThe low-beam headlight
switches on automatically
when you start the engine.
When the engine is not
running you can switch
on the lights by switching on
the ignition and either switch-
ing on the high-beam head-
light or operating the head-
light flasher.
Switch on the high-beam
headlightPress the top part of
switch 1for the high-beam
headlight.
High-beam headlight
switched on.
Move switch 1for the
high-beam headlight to the
centre position.
High-beam headlight
switched off.
Press the bottom part of
switch 1for the high-beam
headlight.
450zOperation
Page 71 of 163
Running-in speeds
<7000 min
-1
No full-load acceleration.
Avoid low engine speeds at
full load.
Do not omit the first inspec-
tion after 500 - 1200 km.Brake padsNew brake pads must "bed
down" and therefore do not
achieve their optimum friction
levels during the first 500 km.
You can compensate for this
initial reduction in braking ef-
ficiency by exerting greater
pressure on the levers. New brake pads can ex-
tend stopping distance
by a significant margin.
Apply the brakes in good
time.
TyresNew tyres have a smooth
surface. This must be
roughened by riding in a
restrained manner at various
heel angles until the tyres
are run in. This running in
procedure is essential if the
tyres are to achieve maximum
grip.
Tyres do not have their
full grip when new and
there is a risk of accidents at
extreme angles of heel.
Avoid extreme angles of
heel.Parking your
motorcyclePlace the motorcycle on
side stand
If the ground is soft or
uneven, there is no guar- antee that the motorcycle will
rest firmly on the stand.
Always check that the ground
under the stand is level and
firm.
Switch off the engine.
Pull the handbrake lever.
Hold the motorcycle upright
and balanced.
Use your left foot to extend
the side stand fully. The side stand is de-
signed to support only
the weight of the motorcycle.
Do not lean or sit on the mo-
torcycle with the side stand
extended.
Slowly lean the motorcycle
to the side until its weight
is taken by the stand and
dismount to the left. If the motorcycle is on
the side stand, the sur-
face of the ground will de-
termine whether it is better
569zRiding
Page 72 of 163

to turn the handlebars to the
left or right. However, the mo-
torcycle is more stable on a
level surface with the handle-
bars turned to the left than
with the handlebars turned to
the right.
On level ground, always turn
the handlebars to the left to
set the steering lock.Turn the handlebars to full
left or right lock.
Check that the motorcycle
is standing firmly. On a gradient, the mo-
torcycle should always
face uphill; select 1st gear.
Lock the steering lock.Remove the motorcycle
from side standUnlock the steering lock.
From the left, grip the
handlebars with both hands. Pull the handbrake lever.
Swing your right leg over
the seat and lift the motor-
cycle to the upright position.
Hold the motorcycle upright
and balanced.
An extended side stand
can catch on the ground
when the motorcycle is mov-
ing and lead to a fall.
Retract the side stand before
moving the motorcycle.
Sit on the motorcycle and
use your left foot to retract
the side stand.
Place the motorcycle on
centre stand
OA
If the ground is soft or
uneven, there is no guar-
antee that the motorcycle will
rest firmly on the stand.
Always check that the ground
under the stand is level and
firm. Switch off the engine.
Dismount and keep your left
hand on the left handlebar
grip.
With your right hand, grip
the rear grab handle or the
rear frame.
Place your right foot on the
pin of the centre stand, and
press the stand down un-
til its curved feet touch the
ground.
Place your full body weight
on the centre stand and at
the same time pull the mo-
torcycle to the rear.
Excessive movements
could cause the centre
stand to retract, and the mo-
torcycle would topple in con-
sequence.
Do not lean or sit on the mo-
torcycle with the centre stand
extended.
570zRiding
Page 76 of 163
Brake system with
BMW Motorrad
Integral ABSPartially integral brakesYour motorcycle is equipped
with partially integral brakes.
Both front and rear brakes
are applied when you pull the
handbrake lever. The foot-
brake lever acts only on the
rear brake.
When actively intervening
in the braking process, the
BMW Motorrad Integral ABS
adapts braking-force distri-
bution between front and rear
brakes to suit the load on the
motorcycle.The integral braking
function makes it
very difficult to spin the
rear wheel by opening
the throttle with the front
brake applied to keep the
motorcycle stationary (burn- out). Attempted burn-outs
can result in damage to the
rear brake and the clutch.
Do not attempt burn-outs.
How does ABS work?The amount of braking force
that can be transferred to
the road depends on factors
hat include the coefficient of
friction of the road surface.
Loose stones, ice and snow
or a wet road all have much
lower coefficients of friction
than a clean, dry asphalt sur-
face. The lower the coeffi-
cient of friction, the longer the
braking distance.
If the rider increases braking
pressure to the extent that
braking force exceeds the
maximum transferrable limit,
the wheels start to lock and
the motorcycle loses its dir-
ectional stability; a fall is im-
minent. Before this situation
can occur, ABS intervenes
and adapts braking pressure
to the maximum transferrable
braking force, so the wheels
continue to turn and direc-
tional stability is maintained
irrespective of the condition of
the road surface.
What are the effects of
surface irregularities?Humps and surface irregu-
larities can cause the wheels
to lose contact temporarily
with the road surface; if this
happens the braking force
that can be transmitted to
the road can drop to zero.
If the brakes are applied un-
der these circumstances the
ABS has to reduce braking
force to ensure that direc-
tional stability is maintained
when the wheels regain con-
tact with the road surface.
At this instant the BMW Mo-
574zRiding
Page 77 of 163
torrad Integral ABS must as-
sume an extremely low coef-
ficient of friction, so that the
wheels will continue to rotate
under all imaginable circum-
stances, because this is the
precondition for ensuring dir-
ectional stability. As soon as
is registers the actual circum-
stances, the system reacts
instantly and adjusts braking
force accordingly to achieve
optimum braking.What feedback does the
rider receive from the
BMW Motorrad Integral
ABS?If the ABS system has to re-
duce braking force on ac-
count of the circumstances
described above, vibration is
perceptible through the hand-
brake lever.
When the handbrake lever is
pulled, brake pressure is alsobuilt up at the rear wheel by
the integral function. If the
brake pedal is depressed
after the handbrake lever is
pulled, the brake pressure
built up beforehand is per-
ceptible as counter-pressure
sooner than is the case when
the brake pedal is depressed
either before or at the same
time as the brake lever is
pulled.
How can stopping
distance be minimised?Each time the brakes are
applied, a load distribution
shift takes place with the
load shifting forward from
the rear to the front wheel.
The sharper the motorcycle
decelerates, the more load
is shifted to the front wheel.
The higher the wheel load, the
more braking force can be
transmitted without the wheel
locking.
To optimise stopping dis-
tance, apply the front brakes
rapidly and keep on increas-
ing the force you apply to the
brake lever. This makes the
best possible use of the dy-
namic increase in load at the
front wheel. Remember to
pull the clutch at the same
time. In the "panic braking
situations" that are trained so
frequently braking force is ap-
plied as rapidly as possible
and with the rider's full force
applied to the brake levers;
under these circumstances
the dynamic shift in load dis-
tribution cannot keep pace
with the increase in decel-
eration and the tyres cannot
transmit the full braking force
to the surface of the road.
ABS has to intervene to keep
the front wheel from locking;
575zRiding
Page 94 of 163
an authorised BMW Motorrad
dealer.Check operation of the
brakesPull the handbrake lever.
The pressure point must be
clearly perceptible.
Press the footbrake lever.
The pressure point must be
clearly perceptible.Brake padsChecking brake-pad
thickness, front brakes
Brake pads worn past
the minimum permissible
thickness can cause a reduc-
tion in braking efficiency and
under certain circumstances
they can cause damage to
the brake system.
In order to ensure the de-
pendability of the brake sys-
tem, do not permit the brake pads to wear past the minim-
um permissible thickness.
Make sure the ground is
level and firm and place the
motorcycle on its stand.
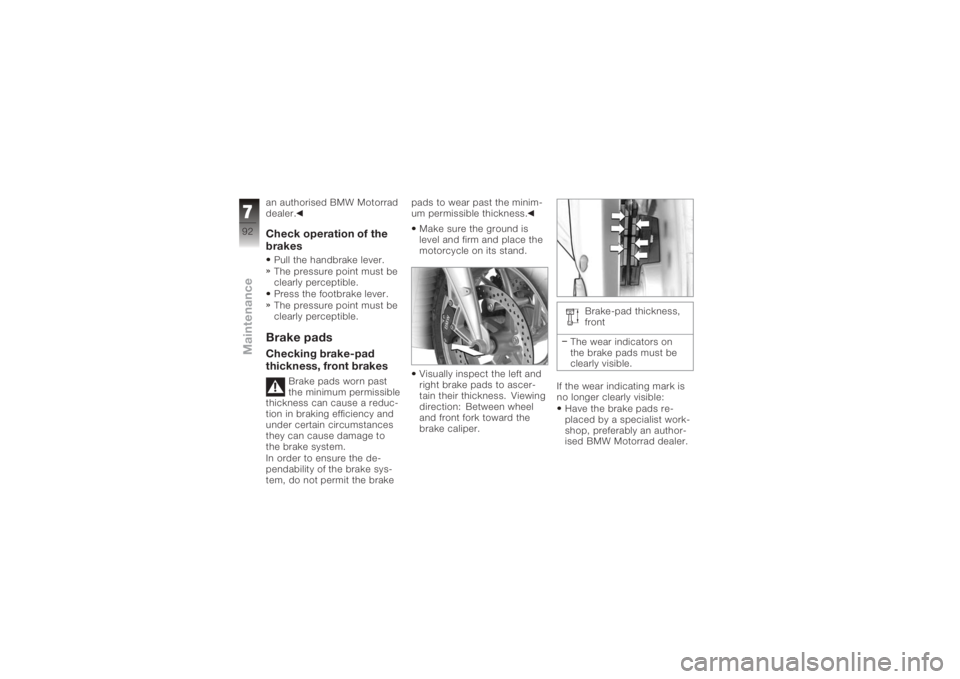
Visually inspect the left and
right brake pads to ascer-
tain their thickness. Viewing
direction: Between wheel
and front fork toward the
brake caliper. Brake-pad thickness,
front
The wear indicators on
the brake pads must be
clearly visible.
If the wear indicating mark is
no longer clearly visible: Have the brake pads re-
placed by a specialist work-
shop, preferably an author-
ised BMW Motorrad dealer.
792zMaintenance
Page 101 of 163
Once the calipers have
been removed, there is
a risk of the brake pads be-
ing pressed together to the
extent that they cannot be
slipped back over the brake
disc on reassembly.
Do not operate the handbrake
lever when the brake calipers
have been removed.
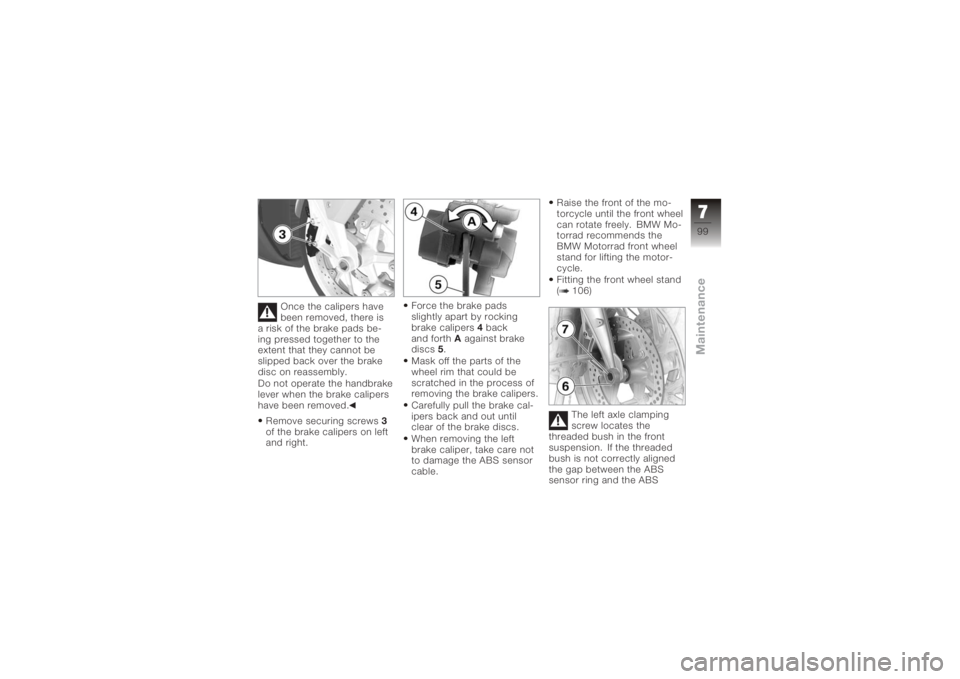
Remove securing screws 3
of the brake calipers on left
and right. Force the brake pads
slightly apart by rocking
brake calipers
4back
and forth Aagainst brake
discs 5.
Mask off the parts of the
wheel rim that could be
scratched in the process of
removing the brake calipers.
Carefully pull the brake cal-
ipers back and out until
clear of the brake discs.
When removing the left
brake caliper, take care not
to damage the ABS sensor
cable. Raise the front of the mo-
torcycle until the front wheel
can rotate freely. BMW Mo-
torrad recommends the
BMW Motorrad front wheel
stand for lifting the motor-
cycle.
Fitting the front wheel stand
( 106)
The left axle clamping
screw locates the
threaded bush in the front
suspension. If the threaded
bush is not correctly aligned
the gap between the ABS
sensor ring and the ABS
799zMaintenance