Page 44 of 163

and cycles through the follow-
ing sequence:Total distance covered
Tripmeter 1 (Trip I)
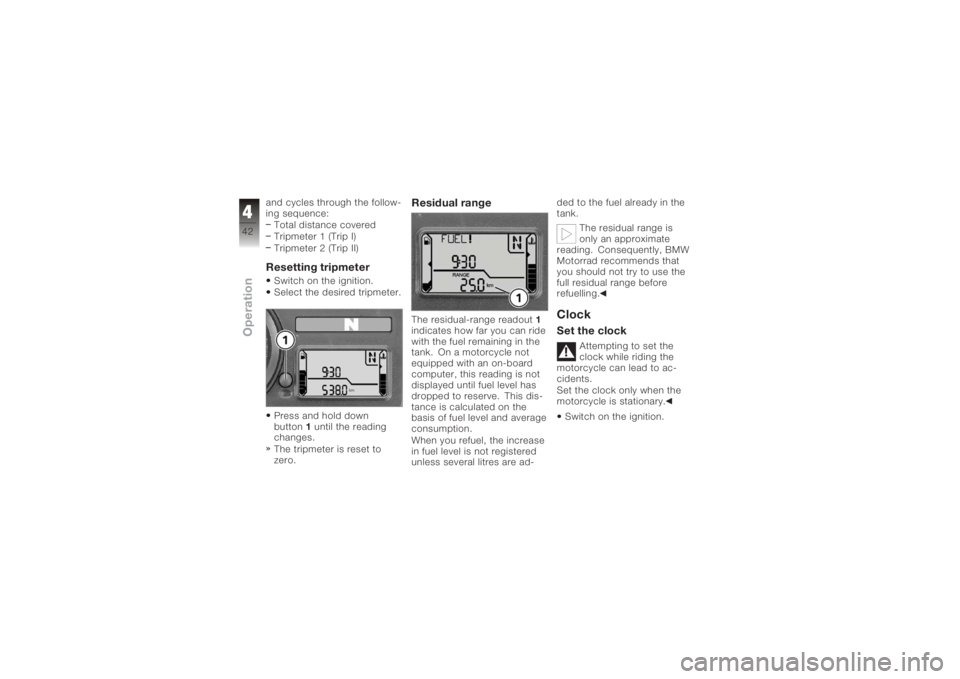
Tripmeter 2 (Trip II)Resetting tripmeterSwitch on the ignition.
Select the desired tripmeter.
Press and hold down
button 1until the reading
changes.
The tripmeter is reset to
zero.
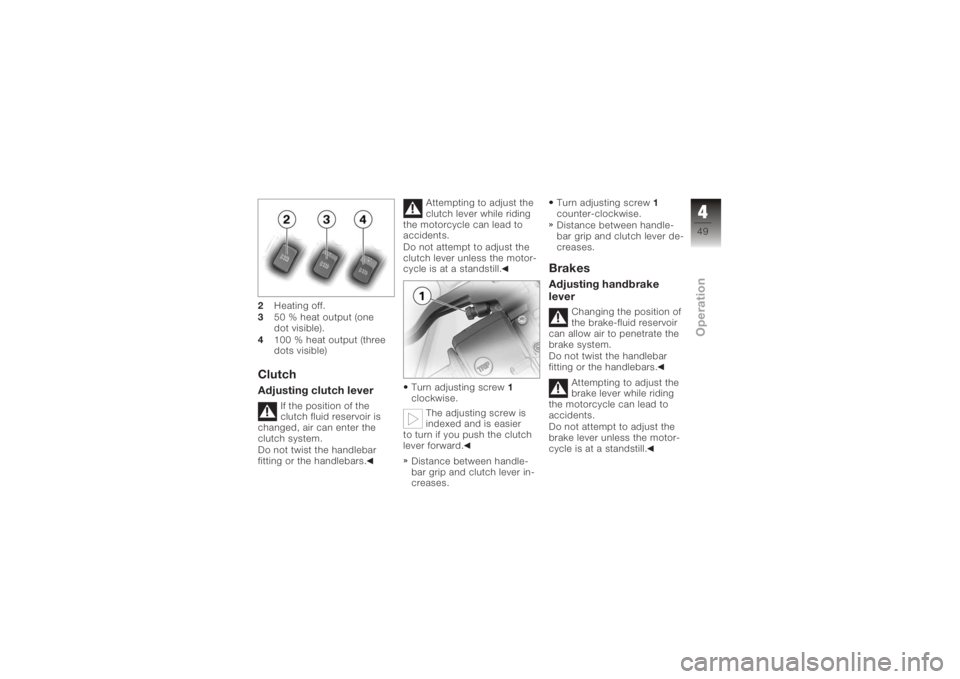
Residual rangeThe residual-range readout 1
indicates how far you can ride
with the fuel remaining in the
tank. On a motorcycle not
equipped with an on-board
computer, this reading is not
displayed until fuel level has
dropped to reserve. This dis-
tance is calculated on the
basis of fuel level and average
consumption.
When you refuel, the increase
in fuel level is not registered
unless several litres are ad- ded to the fuel already in the
tank.
The residual range is
only an approximate
reading. Consequently, BMW
Motorrad recommends that
you should not try to use the
full residual range before
refuelling.
ClockSet the clock
Attempting to set the
clock while riding the
motorcycle can lead to ac-
cidents.
Set the clock only when the
motorcycle is stationary.
Switch on the ignition.
442zOperation
Page 45 of 163
Repeatedly press INFO but-
ton1until the total distance
covered reading appears on
the display. with OE On-board computer:
Repeatedly press INFO but-
ton 1until the clock appears
on the display. Press and hold down the
INFO button until the read-
ing changes.
Hours reading
2starts to
flash.
Press the INFO button.
The hour increments by one
each time you press the
button.
Press and hold down the
INFO button until the read-
ing changes.
Minutes reading 3starts to
flash.
Press the INFO button.
443zOperation
Page 46 of 163
The minute increments by
one each time you press the
button.
Press and hold down the
INFO button until the read-
ing changes.
The reading stops flashing.
The time is now set.Tyre pressure control
RDC
OE
Viewing tyre-pressure
readingsSwitch on the ignition.Repeatedly press INFO but-
ton
1until the tyre pres-
sures appear in the display.
The tyre-pressure readings
alternate with the clock. The
front tyre pressure is on the
left; the reading on the right is the rear tyre pressure. If your
motorcycle is fitted with an
on-board computer, the tyre
pressures are displayed as an
additional set of readings by
the on-board computer.
On-board computer
OE
Selecting readingsSwitch on the ignition.
Press INFO button
1once
at each step.
444zOperation
Page 50 of 163
authorised BMW Motorrad
dealer.Emergency off switch
(kill switch)1Emergency off switch (kill
switch).
Operating the kill switch
when riding can cause
the rear wheel to lock and
thus cause a fall.
Do not operate the kill switch
when riding. The emergency off switch is a
kill switch for switching off the
engine quickly and easily.
A
Normal operating posi-
tion (run)
B Engine switched off.
You cannot start the
engine unless the kill
switch is in the run position.
Grip heating
OE
1 Grip heating switch
The handlebar grips have
two-stage heating. Grip
heating can be activated only
when the engine is running. The increase in power
consumption caused by
the grip heating can drain the
battery if you are riding at low
engine speeds. If the charge
level is low, grip heating is
switched off to ensure the
battery's starting capability.
448zOperation
Page 51 of 163

2Heating off.
3 50 % heat output (one
dot visible).
4 100 % heat output (three
dots visible)ClutchAdjusting clutch lever
If the position of the
clutch fluid reservoir is
changed, air can enter the
clutch system.
Do not twist the handlebar
fitting or the handlebars. Attempting to adjust the
clutch lever while riding
the motorcycle can lead to
accidents.
Do not attempt to adjust the
clutch lever unless the motor-
cycle is at a standstill.
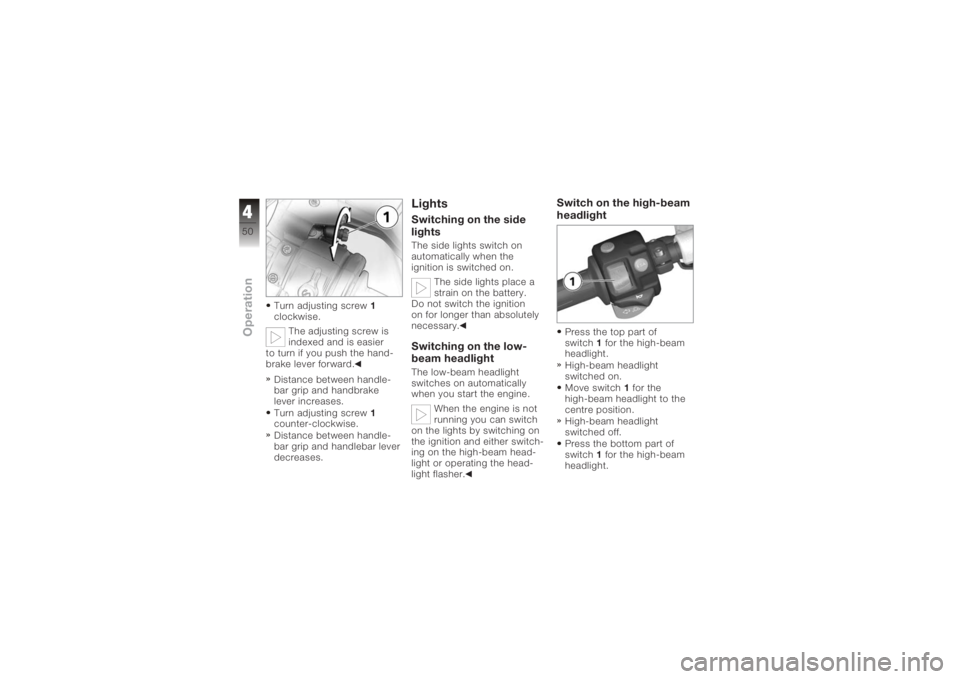
Turn adjusting screw 1
clockwise.
The adjusting screw is
indexed and is easier
to turn if you push the clutch
lever forward.
Distance between handle-
bar grip and clutch lever in-
creases. Turn adjusting screw
1
counter-clockwise.
Distance between handle-
bar grip and clutch lever de-
creases.
BrakesAdjusting handbrake
lever
Changing the position of
the brake-fluid reservoir
can allow air to penetrate the
brake system.
Do not twist the handlebar
fitting or the handlebars.
Attempting to adjust the
brake lever while riding
the motorcycle can lead to
accidents.
Do not attempt to adjust the
brake lever unless the motor-
cycle is at a standstill.
449zOperation
Page 52 of 163

Turn adjusting screw1
clockwise.
The adjusting screw is
indexed and is easier
to turn if you push the hand-
brake lever forward.
Distance between handle-
bar grip and handbrake
lever increases.
Turn adjusting screw 1
counter-clockwise.
Distance between handle-
bar grip and handlebar lever
decreases.
LightsSwitching on the side
lightsThe side lights switch on
automatically when the
ignition is switched on.
The side lights place a
strain on the battery.
Do not switch the ignition
on for longer than absolutely
necessary.Switching on the low-
beam headlightThe low-beam headlight
switches on automatically
when you start the engine.
When the engine is not
running you can switch
on the lights by switching on
the ignition and either switch-
ing on the high-beam head-
light or operating the head-
light flasher.
Switch on the high-beam
headlightPress the top part of
switch 1for the high-beam
headlight.
High-beam headlight
switched on.
Move switch 1for the
high-beam headlight to the
centre position.
High-beam headlight
switched off.
Press the bottom part of
switch 1for the high-beam
headlight.
450zOperation
Page 55 of 163
Press right-hand turn indic-
ator button2.
The turn indicators are
cancelled automatically
after you have ridden for ap-
proximately 10 seconds, or
covered a distance of about
200 m.
Right-hand turn indicators
switched on.
Telltale light for right-hand
turn indicator flashes.
Cancel the turn
indicatorsPress cancel button 3.
Flashing turn indicators
switched off.
Turn indicator telltale light is
off.SeatRemoving the seatMake sure the ground is
level and firm and place the
motorcycle on its stand. Turn the key counter-
clockwise in the seat
lock.
At the same time, press
down on the seat.
453zOperation
Page 57 of 163
Helmet holderHelmet holder
underneath seatHelmet holders1and 2are
located under the seat.
A motorcycle helmet with chin
strap can be attached to hel-
met holders 1. If cases are
fitted or if the chin strap is
too short, a steel cable can
be used to secure the motor-
cycle helmet to helmet hold-
er 2.
Using helmet holderMake sure the ground is
level and firm and place the
motorcycle on its stand.
Removing the seat ( 53)
The helmet catch can
scratch the panelling.
Make sure the lock is out of
the way when you hook the
helmet into position.
Use the wire rope available
as an optional extra to se-
cure the helmet to helmet
holder 2. On the right-hand side
of the motorcycle, the
helmet could be damaged by
heat from the end silencer.
Attach the helmet on the left-
hand side of the motorcycle
only.
Pull the steel cable through
the helmet and hook it into
bracket 2.
You can obtain a suit-
able steel cable from
your authorised BMW Motor-
rad dealer.
455zOperation