670S9±01
I351923Clamps 67±12
± AUDIO & VISUAL SYSTEMFRONT NO.2 SPEAKER ASSY
AVENSIS REPAIR MANUAL (RM1018E)
FRONT NO.2 SPEAKER ASSY
REPLACEMENT
1. REMOVE FRONT NO.2 SPEAKER ASSY
(a) Remove the front door lower frame bracket garnish.
(b) Disconnect the connector.
(c) Disengage the 3 claws and remove the front No.2 speak-
er assy.
750MX±01
B66969: Clip
B66970
: Clip
: Claw
B67801
Claw
75±8
±
ENGINE HOOD/DOOR FRONT DOOR
AVENSIS REPAIR MANUAL (RM1018E)
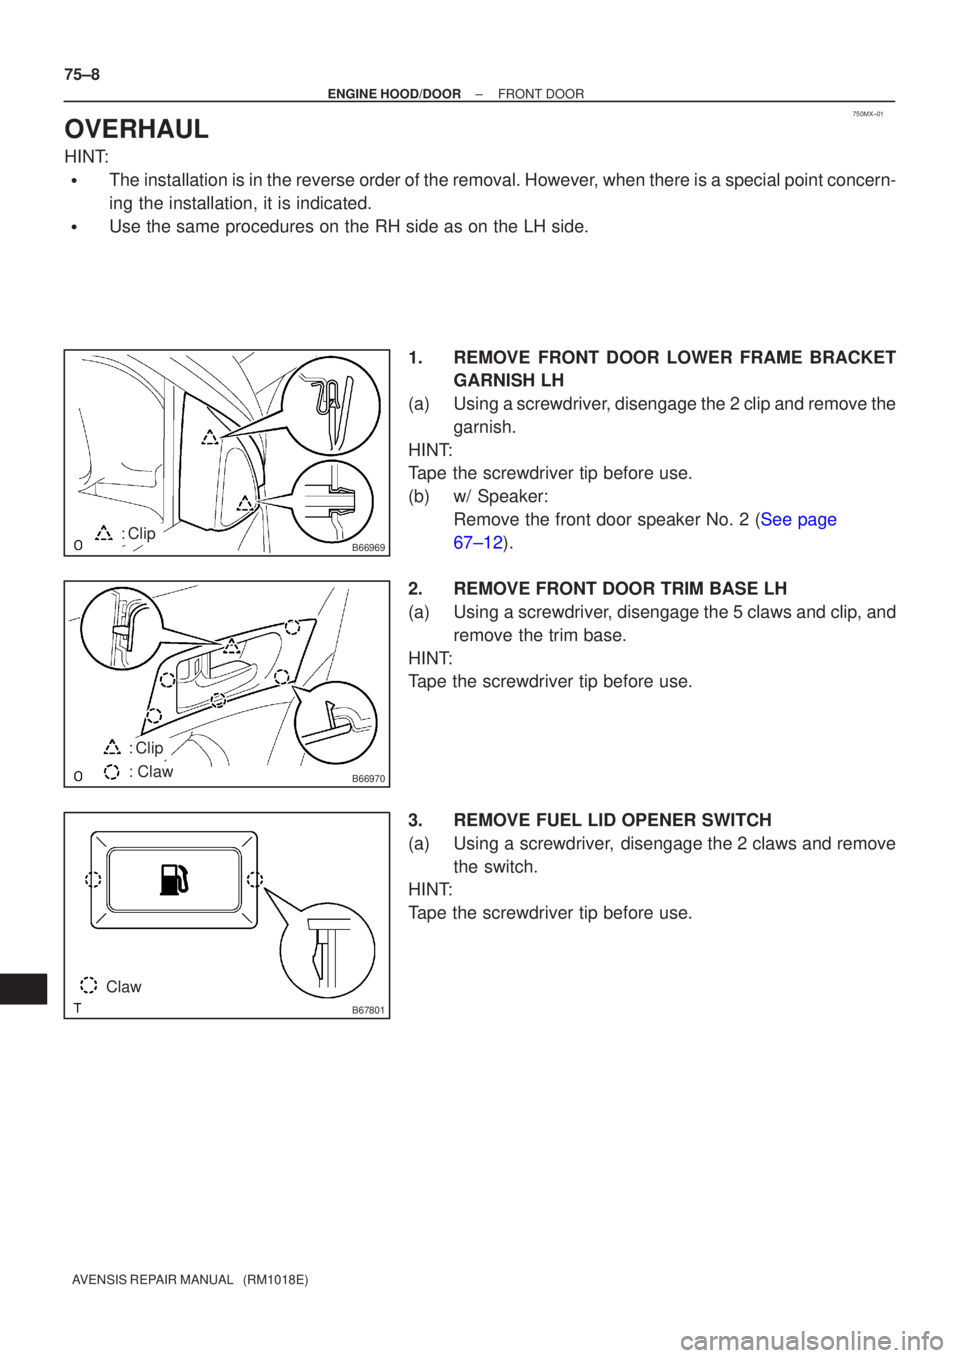
OVERHAUL
HINT:
�The installation is in the reverse order of the removal. However, when there is a special point concern-
ing the installation, it is indicated.
�Use the same procedures on the RH side as on the LH side. 1.REMOVE FRONT DOOR LOWER FRAME BRACKETGARNISH LH
(a)Using a screwdriver, disengage the 2 clip and remove the garnish.
HINT:
Tape the screwdriver tip before use.
(b)w/ Speaker: Remove the front door speaker No. 2 (See page
67±12).
2. REMOVE FRONT DOOR TRIM BASE LH
(a) Using a screwdriver, disengage the 5 claws and clip, and remove the trim base.
HINT:
Tape the screwdriver tip before use.
3. REMOVE FUEL LID OPENER SWITCH
(a) Using a screwdriver, disengage the 2 claws and remove the switch.
HINT:
Tape the screwdriver tip before use.

FRONT NO.2 SPEAKER ASSY
REPLACEMENT
1. REMOVE FRONT NO.2 SPEAKER ASSY
(a) Remove the fr")