Page 3863 of 5135
A56050
New Gasket
Union Bolt
Hollow
Screw
SST
No. 2 Nozzle
Leakage Pipe
Check
Valve
New Gasket
B08328
Check
ValveNo. 2 Nozzle
Leakage Pipe
New Gasket
A09663
: Seal Packing
± ENGINE MECHANICALPARTIAL ENGINE ASSY (1CD±FTV)
14±21
1CD±FTV ENGINE REPAIR MANUAL (RM927E)
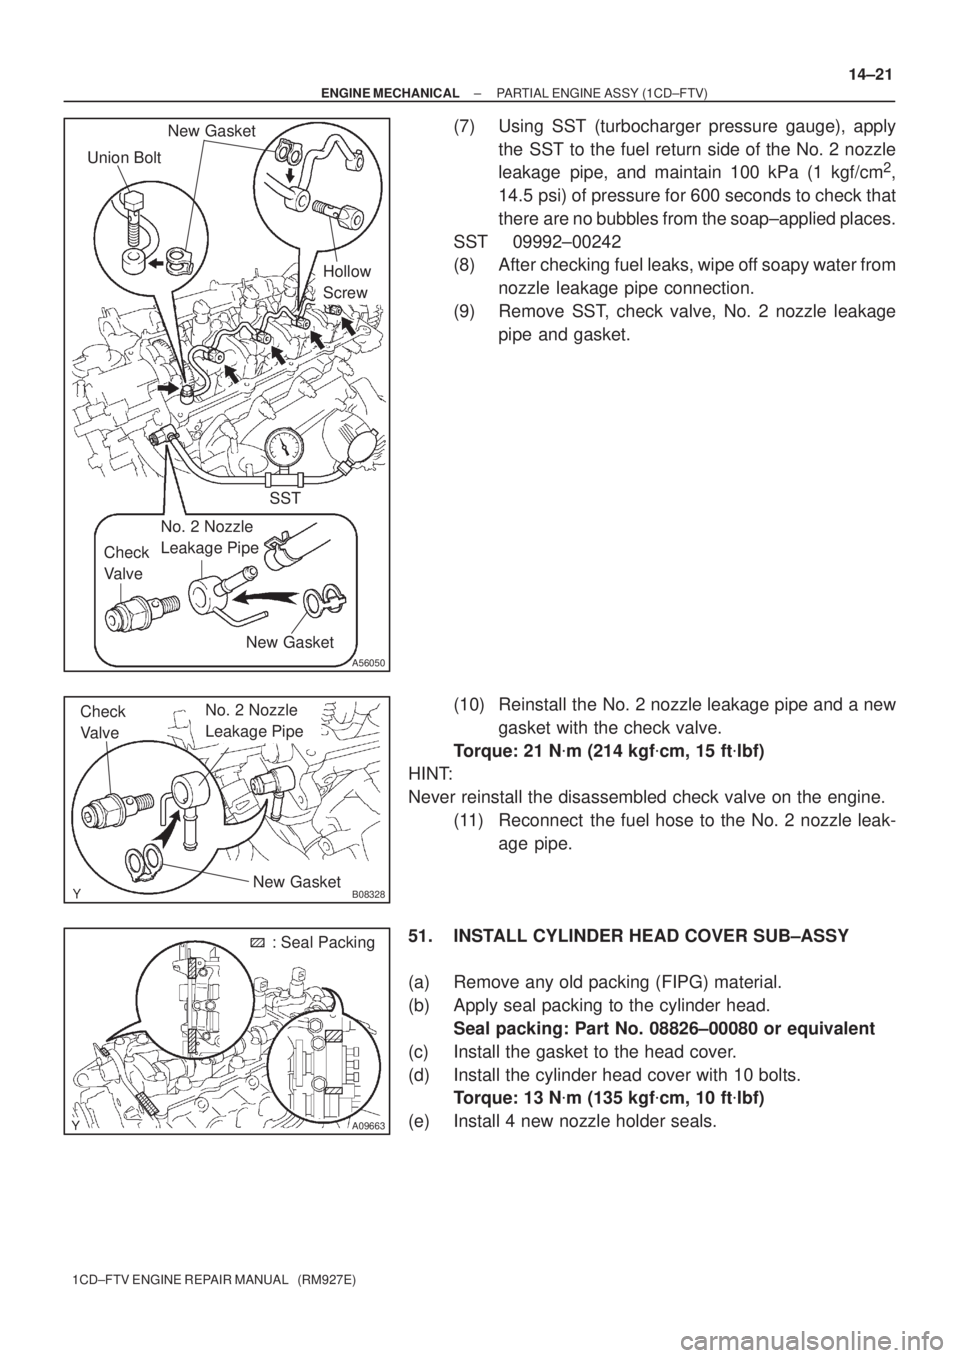
(7) Using SST (turbocharger pressure gauge), apply
the SST to the fuel return side of the No. 2 nozzle
leakage pipe, and maintain 100 kPa (1 kgf/cm
2,
14.5 psi) of pressure for 600 seconds to check that
there are no bubbles from the soap±applied places.
SST 09992±00242
(8) After checking fuel leaks, wipe off soapy water from
nozzle leakage pipe connection.
(9) Remove SST, check valve, No. 2 nozzle leakage
pipe and gasket.
(10) Reinstall the No. 2 nozzle leakage pipe and a new
gasket with the check valve.
Torque: 21 N�m (214 kgf�cm, 15 ft�lbf)
HINT:
Never reinstall the disassembled check valve on the engine.
(11) Reconnect the fuel hose to the No. 2 nozzle leak-
age pipe.
51. INSTALL CYLINDER HEAD COVER SUB±ASSY
(a) Remove any old packing (FIPG) material.
(b) Apply seal packing to the cylinder head.
Seal packing: Part No. 08826±00080 or equivalent
(c) Install the gasket to the head cover.
(d) Install the cylinder head cover with 10 bolts.
Torque: 13 N�m (135 kgf�cm, 10 ft�lbf)
(e) Install 4 new nozzle holder seals.
Page 3875 of 5135
±
DIAGNOSTICS SFI SYSTEM (1ZZ±FE/3ZZ±FE)
05±15
AVENSIS REPAIR MANUAL (RM1018E)
6CHECK FUEL PRESSURE (See page 11±5)
NGPROCEED TO PAGE 11±1 AND CONTINUE TO
TROUBLESHOOT
OK
7CHECK FOR SPARK (See page 18±1)
NGPROCEED TO PAGE 18±1 AND CONTINUE TO TROUBLESHOOT
OK
PROCEED TO PROBLEM SYMPTOMS TABLE ON PAGE 05±22
Page 3895 of 5135
05±160
±
DIAGNOSTICS SFI SYSTEM(1AZ±FE)
AVENSIS REPAIR MANUAL (RM1018E)
6CHECK FUEL PRESSURE (See page 11±19)
NGPROCEED TO PAGE 11±15 AND CONTINUE TO TROUBLESHOOT
OK
7CHECK FOR SPARK (See page 18±7)
NGPROCEED TO PAGE 18±7 AND CONTINUE TO TROUBLESHOOT
OK
PROCEED TO PROBLEM SYMPTOMS TABLE ON PAGE
Page 3902 of 5135
±
DIAGNOSTICS SFI SYSTEM(1AZ±FSE)
05±381
AVENSIS REPAIR MANUAL (RM1018E)
DTCP0134OXYGEN SENSOR CIRCUIT NO ACTIVITY
DETECTED (BANK 1 SENSOR 1)
DTCP0154OXYGEN SENSOR CIRCUIT NO ACTIVITY DETECTED (BANK 2 SENSOR 1)
CIRCUIT DESCRIPTION
Refer to DTC P0130 on page 05±363.
DTC No.DTC Detection ConditionTrouble Area
P0134
P0154
After engine is warmed up, heated oxygen sensor (sensor 1)
output does not indicate RICH ( � 0.45 V) even once when
conditions (a), (b), (c) and (d) continue for at least 65 sec.:
(a)Engine speed: 1,400 rpm or more
(b)Vehicle speed: 130 km/h (81 mph)
(c)Throttle valve is not fully closed
(d)180 sec. or more after starting engine
� Open or short in heated oxygen sensor (bank 1, 2 sensor 1)
circuit
� Heated oxygen sensor (bank 1, 2 sensor 1)
� Heated oxygen sensor heater (bank 1, 2 sensor 1)
� EFI relay
� Air induction system
� Fuel pressure
� PCV hose connection
� PCV valve and hose
� Injector
� Gas leakage in exhaust system
� ECM
HINT:
���&�$�"!��$ �!����%��\b �\f�!��\b
\f��'%�&����!������&�%&�$&"�"!��$ &��"'&#'&("�&���"�
&�����&��")*��!%�!%"$���!� �
%�!%"$ ��$" &�� ºDIAGNOSIS / OBD/MOBD / DATA LIST / ALLº�
��&��"'&#'&("�&���"�&�����&��")*��!%�!%"$�%��%%&��!\b� ��&�����&��")*��!%�!%"$��$�'�&
�*��"#�!"$%�"$&�
�Bank 1 refers to the No. 1 and No. 4 cylinders.
�Bank 2 refers to the No. 2 and No. 3 cylinders.
�Sensor 1 refers to the sensor closest to the engine assembly.
WIRING DIAGRAM
Refer to DTC P0130 on page 05±363.
INSPECTION PROCEDURE
HINT:
Hand±held tester only:
Narrowing down the trouble area is possible by performing the ºA/F CONTROLº ACTIVE TEST (heated oxy-
gen sensor or other trouble areas can be distinguished).
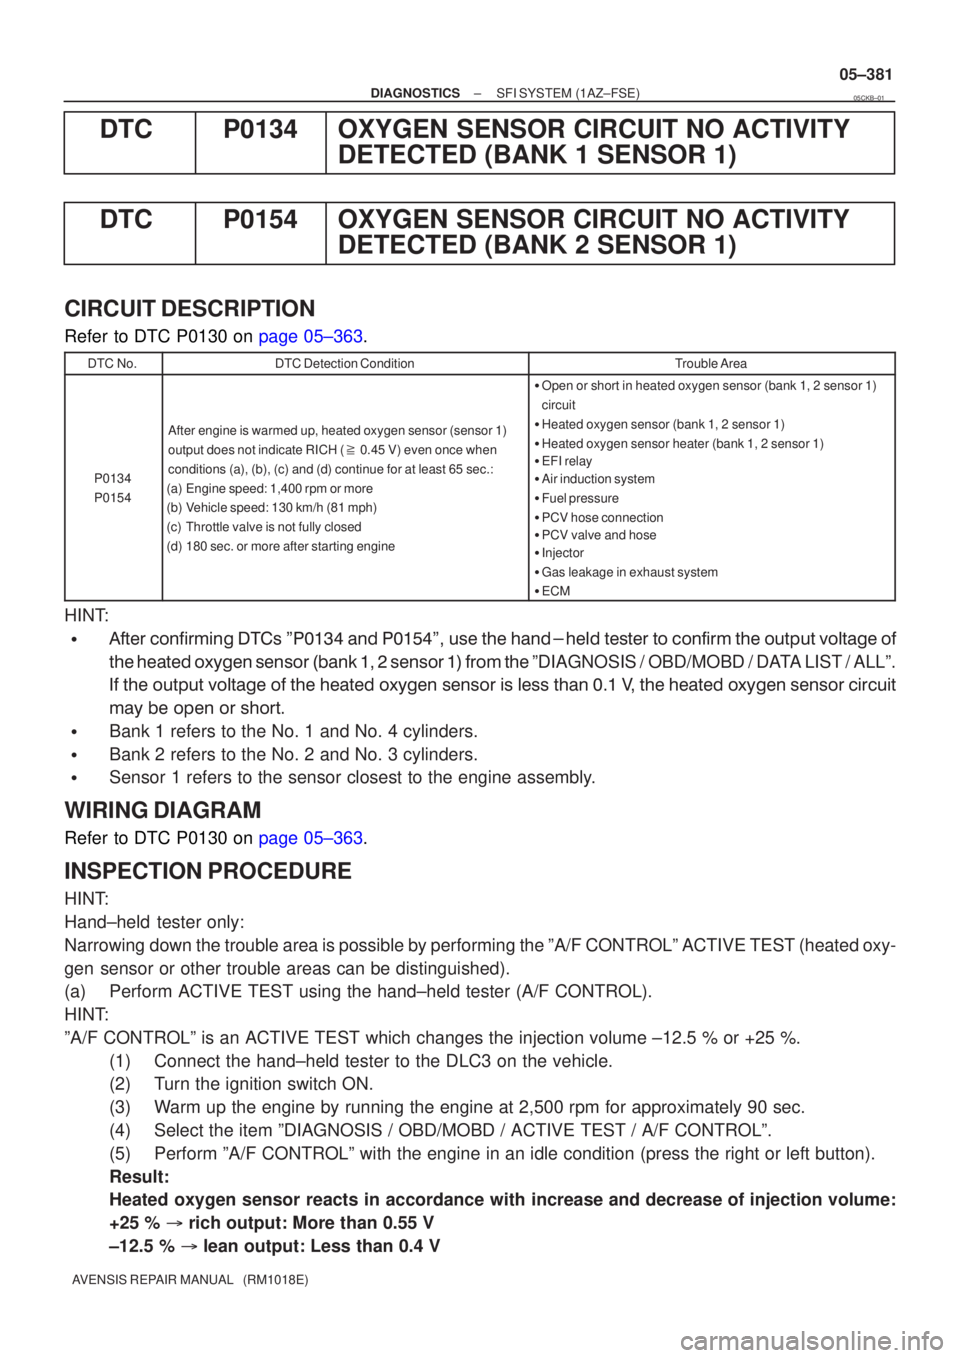
(a) Perform ACTIVE TEST using the hand±held tester (A/F CONTROL).
HINT:
ºA/F CONTROLº is an ACTIVE TEST which changes the injection volume\
±12.5 % or +25 %.
(1) Connect the hand±held tester to the DLC3 on the vehicle.
(2) Turn the ignition switch ON.
(3) Warm up the engine by running the engine at 2,500 rpm for approximately 9\
0 sec.
(4) Select the item ºDIAGNOSIS / OBD/MOBD / ACTIVE TEST / A/F CONTROLº\
.
(5) Perform ºA/F CONTROLº with the engine in an idle condition (press\
the right or left button).
Result:
Heated oxygen sensor reacts in accordance with increase and decrease of injection volume:
+25 % � rich output: More than 0.55 V
±12.5 % � lean output: Less than 0.4 V
05CKB±01
Page 3903 of 5135
+25 %
±12.5 %
More than 0.55 V
Less than 0.4V
Case 1
Case 2
Case 3
Case 4
Output voltage of heated oxygen
sensor (sensor 1: front sensor)
Injection volume
Output voltage
Output voltage of heated oxygen
sensor (sensor 2: rear sensor)Mainly suspect
trouble area
OK
+25 %
±12.5 %
More than 0.55 V
Less than 0.4V
Injection volume
Output voltage
+25 %
±12.5 %
More than 0.55 V
Less than 0.4V
Injection volume
Output voltage
Sensor 1: front sensor
(sensor 1, heater, sensor 1
circuit)
+25 %
±12.5 %
More than 0.55 V
Less than 0.4V
Injection volume
Output voltage
+25 %
±12.5 %
Injection volume
Output voltage
NG
+25 %
±12.5 %
Injection volume
Output voltage
NG
+25 %
±12.5 %
Injection volume
Output voltage
NG
+25 %
±12.5 %
Injection volume
Output voltage
NGExtremely rich or lean actual
air±fuel ratio
(Injector, fuel pressure, gas
leakage in exhaust system,
etc.) OK
OK
OK
No reaction
No reaction
No reaction No reaction
�
Sensor 2: rear sensor
(sensor 2, heater, sensor 2
circuit) 05±382
± DIAGNOSTICSSFI SYSTEM (1AZ±FSE)
AVENSIS REPAIR MANUAL (RM1018E)
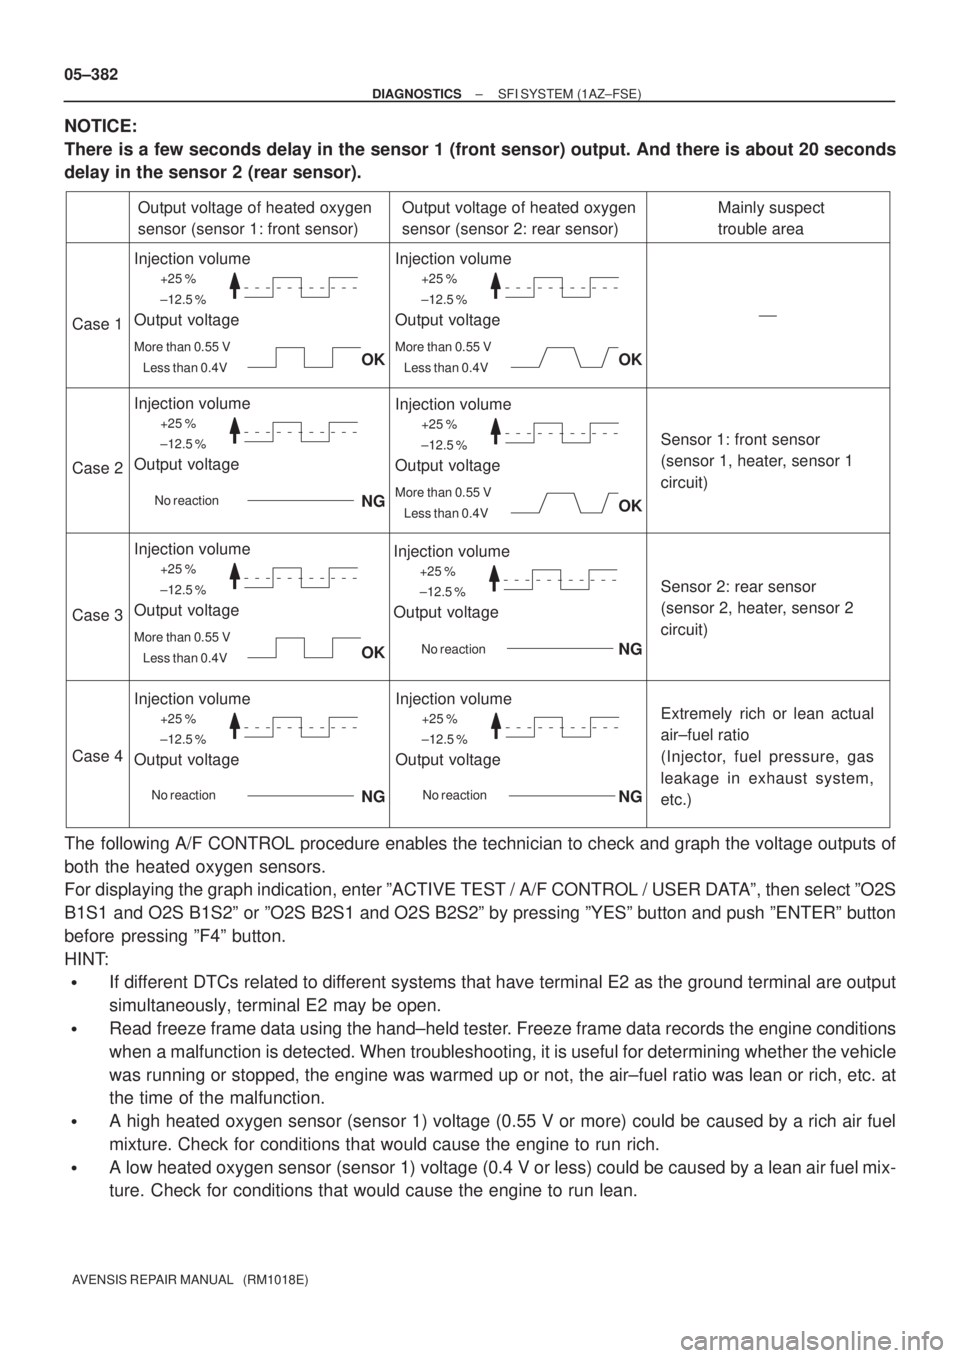
NOTICE:
There is a few seconds delay in the sensor 1 (front sensor) output. And there is about 20 seconds
delay in the sensor 2 (rear sensor).
The following A/F CONTROL procedure enables the technician to check and graph the voltage outputs of
both the heated oxygen sensors.
For displaying the graph indication, enter ºACTIVE TEST / A/F CONTROL / USER DATAº, then select ºO2S
B1S1 and O2S B1S2º or ºO2S B2S1 and O2S B2S2º by pressing ºYESº button and push ºENTERº button
before pressing ºF4º button.
HINT:
�If different DTCs related to different systems that have terminal E2 as the ground terminal are output
simultaneously, terminal E2 may be open.
�Read freeze frame data using the hand±held tester. Freeze frame data records the engine conditions
when a malfunction is detected. When troubleshooting, it is useful for determining whether the vehicle
was running or stopped, the engine was warmed up or not, the air±fuel ratio was lean or rich, etc. at
the time of the malfunction.
�A high heated oxygen sensor (sensor 1) voltage (0.55 V or more) could be caused by a rich air fuel
mixture. Check for conditions that would cause the engine to run rich.
�A low heated oxygen sensor (sensor 1) voltage (0.4 V or less) could be caused by a lean air fuel mix-
ture. Check for conditions that would cause the engine to run lean.
Page 3907 of 5135
05±386
±
DIAGNOSTICS SFI SYSTEM(1AZ±FSE)
AVENSIS REPAIR MANUAL (RM1018E)
10CHECK WHETHER MISFIRE IS OCCURRED OR NOT BY MONITORING DTC AND DATA LIST
NGPERFORM TROUBLESHOOTING FOR MISFIRE
(See page 05±294)
OK
11CHECK AIR INDUCTION SYSTEM
(a)Check for vacuum leaks in the air induction system. NGREPAIR OR REPLACE AIR INDUCTION SYSTEM
OK
12CHECK FUEL PRESSURE(LOW PRESSURE) (See page 11±33)
NG CHECK AND REPLACE FUEL PUMP, PRESSURE REGULATOR, FUEL PIPE LINE AND
FILTER
OK
13CHECK FUEL PRESSURE(HIGH PRESSURE) (See page 11±33)
NG CHECK AND REPLACE FUEL PUMP, FUEL PRESSURE SENSOR, WIRING AND FUEL
LEAKAGE
OK
14 CHECK FOR EXHAUST GAS LEAK
NG REPAIR OR REPLACE EXHAUST GAS LEAKAGE POINT
OK
Page 3911 of 5135
+25 %
±12.5 %
More than 0.55 V
Less than 0.4V
Case 1
Case 2
Case 3
Case 4
Output voltage of heated oxygen
sensor (sensor 1: front sensor)
Injection volume
Output voltage
Output voltage of heated oxygen
sensor (sensor 2: rear sensor)Mainly suspect
trouble area
OK
+25 %
±12.5 %
More than 0.55 V
Less than 0.4V
Injection volume
Output voltage
+25 %
±12.5 %
More than 0.55 V
Less than 0.4V
Injection volume
Output voltage
Sensor 1: front sensor
(sensor 1, heater, sensor 1
circuit)
+25 %
±12.5 %
More than 0.55 V
Less than 0.4V
Injection volume
Output voltage
+25 %
±12.5 %
Injection volume
Output voltage
NG
+25 %
±12.5 %
Injection volume
Output voltage
NG
+25 %
±12.5 %
Injection volume
Output voltage
NG
+25 %
±12.5 %
Injection volume
Output voltage
NGExtremely rich or lean actual
air±fuel ratio
(Injector, fuel pressure, gas
leakage in exhaust system,
etc.) OK
OK
OK
No reaction
No reaction
No reaction No reaction
�
Sensor 2: rear sensor
(sensor 2, heater, sensor 2
circuit) 05±390
± DIAGNOSTICSSFI SYSTEM (1AZ±FSE)
AVENSIS REPAIR MANUAL (RM1018E)
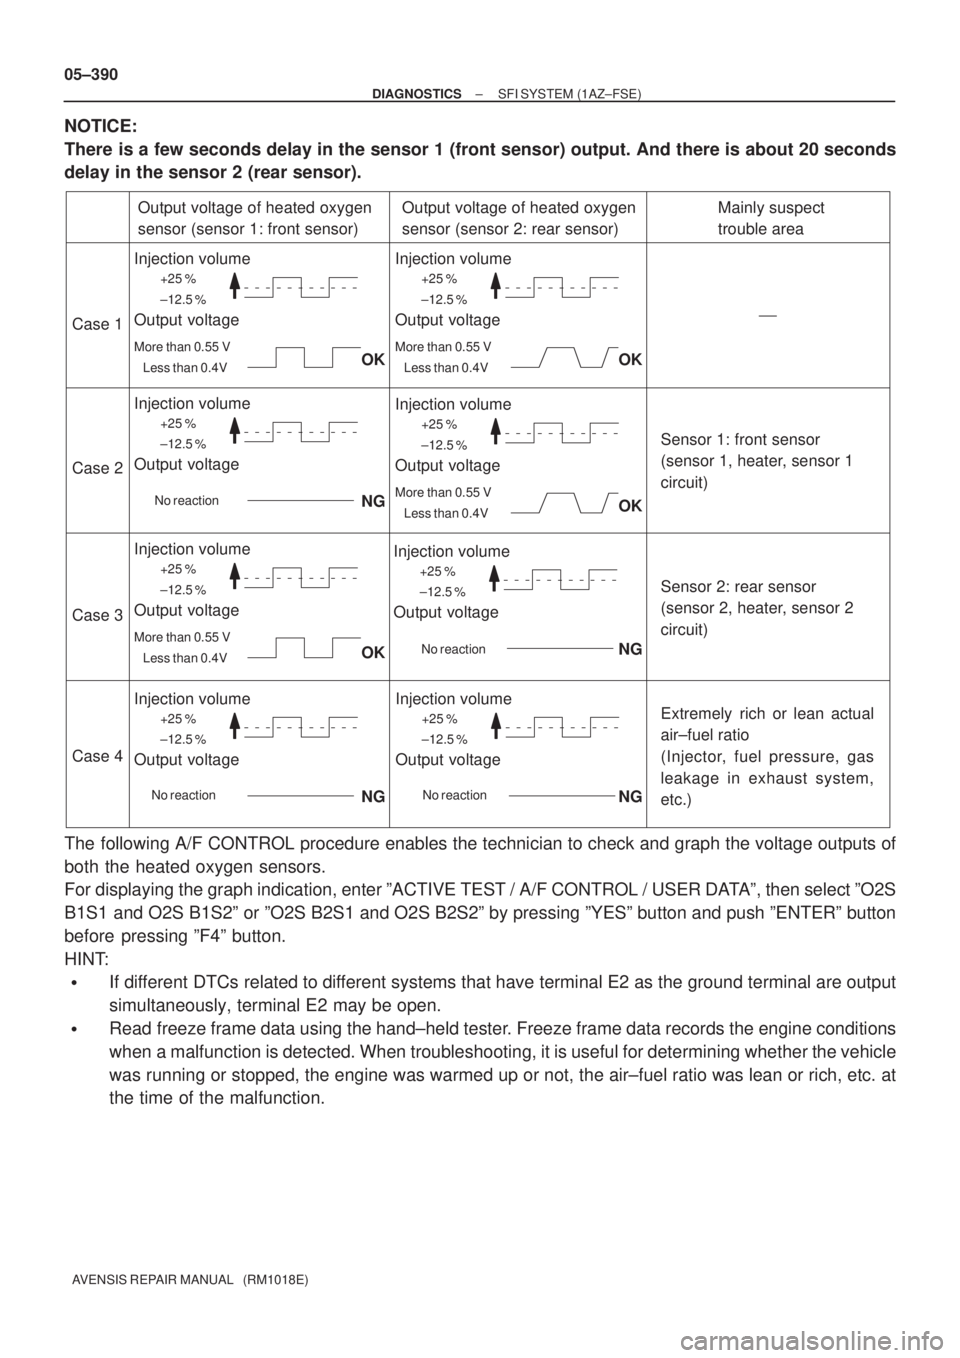
NOTICE:
There is a few seconds delay in the sensor 1 (front sensor) output. And there is about 20 seconds
delay in the sensor 2 (rear sensor).
The following A/F CONTROL procedure enables the technician to check and graph the voltage outputs of
both the heated oxygen sensors.
For displaying the graph indication, enter ºACTIVE TEST / A/F CONTROL / USER DATAº, then select ºO2S
B1S1 and O2S B1S2º or ºO2S B2S1 and O2S B2S2º by pressing ºYESº button and push ºENTERº button
before pressing ºF4º button.
HINT:
�If different DTCs related to different systems that have terminal E2 as the ground terminal are output
simultaneously, terminal E2 may be open.
�Read freeze frame data using the hand±held tester. Freeze frame data records the engine conditions
when a malfunction is detected. When troubleshooting, it is useful for determining whether the vehicle
was running or stopped, the engine was warmed up or not, the air±fuel ratio was lean or rich, etc. at
the time of the malfunction.
Page 3915 of 5135
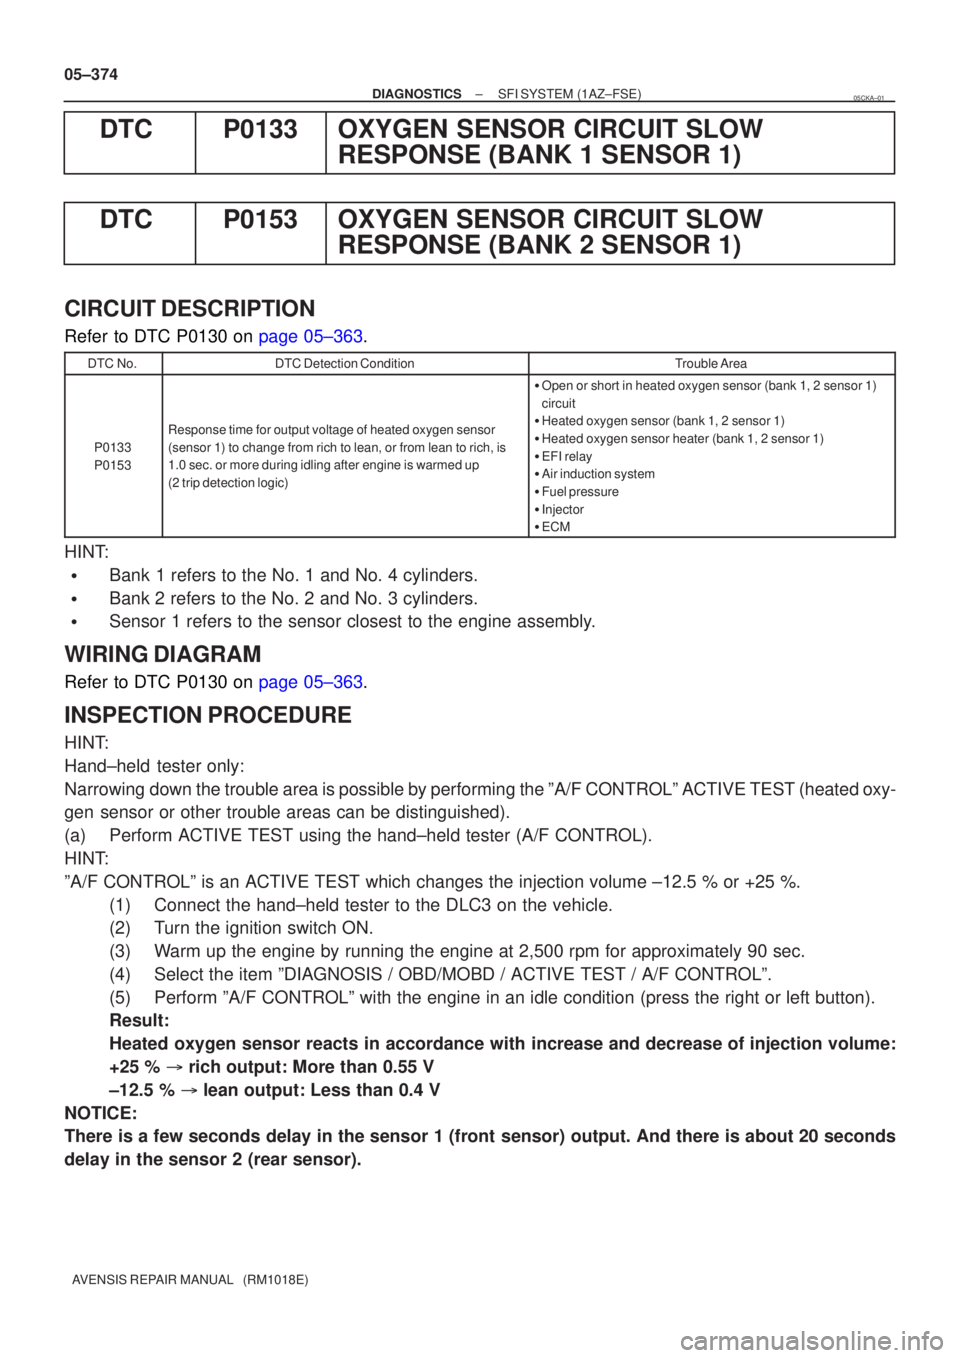
05±374
±
DIAGNOSTICS SFI SYSTEM(1AZ±FSE)
AVENSIS REPAIR MANUAL (RM1018E)
DTCP0133OXYGEN SENSOR CIRCUIT SLOW RESPONSE (BANK 1 SENSOR 1)
DTCP0153OXYGEN SENSOR CIRCUIT SLOW RESPONSE (BANK 2 SENSOR 1)
CIRCUIT DESCRIPTION
Refer to DTC P0130 on page 05±363.
DTC No.DTC Detection ConditionTrouble Area
P0133
P0153
Response time for output voltage of heated oxygen sensor
(sensor 1) to change from rich to lean, or from lean to rich, is
1.0 sec. or more during idling after engine is warmed up
(2 trip detection logic)
�Open or short in heated oxygen sensor (bank 1, 2 sensor 1)
circuit
� Heated oxygen sensor (bank 1, 2 sensor 1)
� Heated oxygen sensor heater (bank 1, 2 sensor 1)
� EFI relay
� Air induction system
� Fuel pressure
� Injector
� ECM
HINT:
�Bank 1 refers to the No. 1 and No. 4 cylinders.
�Bank 2 refers to the No. 2 and No. 3 cylinders.
�Sensor 1 refers to the sensor closest to the engine assembly.
WIRING DIAGRAM
Refer to DTC P0130 on page 05±363.
INSPECTION PROCEDURE
HINT:
Hand±held tester only:
Narrowing down the trouble area is possible by performing the ºA/F CONTROLº ACTIVE TEST (heated oxy-
gen sensor or other trouble areas can be distinguished).
(a) Perform ACTIVE TEST using the hand±held tester (A/F CONTROL).
HINT:
ºA/F CONTROLº is an ACTIVE TEST which changes the injection volume\
±12.5 % or +25 %.
(1) Connect the hand±held tester to the DLC3 on the vehicle.
(2) Turn the ignition switch ON.
(3) Warm up the engine by running the engine at 2,500 rpm for approximately 9\
0 sec.
(4) Select the item ºDIAGNOSIS / OBD/MOBD / ACTIVE TEST / A/F CONTROLº\
.
(5) Perform ºA/F CONTROLº with the engine in an idle condition (press\
the right or left button).
Result:
Heated oxygen sensor reacts in accordance with increase and decrease of injection volume:
+25 % � rich output: More than 0.55 V
±12.5 % � lean output: Less than 0.4 V
NOTICE:
There is a few seconds delay in the sensor 1 (front sensor) output. And there is about 20 seconds
delay in the sensor 2 (rear sensor).
05CKA±01