2005 NISSAN NAVARA check oil
[x] Cancel search: check oilPage 2810 of 3171
REAR SUSPENSION ASSEMBLY
RSU-5
C
D
F
G
H
I
J
K
L
MA
B
RSU
CAUTION:
When installing the components with rubber bushings, the final tightening of the nuts and bolts must
be done with the vehicle in an unladen condition (the fuel, engine coolant, and engine oil full; the
spare tire, jack, hand tools and mats in their designated positions) with the tires on the ground.
On-Vehicle Inspection and ServiceEES002JH
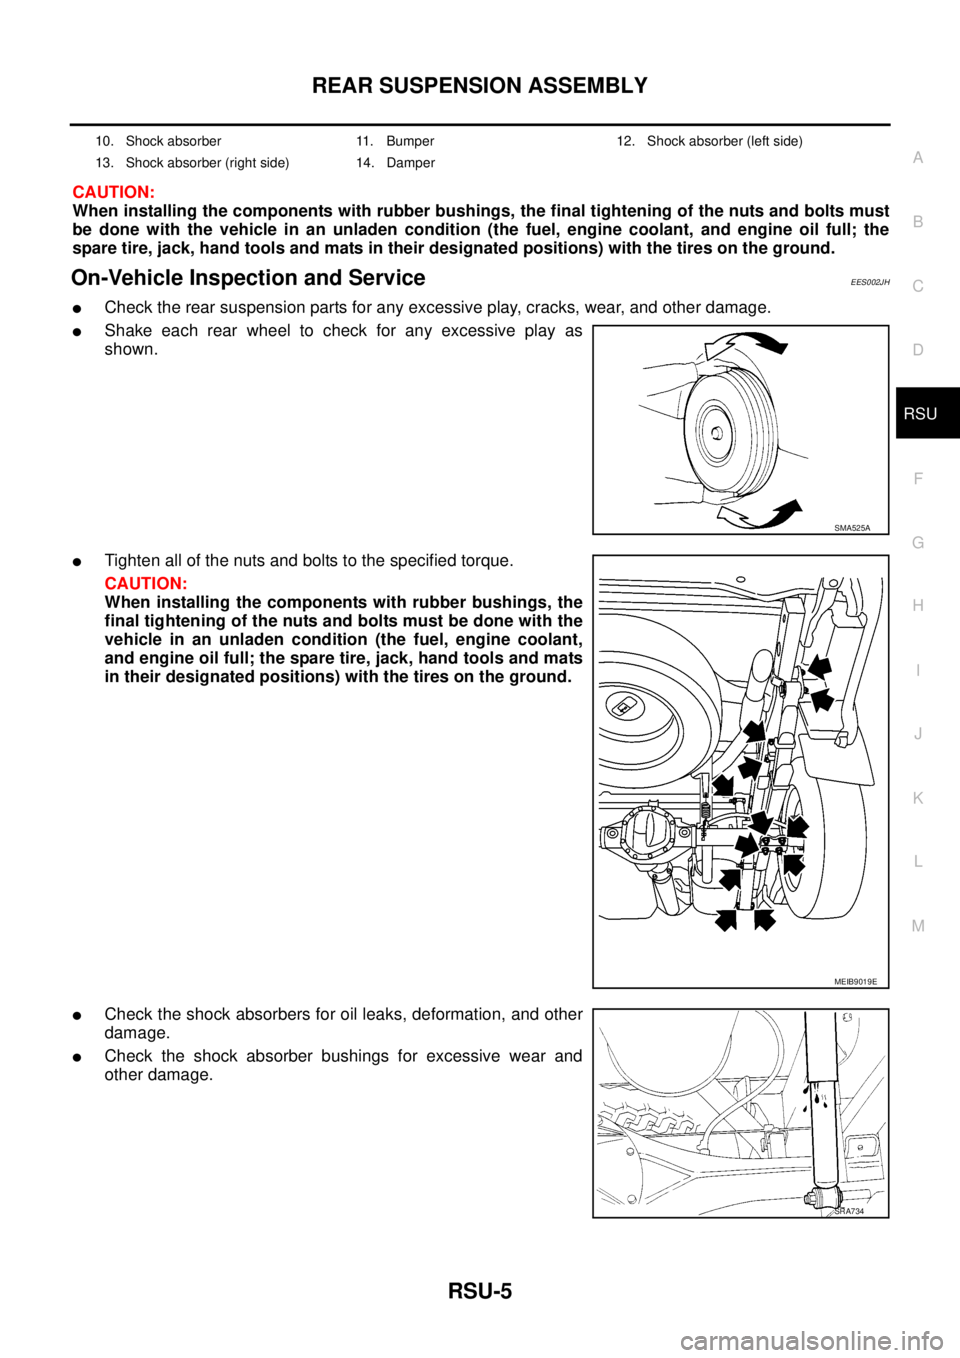
lCheck the rear suspension parts for any excessive play, cracks, wear, and other damage.
lShake each rear wheel to check for any excessive play as
shown.
lTighten all of the nuts and bolts to the specified torque.
CAUTION:
When installing the components with rubber bushings, the
final tightening of the nuts and bolts must be done with the
vehicle in an unladen condition (the fuel, engine coolant,
and engine oil full; the spare tire, jack, hand tools and mats
in their designated positions) with the tires on the ground.
lCheck the shock absorbers for oil leaks, deformation, and other
damage.
lCheck the shock absorber bushings for excessive wear and
other damage.
10. Shock absorber 11. Bumper 12. Shock absorber (left side)
13. Shock absorber (right side) 14. Damper
SMA525A
MEIB9019E
SRA734
Page 2811 of 3171
RSU-6
SHOCK ABSORBER
SHOCK ABSORBER
PFP:56210
Removal and InstallationEES002JI
REMOVAL
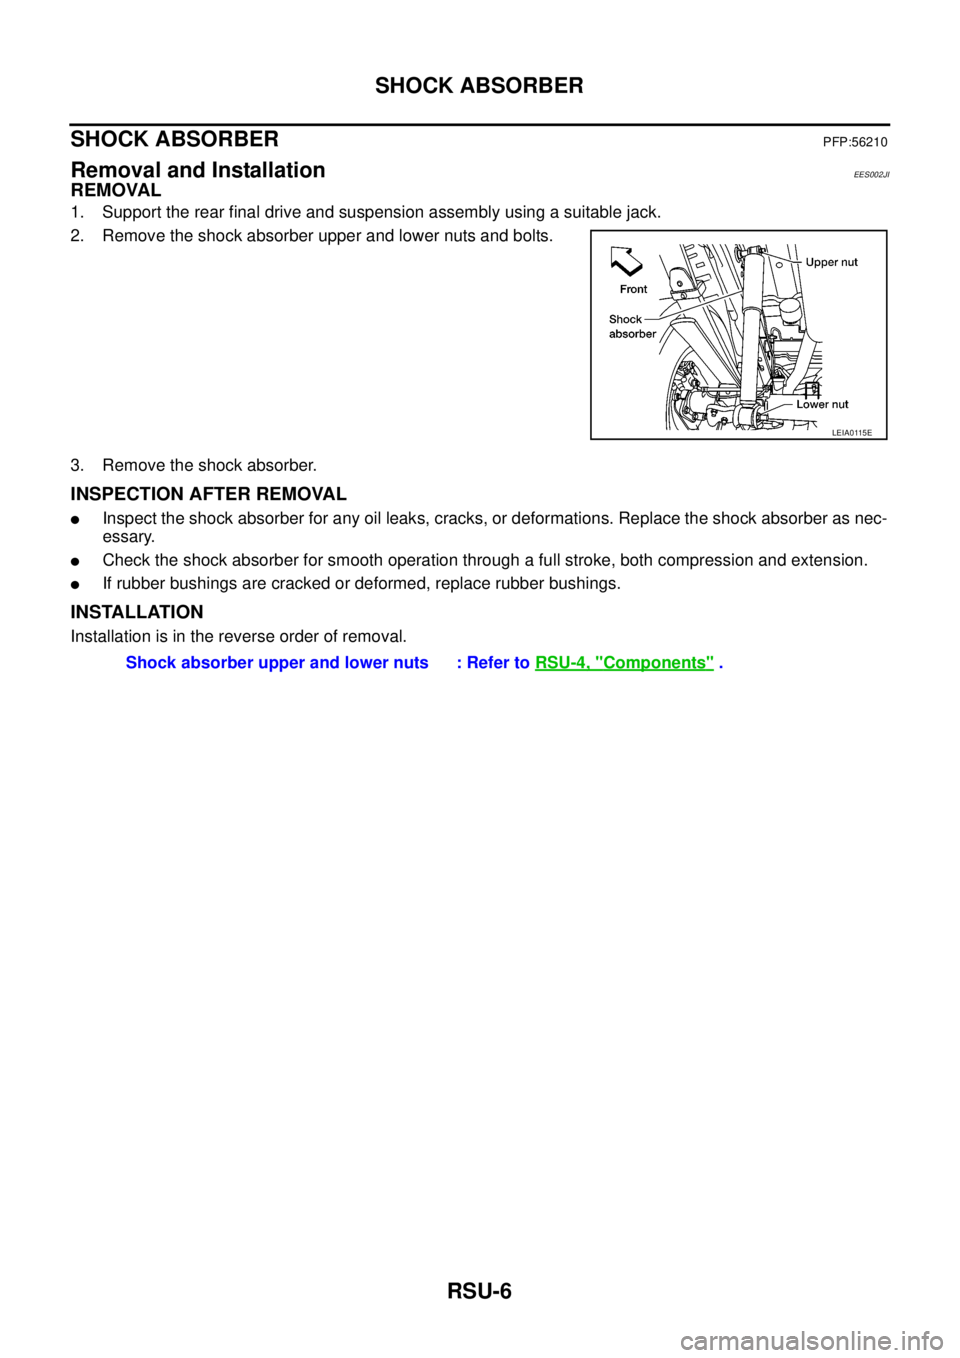
1. Support the rear final drive and suspension assembly using a suitable jack.
2. Remove the shock absorber upper and lower nuts and bolts.
3. Remove the shock absorber.
INSPECTION AFTER REMOVAL
lInspect the shock absorber for any oil leaks, cracks, or deformations. Replace the shock absorber as nec-
essary.
lCheck the shock absorber for smooth operation through a full stroke, both compression and extension.
lIf rubber bushings are cracked or deformed, replace rubber bushings.
INSTALLATION
Installation is in the reverse order of removal.
LEIA0115E
Shock absorber upper and lower nuts : Refer toRSU-4, "Components".
Page 2819 of 3171
SB-2
PRECAUTIONS
PRECAUTIONS
PFP:00001
Precautions for Supplemental Restraint System (SRS) “AIR BAG” and “SEAT
BELT PRE-TENSIONER”
EHS0026D
The Supplemental Restraint System such as “AIR BAG” and “SEAT BELT PRE-TENSIONER”, used along
with a front seat belt, helps to reduce the risk or severity of injury to the driver and front passenger for certain
types of collision. Information necessary to service the system safely is included in the SRS and SB section of
this Service Manual.
WARNING:
lTo avoid rendering the SRS inoperative, which could increase the risk of personal injury or death
in the event of a collision which would result in air bag inflation, all maintenance must be per-
formed by an authorized NISSAN/INFINITI dealer.
lImproper maintenance, including incorrect removal and installation of the SRS, can lead to per-
sonal injury caused by unintentional activation of the system. For removal of Spiral Cable and Air
Bag Module, see the SRS section.
lDo not use electrical test equipment on any circuit related to the SRS unless instructed to in this
Service Manual. SRS wiring harnesses can be identified by yellow and/or orange harnesses or
harness connectors.
Precautions for Seat Belt ServiceEHS00265
CAUTION:
lBefore removing the seat belt pre-tensioner assembly, turn the ignition switch OFF, disconnect
both battery cables and wait at least 3 minutes.
lDo not use electrical test equipment for seat belt pre-tensioner connector.
lAfter replacing or reinstalling seat belt pre-tensioner assembly, or reconnecting seat belt pre-
tensioner assembly connector, ensure entire SRS operates properly. Refer toSRS-18, "
SRS Oper-
ation Check".
lDeploy seat belt pre-tensioner assembly before disposing. Refer toSRS-49, "DISPOSAL OF AIR
BAG MODULE AND SEAT BELT PRE-TENSIONER".
lDo not disassemble buckle or seat belt assembly.
lReplace anchor bolts if they are deformed or worn out.
lNever oil tongue and buckle.
lIf any component of seat belt assembly is questionable, do not repair. Replace the whole seat belt
assembly.
lIf webbing is cut, frayed, or damaged, replace seat belt assembly.
lWhen replacing seat belt assembly, use a genuine NISSAN seat belt assembly.
AFTER A COLLISION
WARNING:
lInspect all seat belt assemblies including retractors and attaching hardware after any collision.
lNISSAN recommends that all seat belt assemblies in use during a collision be replaced unless the
collision was minor and the belts show no damage and continue to operate properly. Failure to do
so could result in serious personal injury in an accident. Seat belt assemblies not in use during a
collision should also be replaced if either damage or improper operation is noted. Seat belt pre-
tensioner should be replaced even if the seat belts are not in use during a frontal collision in which
the air bags are deployed.
Replace any seat belt assembly (including anchor bolts) if:
lThe seat belt was in use at the time of a collision (except for minor collisions and the belts, retractors and
buckles show no damage and continue to operate properly).
lThe seat belt was damaged in an accident. (i.e., torn webbing, bent retractor or guide, etc.)
lThe seat belt attaching point was damaged in an accident. Inspect the seat belt attaching area for damage
or distortion and repair as necessary before installing a new seat belt assembly.
lAnchor bolts are deformed or worn out.
lThe seat belt pre-tensioner should be replaced even if the seat belts are not in use during the collision in
which the air bags are deployed.
Page 2873 of 3171

SE-2
PRECAUTIONS
PRECAUTIONS
PFP:00001
Precautions for Supplemental Restraint System (SRS) “AIR BAG” and “SEAT
BELT PRE-TENSIONER”
EIS00CEB
The Supplemental Restraint System such as “AIR BAG” and “SEAT BELT PRE-TENSIONER”, used along
with a front seat belt, helps to reduce the risk or severity of injury to the driver and front passenger for certain
types of collision. Information necessary to service the system safely is included in the SRS and SB section of
this Service Manual.
WARNING:
lTo avoid rendering the SRS inoperative, which could increase the risk of personal injury or death
in the event of a collision which would result in air bag inflation, all maintenance must be per-
formed by an authorized NISSAN/INFINITI dealer.
lImproper maintenance, including incorrect removal and installation of the SRS, can lead to per-
sonal injury caused by unintentional activation of the system. For removal of Spiral Cable and Air
Bag Module, see the SRS section.
lDo not use electrical test equipment on any circuit related to the SRS unless instructed to in this
Service Manual. SRS wiring harnesses can be identified by yellow and/or orange harnesses or
harness connectors.
Precautions for WorkEIS00BAR
lWhen removing or disassembling each component, be careful not to damage or deform it. If a component
may be subject to interference, be sure to protect it with a shop cloth.
lWhen removing (disengaging) components with a screwdriver or similar tool, be sure to wrap the compo-
nent with a shop cloth or vinyl tape to protect it.
lProtect the removed parts with a shop cloth and keep them.
lReplace a deformed or damaged clip.
lIf a part is specified as a non-reusable part, always replace it with new one.
lBe sure to tighten bolts and nuts securely to the specified torque.
lAfter re-installation is completed, be sure to check that each part works normally.
lFollow the steps below to clean components.
–Water soluble foul: Dip a soft cloth into lukewarm water, and wring the water out of the cloth to wipe the
fouled area.
Then rub with a soft and dry cloth.
–Oily foul: Dip a soft cloth into lukewarm water with mild detergent (concentration: within 2 to 3%), and wipe
the fouled area.
Then dip a cloth into fresh water, and wring the water out of the cloth to wipe the detergent off. Then rub
with a soft and dry cloth.
lDo not use organic solvent such as thinner, benzene, alcohol, or gasoline.
lFor genuine leather seats, use a genuine leather seat cleaner.
Page 2946 of 3171
DRIVER AIR BAG MODULE
SRS-37
C
D
E
F
G
I
J
K
L
MA
B
SRS
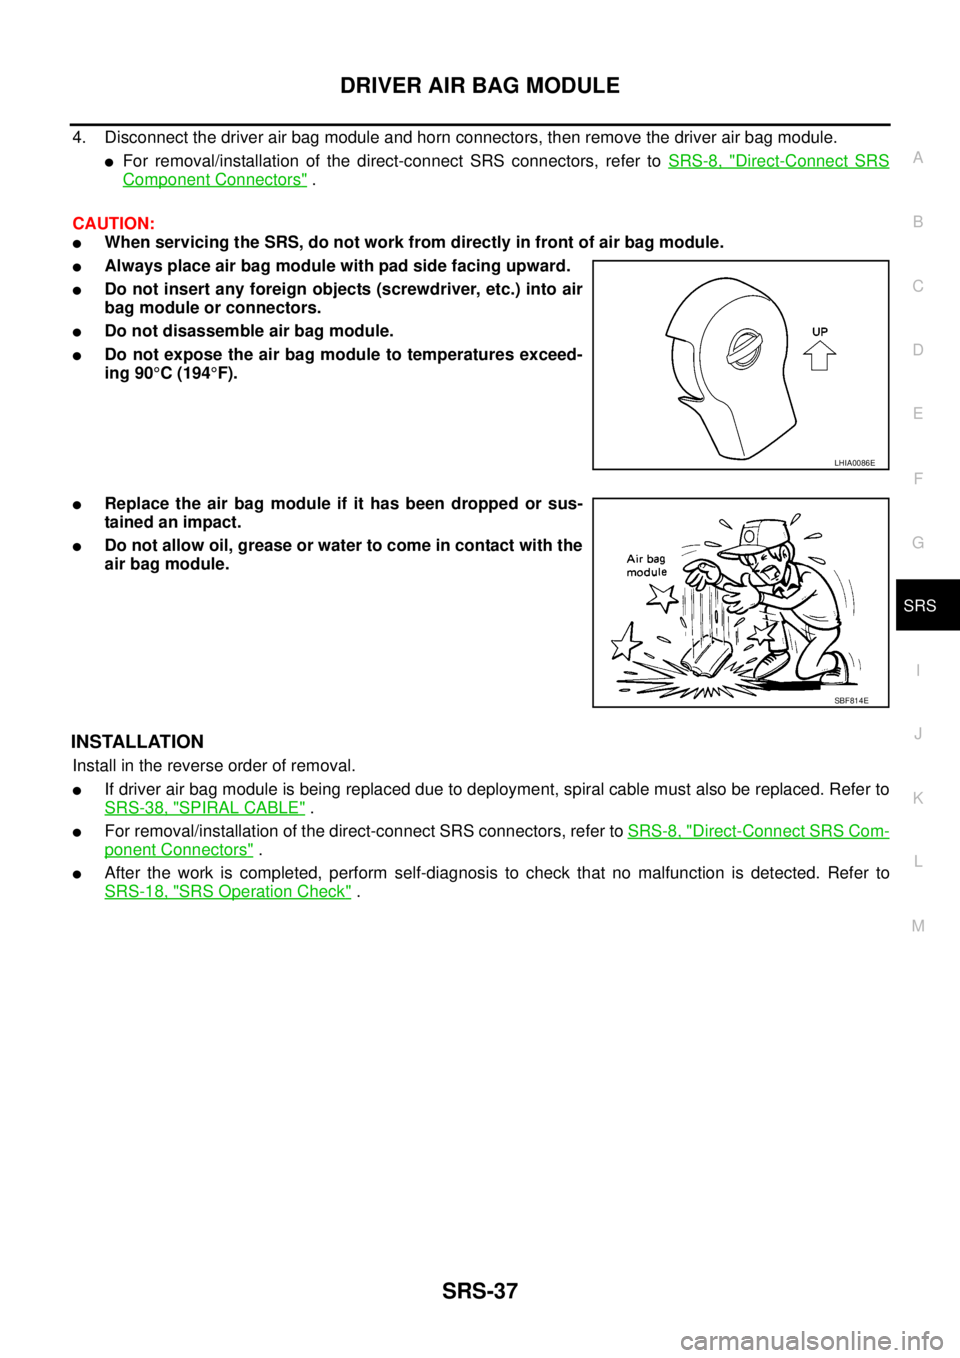
4. Disconnect the driver air bag module and horn connectors, then remove the driver air bag module.
lFor removal/installation of the direct-connect SRS connectors, refer toSRS-8, "Direct-Connect SRS
Component Connectors".
CAUTION:
lWhen servicing the SRS, do not work from directly in front of air bag module.
lAlways place air bag module with pad side facing upward.
lDo not insert any foreign objects (screwdriver, etc.) into air
bag module or connectors.
lDo not disassemble air bag module.
lDo not expose the air bag module to temperatures exceed-
ing 90°C(194°F).
lReplace the air bag module if it has been dropped or sus-
tainedanimpact.
lDo not allow oil, grease or water to come in contact with the
air bag module.
INSTALLATION
Install in the reverse order of removal.
lIf driver air bag module is being replaced due to deployment, spiral cable must also be replaced. Refer to
SRS-38, "
SPIRAL CABLE".
lFor removal/installation of the direct-connect SRS connectors, refer toSRS-8, "Direct-Connect SRS Com-
ponent Connectors".
lAfter the work is completed, perform self-diagnosis to check that no malfunction is detected. Refer to
SRS-18, "
SRS Operation Check".
LHIA0086E
SBF814E
Page 2950 of 3171
FRONT PASSENGER AIR BAG MODULE
SRS-41
C
D
E
F
G
I
J
K
L
MA
B
SRS
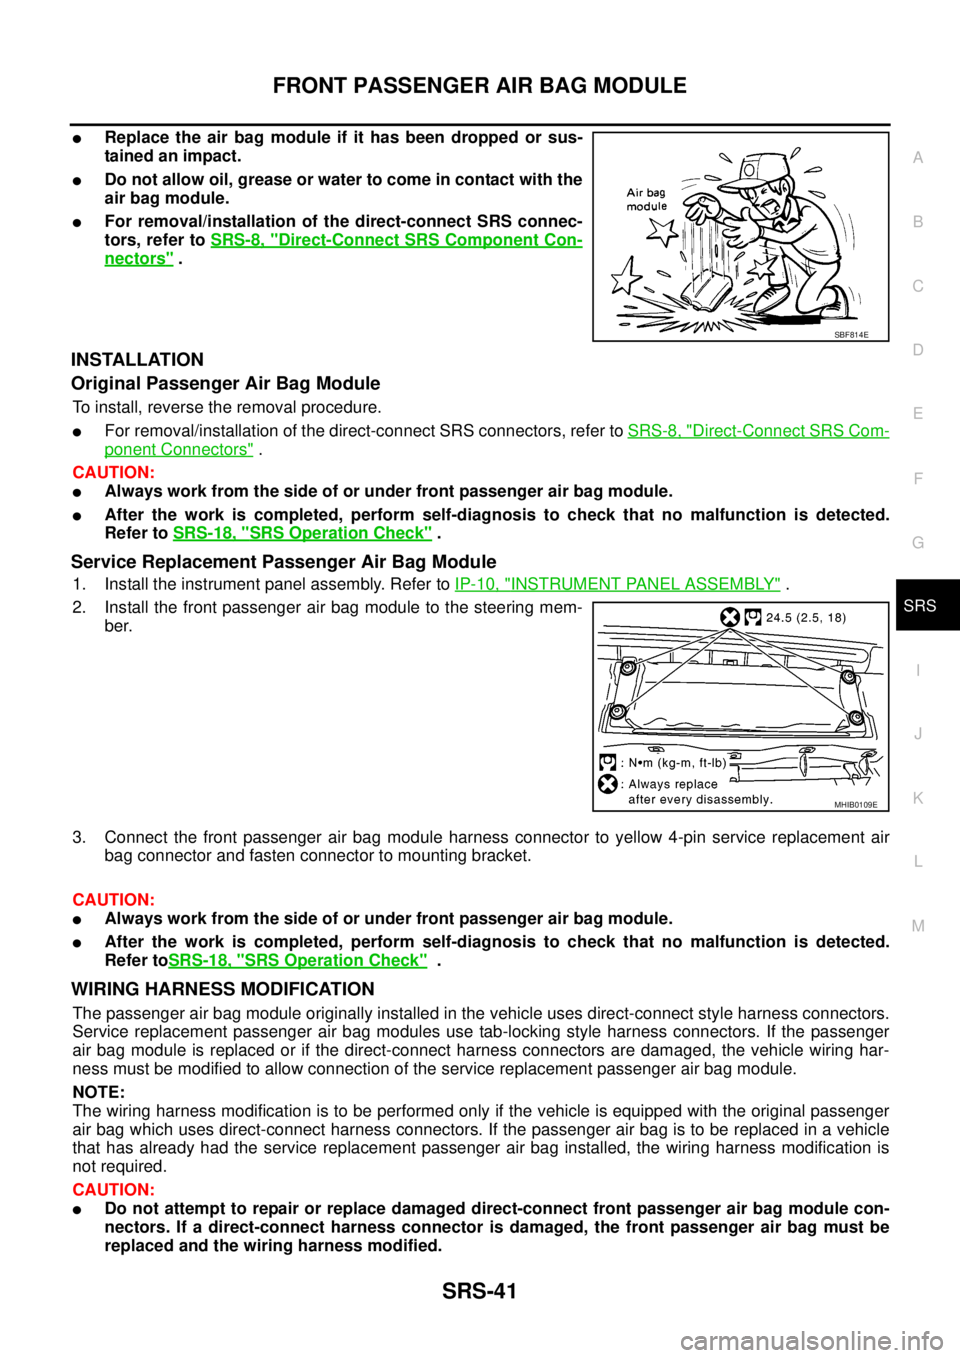
lReplace the air bag module if it has been dropped or sus-
tainedanimpact.
lDo not allow oil, grease or water to come in contact with the
air bag module.
lFor removal/installation of the direct-connect SRS connec-
tors, refer toSRS-8, "
Direct-Connect SRS Component Con-
nectors".
INSTALLATION
Original Passenger Air Bag Module
To install, reverse the removal procedure.
lFor removal/installation of the direct-connect SRS connectors, refer toSRS-8, "Direct-Connect SRS Com-
ponent Connectors".
CAUTION:
lAlways work from the side of or under front passenger air bag module.
lAfter the work is completed, perform self-diagnosis to check that no malfunction is detected.
Refer toSRS-18, "
SRS Operation Check".
Service Replacement Passenger Air Bag Module
1. Install the instrument panel assembly. Refer toIP-10, "INSTRUMENT PANEL ASSEMBLY".
2. Install the front passenger air bag module to the steering mem-
ber.
3. Connect the front passenger air bag module harness connector to yellow 4-pin service replacement air
bag connector and fasten connector to mounting bracket.
CAUTION:
lAlways work from the side of or under front passenger air bag module.
lAfter the work is completed, perform self-diagnosis to check that no malfunction is detected.
Refer toSRS-18, "
SRS Operation Check".
WIRING HARNESS MODIFICATION
The passenger air bag module originally installed in the vehicle uses direct-connect style harness connectors.
Service replacement passenger air bag modules use tab-locking style harness connectors. If the passenger
air bag module is replaced or if the direct-connect harness connectors are damaged, the vehicle wiring har-
ness must be modified to allow connection of the service replacement passenger air bag module.
NOTE:
The wiring harness modification is to be performed only if the vehicle is equipped with the original passenger
air bag which uses direct-connect harness connectors. If the passenger air bag is to be replaced in a vehicle
that has already had the service replacement passenger air bag installed, the wiring harness modification is
not required.
CAUTION:
lDo not attempt to repair or replace damaged direct-connect front passenger air bag module con-
nectors. If a direct-connect harness connector is damaged, the front passenger air bag must be
replaced and the wiring harness modified.
SBF814E
MHIB0109E
Page 3069 of 3171
TF-102
FRONT OIL SEAL
INSTALLATION
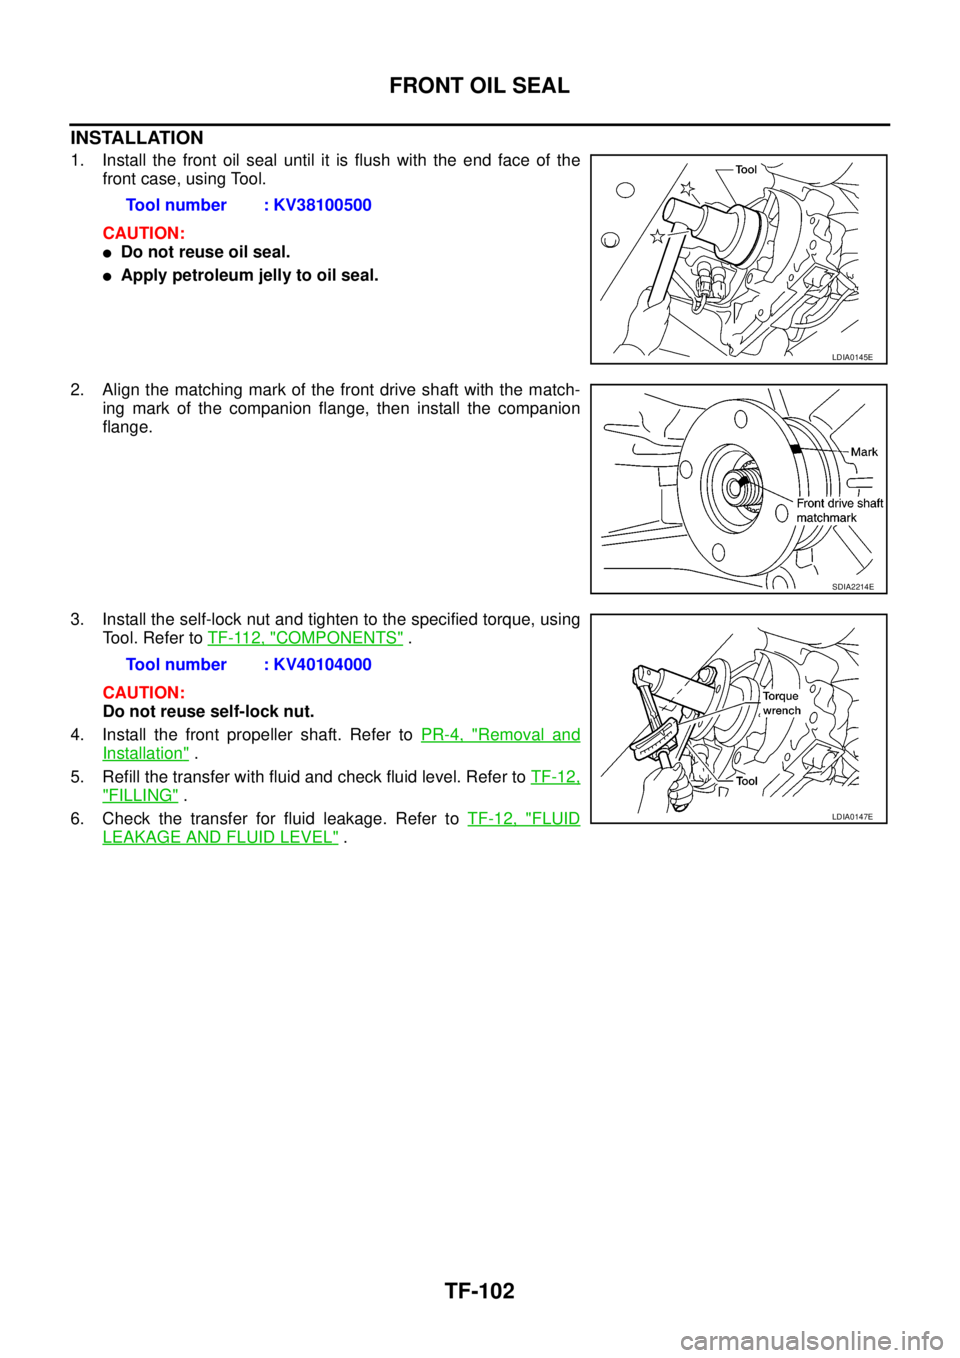
1. Install the front oil seal until it is flush with the end face of the
front case, using Tool.
CAUTION:
lDo not reuse oil seal.
lApply petroleum jelly to oil seal.
2. Align the matching mark of the front drive shaft with the match-
ing mark of the companion flange, then install the companion
flange.
3. Install the self-lock nut and tighten to the specified torque, using
Tool. Refer toTF-112, "
COMPONENTS".
CAUTION:
Do not reuse self-lock nut.
4. Install the front propeller shaft. Refer toPR-4, "
Removal and
Installation".
5. Refill the transfer with fluid and check fluid level. Refer toTF-12,
"FILLING".
6. Check the transfer for fluid leakage. Refer toTF-12, "
FLUID
LEAKAGE AND FLUID LEVEL". Tool number : KV38100500
LDIA0145E
SDIA2214E
Tool number : KV40104000
LDIA0147E
Page 3071 of 3171
TF-104
REAR OIL SEAL
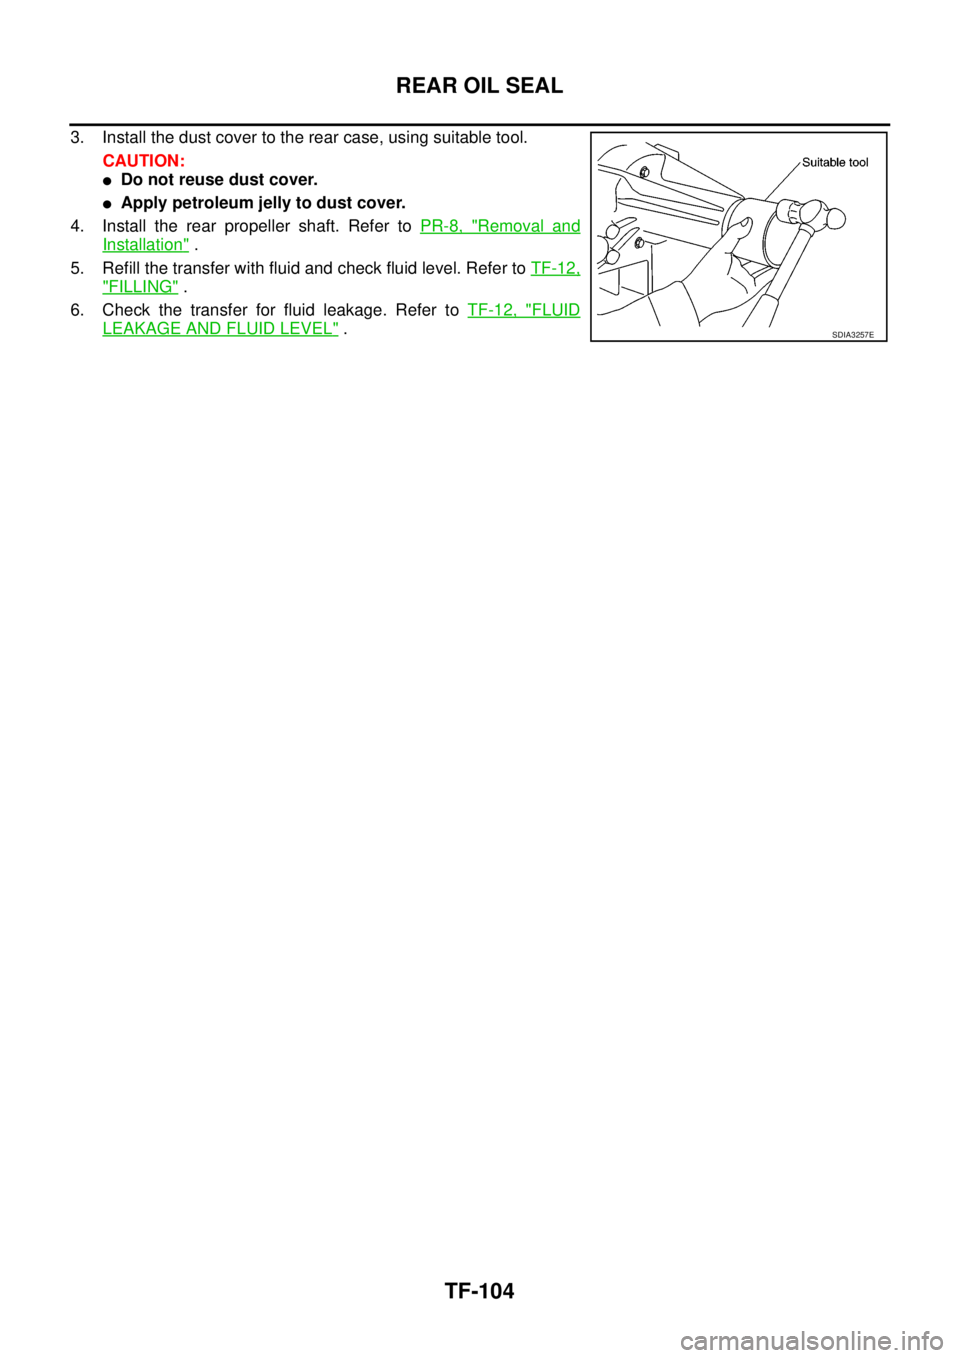
3. Install the dust cover to the rear case, using suitable tool.
CAUTION:
lDo not reuse dust cover.
lApply petroleum jelly to dust cover.
4. Install the rear propeller shaft. Refer toPR-8, "
Removal and
Installation".
5. Refill the transfer with fluid and check fluid level. Refer toTF-12,
"FILLING".
6. Check the transfer for fluid leakage. Refer toTF-12, "
FLUID
LEAKAGE AND FLUID LEVEL".SDIA3257E