Page 33 of 62

Map
The Map destination entry method displays the last
location on the map, and the road preference.
Scroll across and touch the map at the location you
would like to set as your destination. Once you
have located the desired destination, touch the Enter
Destination screen button and then the OK screen
button. The route will then be calculated. You may begin
driving to start route guidance or you may touch the
Route screen button and then the Start screen button.
You may also zoom out to view the entire regional map.
See “Touch-Sensitive Screen Buttons” underUsing
the Navigation System on page 2-2for more information.
However, if you zoom out as much as possible and
scroll around the map, some parts of the map will
appear to be missing because they are not readable in
larger scales.
Previous Start Point
The Previous start point destination entry method allows
you to select the last start point as a destination.
Phone Number
The Phone Number destination entry method allows you
to search for a point of interest (POI) destination by
entering the POI phone number.
Enter the POI phone number on the numeric keypad
and touch the OK screen button. The destination
location will then be displayed. Most phone numbers for
POIs included in the DVD database can be entered
to locate a destination. Cellular phone numbers
and internal company phone numbers cannot be
entered to locate a destination.
2-23
Page 34 of 62
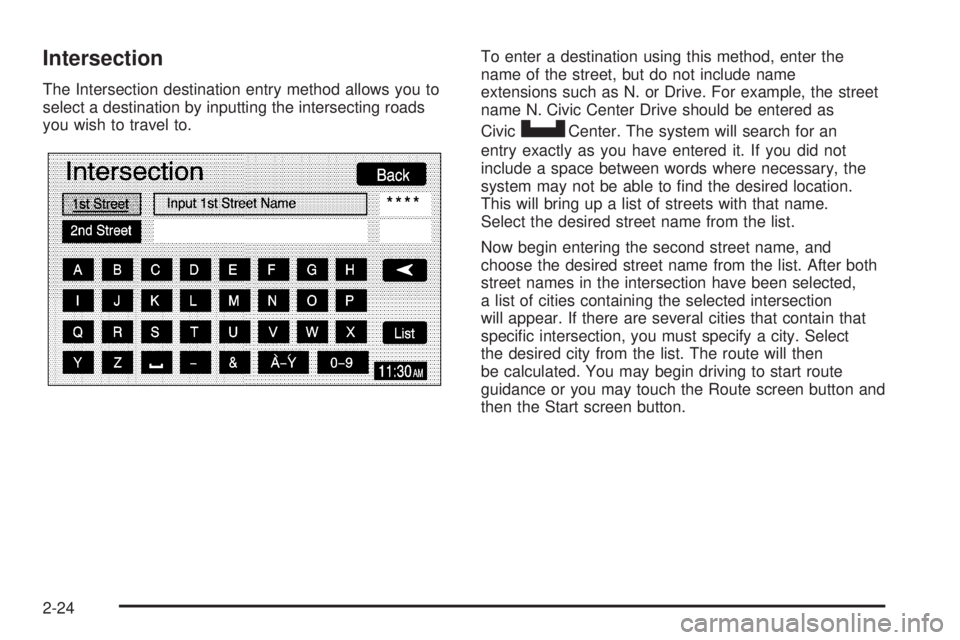
Intersection
The Intersection destination entry method allows you to
select a destination by inputting the intersecting roads
you wish to travel to.To enter a destination using this method, enter the
name of the street, but do not include name
extensions such as N. or Drive. For example, the street
name N. Civic Center Drive should be entered as
Civic
UCenter. The system will search for an
entry exactly as you have entered it. If you did not
include a space between words where necessary, the
system may not be able to �nd the desired location.
This will bring up a list of streets with that name.
Select the desired street name from the list.
Now begin entering the second street name, and
choose the desired street name from the list. After both
street names in the intersection have been selected,
a list of cities containing the selected intersection
will appear. If there are several cities that contain that
speci�c intersection, you must specify a city. Select
the desired city from the list. The route will then
be calculated. You may begin driving to start route
guidance or you may touch the Route screen button and
then the Start screen button.
2-24
Page 35 of 62
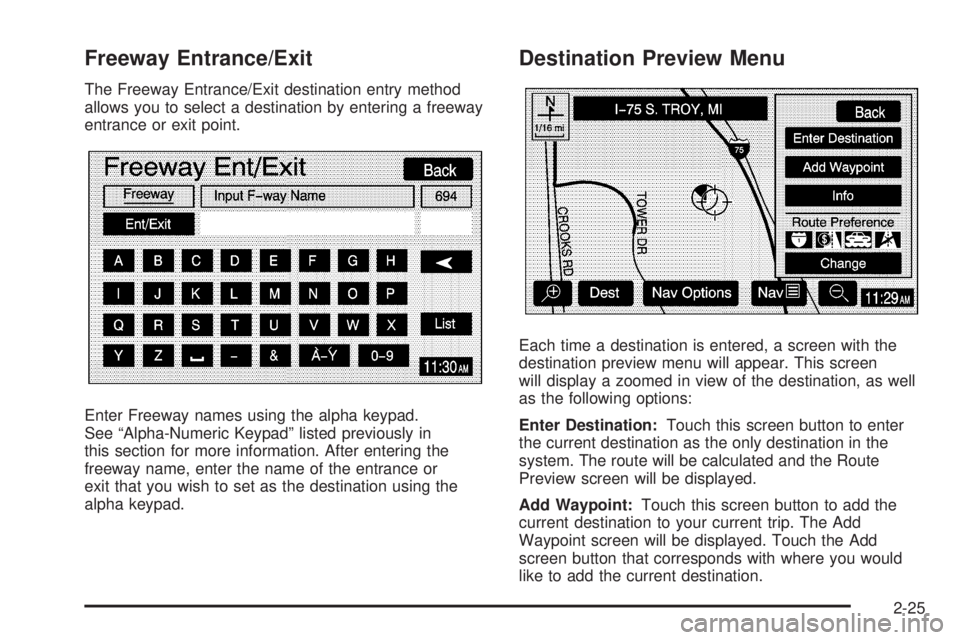
Freeway Entrance/Exit
The Freeway Entrance/Exit destination entry method
allows you to select a destination by entering a freeway
entrance or exit point.
Enter Freeway names using the alpha keypad.
See “Alpha-Numeric Keypad” listed previously in
this section for more information. After entering the
freeway name, enter the name of the entrance or
exit that you wish to set as the destination using the
alpha keypad.
Destination Preview Menu
Each time a destination is entered, a screen with the
destination preview menu will appear. This screen
will display a zoomed in view of the destination, as well
as the following options:
Enter Destination:Touch this screen button to enter
the current destination as the only destination in the
system. The route will be calculated and the Route
Preview screen will be displayed.
Add Waypoint:Touch this screen button to add the
current destination to your current trip. The Add
Waypoint screen will be displayed. Touch the Add
screen button that corresponds with where you would
like to add the current destination.
2-25
Page 36 of 62
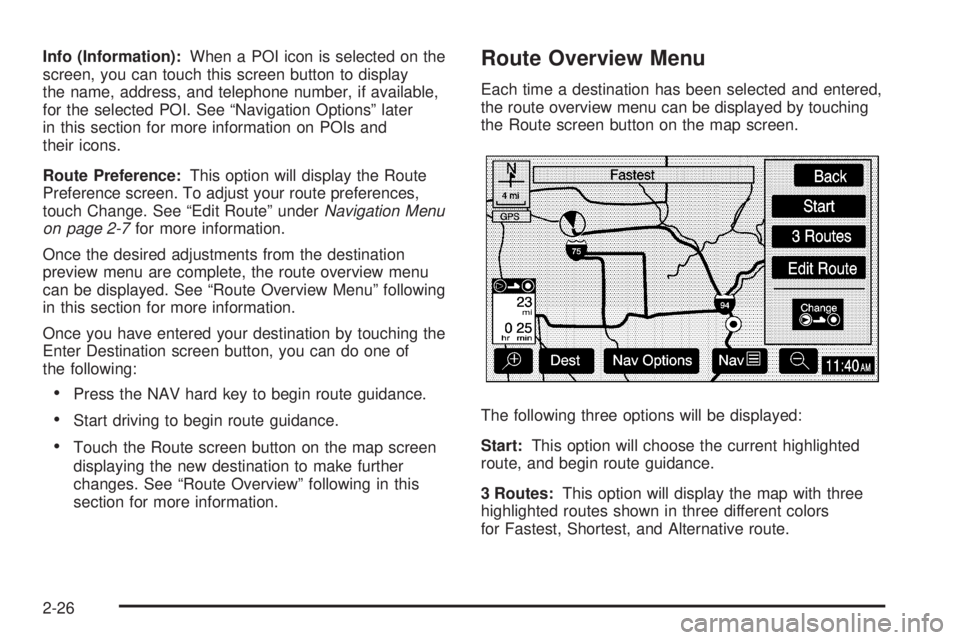
Info (Information):When a POI icon is selected on the
screen, you can touch this screen button to display
the name, address, and telephone number, if available,
for the selected POI. See “Navigation Options” later
in this section for more information on POIs and
their icons.
Route Preference:This option will display the Route
Preference screen. To adjust your route preferences,
touch Change. See “Edit Route” underNavigation Menu
on page 2-7for more information.
Once the desired adjustments from the destination
preview menu are complete, the route overview menu
can be displayed. See “Route Overview Menu” following
in this section for more information.
Once you have entered your destination by touching the
Enter Destination screen button, you can do one of
the following:
Press the NAV hard key to begin route guidance.
Start driving to begin route guidance.
Touch the Route screen button on the map screen
displaying the new destination to make further
changes. See “Route Overview” following in this
section for more information.
Route Overview Menu
Each time a destination has been selected and entered,
the route overview menu can be displayed by touching
the Route screen button on the map screen.
The following three options will be displayed:
Start:This option will choose the current highlighted
route, and begin route guidance.
3 Routes:This option will display the map with three
highlighted routes shown in three different colors
for Fastest, Shortest, and Alternative route.
2-26
Page 37 of 62
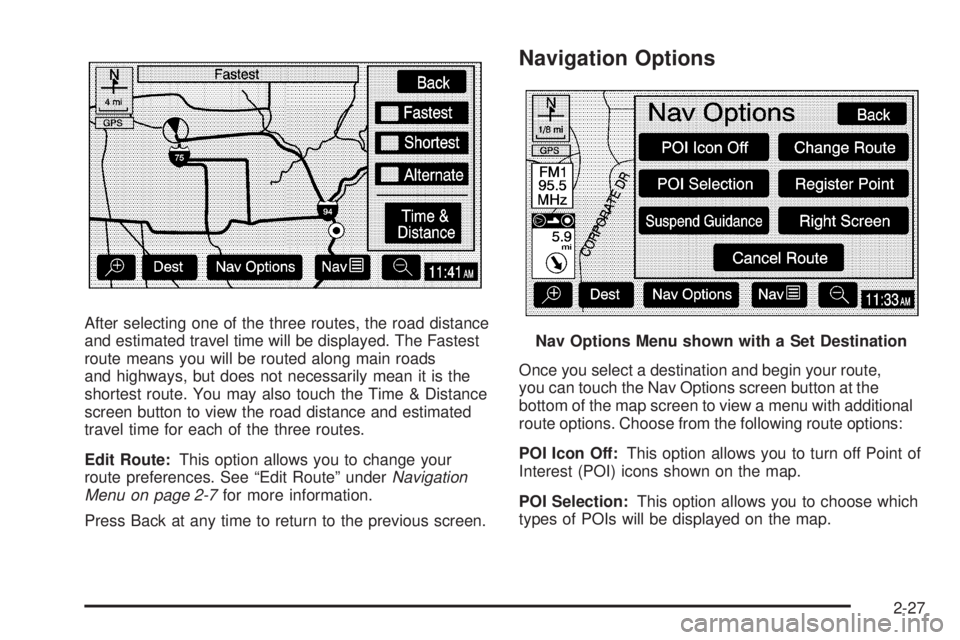
After selecting one of the three routes, the road distance
and estimated travel time will be displayed. The Fastest
route means you will be routed along main roads
and highways, but does not necessarily mean it is the
shortest route. You may also touch the Time & Distance
screen button to view the road distance and estimated
travel time for each of the three routes.
Edit Route:This option allows you to change your
route preferences. See “Edit Route” underNavigation
Menu on page 2-7for more information.
Press Back at any time to return to the previous screen.
Navigation Options
Once you select a destination and begin your route,
you can touch the Nav Options screen button at the
bottom of the map screen to view a menu with additional
route options. Choose from the following route options:
POI Icon Off:This option allows you to turn off Point of
Interest (POI) icons shown on the map.
POI Selection:This option allows you to choose which
types of POIs will be displayed on the map.
Nav Options Menu shown with a Set Destination
2-27
Page 38 of 62
Once you choose POI selection, the POI Selection
screen will appear and display the different POI
categories. You can select up to �ve different POI
categories by touching the categories on the screen.
Touch the More screen button to view further categories.
The icons for the selected categories will appear at
the top of the screen and will be displayed on the map.To view a list of local POIs, touch the Local POI List
screen button. The Local POI List screen will list
the closest POIs from the categories you have selected.
You can sort these POIs by distance, icon/category,
or name. You can also touch the Route screen button to
display POIs along your current route. Once you
select the desired POI, a map of the area with a symbol
marking the destination will be displayed.
2-28
Page 39 of 62
Suspend Guidance:This option allows you to suspend
active route guidance for all current and programmed
destinations. See “Suspend Guidance” underNavigation
Menu on page 2-7for more information.
Cancel Route:This option allows you to cancel the
current, or �rst destination. The second programmed
destination will then be used if one is available.
Change Route:This option allows you to change the
route search condition while the vehicle is moving.
The following options may be available:
Detour for 1 mile?: Touch the Yes screen button to
recalculate your route and detour for one mile
around the vehicle’s current position.
Detour for 3 miles?: Touch the Yes screen button to
recalculate your route and detour for three miles
around the vehicle’s current position.
Change to fastest?: Touch the Yes screen button to
recalculate your route to the fastest route.
Change to shortest?: Touch the Yes screen button
to recalculate your route to the shortest route.
Reroute from adjacent road?: Touch the Yes screen
button to recalculate your route from another road
on your route, near the vehicle’s current position.
Register Point:This option allows you to register a
marked point or memory point. See “Memory Points”
underNavigation Menu on page 2-7for more information.
Right Screen:If you currently have a split-screen, this
option allows you to adjust options for the screen to
the right.
2-29
Page 40 of 62
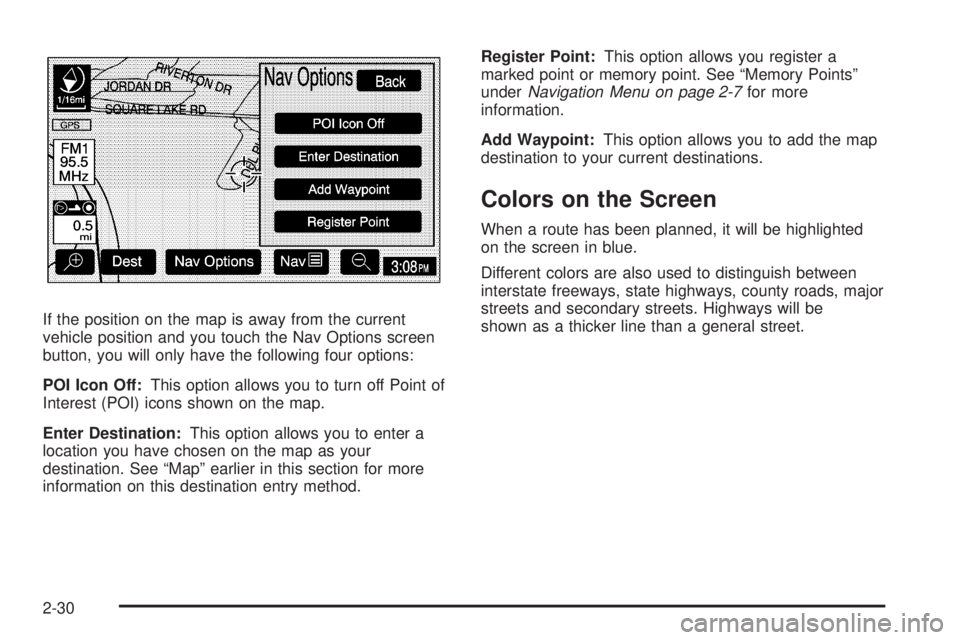
If the position on the map is away from the current
vehicle position and you touch the Nav Options screen
button, you will only have the following four options:
POI Icon Off:This option allows you to turn off Point of
Interest (POI) icons shown on the map.
Enter Destination:This option allows you to enter a
location you have chosen on the map as your
destination. See “Map” earlier in this section for more
information on this destination entry method.Register Point:This option allows you register a
marked point or memory point. See “Memory Points”
underNavigation Menu on page 2-7for more
information.
Add Waypoint:This option allows you to add the map
destination to your current destinations.
Colors on the Screen
When a route has been planned, it will be highlighted
on the screen in blue.
Different colors are also used to distinguish between
interstate freeways, state highways, county roads, major
streets and secondary streets. Highways will be
shown as a thicker line than a general street.
2-30