2005 BMW 645CI COUPE&CONVERTIBLE steering wheel
[x] Cancel search: steering wheelPage 86 of 217

Controls
85Reference
At a glance
Driving tips
Communications
Navigation
Entertainment
Mobility
Report of a flat tire
The warning lamp lights up in red. A
message appears on the Control Dis-
play. In addition, an acoustic signal
sounds. There is a flat tire or extensive inflation
pressure loss.
1.Cautiously reduce the vehicle speed to
below 50 mph/80 km/h. Avoid sudden brak-
ing and steering maneuvers. Do not exceed
a vehicle speed of 50 mph/80 km/h.
If the vehicle is not, as provided at the
factory, equipped with run-flat tires,
refer to page172, stop driving. Continued
driving after a flat tire can result in serious
accidents.<
2.Check the air pressure in all four tires at the
next opportunity.
If the tire inflation pressure in all four
tires is correct, the Flat Tire Monitor
may not have been initialized. The system
must then be initialized.<
3.In case of a complete loss of the tire inflation
pressure or obvious tire damage, you can
estimate the possible driving distance for
continued driving base on the following ref-
erence values:
>With low load:
1 to 2 persons without luggage:
approx. 155 miles/250 km.
>With medium load:
2 persons, luggage compartment full, or
4 persons without luggage:
approx. 94 miles/150 km.
>With full load:
4 persons, luggage compartment full:
approx. 30 miles/50 km.
Drive reservedly and do not exceed
a speed of 50 mph/80 km/h. In the
event of pressure loss, vehicle handling
changes. This includes reduced tracking
stability in braking, extended braking dis-
tance and altered natural steering charac-
teristics.
If unusual vibrations occur while the vehicle
is being driven, this can indicate final failure
of the damaged tire. Reduce speed and stop as soon as possible. Do not continue
driving. Contact your BMW center.<
Malfunction
The warning lamp lights up in yellow. A
message appears on the Control Dis-
play. The Flat Tire Monitor has a mal-
function or has failed. Have the system checked
as soon as possible.
Active steering*
The concept
The active steering is a system that actively var-
ies the steering angle of the front wheels in rela-
tion to the steering wheel movements.
A t l o w s p e e d , e . g . i n a t o w n o r w h e n p a r k i n g , t h e
steering angle of the wheels is reinforced, i.e.
the steering becomes very direct.
In the higher speed range, on the other hand,
the steering angle is reduced more and more.
This improves the handling capability of your
BMW over the entire speed range.
In critical situations, the system can make tar-
geted corrections to the steering angle pro-
vided by the driver and thus stabilize the vehicle
before the driver intervenes. This stability-pro-
moting intervention is deactivated when DSC is
switched off, refer to page82.
Malfunction
The warning lamp lights up. The active
steering is no longer operational. At low
speed, larger steering wheel move-
ments are required, while the vehicle reacts
more sensitively to steering wheel movements
in the higher road-speed range. Have the sys-
tem checked.
If the warning lamp lights up during the first
engine starting following a power supply inter-
ruption, the system must be activated by being
initialized.
Page 87 of 217
Technology for comfort, convenience and safety
86
Initializing system
1.Start the engine.
2.With the vehicle stationary, turn the steer-
ing wheel from the straight-ahead position
to the left as far as it will go and then back to
the straight-ahead position.
3.Switch off the engine.
When you start the engine again, all the func-
tions of the active steering will be available once
again.
Brake Force Display
The Brake Force Display lights up in two stages
depending on how strongly you brake.
>Normal braking:
The brake lamps and the third brake lamp
go on.
>Heavy braking and braking with ABS:
In addition, the illuminated area of the rear
brake lamps is enlarged, refer to illustration.
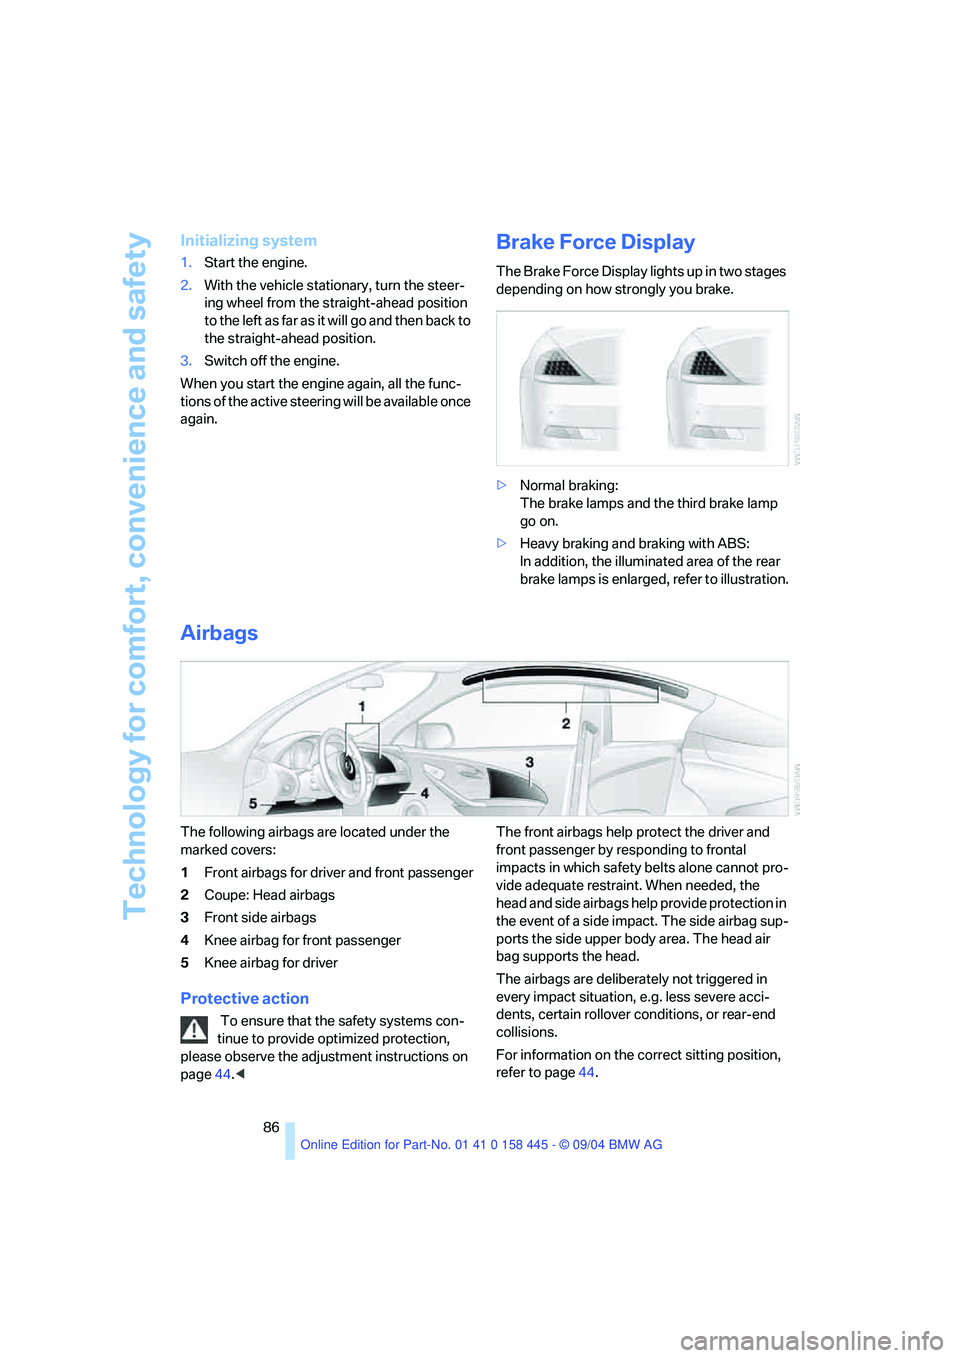
Airbags
The following airbags are located under the
marked covers:
1Front airbags for driver and front passenger
2Coupe: Head airbags
3Front side airbags
4Knee airbag for front passenger
5Knee airbag for driver
Protective action
To ensure that the safety systems con-
tinue to provide optimized protection,
please observe the adjustment instructions on
page44.
impacts in which safety belts alone cannot pro-
vide adequate restraint. When needed, the
head and side airbags help provide protection in
the event of a side impact. The side airbag sup-
ports the side upper body area. The head air
bag supports the head.
The airbags are deliberately not triggered in
every impact situation, e.g. less severe acci-
dents, certain rollover conditions, or rear-end
collisions.
For information on the correct sitting position,
refer to page44.
Page 88 of 217
Controls
87Reference
At a glance
Driving tips
Communications
Navigation
Entertainment
Mobility
Do not apply adhesive materials to the
cover panels of the airbags, cover them or
modify them in any other way.
Do not attempt to remove the airbag retention
system from the vehicle. Never modify or
tamper with either the wiring or the individual
components in the airbag system. This cate-
gory includes the upholstery in the center of the
steering wheel, on the instrument panel, the
side trim panels on the doors and on the Coupe,
the roof pillars along with the sides of the head-
liner. Do not attempt to remove or dismantle the
steering wheel.
Do not touch the individual components
directly after the system has been triggered,
because there is a danger of burns.
If you note any indication of system malfunc-
tion, if you wish to have an airbag deactivated,
or if the airbag retention system is triggered in
response to an accident, you should always
entrust all inspection, repair and dismantling
operations to your BMW center. Unprofessional
attempts to service the system could lead to
failure in an emergency or undesired airbag
activation, either of which could result in per-
sonal injury.<
Airbag warning information is also provided on
the sun visors.
Operational readiness of airbag system
From ignition key position 1 the warning lamp
lights up briefly, indicating the operational
readiness of the entire airbag system and the
belt tensioners.
Airbag system malfunction
>The warning lamp does not light up as of
ignition key position 1.>The warning lamp lights up continuously.
Have the airbag system checked immedi-
ately if a malfunction occurs, as otherwise
there is a danger of the system not responding
in the expected manner to an impact occurring
within its normal response range.<
Convertible:
Rollover protection system
The rollover protection system is automatically
activated in the event of an accident or a critical
driving situation, extreme inclination on the lon-
gitudinal or transverse axis, or loss of ground
contact. The rollover bars located behind the
rear head restraints are deployed within frac-
tions of a second.
As a supplement to the rollover bar integrated
into the windshield frame, the rollover protec-
tion system ensures that all vehicle occupants
have the necessary headroom.
Always keep the path of movement of the
rollover protection system clear.
In less severe accidents, you are protected by
the fastened safety belt and, depending on the
severity of the accident, the belt tensioner and
the multistage airbag restraint system.<
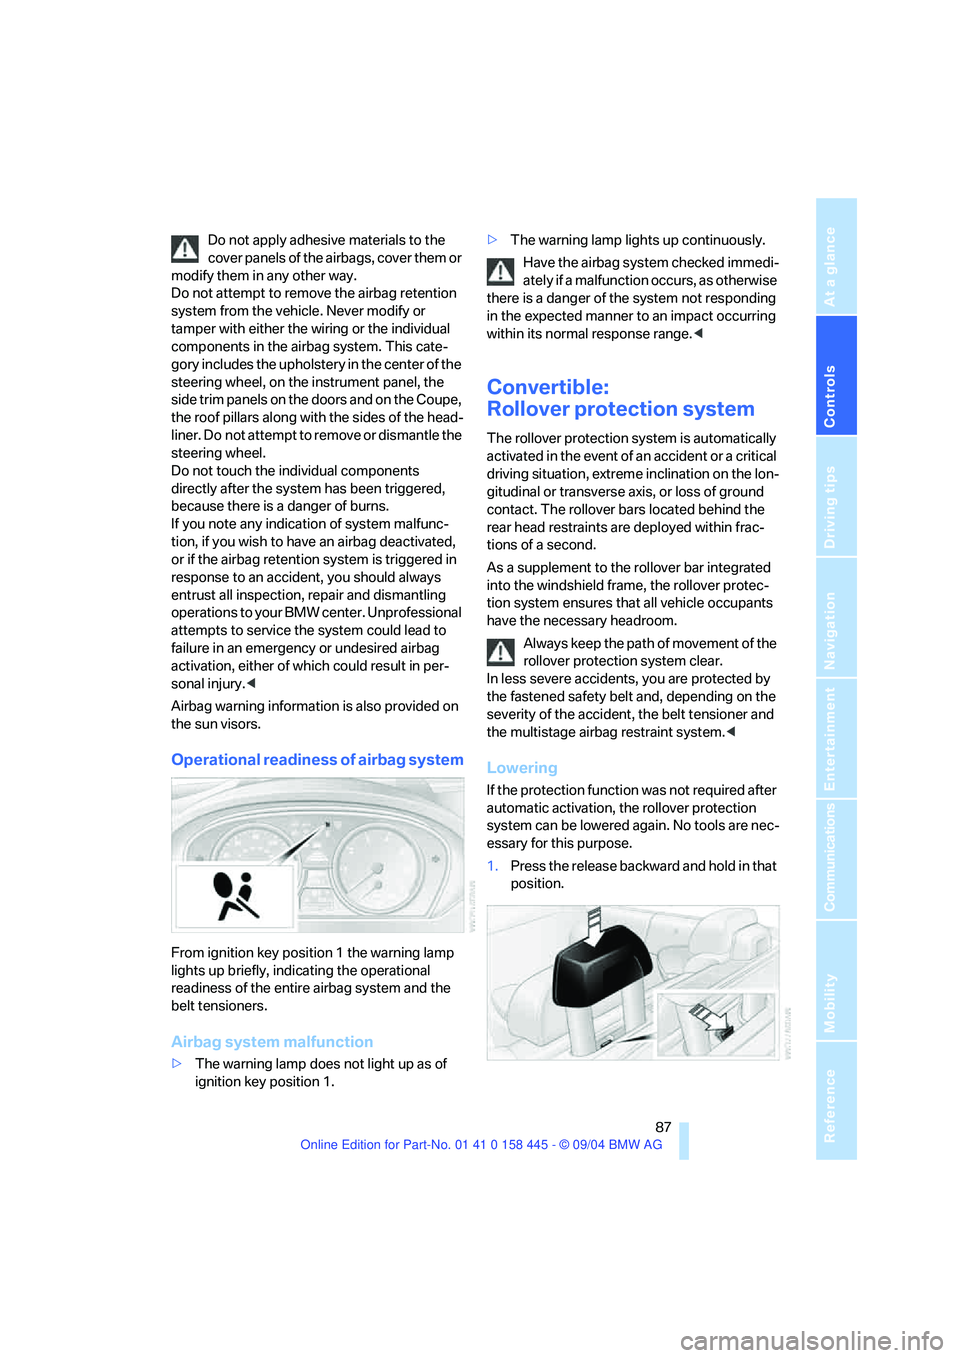
Lowering
If the protection function was not required after
automatic activation, the rollover protection
system can be lowered again. No tools are nec-
essary for this purpose.
1.Press the release backward and hold in that
position.
Page 127 of 217

Destination guidance
126
Destination guidance
through voice instructions
Switching voice instructions on/off
Control Center, for principle details, refer to
page16.
1.Open start menu.
2.Press the controller to open the menu.
3.Select "Display settings" and press the
controller.
4.Select "Languages" and press the control-
ler.
5.Select "Navigation voice instructions on"
and press the controller.
The voice instructions are switched on.
The setting is stored for the remote control cur-
rently in use.
Repeating and canceling voice
instructions
With the programmable buttons on the steering
wheel, you can also make the following set-
tings, refer to page51:
>Repeat the voice instruction:
Press the button.
>Switch voice instructions on/off:
Maintain pressure on the button for several
seconds.
Adjusting volume
1.Repeat the last voice instruction, if required.
2.Turn the button during the voice instruction
to select the desired volume.
This volume is independent of the volume of the
audio sources.
The setting is stored for the remote control cur-
rently in use.
Page 133 of 217
On/off and tone
132
On/off and tone
The following audio sources have shared
controls and setting options:
>Radio Business
>CD player
>CD changer
*
Controls
The audio sources can be operated using:
>Buttons near CD player
>Control Center
>Buttons on the steering wheel, refer to
page11
Buttons near CD player
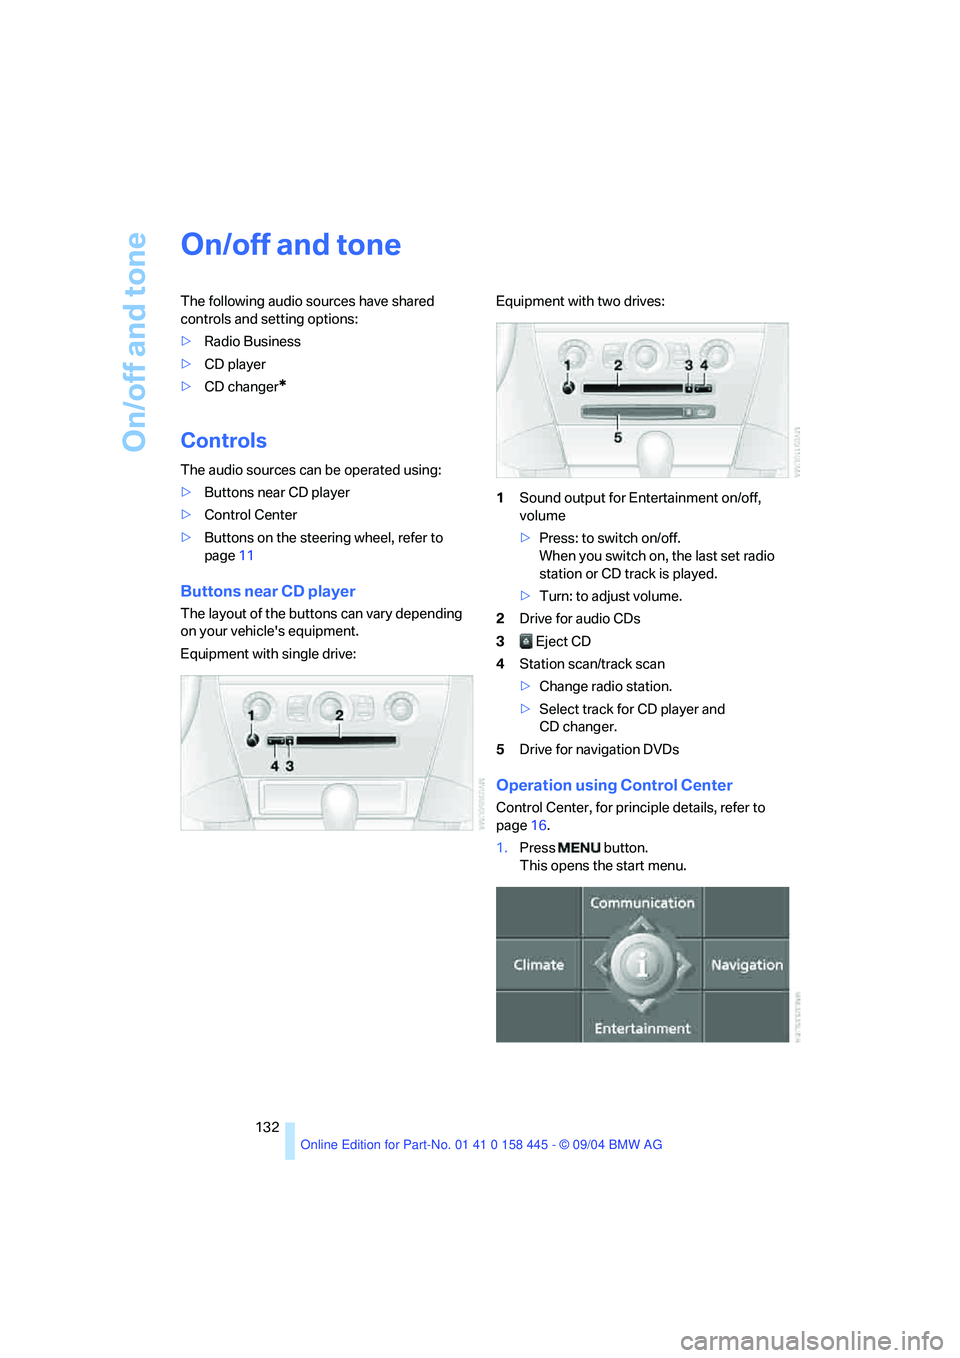
The layout of the buttons can vary depending
on your vehicle's equipment.
Equipment with single drive:Equipment with two drives:
1Sound output for Entertainment on/off,
volume
>Press: to switch on/off.
When you switch on, the last set radio
station or CD track is played.
>Turn: to adjust volume.
2Drive for audio CDs
3 Eject CD
4Station scan/track scan
>Change radio station.
>Select track for CD player and
CD changer.
5Drive for navigation DVDs
Operation using Control Center
Control Center, for principle details, refer to
page16.
1.Press button.
This opens the start menu.
Page 134 of 217
Navigation
Entertainment
Driving tips
133Reference
At a glance
Controls
Communications
Mobility
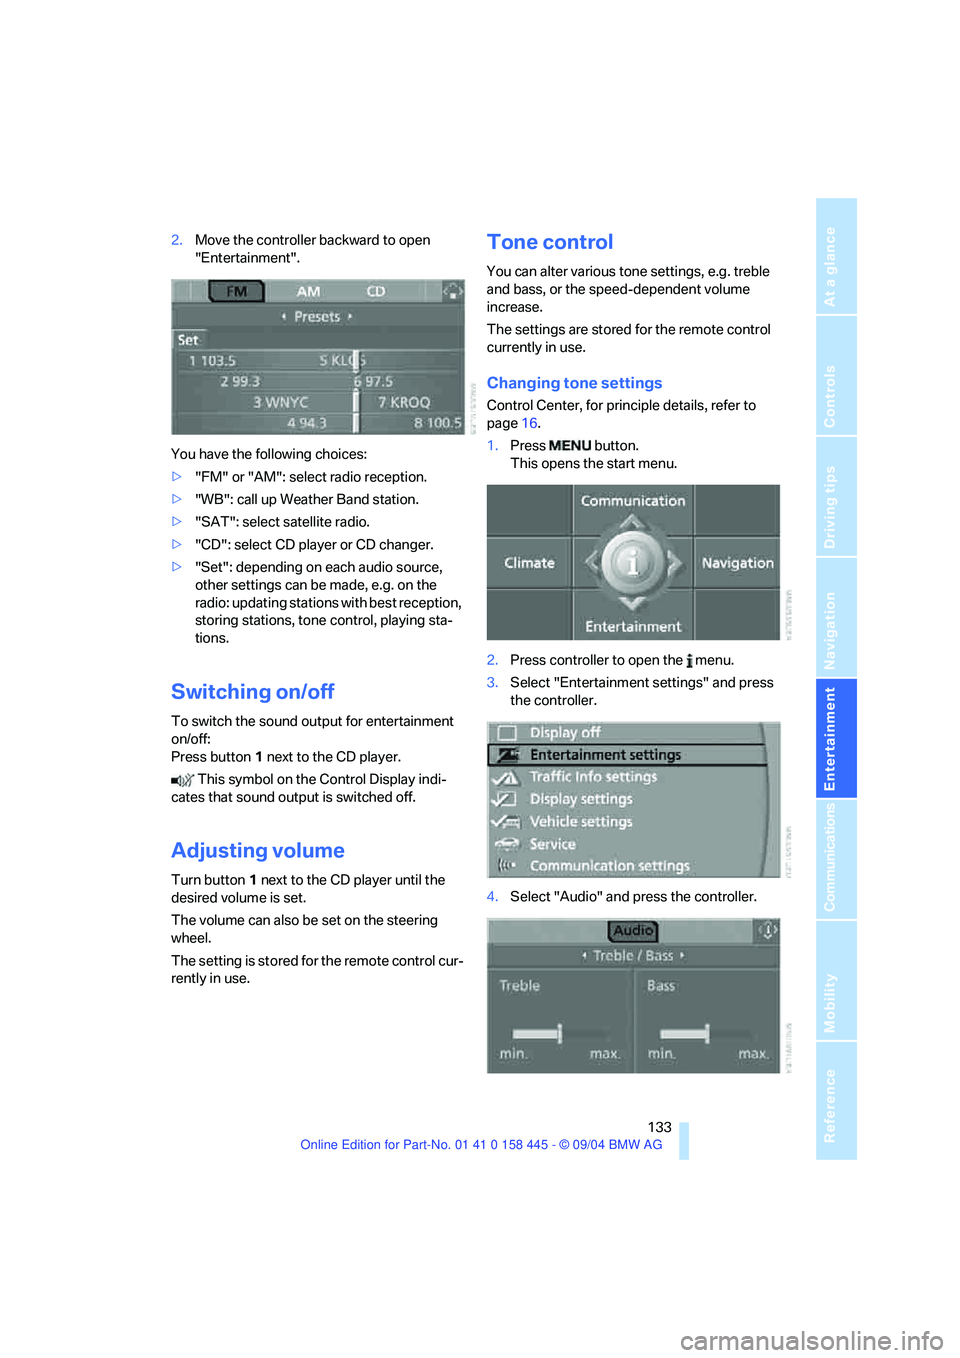
2.Move the controller backward to open
"Entertainment".
You have the following choices:
>"FM" or "AM": select radio reception.
>"WB": call up Weather Band station.
>"SAT": select satellite radio.
>"CD": select CD player or CD changer.
>"Set": depending on each audio source,
other settings can be made, e.g. on the
radio: updating stations with best reception,
storing stations, tone control, playing sta-
tions.
Switching on/off
To switch the sound output for entertainment
on/off:
Press button1 next to the CD player.
This symbol on the Control Display indi-
cates that sound output is switched off.
Adjusting volume
Turn button1 next to the CD player until the
desired volume is set.
The volume can also be set on the steering
wheel.
The setting is stored for the remote control cur-
rently in use.
Tone control
You can alter various tone settings, e.g. treble
and bass, or the speed-dependent volume
increase.
The settings are stored for the remote control
currently in use.
Changing tone settings
Control Center, for principle details, refer to
page16.
1.Press button.
This opens the start menu.
2.Press controller to open the menu.
3.Select "Entertainment settings" and press
the controller.
4.Select "Audio" and press the controller.
Page 145 of 217
CD player and CD changer
144
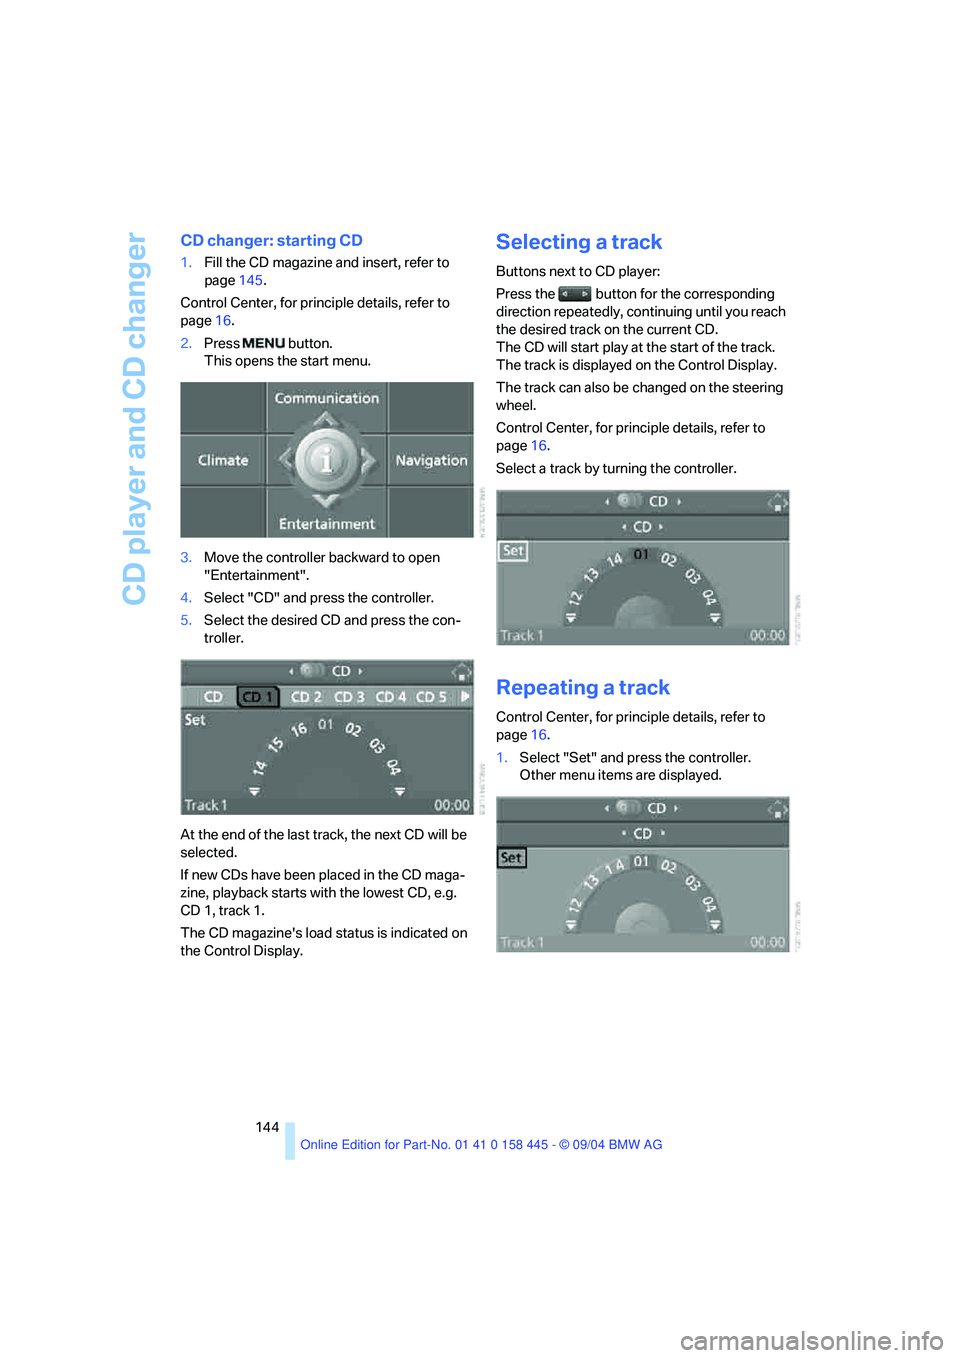
CD changer: starting CD
1.Fill the CD magazine and insert, refer to
page145.
Control Center, for principle details, refer to
page16.
2.Press button.
This opens the start menu.
3.Move the controller backward to open
"Entertainment".
4.Select "CD" and press the controller.
5.Select the desired CD and press the con-
troller.
At the end of the last track, the next CD will be
selected.
If new CDs have been placed in the CD maga-
zine, playback starts with the lowest CD, e.g.
CD 1, track 1.
The CD magazine's load status is indicated on
the Control Display.
Selecting a track
Buttons next to CD player:
Press the button for the corresponding
direction repeatedly, continuing until you reach
the desired track on the current CD.
The CD will start play at the start of the track.
The track is displayed on the Control Display.
The track can also be changed on the steering
wheel.
Control Center, for principle details, refer to
page16.
Select a track by turning the controller.
Repeating a track
Control Center, for principle details, refer to
page16.
1.Select "Set" and press the controller.
Other menu items are displayed.
Page 152 of 217
151
Entertainment
Reference
At a glance
Controls
Driving tips Communications
Navigation
Mobility
your portable phone.
To avoid possible short circuits, after removing
a battery you should never allow it to come into
contact with metallic surfaces of any kind.<
Disposing of used batteries
Return used batteries to a recycling col-
lection point or to your BMW center.<
Care instructions
You can find what you need to know about car-
ing for your portable phone in the Caring for
your vehicle brochure and in the separate porta-
ble phone Owner's Manual.
Operating options
You can operate the portable phone* with:
>The steering wheel, refer to page11
>The Control Center, refer to page152
>Voice commands, refer to page156
Information on operating the portable phone is
contained in the separate Owner's Manual on
the Full Preparation Package Cellphone.
Telephoning with car phone:
BMW Assist calls
You can use the car phone via the hands-free
system for BMW Assist calls.
When the status information "Car Phone" is
displayed in "Communication", only BMW
Assist calls are possible.
Hands-free system
The microphone is located:
>In the Coupe near the interior rearview mir-
ror, refer to page14
>In the Convertible on the steering columnThe hands-free system is activated whenever
you establish or receive a call using:
>The button on the steering wheel
>The Control Center
>Voice commands
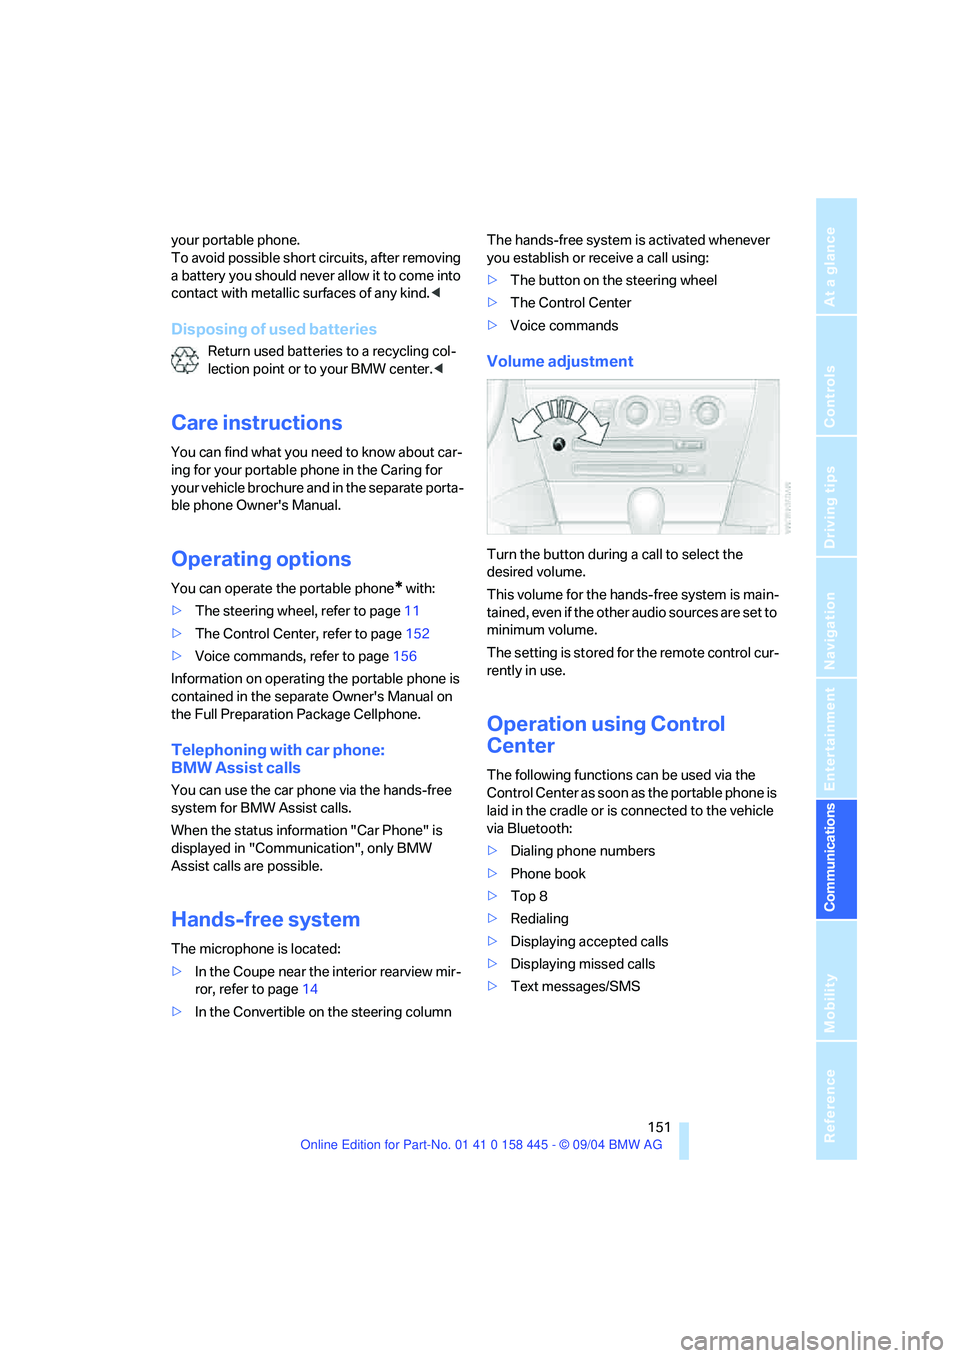
Volume adjustment
Turn the button during a call to select the
desired volume.
This volume for the hands-free system is main-
tained, even if the other audio sources are set to
minimum volume.
The setting is stored for the remote control cur-
rently in use.
Operation using Control
Center
The following functions can be used via the
Control Center as soon as the portable phone is
laid in the cradle or is connected to the vehicle
via Bluetooth:
>Dialing phone numbers
>Phone book
>Top 8
>Redialing
>Displaying accepted calls
>Displaying missed calls
>Text messages/SMS