2005 BMW 645CI COUPE&CONVERTIBLE steering wheel
[x] Cancel search: steering wheelPage 51 of 217

Adjustments
50 1Adjustments
2Switching over to the respective other mir-
ror or to the automatic parking function,
refer to Tilting down passenger's mirror,
page47
Storing the mirror positions, refer to Seat, mir-
ror and steering wheel memory, page46.
Adjusting manually
You can also adjust the mirrors manually if
necessary by pressing against the edges of
the mirror glass.
Outside mirrors, folding in and out
To prevent the exterior mirrors from being
damaged due to the width of the vehicle,
always fold them in by hand before entering an
automatic car wash.<
Automatic functions
>Both exterior mirrors are automatically
heated in ignition key position 2.
>When the vehicle is moving forward, the
interior and exterior mirrors dim as a func-
tion of the incoming light
*.
There are two photocells in the interior mirror to
control the automatic dimming of the interior mirror. One is integrated into the mirror glass,
refer to arrow, while the other is located at a
position slightly offset from this on the rear of
the mirror housing.
For trouble-free operation, keep the photocells
clean and do not cover the area between the
interior rearview mirror and the windshield. Also
do not attach stickers to the windshield in front
of the mirror.
Steering wheel
Adjustments
Do not adjust the steering wheel while the
vehicle is moving. There is a risk of acci-
dent from unexpected movement of the steer-
ing wheel.<
The steering wheel can be adjusted in four
directions.
Storing the steering-wheel position, refer to
Seat, mirror and steering wheel memory,
page46.
Easy entry/exit
To make it easier to enter and exit the vehicle,
the steering wheel temporarily moves into the
uppermost position.
Page 52 of 217
Controls
51Reference
At a glance
Driving tips
Communications
Navigation
Entertainment
Mobility
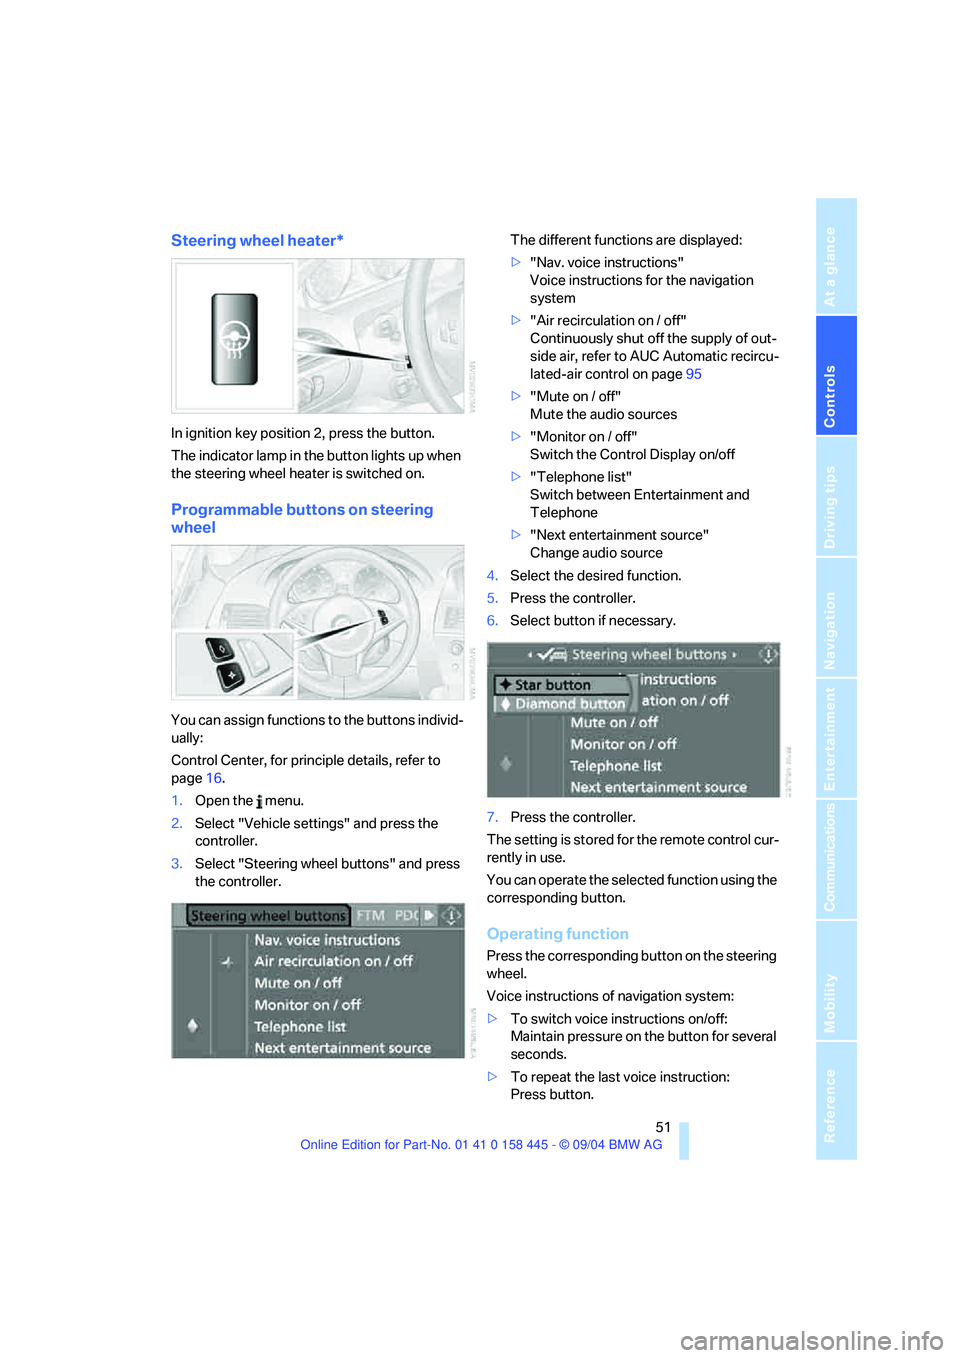
Steering wheel heater*
In ignition key position 2, press the button.
The indicator lamp in the button lights up when
the steering wheel heater is switched on.
Programmable buttons on steering
wheel
You can assign functions to the buttons individ-
ually:
Control Center, for principle details, refer to
page16.
1.Open the menu.
2.Select "Vehicle settings" and press the
controller.
3.Select "Steering wheel buttons" and press
the controller.The different functions are displayed:
>"Nav. voice instructions"
Voice instructions for the navigation
system
>"Air recirculation on / off"
Continuously shut off the supply of out-
side air, refer to AUC Automatic recircu-
lated-air control on page95
>"Mute on / off"
Mute the audio sources
>"Monitor on / off"
Switch the Control Display on/off
>"Telephone list"
Switch between Entertainment and
Telephone
>"Next entertainment source"
Change audio source
4.Select the desired function.
5.Press the controller.
6.Select button if necessary.
.
7.Press the controller.
The setting is stored for the remote control cur-
rently in use.
You can operate the selected function using the
corresponding button.
Operating function
Press the corresponding button on the steering
wheel.
Voice instructions of navigation system:
>To switch voice instructions on/off:
Maintain pressure on the button for several
seconds.
>To repeat the last voice instruction:
Press button.
Page 55 of 217
Driving
54
Driving
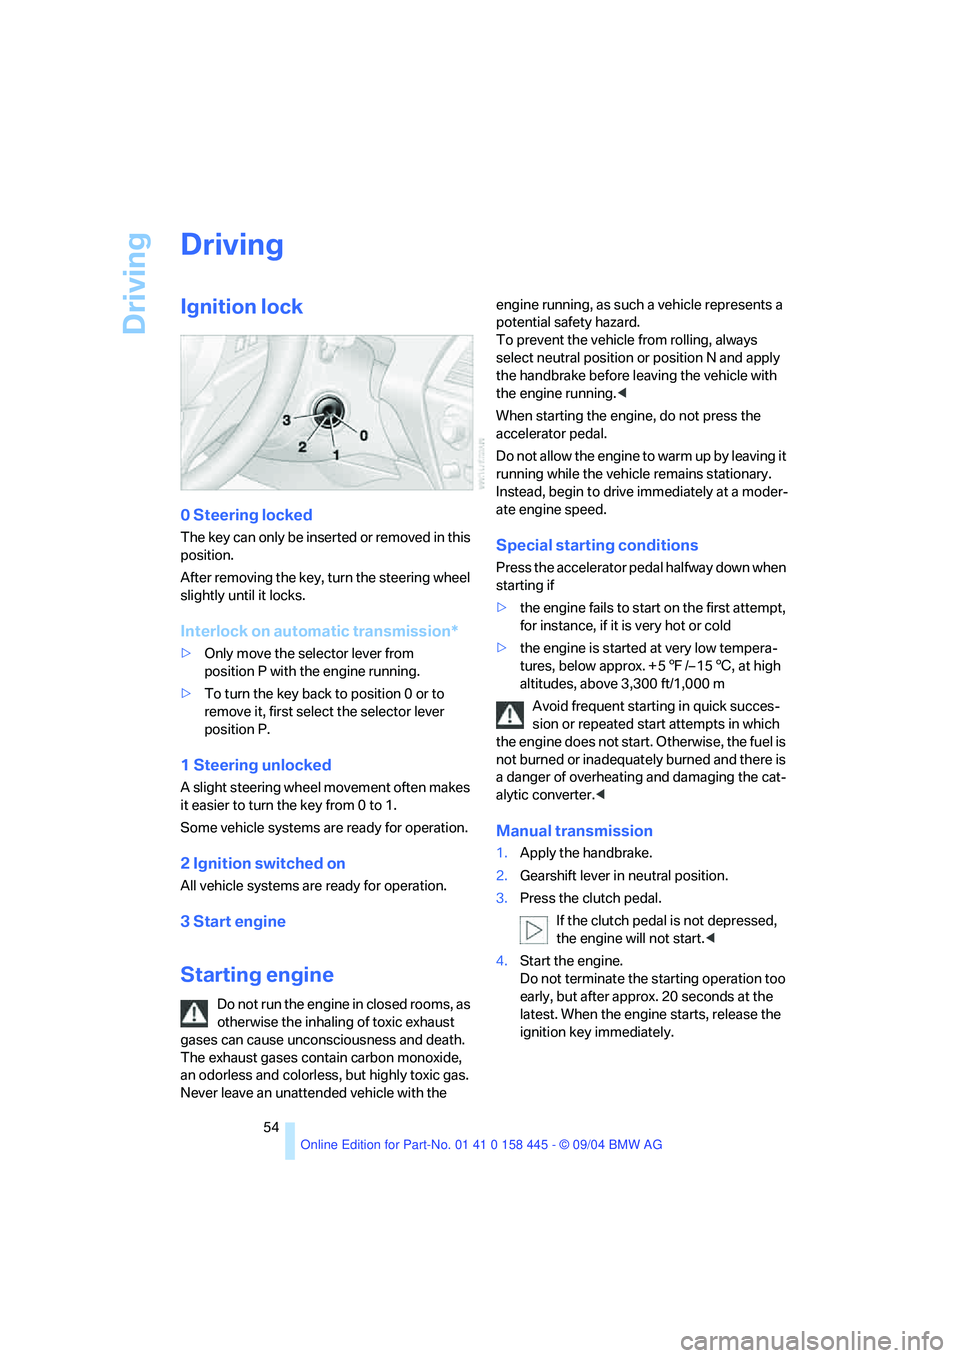
Ignition lock
0 Steering locked
The key can only be inserted or removed in this
position.
After removing the key, turn the steering wheel
slightly until it locks.
Interlock on automatic transmission*
>Only move the selector lever from
position P with the engine running.
>To turn the key back to position 0 or to
remove it, first select the selector lever
position P.
1 Steering unlocked
A slight steering wheel movement often makes
it easier to turn the key from 0 to 1.
Some vehicle systems are ready for operation.
2 Ignition switched on
All vehicle systems are ready for operation.
3 Start engine
Starting engine
Do not run the engine in closed rooms, as
otherwise the inhaling of toxic exhaust
gases can cause unconsciousness and death.
The exhaust gases contain carbon monoxide,
an odorless and colorless, but highly toxic gas.
Never leave an unattended vehicle with the engine running, as such a vehicle represents a
potential safety hazard.
To prevent the vehicle from rolling, always
select neutral position or position N and apply
the handbrake before leaving the vehicle with
the engine running.<
When starting the engine, do not press the
accelerator pedal.
Do not allow the engine to warm up by leaving it
running while the vehicle remains stationary.
Instead, begin to drive immediately at a moder-
ate engine speed.
Special starting conditions
Press the accelerator pedal halfway down when
starting if
>the engine fails to start on the first attempt,
for instance, if it is very hot or cold
>the engine is started at very low tempera-
tures, below approx. + 57/– 156, at high
altitudes, above 3,300 ft/1,000 m
Avoid frequent starting in quick succes-
sion or repeated start attempts in which
the engine does not start. Otherwise, the fuel is
not burned or inadequately burned and there is
a danger of overheating and damaging the cat-
alytic converter.<
Manual transmission
1.Apply the handbrake.
2.Gearshift lever in neutral position.
3.Press the clutch pedal.
If the clutch pedal is not depressed,
the engine will not start.<
4.Start the engine.
Do not terminate the starting operation too
early, but after approx. 20 seconds at the
latest. When the engine starts, release the
ignition key immediately.
Page 56 of 217

Controls
55Reference
At a glance
Driving tips
Communications
Navigation
Entertainment
Mobility
SMG Sequential manual transmission*
and automatic transmission*
Your BMW is equipped with the convenience
starting feature. It is sufficient to turn the igni-
tion key only briefly to position 3 and then
release it right away. The system responds by
automatically engaging the starter for a certain
period and allowing it to run until the engine
starts, after which it then disengages automati-
cally.
SMG Sequential manual transmission*
1.Press the brake pedal.
2.Engage selector-lever position N.
3.Start the engine.
If the engine does not start, engage the
last gear selected again, refer to instru-
ment cluster display, and then shift into posi-
tion N.<
Automatic transmission with
Steptronic*
1.Press the brake pedal.
2.Engage selector-lever position P or N.
3.Start the engine.
Switching off engine
Do not remove the ignition key while the
vehicle is rolling, as otherwise the steer-
ing wheel lock will immobilize the steering.
When leaving the vehicle, remove the ignition
key and lock the steering.
When parking on a downhill incline, apply the
handbrake, as otherwise the vehicle could roll
away.<
Manual transmission
1.Turn the ignition key to position 1 or 0.
2.Shift into first gear or reverse.
SMG Sequential manual transmission*
1.Engage a drive position.
2.Turn the ignition key to position 1 or 0.
A signal sounds on stopping the engine.
Automatic transmission with
Steptronic*
1.Engage selector-lever position P.
2.Turn the ignition key to position 1 or 0.
Handbrake
The handbrake is primarily intended to prevent
the vehicle from rolling while parked; it brakes
the rear wheels.
Indicator lamp
The indicator lamp lights up, and an
acoustic signal also sounds when start-
ing off. The handbrake is engaged.
Indicator lamp for Canadian models.
Engaging
The lever engages automatically.
Releasing
Pull slightly upward, press the button and lower
the lever.
If exceptional circumstances should
make it necessary to engage the hand-
brake while the vehicle is in motion, do not pull it
too strongly. In doing so, continuously press the
button of the handbrake lever.
Strong application of the handbrake can lead to
overbraking of the rear axle and associated
'fishtailing' of the vehicle rear end.
The brake lamps do not light up when the hand-
brake is engaged.
Page 57 of 217
Driving
56 Vehicles with manual or SMG transmission:
When parking on inclines, engage the hand-
brake, as even engaging the first or reverse gear
might not under certain circumstances secure
the vehicle against moving.
Vehicles with automatic transmission
*:
Engage selector-lever position P.<
To prevent corrosion and one-sided brak-
ing action, occasionally engage the hand-
brake lightly when the vehicle is slowly coming
to a stop if the traffic conditions are suitable.<
Manual transmission
When shifting into 5th/6th gear, press the
selector lever toward the right, otherwise
an inadvertent shift into 3rd or 4th gear could
damage the engine.<
Reverse gear
Select only when the vehicle is stationary.
When pressing the gearshift lever to the left,
overcome some resistance.
The backup lamps automatically switch on in
ignition key position 2.
SMG Sequential manual
transmission*
The concept
The SMG Sequential manual transmission is an
automated manual transmission in which an
electrohydraulic system handles the clutching
and gear changes.You operate the SMG using the selector lever in
the center console and two shift paddles on the
steering wheel.
It offers the following functions:
>Choice of manual or automatic mode:
Sequential mode or Drive mode
>Options of two drive programs: Normal or
Sport, refer to Dynamic Driving Control
page59
>Automatic downshifting and protection
against incorrect shifting even in sequential
operation
>Kick-down function in the Drive mode
>Acceleration assistant, refer to page59.
The SMG is operational in ignition key
position 2.
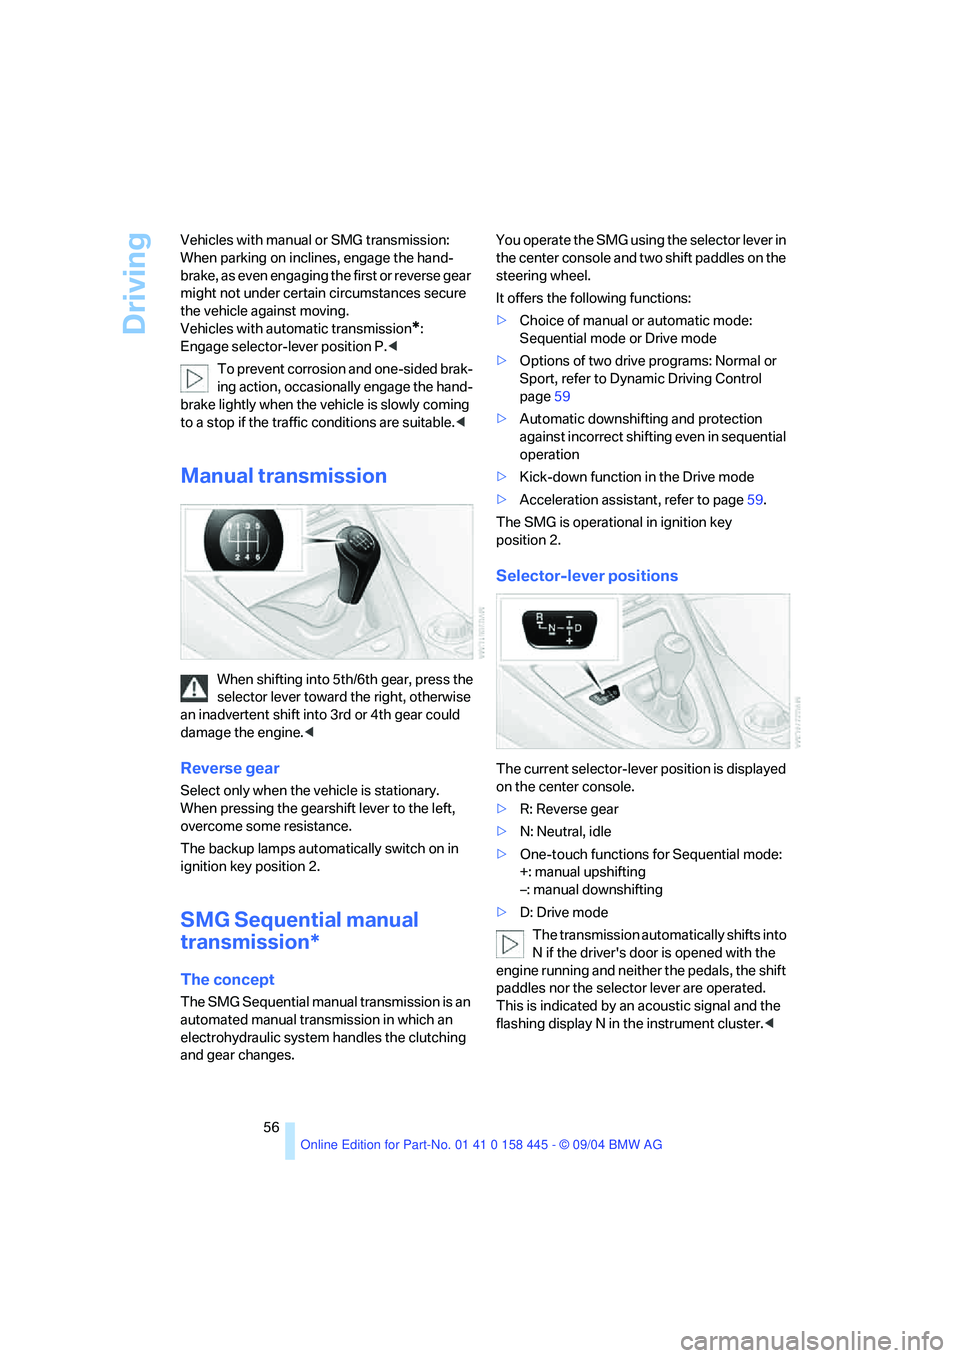
Selector-lever positions
The current selector-lever position is displayed
on the center console.
>R: Reverse gear
>N: Neutral, idle
>One-touch functions for Sequential mode:
+: manual upshifting
–: manual downshifting
>D: Drive mode
The transmission automatically shifts into
N if the driver's door is opened with the
engine running and neither the pedals, the shift
paddles nor the selector lever are operated.
This is indicated by an acoustic signal and the
flashing display N in the instrument cluster.<
Page 58 of 217
Controls
57Reference
At a glance
Driving tips
Communications
Navigation
Entertainment
Mobility
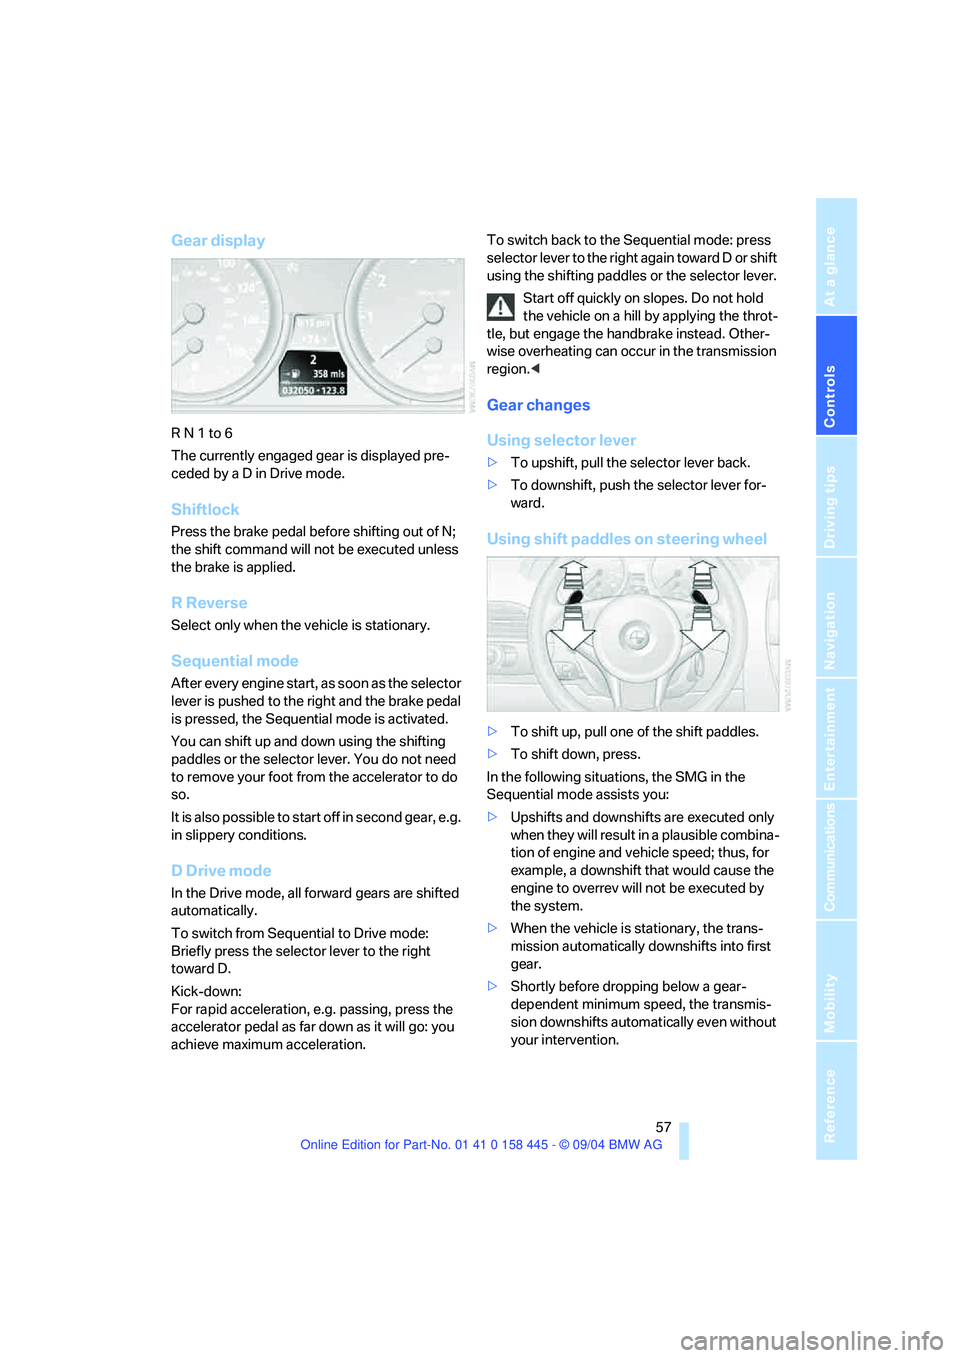
Gear display
R N 1 to 6
The currently engaged gear is displayed pre-
ceded by a D in Drive mode.
Shiftlock
Press the brake pedal before shifting out of N;
the shift command will not be executed unless
the brake is applied.
R Reverse
Select only when the vehicle is stationary.
Sequential mode
After every engine start, as soon as the selector
lever is pushed to the right and the brake pedal
is pressed, the Sequential mode is activated.
You can shift up and down using the shifting
paddles or the selector lever. You do not need
to remove your foot from the accelerator to do
so.
It is also possible to start off in second gear, e.g.
in slippery conditions.
D Drive mode
In the Drive mode, all forward gears are shifted
automatically.
To switch from Sequential to Drive mode:
Briefly press the selector lever to the right
toward D.
Kick-down:
For rapid acceleration, e.g. passing, press the
accelerator pedal as far down as it will go: you
achieve maximum acceleration.To switch back to the Sequential mode: press
selector lever to the right again toward D or shift
using the shifting paddles or the selector lever.
Start off quickly on slopes. Do not hold
the vehicle on a hill by applying the throt-
tle, but engage the handbrake instead. Other-
wise overheating can occur in the transmission
region.<
Gear changes
Using selector lever
>To upshift, pull the selector lever back.
>To downshift, push the selector lever for-
ward.
Using shift paddles on steering wheel
>To shift up, pull one of the shift paddles.
>To shift down, press.
In the following situations, the SMG in the
Sequential mode assists you:
>Upshifts and downshifts are executed only
when they will res ult in a plausible combina-
tion of engine and vehicle speed; thus, for
example, a downshift that would cause the
engine to overrev will not be executed by
the system.
>When the vehicle is stationary, the trans-
mission automatically downshifts into first
gear.
>Shortly before dropping below a gear-
dependent minimum speed, the transmis-
sion downshifts automatically even without
your intervention.
Page 82 of 217

Controls
81Reference
At a glance
Driving tips
Communications
Navigation
Entertainment
Mobility
1.Press button.
This opens the start menu.
2.Press the controller to open the menu.
3.Select "Vehicle settings" and press the
controller.
4.Select "PDC" and press the controller.
5.Select "Monitor display on" and press the
controller.
The PDC screen is activated.
The display appears on the Control Display as
soon as PDC is activated.
The setting is stored for the remote control cur-
rently in use.
System limits
Even with PDC, final responsibility for
estimating the distance between the
vehicle and any obstructions always remains
with the driver. Even when sensors are involved,
there is a blind spot in which objects cannot be
detected. The system is also subject to the
physical limits that apply to all forms of ultra-
sonic measurement, such as those encoun-
tered with thin and wedge-shaped objects, etc.
Low objects already displayed, e.g. a curb, can
also disappear from the detection area of the sensors again before a continuous tone
sounds.
Loud noises from outside and inside your vehi-
cle may prevent you from hearing the PDC sig-
nal tone.<
Do not apply high pressure spray to the
sensors for a prolonged period of time.
Keep the spray at least 4 in/10 cm away from
the sensors.<
Driving stability control
systems
Your BMW is equipped with an extended array
of systems designed to enhance and maintain
vehicle stability under extreme conditions.
ABS Antilock Brake System
ABS prevents the wheels from locking during
braking. Safe steering response is maintained
even during hard braking. This increases active
driving safety.
ABS is operational every time you start the
engine. For information on safe braking, refer to
page109.
CBC Cornering Brake Control
This system provides further enhancements to
vehicle stability and steering response when
braking while cornering or when braking during
a lane change.
Electronic brake-force distribution
This system controls the brake system's appli-
cation pressure at the rear wheels to ensure
stable deceleration.
DBC Dynamic Brake Control
When you apply the brakes rapidly, this system
automatically produces the maximum braking
force boost and thus helps to achieve the short-
est possible braking distance during panic
stops. This system exploits all of the benefits
provided by ABS.
Page 83 of 217
Technology for comfort, convenience and safety
82 Do not reduce the pressure on the brake pedal
for the duration of the brake application. When
the brake pedal is released, DBC is deactivated.
DSC Dynamic Stability Control
The system prevents slip at the drive wheels
when driving off and accelerating. DSC also
detects unstable driving conditions such as
fishtailing or sliding of the front wheels. In these
cases DSC helps the vehicle safely stay on
course within the physical limits by reducing the
engine output and through braking actions in
the individual wheels.
The DSC is operational every time you start the
engine.
The laws of physics cannot be repealed,
even with DSC. An appropriate driving
style always remains the responsibility of the
driver. Therefore, do not reduce the additional
safety margin again by taking risks.<
DTC Dynamic Traction Control
DTC is a variant of DSC for special road condi-
tions, e.g. uncleared snow-covered roads, that
is optimized for forward momentum. The sys-
tem ensures maximum forward momentum, but
with limited driving stability. Therefore, drive
with the corresponding caution.
You may find it useful to briefly activate DTC
under the following special circumstances:
>When driving on snow-covered uphill
grades, in slushy snow or on uncleared,
snow-covered roads
>When rocking a stuck vehicle free or when
starting off in deep snow or on loose ground
>When driving with snow chains
*
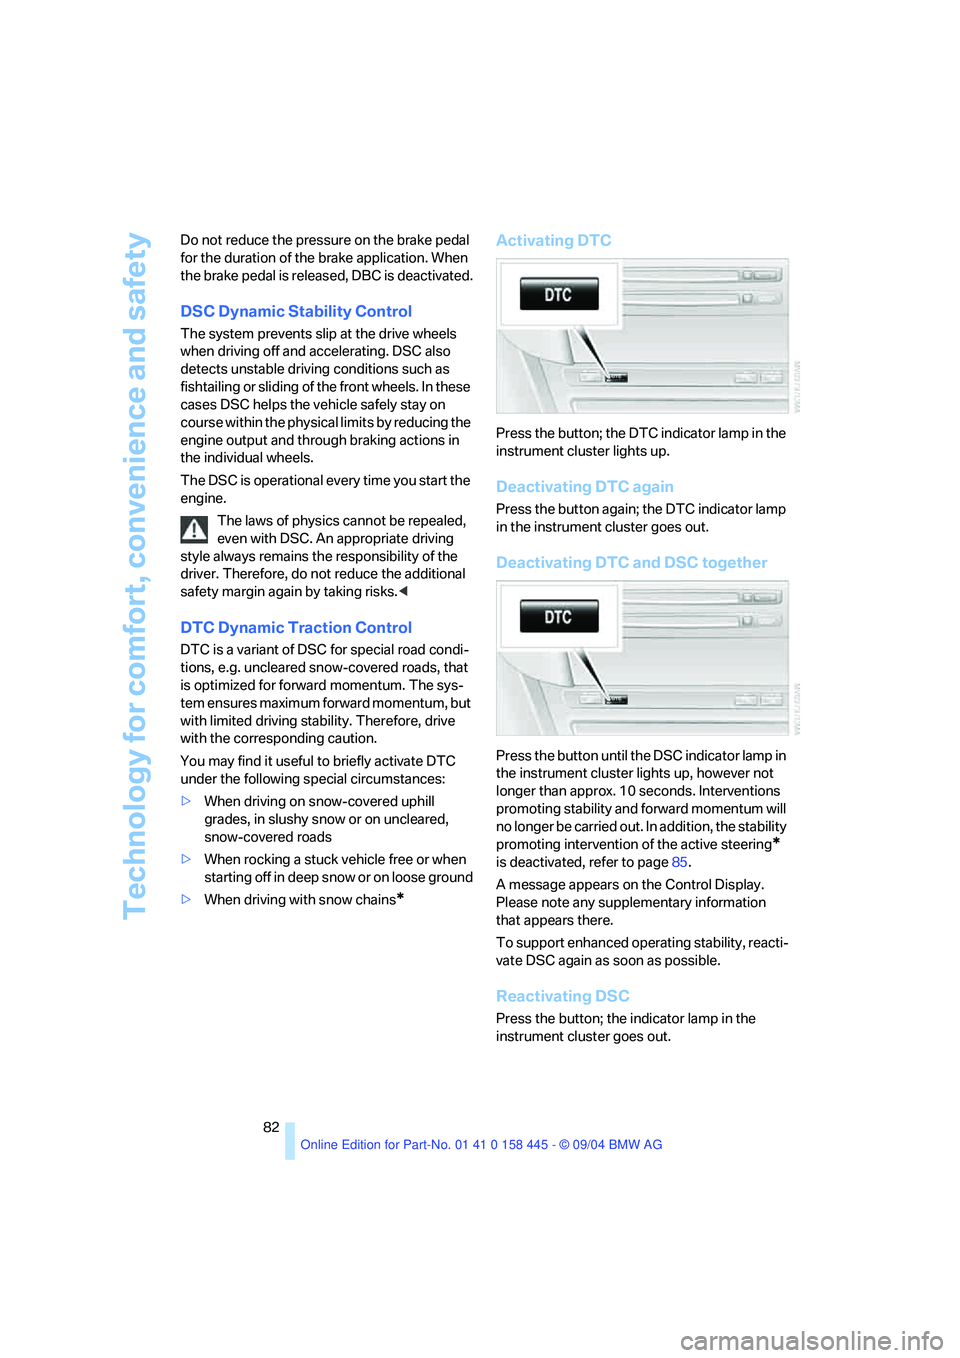
Activating DTC
Press the button; the DTC indicator lamp in the
instrument cluster lights up.
Deactivating DTC again
Press the button again; the DTC indicator lamp
in the instrument cluster goes out.
Deactivating DTC and DSC together
Press the button until the DSC indicator lamp in
the instrument cluster lights up, however not
longer than approx. 10 seconds. Interventions
promoting stability and forward momentum will
no longer be carried out. In addition, the stability
promoting intervention of the active steering
*
is deactivated, refer to page85.
A message appears on the Control Display.
Please note any supplementary information
that appears there.
To support enhanced operating stability, reacti-
vate DSC again as soon as possible.
Reactivating DSC
Press the button; the indicator lamp in the
instrument cluster goes out.