Page 214 of 442

214 Controls in detailDriving systemsDistronic*
When activated, the Distronic adaptive
cruise control system increases driving
convenience afforded by the cruise control
during travel on expressways and other
major roads.�
If the Distronic distance sensor detects
a slower moving vehicle directly ahead,
your vehicle speed will be reduced so
that you follow that vehicle at a preset
distance.
�
If there is no vehicle directly ahead of
you, Distronic will function in the same
way as cruise control (
�page 218).
Warning!
G
Distronic adaptive cruise control is no sub-
stitute for active driving involvement. It does
not react to stationary objects, nor recog-
nize or predict the curvature and lane layout
or the movement of vehicles ahead.
Distronic can only apply a maximum of 20%
of the vehicle’s braking power.
It is the driver’s responsibility at all times to
be attentive to traffic and road conditions
and to provide the steering, braking and oth-
er driving inputs necessary to retain control
of the vehicle.Warning!
G
Distronic is a convenience system. Its speed
adjustment reduction capability is intended
to make cruise control more effective and
usable when traffic speeds vary. However, it
is not intended to, nor does it, replace the
need for extreme care. The responsibility for
the vehicle speed and the distance to the ve-
hicle ahead, including most importantly
brake operation to assure safe stopping dis-
tance, always rests with the driver.
Distronic cannot take street and traffic con-
ditions into account.
Warning!
G
Distronic requires familiarity with its opera-
tional characteristics. We strongly recom-
mend that you review the following
information carefully before operating the
system.iFor operation in the USA only: This de-
vice complies with Part 15 of the
FCC Rules. Operation is subject to the
following two conditions:�
this device may not cause harmful
interference, and
�
this device must accept any inter-
ference received, including interfer-
ence that may cause undesired
operation.
Any unauthorized modification to this
device could void the user’s authority
to operate the equipment.
Page 217 of 442

217 Controls in detail
Driving systems
Distronic menu in the control system
In the Distronic menu you can read the cur-
rent settings for Distronic. What appears in
the display depends on whether Distronic
and the distance warning function are
turned on or off.�
Press buttonè orÿ repeatedly
until you see one of the following dis-
plays.
Warning!
G
An intermittent warning sounds and the
DTR warning lamp in the instrument cluster
is illuminated if the Distronic system calcu-
lates that the distance to the vehicle ahead
and your vehicle’s current speed indicate
that Distronic will not be capable of slowing
the vehicle sufficiently to maintain the pre-
set following distance, which creates a dan-
ger of a collision.
Immediately brake the vehicle to increase
the distance to the vehicle in front of you.
The warning sound is intended as a final cau-
tion that you have not interceded with your
own braking inputs to avoid a potentially
dangerous situation. Do not wait for the op-
eration of the warning signal to intercede
with your own braking, as that will result in
potentially dangerous emergency braking
which will not always result in an impact be-
ing avoided.
Tailgating increases the risk of an accident.
Warning!
G
Distronic brakes your vehicle with a maxi-
mum deceleration of 6.5 ft / s
2 (2 m / s
2).
This corresponds to about 20% of the maxi-
mum deceleration ability of your vehicle.
Distronic brakes the vehicle in an effort to
restore the preset distance or to maintain
the speed. The brake pedal is automatically
applied as this happens which results in the
brake pedal moving.
Keep driver’s foot area clear at all times, in-
cluding the area under the brake pedal. Ob-
jects stored in this area may impair pedal
movement which could interfere with the
braking ability of the Distronic system.
Do not place your foot under the brake pedal
– your foot could become caught.
Page 229 of 442

The Parktronic system is an electronic aid
designed to assist the driver during park-
ing maneuvers. It visually and audibly")
229 Controls in detail
Driving systems
Parktronic system* (Parking assist)
The Parktronic system is an electronic aid
designed to assist the driver during park-
ing maneuvers. It visually and audibly indi-
cates the relative distance between the
vehicle and an obstacle.
The Parktronic system is automatically ac-
tivated when you switch on the ignition
and release the parking brake. The
Parktronic system deactivates at speeds
over 11 mph (18 km / h). At lower speeds
the Parktronic system turns on again.The Parktronic system monitors the sur-
roundings of your vehicle with six sensors
in the front bumper and four sensors in the
rear bumper.
1Sensors in the front bumperWarning!
G
The Parktronic system is a supplemental
system. It is not intended to, nor does it re-
place, the need for extreme care. The re-
sponsibility during parking and other critical
maneuvers always rests with the driver.
Special attention must be paid to objects
with smooth surfaces or low silhouettes
(e.g. trailer couplings, painted posts, or road
curbs). Such objects may not be detected by
the system and can damage the vehicle.
The operational function of the Parktronic
system can be affected by dirty sensors, es-
pecially at times of snow and ice. See
“Cleaning the Parktronic system sensors”
(�page 305).
Interference caused by other ultrasonic sig-
nals (e.g. working jackhammers or the air
brakes of trucks) can cause the system to
send erratic indications, and should be tak-
en into consideration.
Warning!
G
Make sure that no persons or animals are in
the area in which you are maneuvering. You
could otherwise injure them.
Page 233 of 442
233 Controls in detail
Loading
�Loading
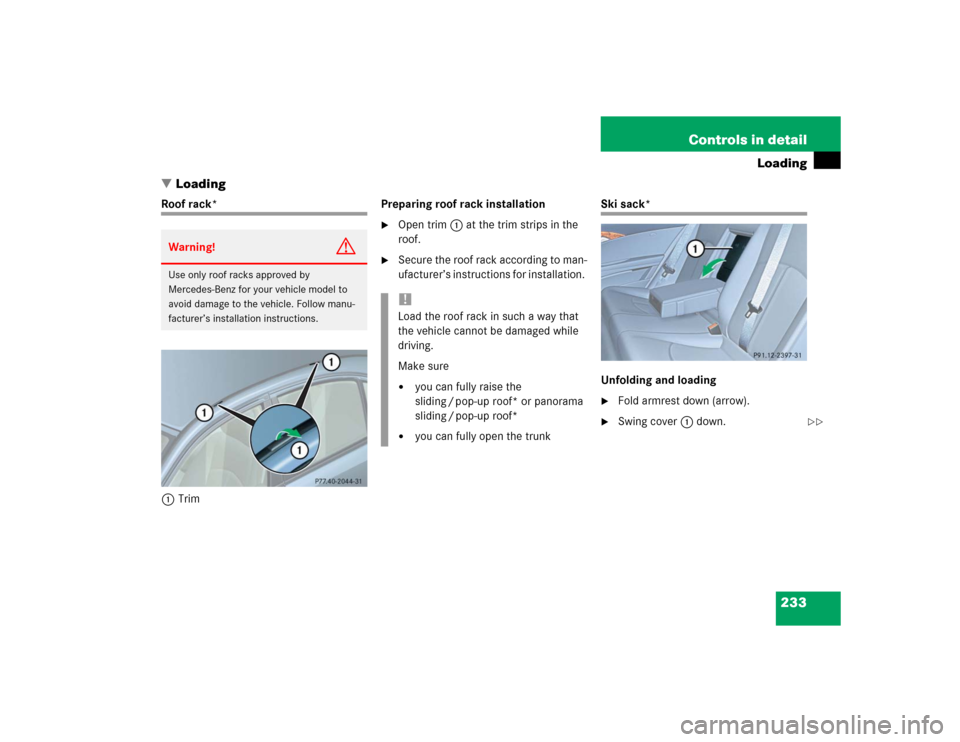
Roof rack*
1TrimPreparing roof rack installation
�
Open trim1 at the trim strips in the
roof.
�
Secure the roof rack according to man-
ufacturer’s instructions for installation.
Ski sack*
Unfolding and loading�
Fold armrest down (arrow).
�
Swing cover1 down.
Warning!
G
Use only roof racks approved by
Mercedes-Benz for your vehicle model to
avoid damage to the vehicle. Follow manu-
facturer’s installation instructions.
!Load the roof rack in such a way that
the vehicle cannot be damaged while
driving.
Make sure�
you can fully raise the
sliding / pop-up roof* or panorama
sliding / pop-up roof*
�
you can fully open the trunk
��
Page 234 of 442
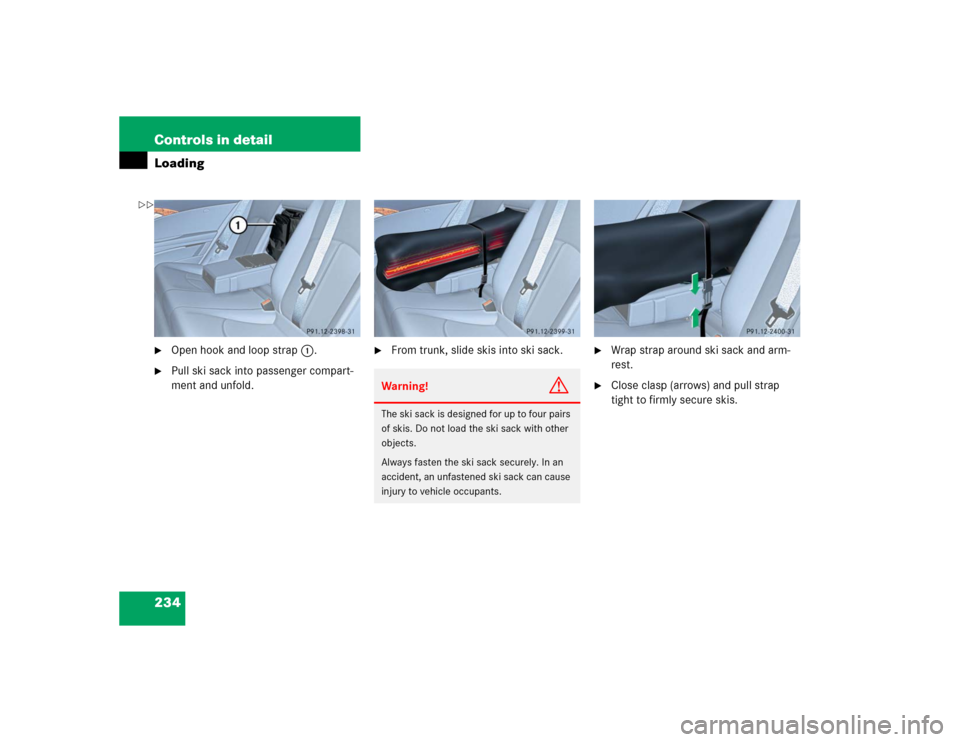
234 Controls in detailLoading�
Open hook and loop strap1.
�
Pull ski sack into passenger compart-
ment and unfold.
�
From trunk, slide skis into ski sack.
�
Wrap strap around ski sack and arm-
rest.
�
Close clasp (arrows) and pull strap
tight to firmly secure skis.
Warning!
G
The ski sack is designed for up to four pairs
of skis. Do not load the ski sack with other
objects.
Always fasten the ski sack securely. In an
accident, an unfastened ski sack can cause
injury to vehicle occupants.
��
Page 235 of 442
235 Controls in detail
Loading
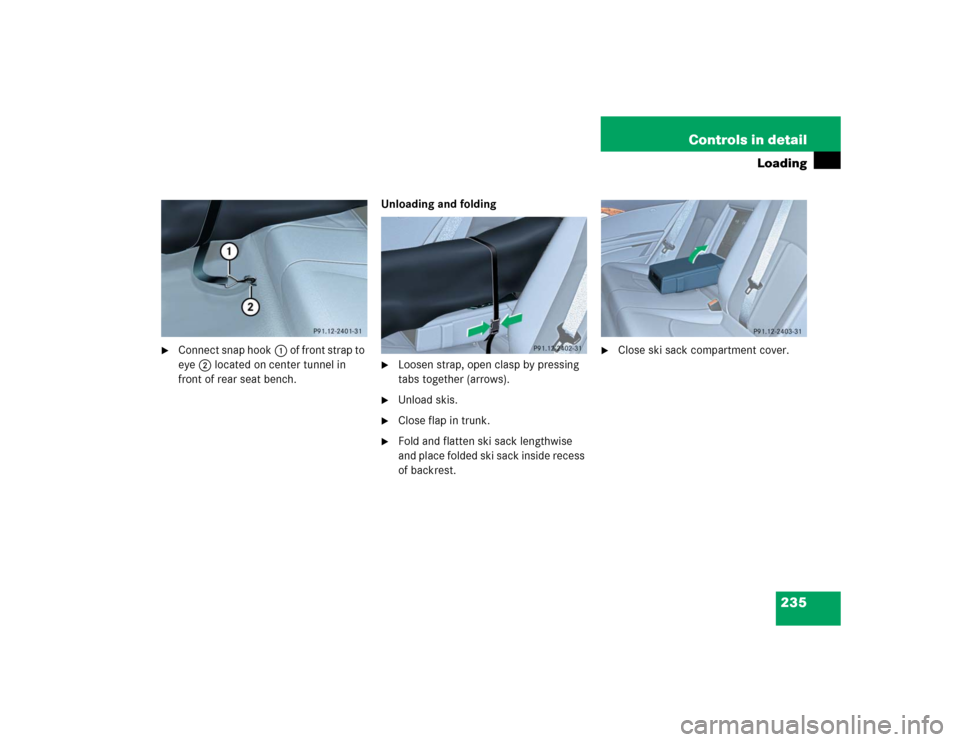
�
Connect snap hook1 of front strap to
eye2 located on center tunnel in
front of rear seat bench.Unloading and folding
�
Loosen strap, open clasp by pressing
tabs together (arrows).
�
Unload skis.
�
Close flap in trunk.
�
Fold and flatten ski sack lengthwise
and place folded ski sack inside recess
of backrest.
�
Close ski sack compartment cover.
Page 236 of 442

236 Controls in detailLoadingRemoval of ski sack
For removal of the ski sack we recommend
that you contact an authorized
Mercedes-Benz Center.
Split rear bench seat*
To expand the trunk, you can fold down the
left and right rear seat backrests.
The two sections can be folded down sep-
arately to enlarge the trunk.Folding the backrest forward
1Release handle
Warning!
G
Never drive vehicle with trunk open while
the ski sack is removed. Deadly carbon
monoxide (CO) gases may enter vehicle in-
terior, resulting in unconsciousness and
death.iTo prevent unauthorized persons from
access to the trunk, always close the
cover.
Warning!
G
When expanding the luggage compartment,
always fold the seat cushions fully forward.
Unless you are transporting cargo, the back-
rests must remain properly locked in the up-
right position.
In an accident, during hard braking or sud-
den maneuvers, loose items will be thrown
around inside the vehicle, and cause injury
to vehicle occupants unless the items are
securely fastened in the vehicle.
Always use the cargo tie down rings
(�page 241).
!You must always release the seat cush-
ion and fold it up before folding the seat
backrests forward. The upholstery on
the seat backrest may otherwise be
damaged.
Page 237 of 442
237 Controls in detail
Loading
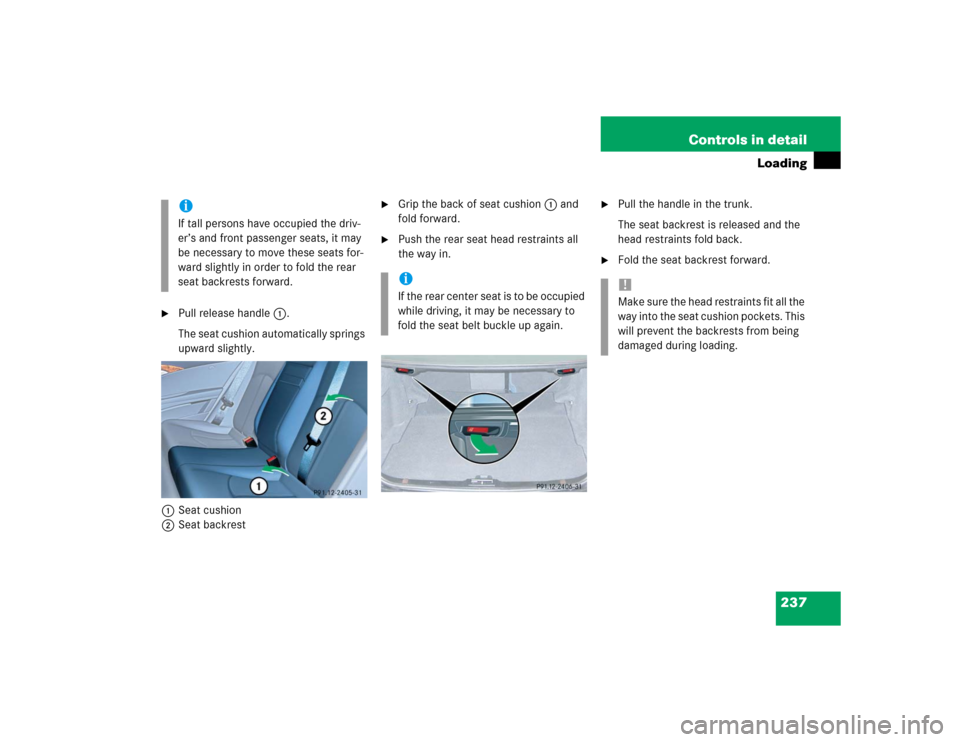
�
Pull release handle1.
The seat cushion automatically springs
upward slightly.
1Seat cushion
2Seat backrest
�
Grip the back of seat cushion1 and
fold forward.
�
Push the rear seat head restraints all
the way in.
�
Pull the handle in the trunk.
The seat backrest is released and the
head restraints fold back.
�
Fold the seat backrest forward.
iIf tall persons have occupied the driv-
er’s and front passenger seats, it may
be necessary to move these seats for-
ward slightly in order to fold the rear
seat backrests forward.
iI f t h e r e a r c e n t e r s e a t i s t o b e o c c u p i e d
while driving, it may be necessary to
fold the seat belt buckle up again.
!Make sure the head restraints fit all the
way into the seat cushion pockets. This
will prevent the backrests from being
damaged during loading.