Page 130 of 168

129 Navigation*
During route guidance
�
None option:
No symbols will be displayed on the
map.
Setting personal symbol display
�
After activating the Personal option,
press the Change soft key.
The list of available symbols will
appear.
�
Use � or ��to select a list entry.
�
Press �.
Activate or deactivate the symbol de-
pending on its previous state. Several
symbols can be activated.
�
Finally, press the Back soft key.
The setting is stored.
One of the following orientations can be
selected:
�
2D North up
Fixed map orientation, north is always
pointing up,
�
2D Heading up
Dynamic map orientation, driving direc-
tion is always pointing up.
�
In the Display menu (
�page 127),
press the View soft key.
Both options appear.Changing map orientation
�
Use � or ��to select the deactivat-
ed option.
�
Press�.
The orientation changes.
�
Finally, press the Back soft key.
iThe Change soft key is available, only if
the Personal option is selected. In
both other cases it will appear shaded
out.iEmpty square = symbol deactivated
Solid square = symbol activated
Setting map orientation
iEmpty circle = deactivated
Solid circle = activated
��
Page 131 of 168

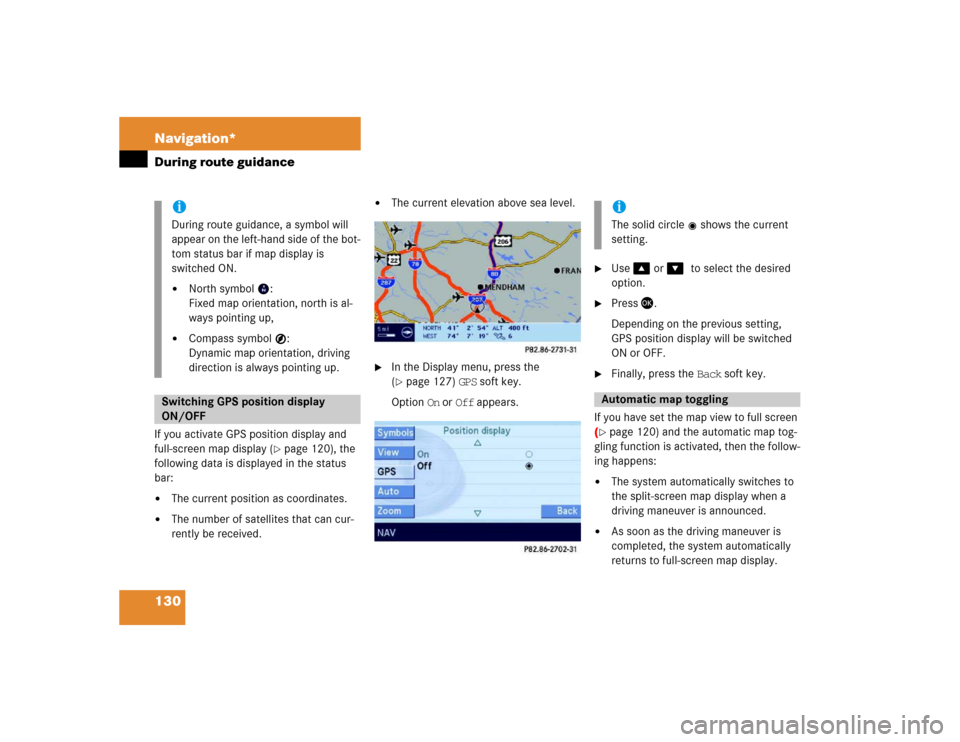
130 Navigation*During route guidanceIf you activate GPS position display and
full-screen map display (
�page 120), the
following data is displayed in the status
bar:
�
The current position as coordinates.
�
The number of satellites that can cur-
rently be received.
�
The current elevation above sea level.
�
In the Display menu, press the
(�page 127) GPS soft key.
Option On or Off appears.
�
Use � or ��to select the desired
option.
�
Press �.
Depending on the previous setting,
GPS position display will be switched
ON or OFF.
�
Finally, press the Back soft key.
If you have set the map view to full screen
(
�page 120) and the automatic map tog-
gling function is activated, then the follow-
ing happens:
�
The system automatically switches to
the split-screen map display when a
driving maneuver is announced.
�
As soon as the driving maneuver is
completed, the system automatically
returns to full-screen map display.
iDuring route guidance, a symbol will
appear on the left-hand side of the bot-
tom status bar if map display is
switched ON.�
North symbol :
Fixed map orientation, north is al-
ways pointing up,
�
Compass symbol :
Dynamic map orientation, driving
direction is always pointing up.
Switching GPS position display
ON/OFF
iThe solid circle shows the current
setting.Automatic map toggling
Page 132 of 168

131 Navigation*
During route guidance
Switching automatic toggling ON/OFF �
In the Display menu, press the
(�page 127) Auto soft key.
Option On and Off appears.
�
Use � or ��to select the desired
option.
�
Press �.Depending on the previous setting, au-
tomatic map toggling will be switched
ON or OFF.
�
Finally, press the Back soft key.
You can select whether the full-screen and
split-screen map scales are to be set to-
gether (default setting) or individually.
�
In the Display menu, press the
(�page 127) Zoom soft key.
The Default setting and Manual op-
tions appear.
�
Default setting option:
The scales for full-screen and split-
screen map display are always
identical. Changing the scale
(�page 119) on one map likewise
changes the scale of the other map.
�
Manual option:
The scales can be different. Chang-
ing the scale on one map has no ef-
fect on the current scale of the
other map.
�
Use � or � to select the desired op-
tion.
�
Press �.
Depending on the previous setting, the
Default setting (identical scale) or
Manual (individual scale) option is acti-
vated.
�
Finally, press the Back soft key.
iThe solid circle shows the current
setting.
Scales for full-screen and
split-screen map display
iThe solid circle shows the current
setting.
Page 133 of 168

132 Navigation*Last destinations and destination memoryThe Last destinations memory auto-
matically stores the last destination for
which route guidance had been started. A
maximum of 50 destinations can be
stored.
The current vehicle position can also be
stored as a destination in this memory
(�page 101 or 127). Such destinations
are marked with the symbol.
Retrieving last destinations
�
Call up the Navigation main menu
(�page 98).
�
Use� to select the Last
destinations menu item.
�
Press �.
The list of last destinations is dis-
played. The most recently stored desti-
nation is at the top of the list.Selecting a destination from the last
destinations memory
�
Retrieve the last destinations
(�page 132).
�
Use� or � to select an entry.
The Page soft keys allow scrolling
through the list page by page.The following options are now available:
�
Start route guidance to the selected
entry (
�page 133).
�
Delete the selected entry
(�page 133).
�
Store the selected entry in the destina-
tion memory:�
Press the Save soft key for this pur-
pose.
Refer to “Saving a destination in the
destination memory” section
(�page 133) for the remaining
steps.
�
Display of details on the selected entry
(if available):�
Press the Details soft key for this
purpose.
Last destinations memory
Page 134 of 168

133 Navigation*
Last destinations and destination memory
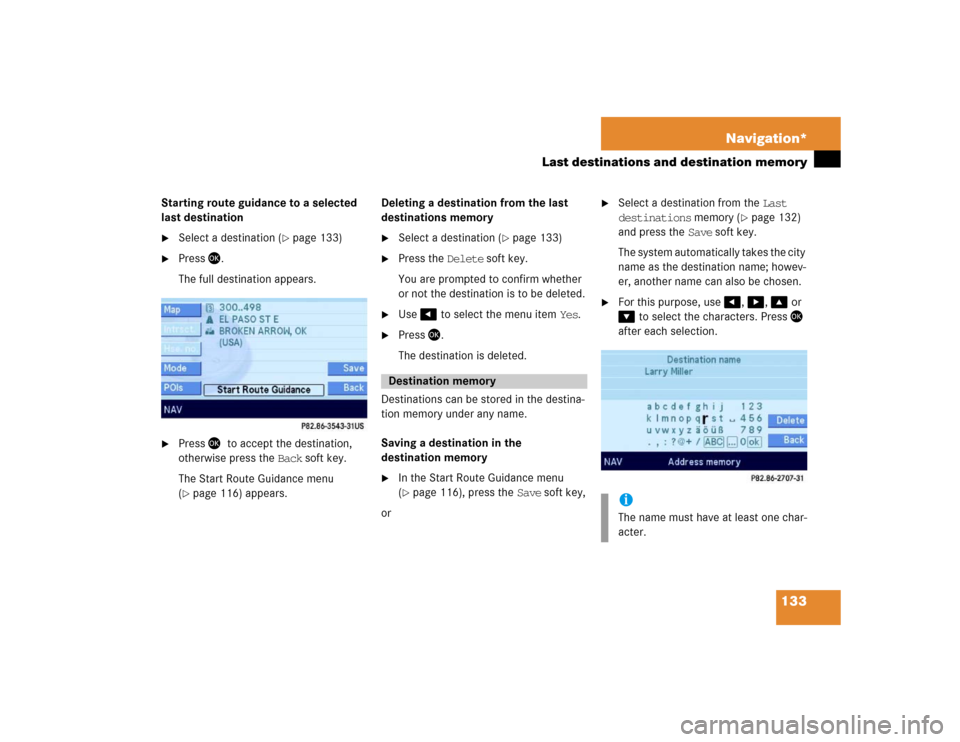
Starting route guidance to a selected
last destination �
Select a destination (
�page 133)
�
Press �.
The full destination appears.
�
Press ��to accept the destination,
otherwise press the Back soft key.
The Start Route Guidance menu
(�page 116) appears.Deleting a destination from the last
destinations memory
�
Select a destination (
�page 133)
�
Press the Delete soft key.
You are prompted to confirm whether
or not the destination is to be deleted.
�
Use � to select the menu item Yes.
�
Press �.
The destination is deleted.
Destinations can be stored in the destina-
tion memory under any name.
Saving a destination in the
destination memory
�
In the Start Route Guidance menu
(�page 116), press the Save soft key,
or
�
Select a destination from the Last
destinations memory (
�page 132)
and press the Save soft key.
The system automatically takes the city
name as the destination name; howev-
er, another name can also be chosen.
�
For this purpose, use �, �, � or
� to select the characters. Press �
after each selection.
Destination memory
iThe name must have at least one char-
acter.
Page 135 of 168

134 Navigation*Last destinations and destination memory�
If necessary, press the Delete soft key
to delete the character last entered.
�
Upon completion of the name entry
press and hold � for approx. 2 sec-
onds,
or
�
Use� or � to select the sym-
bol and press �.
The system will save the address.
Calling up the destination memory
�
Call up the Navigation main menu
(�page 98).
�
Use � or � to select the
Destination memory menu item.
�
Press �.
The destination memory appears.Selecting a destination in the
Destination memory
�
Call up the destination memory
(�page 134).
�
Use�, �, �, or � to select the
desired entry.
The following options are now available:
�
Start route guidance to the selected
destination (
�page 135).
�
Delete the selected destination
(�page 135).
�
Display the details of the selected des-
tination (if available):�
Press the Details soft key for this
purpose.
iDo not confuse the Delete soft key
(deletion of the last character) with the
Back soft key (deletion of the complete
entry).
ok
Page 136 of 168
135 Navigation*
Last destinations and destination memory
Starting route guidance to a destina-
tion stored in the destination memory �
Select a destination (
�page 134).
�
Press �.
The Start Route Guidance menu
(�page 116) appears.
Deleting a destination from the destina-
tion memory
�
Select a destination (
�page 134).
�
Press the Delete soft key:
A delete prompt appears.
�
Use � to select the menu item Yes.
�
Press �.
The system deletes the entry from the
destination memory.
Page 137 of 168
136 Navigation*POIs (Points of Interest)POIs include gas stations, airports, parking
areas, rest stops, or hospitals, etc.
Via Navigation main menu�
Call up the Navigation main menu
(�page 98).
The Navigation main menu appears.
�
Use� to select the POIs menu item.
�
Press �.
The POIs main menu appears
(�page 137).
Using the map
A POI shown on the map can be selected
(
�page 140).
Via Enter Destination menu
�
Open the Enter Destination menu
(�page 102) A POI in the vicinity of a city can now be
selected,
or
If a further location detail, e.g. a street,
is to be entered:
A POI in the vicinity of this detailed lo-
cation can be selected:
�
Enter the desired details of a destina-
tion (
�page 102).
�
Press the POIs soft key.
�
Proceed as described in the “Selecting
POI in the local area of the current loca-
tion” section under “Selecting a POI
category” (
�page 137).
Entering POIs