Page 36 of 168
35 Audio
Radio operation
� Radio operation
�
Open the Audio main menu
(�page 34).
�
Press the Radio soft key.
The Radio main menu appears. The sta-
tion last tuned to will begin to play. In this example:
�
Weather Band
�
Channel 1 = current station
�
Press the FM/AM soft key in the Radio
main menu.
Alternatingly the Radio main menu for
the FM or AM wavebands appears. The
station last tuned to will begin to play.The waveband is indicated in the center
of the status bar.
In this example:
�
FM = FM waveband
�
1 = selected station is stored on
preset 1
Warning
G
In order to avoid distraction which could
lead to an accident, the driver should enter
system settings with the vehicle at a stand-
still and operate the audio system only when
road, weather and traffic conditions permit.
Bear in mind that at a speed of just 30 mph
(approximately 50 km/h), your vehicle is
covering a distance of 44 feet (approximate-
ly 14 m) every second.Switching to radio mode
Switching wavebands
Page 44 of 168
43 Audio
Single CD operation
�
Open the Single CD main menu
(�page 44).
or
�
Load an audio CD into the COMAND
CD drive.Switching to Single CD modeLoading a CDWarning
G
In order to avoid distraction which could
lead to an accident, the driver should insert
CDs with the vehicle at a standstill and oper-
ate the audio system only when road, weath-
er and traffic conditions permit.
Bear in mind that at a speed of just 30 mph
(approximately 50 km/h), your vehicle is
covering a distance of 44 feet (approximate-
ly 14 m) every second.
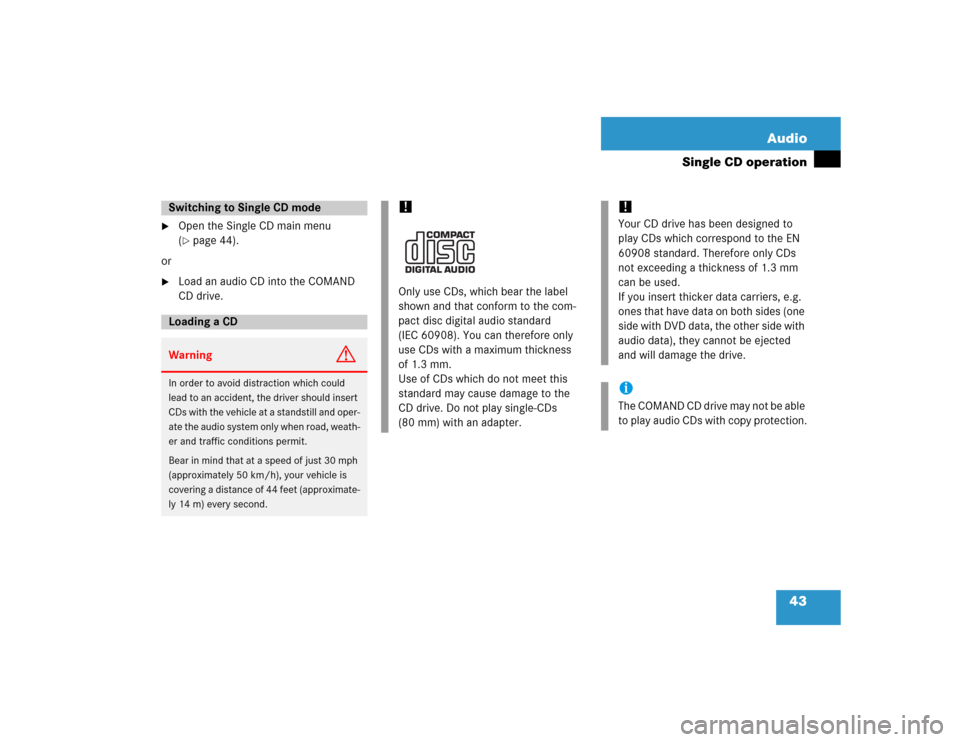
!Only use CDs, which bear the label
shown and that conform to the com-
pact disc digital audio standard
(IEC 60908). You can therefore only
use CDs with a maximum thickness
of 1.3 mm.
Use of CDs which do not meet this
standard may cause damage to the
CD drive. Do not play single-CDs
(80 mm) with an adapter.
!Your CD drive has been designed to
play CDs which correspond to the EN
60908 standard. Therefore only CDs
not exceeding a thickness of 1.3 mm
can be used.
If you insert thicker data carriers, e.g.
ones that have data on both sides (one
side with DVD data, the other side with
audio data), they cannot be ejected
and will damage the drive.iThe COMAND CD drive may not be able
to play audio CDs with copy protection.
Page 45 of 168
44 AudioSingle CD operationThe COMAND CD drive holds one CD. The
slot for inserting a CD is located above the
display (
�page 15).
�
Insert a CD into the CD slot while
COMAND is switched ON. Insert the
CD with the label facing up.
COMAND pulls the CD in. If the CD is
an audio CD, the system switches to
CD mode.
�
Press�.
COMAND ejects the CD.
�
Remove the CD from the slot.
If you do not remove the CD from the
slot within approx. 15 seconds, the CD
is pulled back into the CD drive.
�
Open the Audio main menu
(�page 34).
�
Press the CD soft key.
The CD main menu appears.
If the CD contains CD text data, the
Single CD main menu will show the title
of the track currently playing.The status bar also contains the follow-
ing:
�
the track number and total number
of tracks
�
elapsed time of the track
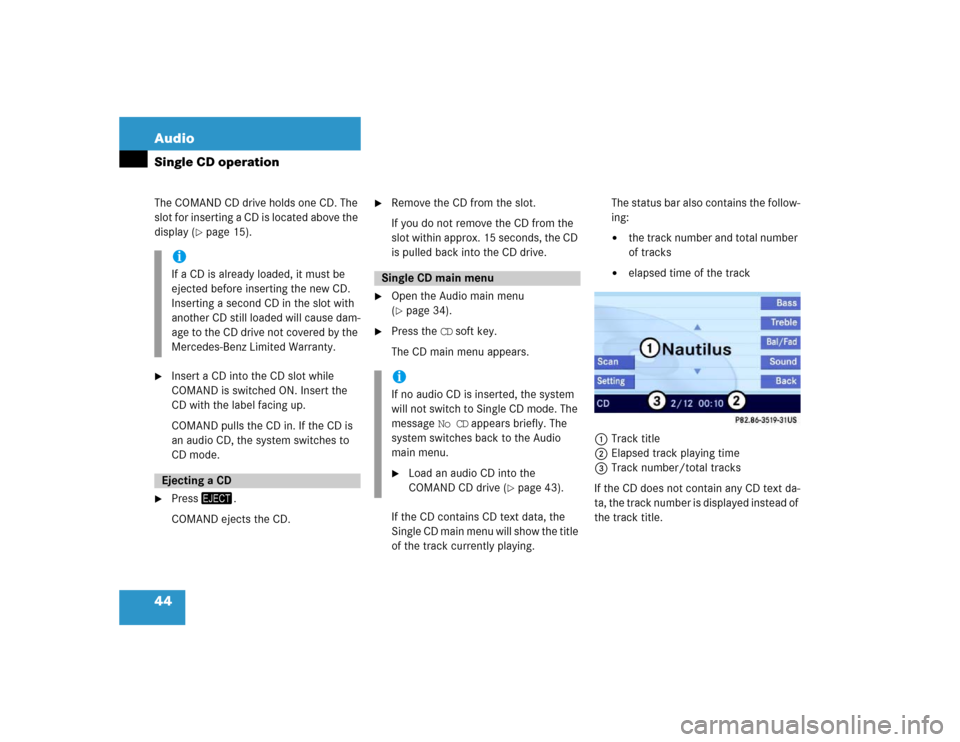
1Track title
2Elapsed track playing time
3Track number/total tracks
If the CD does not contain any CD text da-
ta, the track number is displayed instead of
the track title.
iIf a CD is already loaded, it must be
ejected before inserting the new CD.
Inserting a second CD in the slot with
another CD still loaded will cause dam-
age to the CD drive not covered by the
Mercedes-Benz Limited Warranty. Ejecting a CD
Single CD main menuiIf no audio CD is inserted, the system
will not switch to Single CD mode. The
message No CD appears briefly. The
system switches back to the Audio
main menu.�
Load an audio CD into the
COMAND CD drive (
�page 43).
Page 50 of 168
49 Audio
CD changer* operation
�
Open the CD changer* main menu
(�page 54).
or
�
Load an audio CD into the CD changer*
(�page 49).
The CD changer* can play audio CDs.
The CD changer* is concealed behind the
control panel faceplate in the center con-
sole.
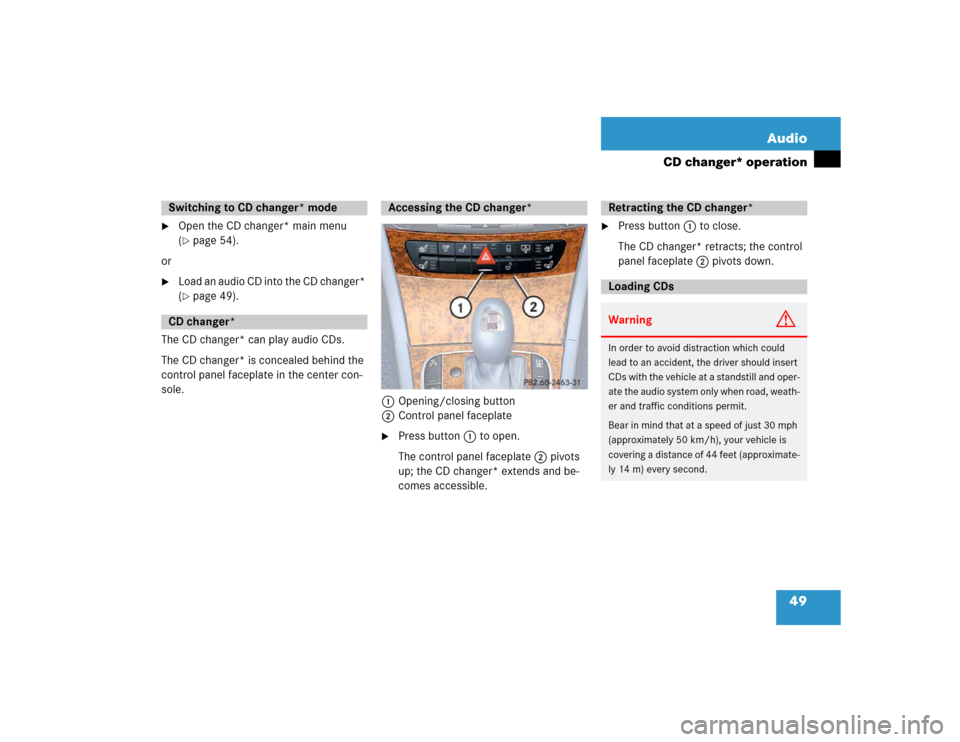
1Opening/closing button
2Control panel faceplate
�
Press button 1 to open.
The control panel faceplate 2 pivots
up; the CD changer* extends and be-
comes accessible.
�
Press button 1 to close.
The CD changer* retracts; the control
panel faceplate 2 pivots down.
Switching to CD changer* modeCD changer*
Accessing the CD changer*
Retracting the CD changer* Loading CDsWarning
G
In order to avoid distraction which could
lead to an accident, the driver should insert
CDs with the vehicle at a standstill and oper-
ate the audio system only when road, weath-
er and traffic conditions permit.
Bear in mind that at a speed of just 30 mph
(approximately 50 km/h), your vehicle is
covering a distance of 44 feet (approximate-
ly 14 m) every second.
Page 54 of 168
53 Audio
CD changer* operation
The following options are available:�
Ejecting all CDs (
�page 54)
�
Ejecting one CD
Ejecting one CD
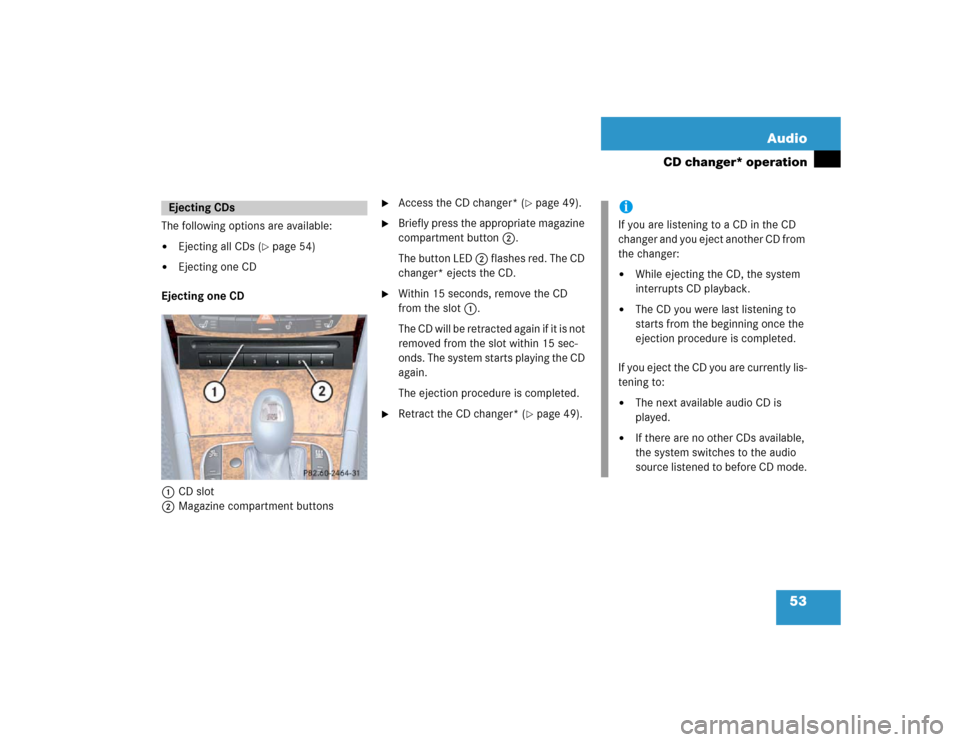
1CD slot
2Magazine compartment buttons
�
Access the CD changer* (
�page 49).
�
Briefly press the appropriate magazine
compartment button 2.
The button LED 2 flashes red. The CD
changer* ejects the CD.
�
Within 15 seconds, remove the CD
from the slot 1.
The CD will be retracted again if it is not
removed from the slot within 15 sec-
onds. The system starts playing the CD
again.
The ejection procedure is completed.
�
Retract the CD changer* (
�page 49).
Ejecting CDs
iIf you are listening to a CD in the CD
changer and you eject another CD from
the changer:�
While ejecting the CD, the system
interrupts CD playback.
�
The CD you were last listening to
starts from the beginning once the
ejection procedure is completed.
If you eject the CD you are currently lis-
tening to:
�
The next available audio CD is
played.
�
If there are no other CDs available,
the system switches to the audio
source listened to before CD mode.
Page 55 of 168
54 AudioCD changer* operationEjecting all CDs �
Access the CD changer* (
�page 49).
�
Press and hold the button of a loaded
magazine compartment 2 for more
than 2 seconds.
The button LEDs of all loaded magazine
compartments will briefly flash red,
several times.
The CD changer* ejects the CDs one
after another.
�
Within 15 seconds, remove each CD
from the slot 1.
The CD will be retracted again if it is not
removed from the slot within 15 sec-
onds. The system starts playing the CD
again.The ejection procedure is completed when
all CDs are removed, or when the proce-
dure is aborted by the CD changer*.
�
Retract the CD changer* (
�page 49).
�
Open the Audio main menu
(�page 34).
�
Press the CDC soft key.
The CD changer* main menu appears.
You will hear the CD listened to last. If
the CD listened to last is no longer
available, the unit plays the next avail-
able audio CD.If the CD contains CD text data, the CD
changer* main menu will show the
name of the CD and the title of the
track currently playing.
The status bar also contains the follow-
ing:
�
the track number and total number
of tracks
�
elapsed playing time of the track
CD changer* main menuiThe CDC soft key will only be vis-
ible if a CD changer* is connect-
ed.
iIf no audio CD is inserted, the system
will not switch to CD changer* mode.
The message No CD appears briefly.
The system switches back to the Audio
main menu.�
Load an audio CD into the
CD changer* (
�page 49).
Page 67 of 168
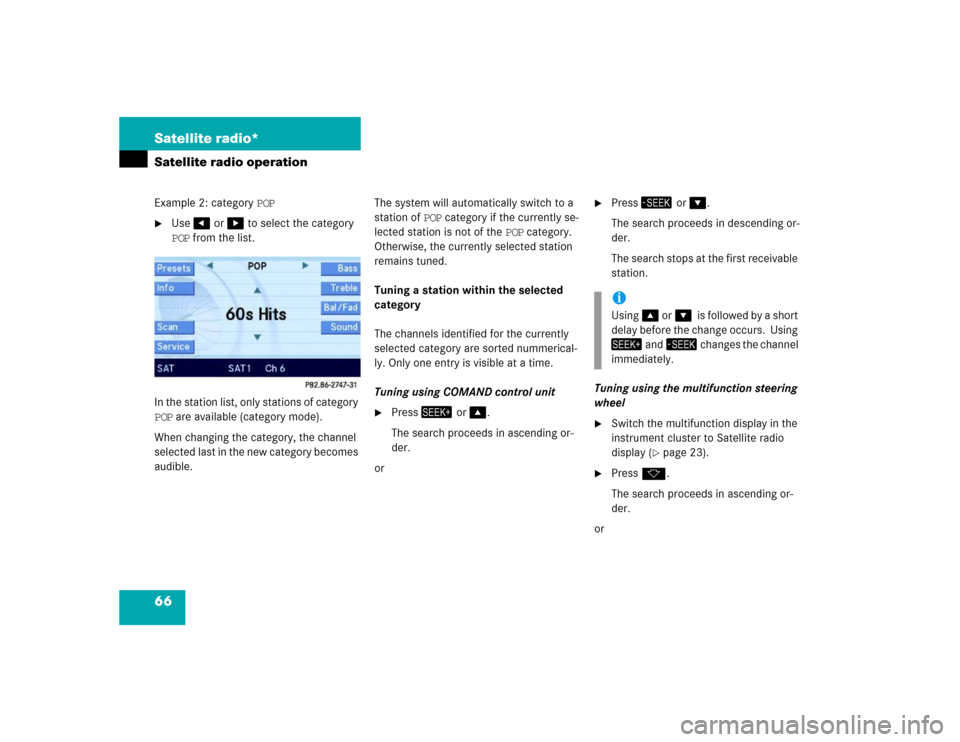
66 Satellite radio*Satellite radio operationExample 2: category POP�
Use� or � to select the category
POP from the list.
In the station list, only stations of category
POP are available (category mode).
When changing the category, the channel
selected last in the new category becomes
audible.The system will automatically switch to a
station of POP category if the currently se-
lected station is not of the POP category.
Otherwise, the currently selected station
remains tuned.
Tuning a station within the selected
category
The channels identified for the currently
selected category are sorted nummerical-
ly. Only one entry is visible at a time.
Tuning using COMAND control unit
�
Press� or �.
The search proceeds in ascending or-
der.
or
�
Press� or �.
The search proceeds in descending or-
der.
The search stops at the first receivable
station.
Tuning using the multifunction steering
wheel
�
Switch the multifunction display in the
instrument cluster to Satellite radio
display (
�page 23).
�
Pressk.
The search proceeds in ascending or-
der.
oriUsing� or��is followed by a short
delay before the change occurs. Using
� and� changes the channel
immediately.
Page 68 of 168
67 Satellite radio*
Satellite radio operation
�
Pressj.
The search proceeds in descending or-
der.
The search stops at the first receivable
station.
Tuning via scan search
Scan search is characterized as follows:
�
Scan search plays a channel for
approx. 8 seconds and then skips to
the next channel within the current
category.
�
Scan search can be terminated manu-
ally.
�
Scan search stops automatically at the
station that was playing when scan
search was started.
�
Press the Scan soft key.
The scan search starts.
�
Press the Scan soft key again.
The scan search stops.
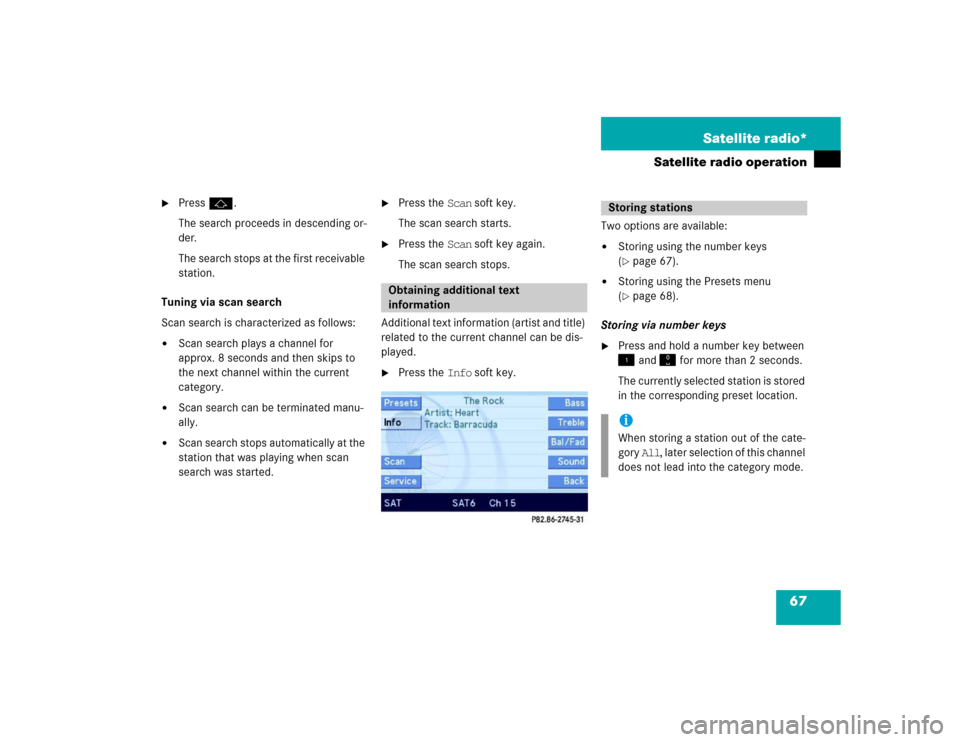
Additional text information (artist and title)
related to the current channel can be dis-
played.
�
Press the Info soft key.Two options are available:
�
Storing using the number keys
(�page 67).
�
Storing using the Presets menu
(�page 68).
Storing via number keys
�
Press and hold a number key between
� and � for more than 2 seconds.
The currently selected station is stored
in the corresponding preset location.
Obtaining additional text
information
Storing stationsiWhen storing a station out of the cate-
gory All, later selection of this channel
does not lead into the category mode.