2004 FIAT MULTIPLA display
[x] Cancel search: displayPage 66 of 202

65
CONNECT NAV
NAVIGATOR
Adjusting display brightness
Proceed as follows to adjust display
brightness:
1) Open the IMPOSTAZIONI (SET-
TINGS) menu fig. 85as described
above
2) Select DISPLAY by turning the
knob/button (11)
3) Press the knob/button (11) to
confirm the selection
4) Select LUMINOSITÀ (BRIGHT-
NESS) by turning the knob/button (11)
fig. 86
5) press the knob/button (11) to
confirm the selection
6) select GIORNO (DAY) or
NOTTE (NIGHT) by turning the
knob/button (11) to adjust brightness
7) press the knob/button (11) to
confirm the setting.
Press ESC (9) to return to the pre-
vious menu.ADJUSTING POWER-ON, TA
ANNOUNCEMENT,
MESSAGE
The power-on volume (ACCENS.)
(POWER-ON), the minimum traffic
announcement volume (TA-MIN), the
minimum volume for voice messages
and warnings (NAV-MIN) can be set
in the IMPOSTAZIONI (SETTINGS)
menu.
IMPORTANT The system volume
overrides the IMPOSTAZIONI (SET-
TINGS) volume when it is higher than
the minimum setup volume. Adjusting the fade effect
Proceed as follows to adjust the fade
effect:
1) open the IMPOSTAZIONI (SET-
TINGS) menu fig. 85as described
above
2) Select DISPLAY by turning the
knob/button (11)
3) press the knob/button (11) to
confirm the selection
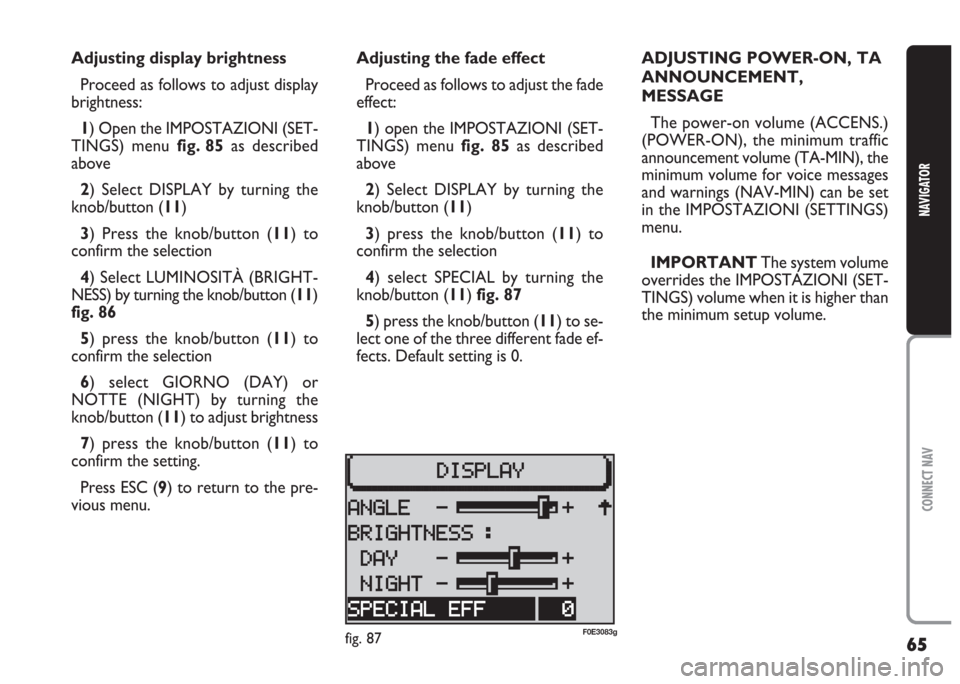
4) select SPECIAL by turning the
knob/button (11) fig. 87
5) press the knob/button (11) to se-
lect one of the three different fade ef-
fects. Default setting is 0.
fig. 87F0E3083g
Page 69 of 202

68
CONNECT NAV
NAVIGATOR
Selecting the time zone
Proceed as follows to change the
time zone:
1) open the IMPOSTAZIONI (SET-
TINGS) menu fig. 85as shown above
2) select OROLOGIO (CLOCK) by
turning the knob/button (11)
3) press the knob/button (11) to
confirm the selection
4) select IMPOSTAZIONI (SET-
TINGS) by turning the knob/button
(11)
5) select FUSO ORARIO (TIME
ZONE) by turning the knob/button
(11) fig. 90
6) press the knob/button (11) to
confirm the selection
7) turn the knob/button (11) to set
the time zone (example: –2, –1, 0, +1,
+2, etc.)
8) confirm the selection by pressing
the knob/button (11).
Press ESC (9) to return to the pre-
vious menu.Switching summer time
on and off
The system will automatically switch
to summer time when the function is
on. Proceed as follows to switch sum-
mer time on and off:
1) open the IMPOSTAZIONI (SET-
TINGS) menu fig. 85as shown above
2) select OROLOGIO (CLOCK) by
turning the knob/button (11)
3) press the knob/button (11) to
confirm the selection
4) select IMPOSTAZIONI (SET-
TINGS) by turning the knob/button
(11)
5) select ORA LEGALE (SUMMER
TIME) by turning the knob/button (11)
fig. 90
6) press the knob/button (11) to dis-
play summer time ON or OFF.
The system time will be automatically
adjusted. The message ON or OFF ac-
cording to the selection will appear on
the display.Switching the main time
on and off
Proceed as follows to switch the
main time function on and off:
1) open the IMPOSTAZIONI (SET-
TINGS) menu fig. 85as shown above
2) select OROLOGIO (CLOCK)
fig. 91 by turning the knob/button
(11)
3) press the knob/button (11) to
confirm the selection
4) select OROL. PRINCIP. (MAIN
CLOCK) by turning the knob/button
(11)
5) press the knob/button (11) to se-
lect ON or OFF
fig. 91F0E3086g
Page 70 of 202

69
CONNECT NAV
NAVIGATOR
Switching the time status
on and off
Proceed as follows to switch the
time status function on and off:
1) open the IMPOSTAZIONI (SET-
TINGS) menu fig. 85as shown above
2) select OROLOGIO (CLOCK) by
turning the knob/button (11)
3) press the knob/button (11) to
confirm the selection
4) select VISUALIZZA (DISPLAY) by
turning the knob/button (11)
5) press the knob/button (11) to se-
lect ON or OFF
Setting the exact time
manually
Proceed as follows to set manually
the exact time (e.g.: when no GPS
satellite signal is received):1) open the IMPOSTAZIONI (SET-
TINGS) menu fig. 85as shown above
2) select OROLOGIO (CLOCK) by
turning the knob/button (11)
3) press the knob/button (11) to
confirm the selection
4) select IMPOSTAZIONI (SET-
TINGS) by turning the knob/button
(11)
5) select ORA SISTEM. (SYS. TIME)
by turning the knob/button (11)
6) press the knob/button (11) to
confirm the selection: hours are dis-
played with reverse writing
7) turn the knob/button (11) to set
hours
8) press the knob/button (11) to
confirm the selection: minutes are dis-
played with reverse writing
9) turn the knob/button (11) to set
minutes
10) press the knob/button (11) to
confirm the selectionSELECTING THE LANGUAGE
You can select the language for mes-
sages on the display. “Metric” (dis-
tances in kilometres) and “imperial”
(distances in miles) versions are of-
fered for English
1) open the IMPOSTAZIONI (SET-
TINGS) menu fig. 85as shown above
2) select LINGUA (LANGUAGE) by
turning the knob/button (11)
3) press the knob/button (11) to
confirm the selection. A list of avail-
able languages will be displayed
IMPORTANT For certain coun-
tries (e.g. Denmark, Sweden and Por-
tugal), the voice messages related to
Navigation are in English whereas dis-
played messages are written in the lan-
guage of each country.
Page 71 of 202

70
CONNECT NAV
NAVIGATOR
GPS STATUS (INFO GPS)
Proceed as follows to display the
number of GPS satellites which can be
received and the car position:
1) press the NAV button (12) to
open the main navigation menu
2) press the MEN button (10) to
open the IMPOSTAZIONI (SET-
TINGS) menu
3) select INSTALLAZIONE (IN-
STALL) by turning the knob/button
(11) fig. 96 4) select the required language by
turning the knob/button (11)
5) confirm the selection by pressing
the knob/button (11).
A new language will be loaded. At the
end of the loading operation with a
CD inserted in the drive a confirma-
tion voice message will be heard.
The device will return to the IM-
POSTAZIONI (SETTINGS) menu.4) press the knob/button (11) to
confirm the selection. The INSTAL-
LAZIONE (INSTALL) menu will ap-
pear on the displayfig. 97
5) select INFO GPS (GPS STATUS)
by turning the knob/button (11)
6) confirm the selection by pressing
the knob/button (11).
Press ESC (9) to return to the pre-
vious menu.
fig. 92F0E3080gfig. 93F0E3088g
Page 73 of 202

72
CONNECT NAV
NAVIGATOR
RESETTING
DEFAULT SETTINGS
To reset the sound/navigation system
default settings:
1) press the NAV button (12) to
open the main navigation menu
2) press the MEN button (10) to
open the IMPOSTAZIONI (SET-
TINGS) menu
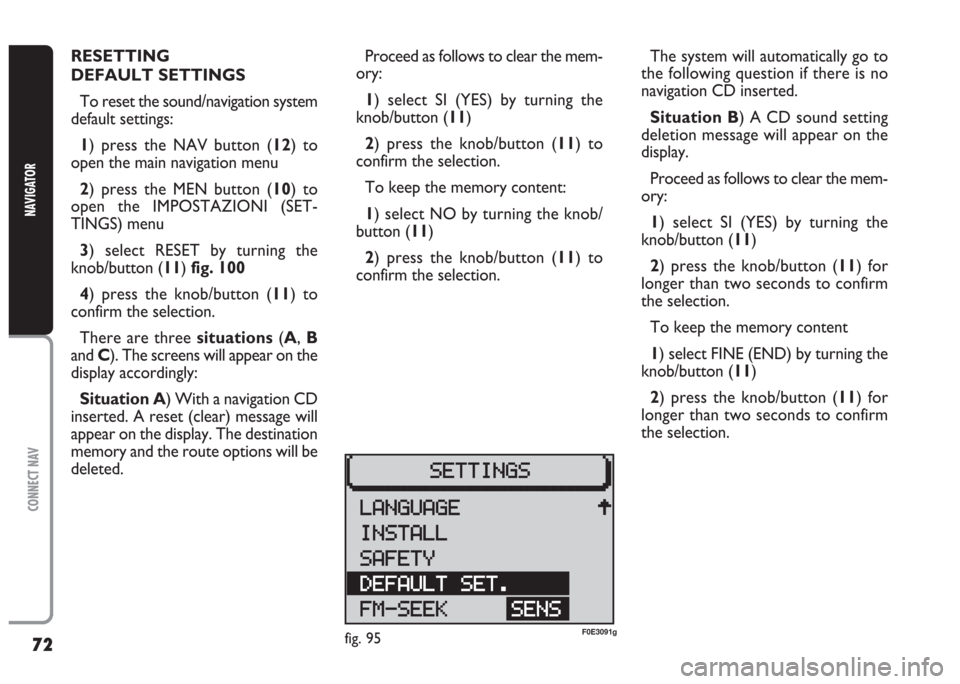
3) select RESET by turning the
knob/button (11) fig. 100
4) press the knob/button (11) to
confirm the selection.
There are three situations(A, B
and C). The screens will appear on the
display accordingly:
Situation A) With a navigation CD
inserted. A reset (clear) message will
appear on the display. The destination
memory and the route options will be
deleted.Proceed as follows to clear the mem-
ory:
1) select SI (YES) by turning the
knob/button (11)
2) press the knob/button (11) to
confirm the selection.
To keep the memory content:
1) select NO by turning the knob/
button (11)
2) press the knob/button (11) to
confirm the selection.The system will automatically go to
the following question if there is no
navigation CD inserted.
Situation B) A CD sound setting
deletion message will appear on the
display.
Proceed as follows to clear the mem-
ory:
1) select SI (YES) by turning the
knob/button (11)
2) press the knob/button (11) for
longer than two seconds to confirm
the selection.
To keep the memory content
1) select FINE (END) by turning the
knob/button (11)
2) press the knob/button (11) for
longer than two seconds to confirm
the selection.
fig. 95F0E3091g
Page 74 of 202

73
CONNECT NAV
NAVIGATOR
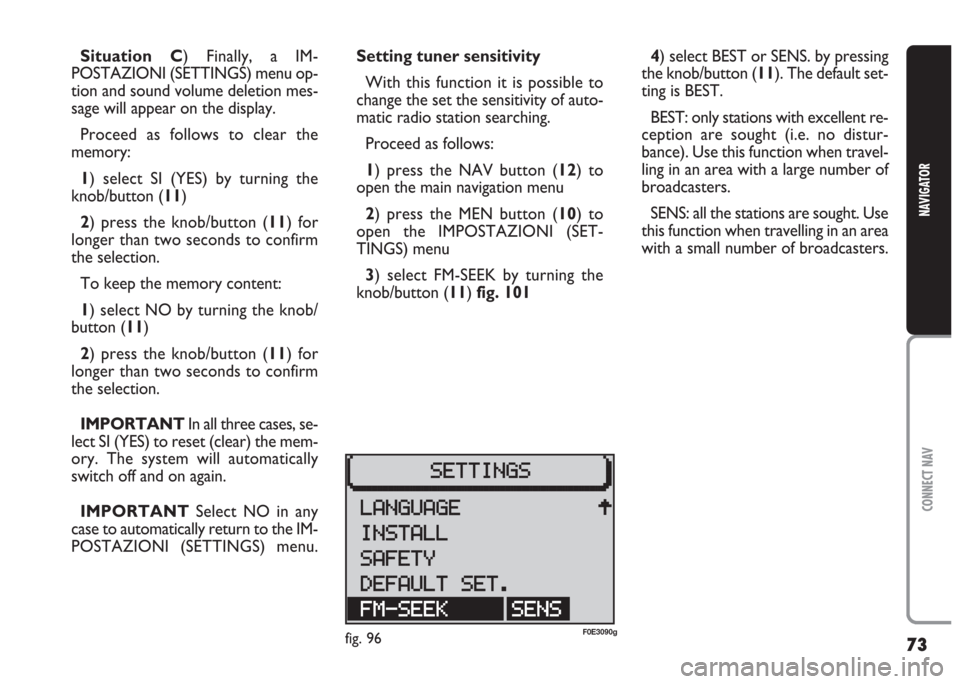
4) select BEST or SENS. by pressing
the knob/button (11). The default set-
ting is BEST.
BEST: only stations with excellent re-
ception are sought (i.e. no distur-
bance). Use this function when travel-
ling in an area with a large number of
broadcasters.
SENS: all the stations are sought. Use
this function when travelling in an area
with a small number of broadcasters. Setting tuner sensitivity
With this function it is possible to
change the set the sensitivity of auto-
matic radio station searching.
Proceed as follows:
1) press the NAV button (12) to
open the main navigation menu
2) press the MEN button (10) to
open the IMPOSTAZIONI (SET-
TINGS) menu
3) select FM-SEEK by turning the
knob/button (11) fig. 101 Situation C) Finally, a IM-
POSTAZIONI (SETTINGS) menu op-
tion and sound volume deletion mes-
sage will appear on the display.
Proceed as follows to clear the
memory:
1) select SI (YES) by turning the
knob/button (11)
2) press the knob/button (11) for
longer than two seconds to confirm
the selection.
To keep the memory content:
1) select NO by turning the knob/
button (11)
2) press the knob/button (11) for
longer than two seconds to confirm
the selection.
IMPORTANT In all three cases, se-
lect SI (YES) to reset (clear) the mem-
ory. The system will automatically
switch off and on again.
IMPORTANT Select NO in any
case to automatically return to the IM-
POSTAZIONI (SETTINGS) menu.
fig. 96F0E3090g
Page 75 of 202

74
CONNECT NAV
NAVIGATOR
GENERAL INFORMATION ............................................ 77
ADVICE........................................................................................ 78
ROAD SAFETY ........................................................................ 78
RADIOFREQUENCY ............................................................ 78
RECEPTION/TRANSMISSION CONDITIONS .............. 78
CARE AND MAINTENANCE ............................................ 79
COMPACT DISCS .................................................................. 79
CONTROLS.............................................................................. 80
CONTROLS ON STEERING WHEEL .............................. 82
OPERATION ............................................................................ 84
SWITCHING THE CONNECT NAV ON/OFF ............ 84
SELECTING FUNCTIONS .................................................. 84
ADJUSTING THE VOLUME ................................................ 85
DISPLAY .................................................................................... 85
ADJUSTING THE SOUND .................................................. 86
RADIO........................................................................................ 87
LISTENING TO THE RADIO .............................................. 87
SELECTING THE WAVEBAND ........................................ 88
TUNING TO FM STATIONS .............................................. 88
STORING STATIONS .......................................................... 90
SCAN FUNCTION ................................................................ 92
C C
O O
N N
N N
E E
C C
T T
N N
a a
v v
RDS FUNCTION .................................................................... 93
REG FUNCTION .................................................................... 93
PTY FUNCTION...................................................................... 93
TA FUNCTION ...................................................................... 94
TMC FUNCTION .................................................................. 95
SHARX FUNCTION .............................................................. 96
R-TXT FUNCTION .............................................................. 96
TIM FUNCTION ...................................................................... 97
COMPACT DISC PLAYER (CD).................................. 99
INSERTING AND EJECTING A CD ................................ 99
PLAYING A CD ...................................................................... 100
CD FUNCTIONS .................................................................. 100
SELECTING NEXT/PREVIOUS TRACKS ........................ 101
SCANNING TRACKS .......................................................... 101
MIX FUNCTION...................................................................... 102
SCAN FUNCTION.................................................................. 102
REPEAT FUNCTION .............................................................. 102
PROGRAM FUNCTION ...................................................... 103
CD NAME FUNCTION ........................................................ 104
CD CHANGER - CDC (where fitted).......................... 106
INSERTING AND EJECTING A CD ................................ 106
PLAYING A CD WITH THE INTERNAL CD PLAYER 107
PLAYING A CD WITH THE CD Changer ...................... 107
TURNING ON THE CD CHANGER .............................. 108
Page 77 of 202

76
CONNECT NAV
NAVIGATOR
“FOLLOW ME” FUNCTION ............................................ 157
RECALLING THE PHONE CODE NUMBER .............. 162
RECALLING THE PHONE “STATE” FUNCTION .... 162
DISPLAYING AVAILABLE SIM PROFILES .................... 163
TELEPHONE.......................................................................... 164
GENERAL INFORMATION .............................................. 164
TURNING THE PHONE ON .......................................... 164
ENTERING THE PIN CODE ............................................ 164
CHANGING THE PIN CODE ........................................ 165
SIM CARD UNLOCKING ................................................ 166
VOLUME ADJUSTMENT .................................................. 166
SELECTING PHONE NUMBERS .................................... 167
SELECTING A NUMBER
IN THE PHONE BOOK .................................................... 169
INCOMING CALLS ............................................................ 170
TELEPHONE CALLS TO FOREIGN COUNTRIES .... 171
SELECTING THE NETWORK ........................................ 172
PHONEBOOK ...................................................................... 176
MESSAGES (SMS) ................................................................ 178BASIC SETTINGS .............................................................. 183
OPENING THE SETTINGS MENU ................................ 183
ADJUSTING THE DISPLAY .............................................. 183
ADJUSTING POWER-ON, TA ANNOUNCEMENT
MESSAGE ................................................................................ 185
SETTING THE CLOCK ...................................................... 187
SELECTING THE LANGUAGE ........................................ 189
GPS STATUS ........................................................................ 190
SECURITY .............................................................................. 191
RESETTING DEFAULT SETTINGS ................................ 192
ANTITHEFT PROTECTION SYSTEM.................. 195
GENERAL INFORMATION .............................................. 195
CODE CARD ........................................................................ 195
ENTERING THE SECURITY CODE .............................. 195
TECHNICAL DATA .......................................................... 197
RADIO .................................................................................... 197
COMPACT DISC PLAYER AND CD CHANGER .... 197
AUDIO .................................................................................... 198
SATELLITE NAVIGATION ................................................ 198
TARGA INFOMOBILITY SERVICES ................................ 198
TELEPHONE ........................................................................ 198
SYSTEM TECHNICAL DATA .......................................... 199