2004 FIAT MULTIPLA light
[x] Cancel search: lightPage 6 of 202

5
CONNECT NAV
NAVIGATOR
CARE AND MAINTENANCE
The construction of the system en-
sures long operation without the need
for particular maintenance operations.
In the event of failures, contact a
Fiat Dealership.
Clean the front panel with a soft, an-
tistatic cloth only. Detergents and pol-
ishes could damage the surface.
Handle the display with care. The use
of sharp objects could scratch and
damage the display.
Clean the display with a soft, clean
and dry cloth. Do not use solvents as
they could corrode and damage the
display.COMPACT DISC
If you are using a CD player, re-
member that dirt or marks on the CD
can cause skipping or bad sound qual-
ity in playback. The same will occur if
the CD is bent.
For optimal playback:
– only use CDs with the following
trademark:– clean each CD carefully. Remove
fingerprints and dust with a soft cloth.
Hold the CD at the edge and clean
from the centre outwards;
– never use chemical products (e.g.
sprays, antistatic products or thin-
ners). These products could damage
the CD surface;
– after use, put the CDs back in their
cases to avoid marking or scratching
the discs. This would cause skips in
playback;
– do not leave discs in direct sunlight
or expose them to high temperatures
or moisture for a long time to avoid
bending them;
– do not stick labels or write on the
recorded side of a CD.Be careful not to knock
the display with pointed
or hard objects and avoid
touching with hands. Do not
press on the display when clean-
ing and in case of breakage do not
touch the fluid coming out. In
case of contact with the skin,
wash immediately with water
and soap.
Page 15 of 202
14
CONNECT NAV
NAVIGATOR
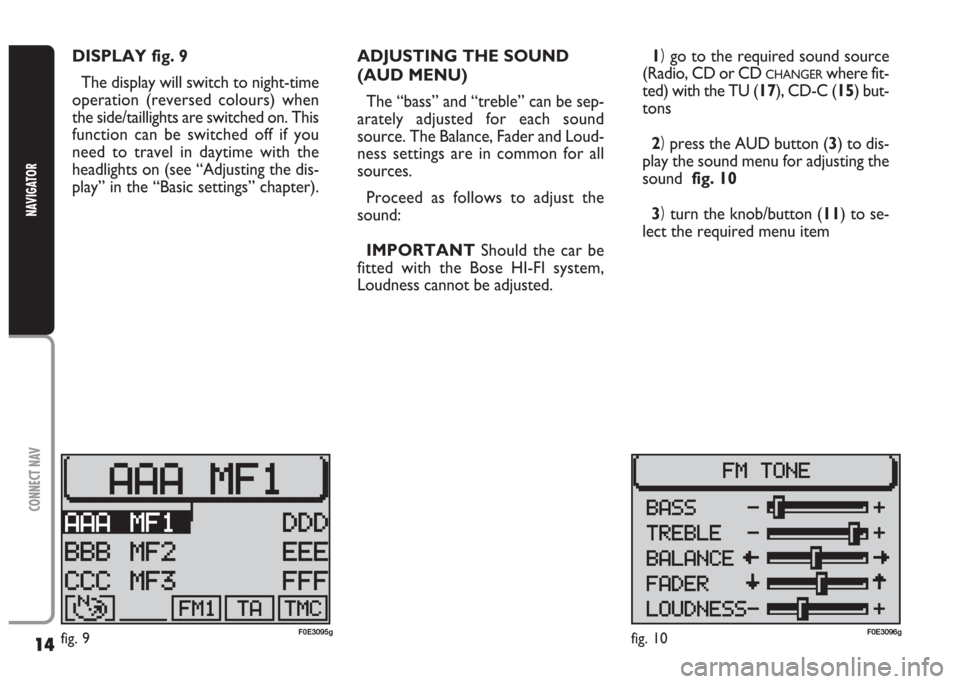
DISPLAY fig. 9
The display will switch to night-time
operation (reversed colours) when
the side/taillights are switched on. This
function can be switched off if you
need to travel in daytime with the
headlights on (see “Adjusting the dis-
play” in the “Basic settings” chapter).ADJUSTING THE SOUND
(AUD MENU)
The “bass” and “treble” can be sep-
arately adjusted for each sound
source. The Balance, Fader and Loud-
ness settings are in common for all
sources.
Proceed as follows to adjust the
sound:
IMPORTANTShould the car be
fitted with the Bose HI-FI system,
Loudness cannot be adjusted.1)go to the required sound source
(Radio, CD or CD
CHANGERwhere fit-
ted) with the TU (17), CD-C (15) but-
tons
2)press the AUD button (3) to dis-
play the sound menu for adjusting the
sound fig. 10
3)turn the knob/button (11) to se-
lect the required menu item
fig. 9F0E3095gfig. 10F0E3096g
Page 16 of 202

15
CONNECT NAV
NAVIGATOR
4)press the knob/button (11) to
confirm and highlight the setting to be
adjusted “BASSI” (BASS), “ACUTI”
(TREBLE), etc.) fig. 11
5)turn the knob/button (11) to ad-
just, as required.To storethe edited values, press
the knob/button (11).
To return to the previous menu
without storing the edited values,
press the ESC button (9).
IMPORTANTThe display will au-
tomatically return to the previous
menu if no button is pressed for
longer than 30 seconds.
fig. 11F0E3097g
Page 28 of 202
27
CONNECT NAV
NAVIGATOR
C C
O O
M M
P P
A A
C C
T T
D D
I I
S S
C C
( (
C C
D D
) )
Audio CDs can be played with the in-
ternal CD player or with the CD
CHANGER(where fitted).
During CD playback, either the track
number and the playing time, or the
track number only, will appear on the
display (according to the settings, see
CD
FUNCTIONSin this chapter).
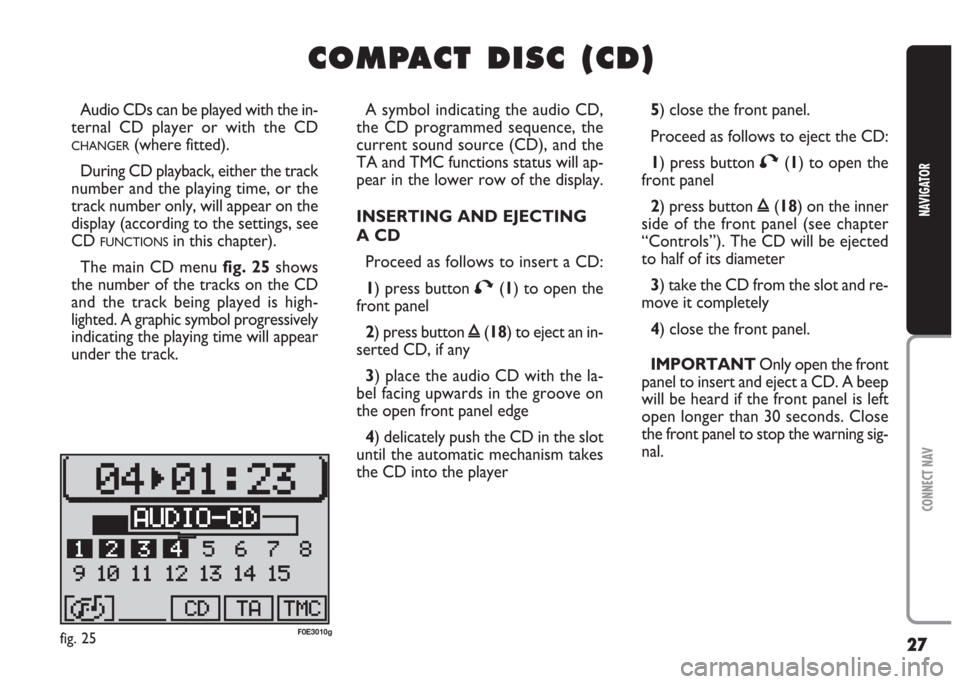
The main CD menu fig. 25shows
the number of the tracks on the CD
and the track being played is high-
lighted. A graphic symbol progressively
indicating the playing time will appear
under the track.A symbol indicating the audio CD,
the CD programmed sequence, the
current sound source (CD), and the
TA and TMC functions status will ap-
pear in the lower row of the display.
INSERTING AND EJECTING
A CD
Proceed as follows to insert a CD:
1) press button
T(1) to open the
front panel
2) press button
ı(18) to eject an in-
serted CD, if any
3) place the audio CD with the la-
bel facing upwards in the groove on
the open front panel edge
4) delicately push the CD in the slot
until the automatic mechanism takes
the CD into the player5) close the front panel.
Proceed as follows to eject the CD:
1) press button
T(1) to open the
front panel
2) press button
ı(18) on the inner
side of the front panel (see chapter
“Controls”). The CD will be ejected
to half of its diameter
3) take the CD from the slot and re-
move it completely
4) close the front panel.
IMPORTANT Only open the front
panel to insert and eject a CD. A beep
will be heard if the front panel is left
open longer than 30 seconds. Close
the front panel to stop the warning sig-
nal.
fig. 25F0E3010g
Page 31 of 202
30
CONNECT NAV
NAVIGATOR
SCANNING ALL TRACKS
ON A CD (SCAN)
Proceed as follows to listen to the
first part of each track on the CD:
1) in CD mode, go to the CD func-
tions menu by pressing the CD-C but-
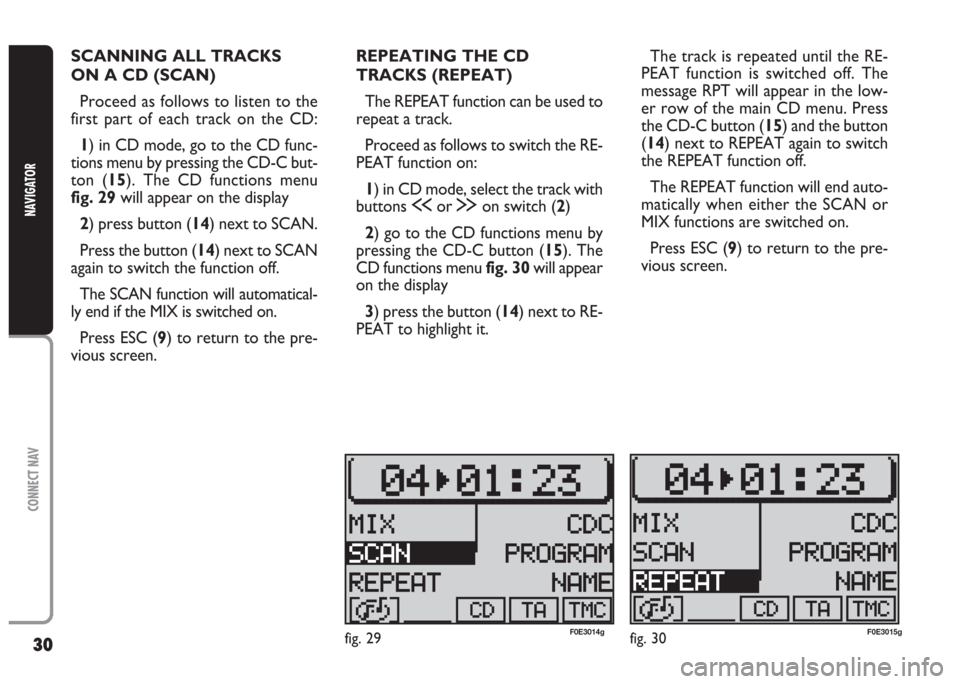
ton (15). The CD functions menu
fig. 29will appear on the display
2) press button (14) next to SCAN.
Press the button (14) next to SCAN
again to switch the function off.
The SCAN function will automatical-
ly end if the MIX is switched on.
Press ESC (9) to return to the pre-
vious screen.REPEATING THE CD
TRACKS (REPEAT)
The REPEAT function can be used to
repeat a track.
Proceed as follows to switch the RE-
PEAT function on:
1) in CD mode, select the track with
buttons
ùor §on switch (2)
2) go to the CD functions menu by
pressing the CD-C button (15). The
CD functions menu fig. 30will appear
on the display
3) press the button (14) next to RE-
PEAT to highlight it.The track is repeated until the RE-
PEAT function is switched off. The
message RPT will appear in the low-
er row of the main CD menu. Press
the CD-C button (15) and the button
(14) next to REPEAT again to switch
the REPEAT function off.
The REPEAT function will end auto-
matically when either the SCAN or
MIX functions are switched on.
Press ESC (9) to return to the pre-
vious screen.
fig. 29F0E3014gfig. 30F0E3015g
Page 40 of 202

39
CONNECT NAV
NAVIGATOR
9) position the cursor on the symbol
jand press the knob/button (11) or
hold the knob/button (11) pressed for
longer than two seconds. The alpha-
betical list of destinations will appear
on the display
10) turn the knob/button (11) to
seek the required street name in the
editing list
11) confirm the destination by press-
ing the knob/button (11).IMPORTANT Only the options
for which data is available on the nav-
igation CD are offered. A lock symbol
S will appear next to the unavailable
options.
Press ESC (9) to return to the pre-
vious menu.
“NUMERO CIVICO” (HOUSE
NUMBER) destination entry
Proceed as follows to reach a house
number:
1) enter the street number as de-
scribed previously 2) select NUMERO CIVICO
(HOUSE NUMBER) with the
knob/button (11) fig. 41. The list of
available house numbers will appear
on the display fig. 42
3) position the cursor on the re-
quired number by turning the
knob/button (11)
4) confirm the number by pressing
the knob/button (11). The selected
number will be highlighted on the dis-
play
5) confirm the destination by press-
ing the knob/button (11) for longer
than two seconds.
IMPORTANT Only the options
for which data is available on the nav-
igation CD are offered. A lock symbol
Swill appear next to the unavailable
options.
Press ESC (9) to return to the pre-
vious menu.
fig. 41F0E3040gfig. 42F0E3041g
Page 42 of 202
41
CONNECT NAV
NAVIGATOR
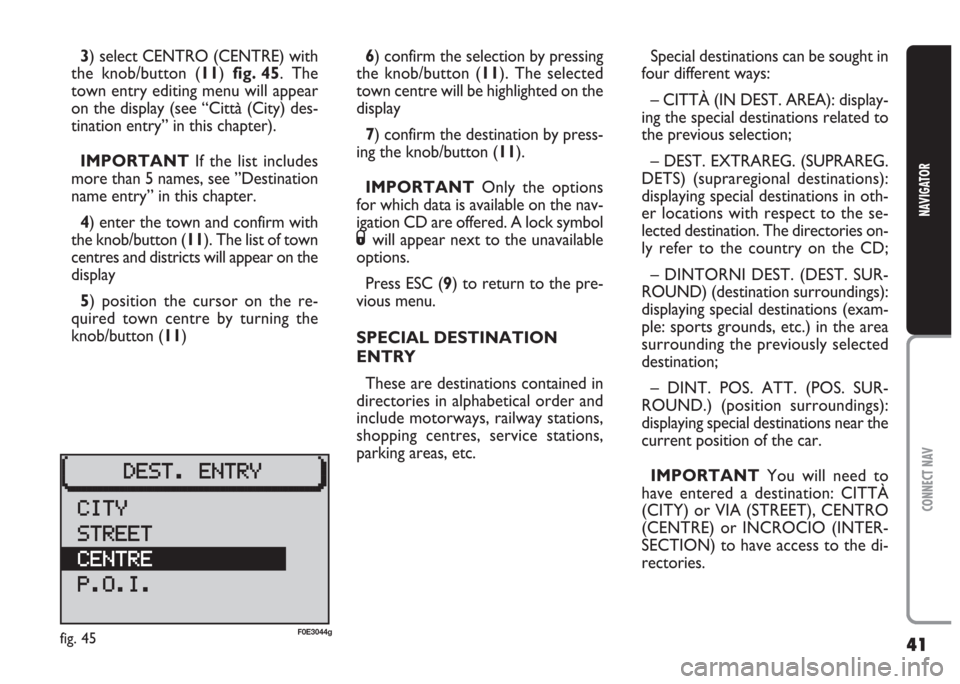
3) select CENTRO (CENTRE) with
the knob/button (11) fig. 45. The
town entry editing menu will appear
on the display (see “Città (City) des-
tination entry” in this chapter).
IMPORTANT If the list includes
more than 5 names, see ”Destination
name entry” in this chapter.
4) enter the town and confirm with
the knob/button (11). The list of town
centres and districts will appear on the
display
5) position the cursor on the re-
quired town centre by turning the
knob/button (11)6) confirm the selection by pressing
the knob/button (11). The selected
town centre will be highlighted on the
display
7) confirm the destination by press-
ing the knob/button (11).
IMPORTANT Only the options
for which data is available on the nav-
igation CD are offered. A lock symbol
Swill appear next to the unavailable
options.
Press ESC (9) to return to the pre-
vious menu.
SPECIAL DESTINATION
ENTRY
These are destinations contained in
directories in alphabetical order and
include motorways, railway stations,
shopping centres, service stations,
parking areas, etc.Special destinations can be sought in
four different ways:
– CITTÀ (IN DEST. AREA): display-
ing the special destinations related to
the previous selection;
– DEST. EXTRAREG. (SUPRAREG.
DETS) (supraregional destinations):
displaying special destinations in oth-
er locations with respect to the se-
lected destination. The directories on-
ly refer to the country on the CD;
– DINTORNI DEST. (DEST. SUR-
ROUND) (destination surroundings):
displaying special destinations (exam-
ple: sports grounds, etc.) in the area
surrounding the previously selected
destination;
– DINT. POS. ATT. (POS. SUR-
ROUND.) (position surroundings):
displaying special destinations near the
current position of the car.
IMPORTANT You will need to
have entered a destination: CITTÀ
(CITY) or VIA (STREET), CENTRO
(CENTRE) or INCROCIO (INTER-
SECTION) to have access to the di-
rectories.
fig. 45F0E3044g
Page 80 of 202
79
CONNECT NAV
NAVIGATOR
CARE AND MAINTENANCE
The structure of the system ensures
long years of operation with no need
for particular maintenance. In the
event of a fault, contact
Alfa Romeo Au-
thorised Services
.
Clean the front panel and display on-
ly using a soft, dry antistatic cloth.
Cleaning and polishing products may
damage the surface.
Treat the display with care. Do not
use pointed or hard objects which
might scratch and damage it.
Clean the display with a soft, clean
and dry cloth. Do not use solvents
which might corrode and damage the
display.COMPACT DISCS
If a Compact Disc is used on the
Sound system, remember that the
presence of dirt or marks on Compact
Discs may cause skipping when play-
ing and poor sound quality. The same
happens if Compact Discs are bent by
accident.
To obtain optimum playing condi-
tions we give the following advice:
– only use Audio Compact Disc with
the brand:
– carefully clean all Compact Discs of
any fingerprints and dust using a soft
cloth. Support Compact Discs on the
edges and clean from the centre out-
wards; – never use chemical products for
cleaning (e.g. spray cans, antistatics or
thinners) as they might damage the
surface of Compact Discs;
– after listening to them put Com-
pact Discs back in their boxes to avoid
marking or scoring which would cause
skipping when playing;
– do not expose Compact Discs to
direct sunlight, high temperatures or
damp for prolonged lengths of time to
prevent them from bending;
– do not stick labels or write on the
recorded surface of Compact Discs.
Be careful not to knock
the display with pointed
or hard objects and avoid
touching with the hands. Do not
press on the display when clean-
ing. If it gets broken, do not touch
the fluid which might come out.
In case it gets in contact with the
skin, wash it immediately with
water and soap.