Page 57 of 249
WARNING!
Do not ride with the seatback reclined so that the
shoulder belt is no longer resting against your chest.
In a collision you could slide under the seat belt and
be seriously or even fatally injured. Use the recliner
only when the vehicle is parked.
Lumbar Support — If Equipped
This feature allows you to increase or decrease the
amount of lumbar support. Turn the control level for-
ward to increase and rearward to decrease the desired
amount of lumbar support.
Head Restraints
Head restraints can reduce the risk of whiplash injury in
the event of impact from the rear. Adjustable restraints
should be adjusted so that the upper edge is as high as
practical.
UNDERSTANDING THE FEATURES OF YOUR VEHICLE 57
3
Page 58 of 249
The head restraints have a locking button which must be
pushed in to lower the head restraint. The restraints may
be raised without pushing in the button.
Folding Rear Seats — If Equipped
To provide additional storage area, the rear seatbacks can
be folded forward. Pull the loop near the top of the seat
and fold the seatback forward. When the seat back is
folded to the upright position make sure it is latched by
strongly pulling on the top of the seat back above the seat
strap.
58 UNDERSTANDING THE FEATURES OF YOUR VEHICLE
Page 59 of 249
WARNING!
The cargo area in the rear of the vehicle (with the
rear seatbacks in the locked-up or folded down
position) should not be used as a play area by
children when the vehicle is in motion. They could
be seriously injured in an accident. Children should
be seated and using the proper restraint system.
TO OPEN AND CLOSE THE HOOD
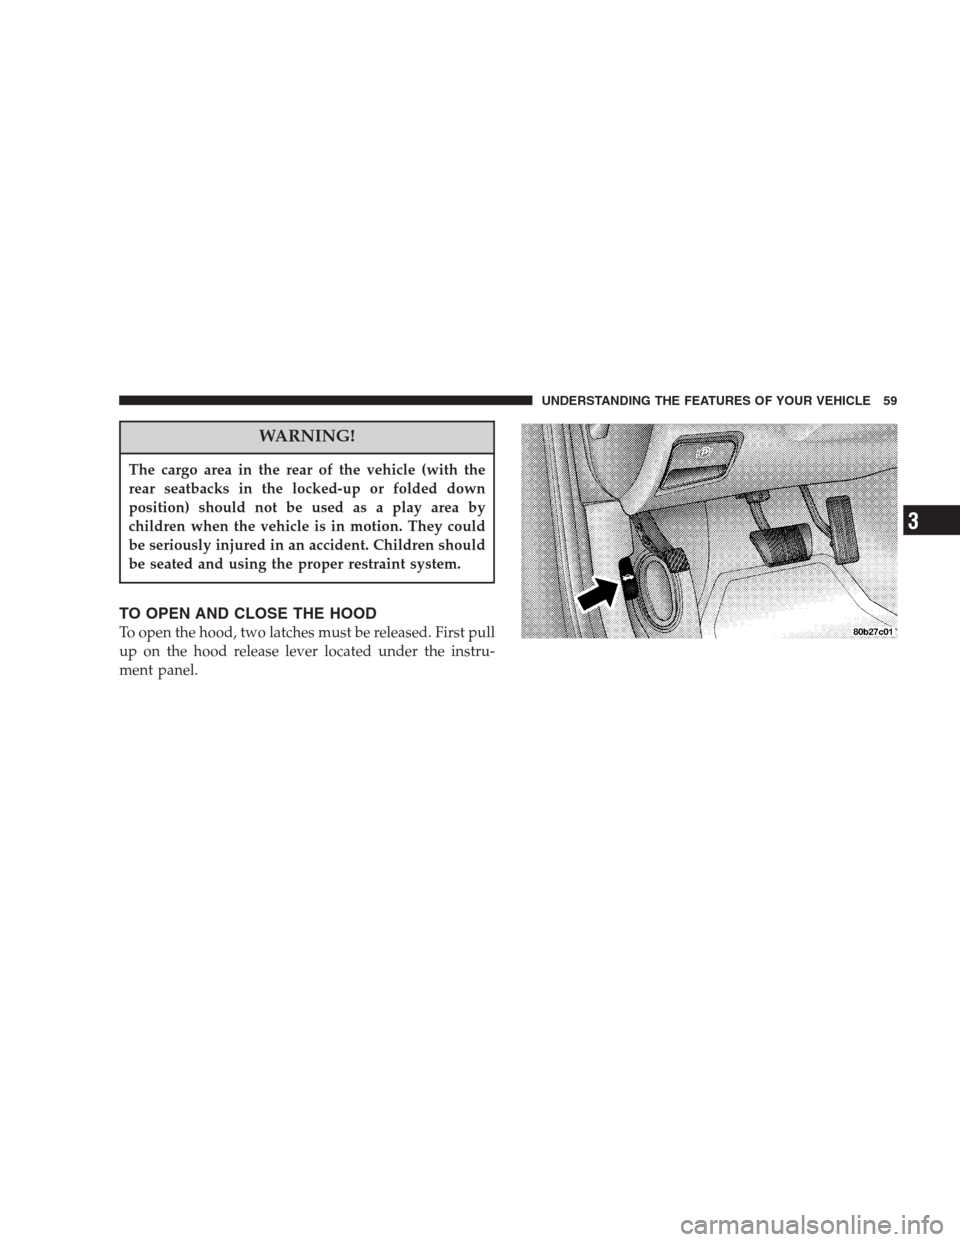
To open the hood, two latches must be released. First pull
up on the hood release lever located under the instru-
ment panel.
UNDERSTANDING THE FEATURES OF YOUR VEHICLE 59
3
Page 60 of 249

Then lift up on the catch located under the front edge of
the hood, near the center.
To prevent possible damage, do not slam the hood to
close it. Use a firm downward push at the center of the
hood to ensure that both latches engage. Never drive
your vehicle unless the hood is fully closed, with both
latches engaged.WARNING!
If the hood is not fully latched, it could fly up when
the vehicle is moving and block your forward vision.
You could have a collision. Be sure all hood latches
are fully latched before driving.
INTERIOR LIGHTS
To Turn The Interior Lights On:
Rotate the Dimmer Control upward to the second detent.
Rotate the switch downward to turn the interior lights
off.
NOTE:The interior lights have a “fade to off” feature.
When the lights are turned off, they gradually “fade” off.
Battery Saver Feature—Interior Lights
The interior lights come on when a door is open or left
ajar. To prevent battery drain, if you leave a door open or
ajar these lights will turn off after 15 minutes. After you
close the door, the interior lights will again function in
the normal matter.
60 UNDERSTANDING THE FEATURES OF YOUR VEHICLE
Page 61 of 249

NOTE:The Battery Saver Feature will not turn these
lights off if a switch was used to turn them on.
Instrument Panel Lighting
The brightness of the instrument panel lighting can be
regulated by rotating the dimmer switch.
Daytime Brightness Feature
Certain instrument panel components can be illuminated
at full brightness during the daytime. These are the
Odometer, Transmission Range Indicator, Radio, Climate
Controls, and the Overhead Travel Information Center.
This can be helpful when driving with your headlightson during the daytime such as in a parade or a funeral
procession. To activate this feature, rotate the Dimmer
Control upward to the first detent.
Front Map/Reading Lights
These lights are mounted between the sun visors. Each
light is turned On by pressing the lens. Press the lens a
second time to turn the light Off. The lights also come on
when a door is opened or the dimmer switch is turned
fully upward to the dome light position.
NOTE:The lights will remain on until the switch is
pressed a second time, so be sure they have been turned
off before leaving the vehicle.
Rear Seat Reading/Courtesy Lights
These lights may be individually operated by a switch
next to the light. The Battery Saver feature will not turn
these lights off if the switch was used to turn them on. Be
sure the lights are off before leaving the vehicle. The
lights also come on when a door is opened or the dimmer
switch is turned to the dome light position.
UNDERSTANDING THE FEATURES OF YOUR VEHICLE 61
3
Page 62 of 249
EXTERIOR LIGHTS
Headlights And Parking Lights
When the headlight switch is turned clockwise
from Off to the first position, the parking lights,
taillights, side marker lights, license plate light and
instrument panel lights are all turned on. The headlights
turn on when the switch is turned to the second position.
Lights-On Reminder
If the headlights or parking lights are left on after the
ignition is turned Off, a chime will sound when the
driver’s door is opened.
Headlight Time Delay
This feature provides the safety of headlight illumination
for about 90 seconds when leaving your vehicle in an
unlighted area. For vehicles equipped with Electronic
Vehicle Information Center (EVIC), this is customer pro-
grammable to Off, 30, 60, or 90 seconds. (See the Elec-
tronic Vehicle Information Center (EVIC) section of this
manual.)
62 UNDERSTANDING THE FEATURES OF YOUR VEHICLE
Page 63 of 249

To activate the delay, turn off the ignition while the
headlights are still on. Then turn off the headlights within
45 seconds. The delay interval begins when the ignition is
turned off.
If the headlights are turned off before the ignition, they
will go off in the normal manner.
Battery Saver Feature—Exterior Lights
If an exterior light is left on when the ignition switch is
moved to the Off position, it will automatically turn off
after 10 minutes. Normal operation will resume when the
ignition is turned On or when the headlight switch is
turned to another position.
Fog Lights
Turn the headlight switch to either the headlight
On or parking light On positions, then pull out the
headlight switch knob to turn on the fog lights. A
light on the switch will illuminate to show that the Fog
Lights are On.
NOTE:Turning on the high beam headlights will turn
off the fog lights. Fog light operation will continue when
the lights return to the low beam or parking light
position.
Daytime Running Lights (Canada Only)
The headlights are on at a dimmer level whenever the
vehicle is started and the parking brake is released. The
lights remain on until the ignition switch is turned OFF.
MULTIFUNCTION CONTROL LEVER
UNDERSTANDING THE FEATURES OF YOUR VEHICLE 63
3
Page 64 of 249

Turn Signals
The arrows on each side of the instrument cluster flash to
show operation of the front and rear turn signal lights. If
either light flashes at an extremely fast rate, check for a
defective outside light bulb. If both of the indicators fail
to light when the lever is moved, it would suggest that
the fuse or indicator bulbs are defective.
Headlight Dimmer Switch
Pull the multi-function control lever toward the steering
wheel to switch the headlights from high or low beam.
Passing Light
You can signal another vehicle with your headlights by
lightly pulling the multi-function lever toward the steer-
ing wheel. This will cause the headlights to turn on at
high beam and remain on until the lever is released.
Windshield Wipers And Washers
The wipers and washers are operated by a switch in the
control lever. Turn the end of the handle to select the
desired wiper speed.To use the washer, push the knob in when spray is
desired. If the button is pushed while in the delay range,
the wiper will operate for several seconds after the knob
is released, and then resume the intermittent interval.
If the button is pushed and held while in the OFF
position, the wiper will operate for several wipes then
turn off.
If the button is pushed while in the OFF position, the
wipers will cycle twice.
64 UNDERSTANDING THE FEATURES OF YOUR VEHICLE