2004 CHEVROLET CORVETTE oil
[x] Cancel search: oilPage 79 of 384
Starter Interlock Feature
For your convenience and to avoid damage to your
starter, your vehicle is equipped with a starter interlock
feature. This feature will not allow you to crank the
engine while the vehicle is already running.
Racing or Other Competitive Driving
See your warranty book before using your vehicle
for racing or other competitive driving.
Notice:If you use your vehicle for racing or other
competitive driving, the engine may use more
oil than it would with normal use. Low oil levels can
damage the engine. Be sure to check the oil level
often during racing or other competitive driving and
keep the level at or near 1 quart (1 L) above the
upper mark that shows the proper operating range
on the engine oil dipstick. For information on
how to add oil, seeEngine Oil on page 5-13. After
the competitive driving, remove excess oil so
that the level on the dipstick is not above the upper
mark that shows the proper operating range.
Engine Coolant Heater
The engine coolant heater is located on the driver’s side
of the engine under the manifold.
In very cold weather, 0°F (−18°C) or colder, the engine
coolant heater can help. You will get easier starting
and better fuel economy during engine warm-up.
Usually, the coolant heater should be plugged in a
minimum of four hours prior to starting your vehicle. At
temperatures above 32°F (0°C), use of the coolant
heater is not required.
2-23
Page 80 of 384
To Use The Engine Coolant Heater
1. Turn off the engine.
2. Open the hood and unwrap the electrical cord.
The electrical cord is attached to the generator
bracket assembly, between the generator and the
windshield washer fluid tank. With the headlamps
closed, route the cord in the opening between
the headlamp door and the fender panel on
the driver’s side of the vehicle. Do not pinch the
cord when closing the hood.
3. Plug it into a normal, grounded 110-volt AC outlet.
{CAUTION:
Plugging the cord into an ungrounded outlet
could cause an electrical shock. Also, the
wrong kind of extension cord could overheat
and cause a �re. You could be seriously
injured. Plug the cord into a properly grounded
three-prong 110-volt AC outlet. If the cord will
not reach, use a heavy-duty three-prong
extension cord rated for at least 15 amps.4. Before starting the engine, be sure to unplug and
store the cord as it was before to keep it away
from moving engine parts. If you do not it could be
damaged.
How long should you keep the coolant heater plugged
in? The answer depends on the outside temperature, the
kind of oil you have, and some other things. Instead
of trying to list everything here, we ask that you contact
your dealer in the area where you will be parking
your vehicle. The dealer can give you the best advice
for that particular area.
2-24
Page 115 of 384
Instrument Panel Overview...............................3-2
Hazard Warning Flashers................................3-4
Other Warning Devices...................................3-5
Horn.............................................................3-5
Tilt Wheel.....................................................3-5
Turn Signal/Multifunction Lever.........................3-6
Exterior Lamps.............................................3-13
Interior Lamps..............................................3-17
Head-Up Display (HUD).................................3-18
Accessory Power Outlets...............................3-22
Ashtrays and Cigarette Lighter........................3-23
Climate Controls............................................3-23
Dual Automatic Climate
Control System.........................................3-23
Outlet Adjustment.........................................3-31
Warning Lights, Gages, and Indicators............3-32
Instrument Panel Cluster................................3-33
Speedometer and Odometer...........................3-34
Tachometer.................................................3-34
Safety Belt Reminder Light.............................3-34
Air Bag Readiness Light................................3-35
Air Bag Off Light..........................................3-36
Voltmeter Gage............................................3-37
Brake System Warning Light..........................3-38
Anti-Lock Brake System Warning Light.............3-39
Traction Control System (TCS) Warning Light . . .3-39Active Handling System Light.........................3-40
Engine Coolant Temperature Gage..................3-41
Malfunction Indicator Lamp.............................3-41
Engine Oil Pressure Gage.............................3-44
Security Light...............................................3-45
Check Gages Warning Light...........................3-46
Fuel Gage...................................................3-46
Driver Information Center (DIC).......................3-48
DIC Controls and Displays.............................3-49
DIC Warnings and Messages.........................3-58
Other Messages...........................................3-68
Audio System(s).............................................3-69
Setting the Time...........................................3-69
Radio with Cassette......................................3-70
Radio with CD..............................................3-76
Trunk-Mounted CD Changer...........................3-81
Theft-Deterrent Feature..................................3-86
Radio Reception...........................................3-88
Care of Your Cassette Tape Player.................3-88
Care of Your CDs.........................................3-89
Care of Your CD Player................................3-89
Fixed Mast Antenna (Z06)..............................3-89
Power Antenna Mast Care (Convertible)...........3-90
Integrated Windshield and Rear Window
Antennas (Coupe).....................................3-90
Section 3 Instrument Panel
3-1
Page 133 of 384
The information may be displayed in English or metric
units and appears as an image focused out toward
the front of your vehicle. The HUD consists of the
following information:
•Speedometer
•Turn Signal Indicators
•High-Beam Indicator Symbol
•Tachometer
•Oil, Temperature and Fuel Gages
•Shift Light (Performance SHIFT Light)
This light is used for performance driving to indicate
that the vehicle’s best performance level has been
reached to shift the transmission into the next higher
gear. The SHIFT light will display at an engine speed
of about 5,750 rpm (6,250 rpm on Z06), just prior to
reaching the engine fuel cut-off mode.
•Check Gages IconThere are five HUD selections that you can choose to
view in the HUD display. By pressing and holding
the PAGE button, you can scroll through these pages in
the following order:
•Speed Only
•Speed and Gage
•Speed, Tachometer and Gage
•Speed and Tachometer
•Tachometer Only
When you have chosen the desired HUD display,
release the PAGE button.
Gages can be scrolled through by tapping the PAGE
button (only when a gage is displayed). The gages
shown are the following:
•Oil Pressure
•Coolant Temperature
•Fuel Level
The selections that you choose will remain in the HUD
display until they are changed.
3-19
Page 158 of 384
Emissions Inspection and Maintenance
Programs
Some state/provincial and local governments have or
may begin programs to inspect the emission control
equipment on your vehicle. Failure to pass this
inspection could prevent you from getting a vehicle
registration.
Here are some things you need to know to help your
vehicle pass an inspection:
Your vehicle will not pass this inspection if the CHECK
ENGINE light is on or not working properly.
Your vehicle will not pass this inspection if the OBD
(on-board diagnostic) system determines that critical
emission control systems have not been completely
diagnosed by the system. The vehicle would be
considered not ready for inspection. This can happen if
you have recently replaced your battery or if your
battery has run down. The diagnostic system is
designed to evaluate critical emission control systems
during normal driving. This may take several days
of routine driving. If you have done this and your vehicle
still does not pass the inspection for lack of OBD
system readiness, your GM dealer can prepare the
vehicle for inspection.
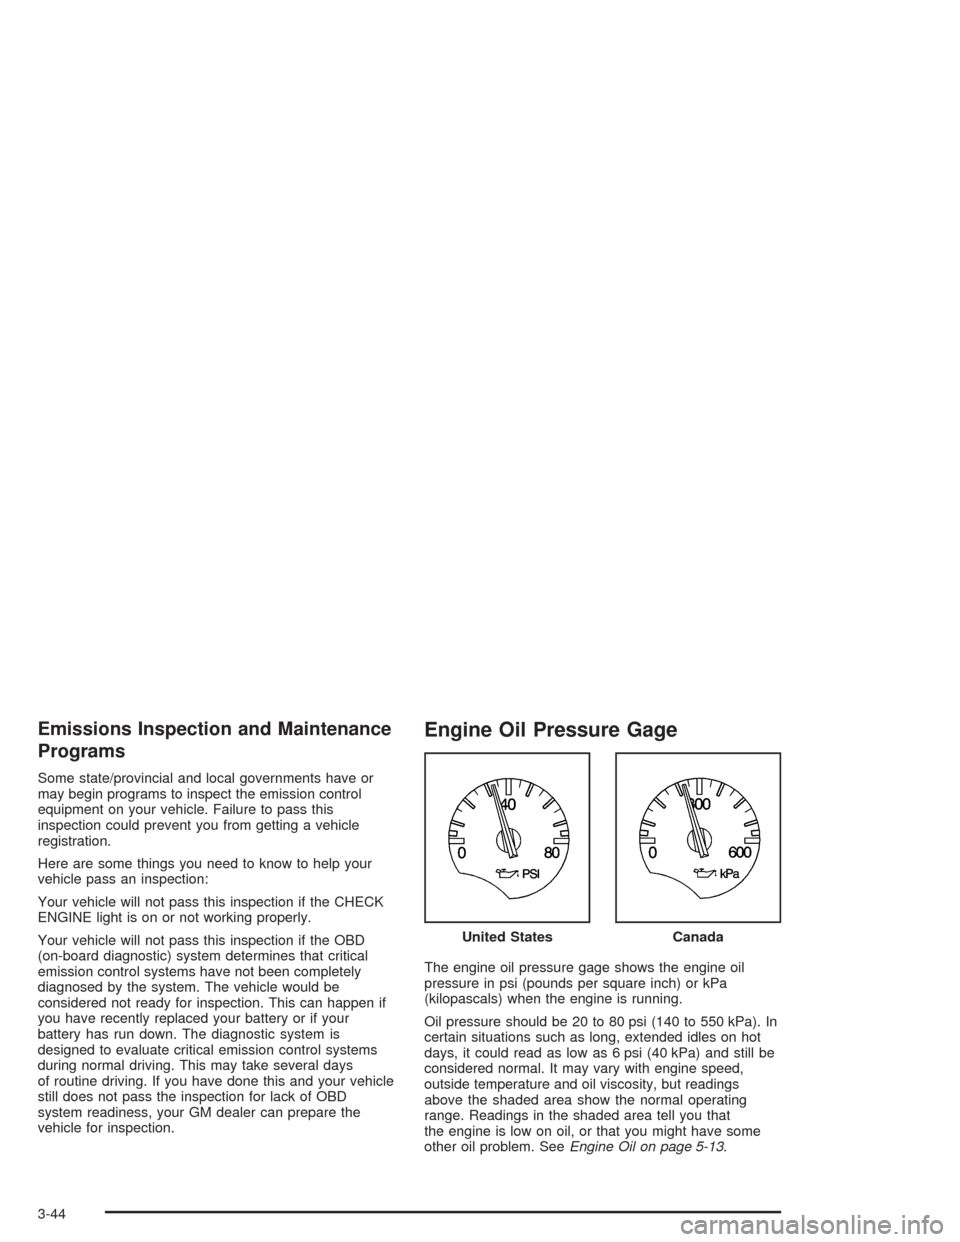
Engine Oil Pressure Gage
The engine oil pressure gage shows the engine oil
pressure in psi (pounds per square inch) or kPa
(kilopascals) when the engine is running.
Oil pressure should be 20 to 80 psi (140 to 550 kPa). In
certain situations such as long, extended idles on hot
days, it could read as low as 6 psi (40 kPa) and still be
considered normal. It may vary with engine speed,
outside temperature and oil viscosity, but readings
above the shaded area show the normal operating
range. Readings in the shaded area tell you that
the engine is low on oil, or that you might have some
other oil problem. SeeEngine Oil on page 5-13. United States
Canada
3-44
Page 159 of 384
The engine oil pressure can also be displayed using the
GAGES button on the Driver Information Center (DIC).
SeeDriver Information Center (DIC) on page 3-48.
{CAUTION:
Do not keep driving if the oil pressure is low. If
you do, your engine can become so hot that it
catches �re. You or others could be burned.
Check your oil as soon as possible and have
your vehicle serviced.
Notice:Lack of proper engine oil maintenance may
damage the engine. The repairs would not be
covered by your warranty. Always follow the
maintenance schedule in this manual for changing
engine oil.
Security Light
This light comes on to
remind you to arm your
theft-deterrent system. If it
comes on and stays on
when your ignition is
on, there may be a
problem with your
theft-deterrent system.
SeeTheft-Deterrent System on page 2-16and
PASS-Key
®on page 2-18.
3-45
Page 160 of 384
Check Gages Warning Light
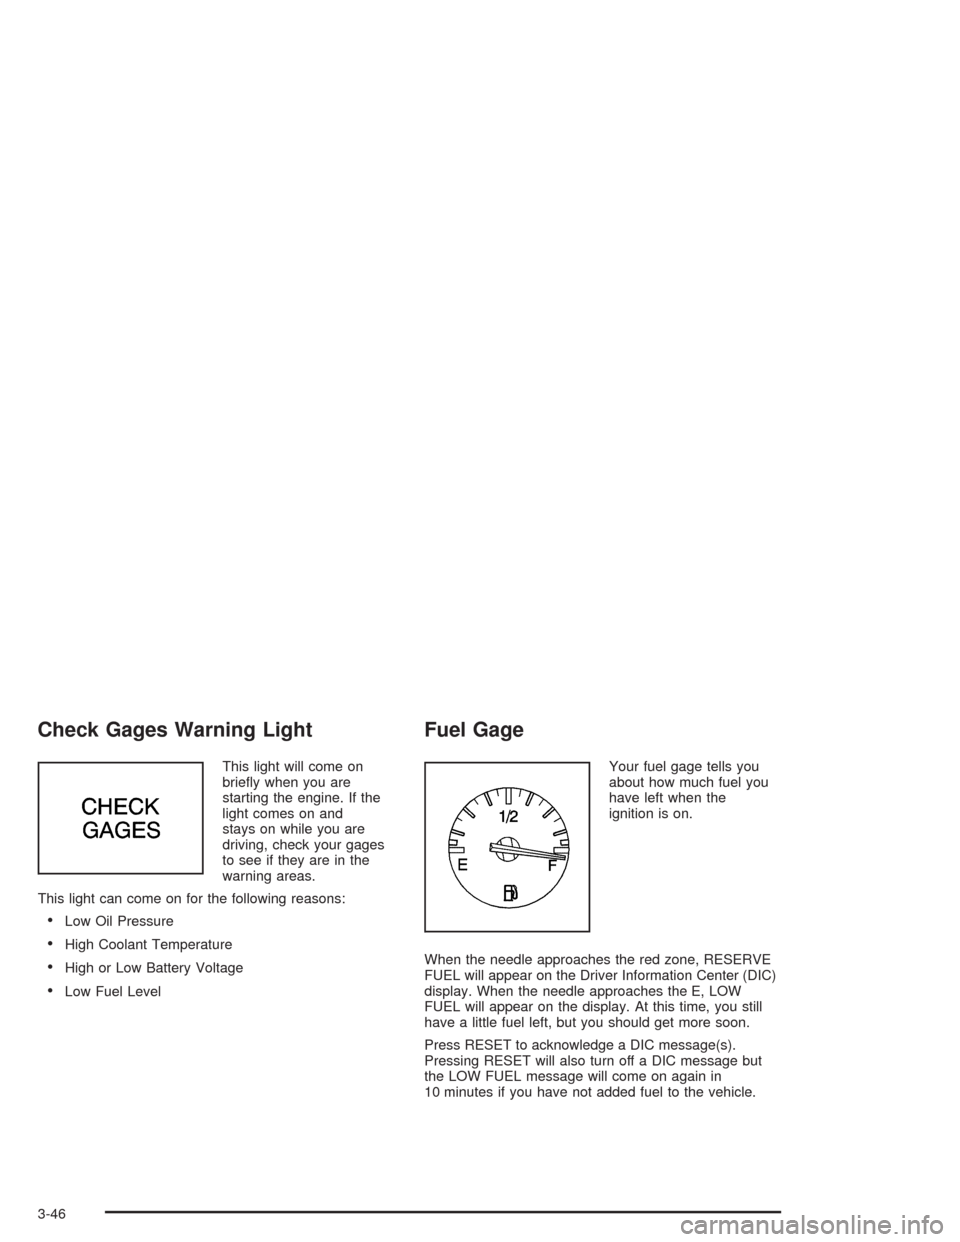
This light will come on
briefly when you are
starting the engine. If the
light comes on and
stays on while you are
driving, check your gages
to see if they are in the
warning areas.
This light can come on for the following reasons:
•Low Oil Pressure
•High Coolant Temperature
•High or Low Battery Voltage
•Low Fuel Level
Fuel Gage
Your fuel gage tells you
about how much fuel you
have left when the
ignition is on.
When the needle approaches the red zone, RESERVE
FUEL will appear on the Driver Information Center (DIC)
display. When the needle approaches the E, LOW
FUEL will appear on the display. At this time, you still
have a little fuel left, but you should get more soon.
Press RESET to acknowledge a DIC message(s).
Pressing RESET will also turn off a DIC message but
the LOW FUEL message will come on again in
10 minutes if you have not added fuel to the vehicle.
3-46
Page 162 of 384
Driver Information Center (DIC)
The Driver Information Center (DIC) will display
information about how your vehicle is functioning, as
well as warning messages if a system problem is
detected. The DIC display area is located in the
instrument panel cluster below the speedometer and
tachometer, directly above the steering column.
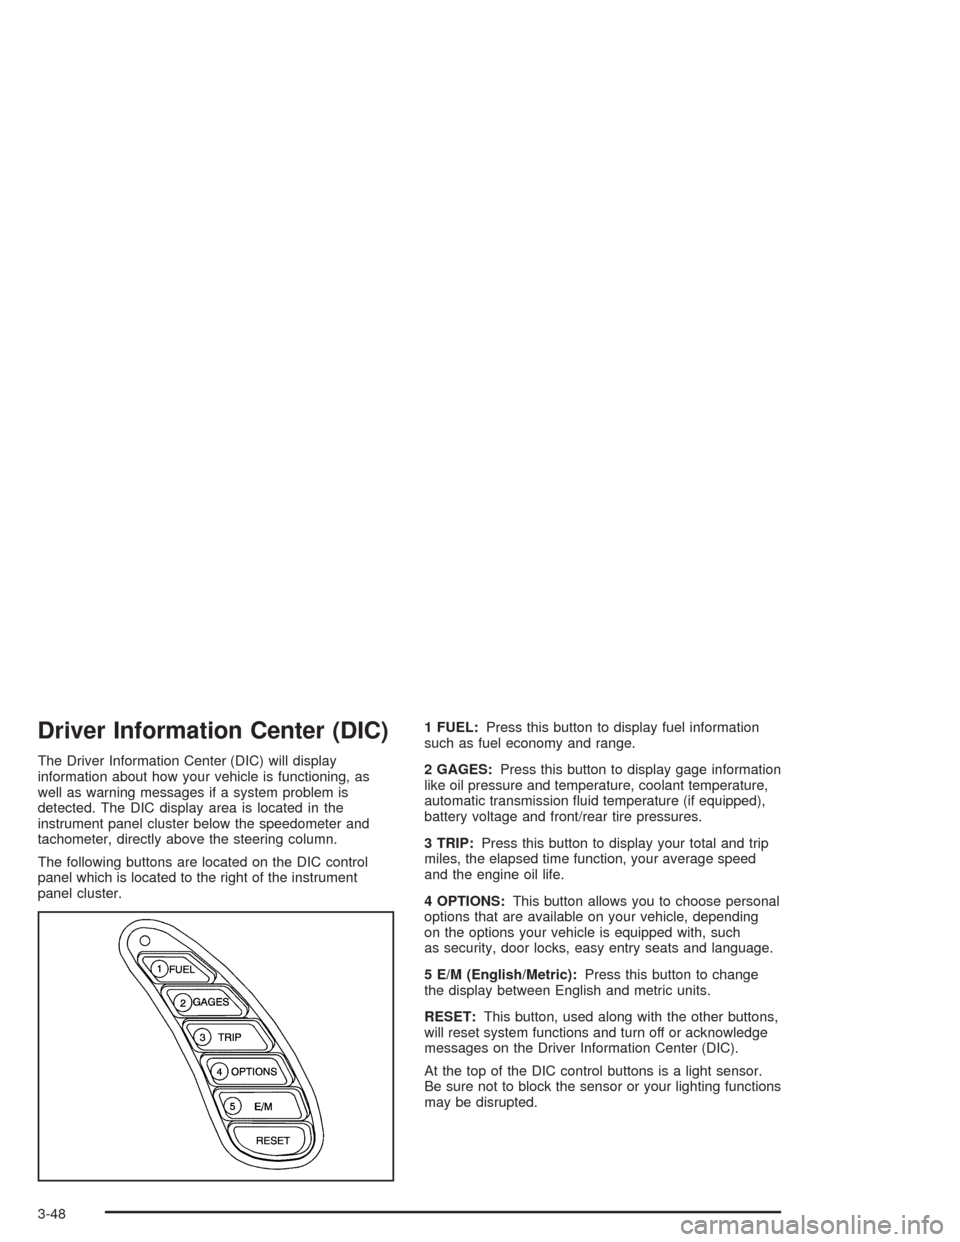
The following buttons are located on the DIC control
panel which is located to the right of the instrument
panel cluster.1 FUEL:Press this button to display fuel information
such as fuel economy and range.
2 GAGES:Press this button to display gage information
like oil pressure and temperature, coolant temperature,
automatic transmission fluid temperature (if equipped),
battery voltage and front/rear tire pressures.
3 TRIP:Press this button to display your total and trip
miles, the elapsed time function, your average speed
and the engine oil life.
4 OPTIONS:This button allows you to choose personal
options that are available on your vehicle, depending
on the options your vehicle is equipped with, such
as security, door locks, easy entry seats and language.
5 E/M (English/Metric):Press this button to change
the display between English and metric units.
RESET:This button, used along with the other buttons,
will reset system functions and turn off or acknowledge
messages on the Driver Information Center (DIC).
At the top of the DIC control buttons is a light sensor.
Be sure not to block the sensor or your lighting functions
may be disrupted.
3-48