Page 41 of 100
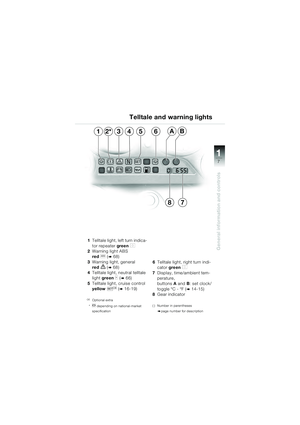
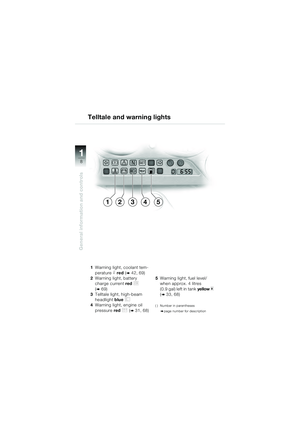
 22
39
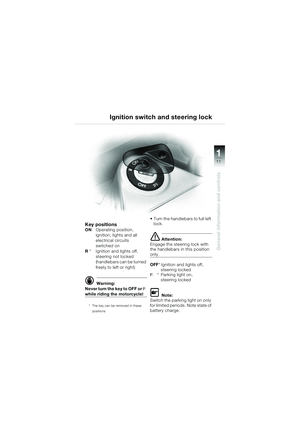
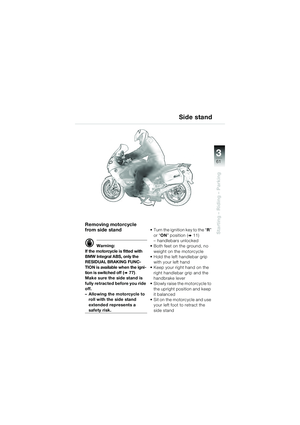
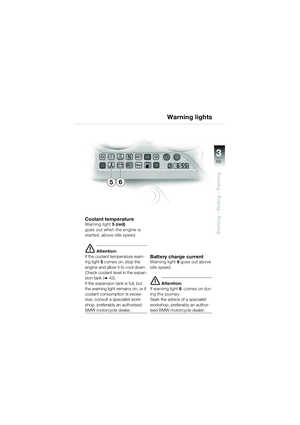
Safety check
2
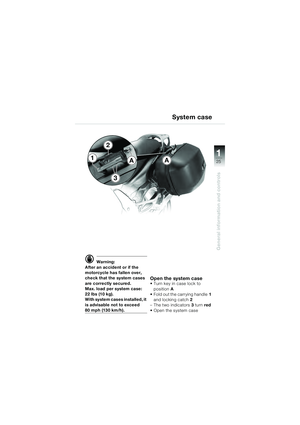
Brake system - with BMW Integral ABS
RESIDUAL BRAKING
FUNCTION
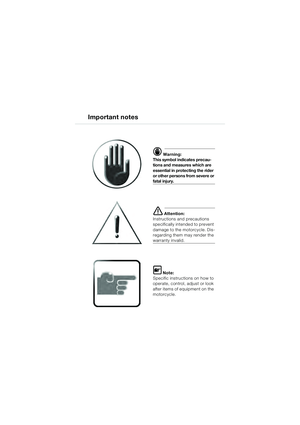
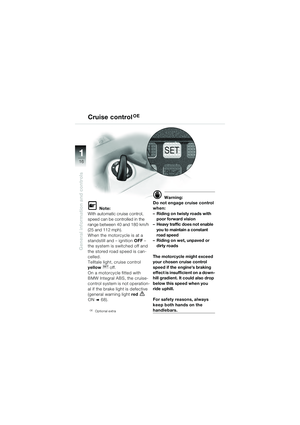
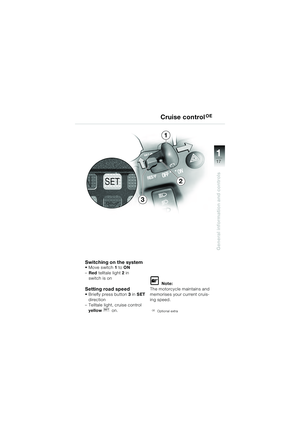
� Warning:
When the ignition is switched
off, before and during self-diag-
nosis (
� 78), or if the B MW Inte-
gra")
22
39
Safety check
2
Brake system - with BMW Integral ABS
RESIDUAL BRAKING
FUNCTION
� Warning:
When the ignition is switched
off, before and during self-diag-
nosis (
� 78), or if the B MW Inte-
gral ABS fails, only a RESIDUAL
BRAKING FUNCTION (
� 77)
remains available for slowing
the motorcycle.
When the RESIDUAL BRAKING
FUNCTION is active, you must
apply CONSIDERABLY higher
pressure to the brake levers in
question in order to apply the
brakes, and lever travel is
longer.
When the RESIDUAL BRAKING
FUNCTION is active, the ABS
function is unavailable in the
brake systems in question.
� Warning:
When the RESIDUAL BRAK-
ING FUNCTION is active,
maintain a defensive riding
style and proceed immediate-
ly to the nearest specialist
workshop, preferably an au-
thorised BMW motorcycle
dealer.
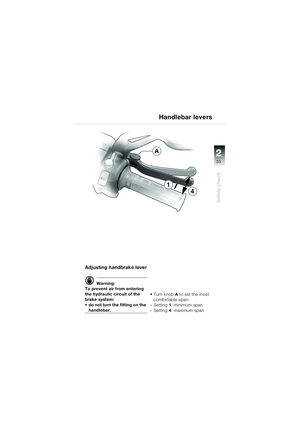
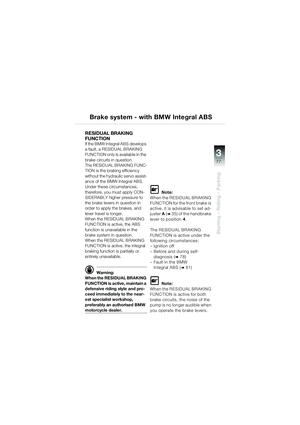
� Note:
When the RESIDUAL BRAKING
FUNCTION for the front brake is
active, it is advisable to set ad-
juster A (
� 35) of the handbrake
lever to position 4.
10k41bkg3.book Seite 39 Donnerstag, 27. Mai 2004 5:30 17
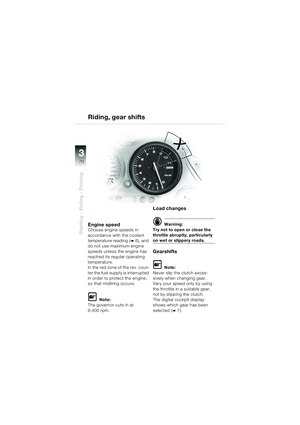
Page 42 of 100
40
Safety check
2
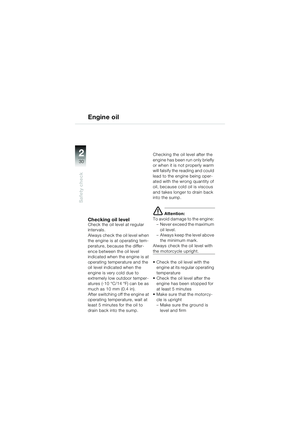
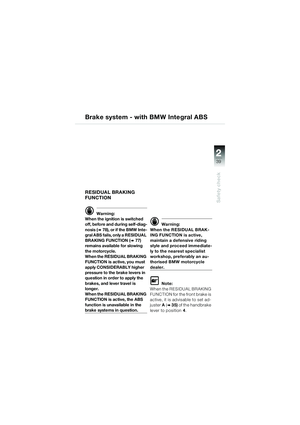
Checking front brake fluid
level
� Warning:
Never permit the brake fluid
level to drop below the mini-
mum level (MIN mark).
• Place motorcycle on main
(centre) stand
– Make sure the ground is level and firm • Turn the handlebars fully to
the left
• Check brake fluid level in
sight glass
MIN Minimum level
(top of marking ring)
� Note:
The brake fluid level in the
brake fluid reservoir remains
constant despite wear of the
brake pads.
Brake system - with BMW Integral ABS
MIN
10k41bkg3.book Seite 40 Donnerstag, 27. Mai 2004 5:30 17
Page 43 of 100
22
41
Safety check
2
Brake system - with BMW Integral ABS
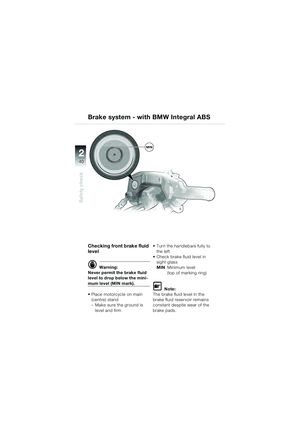
Brake fluid level, rear
brake
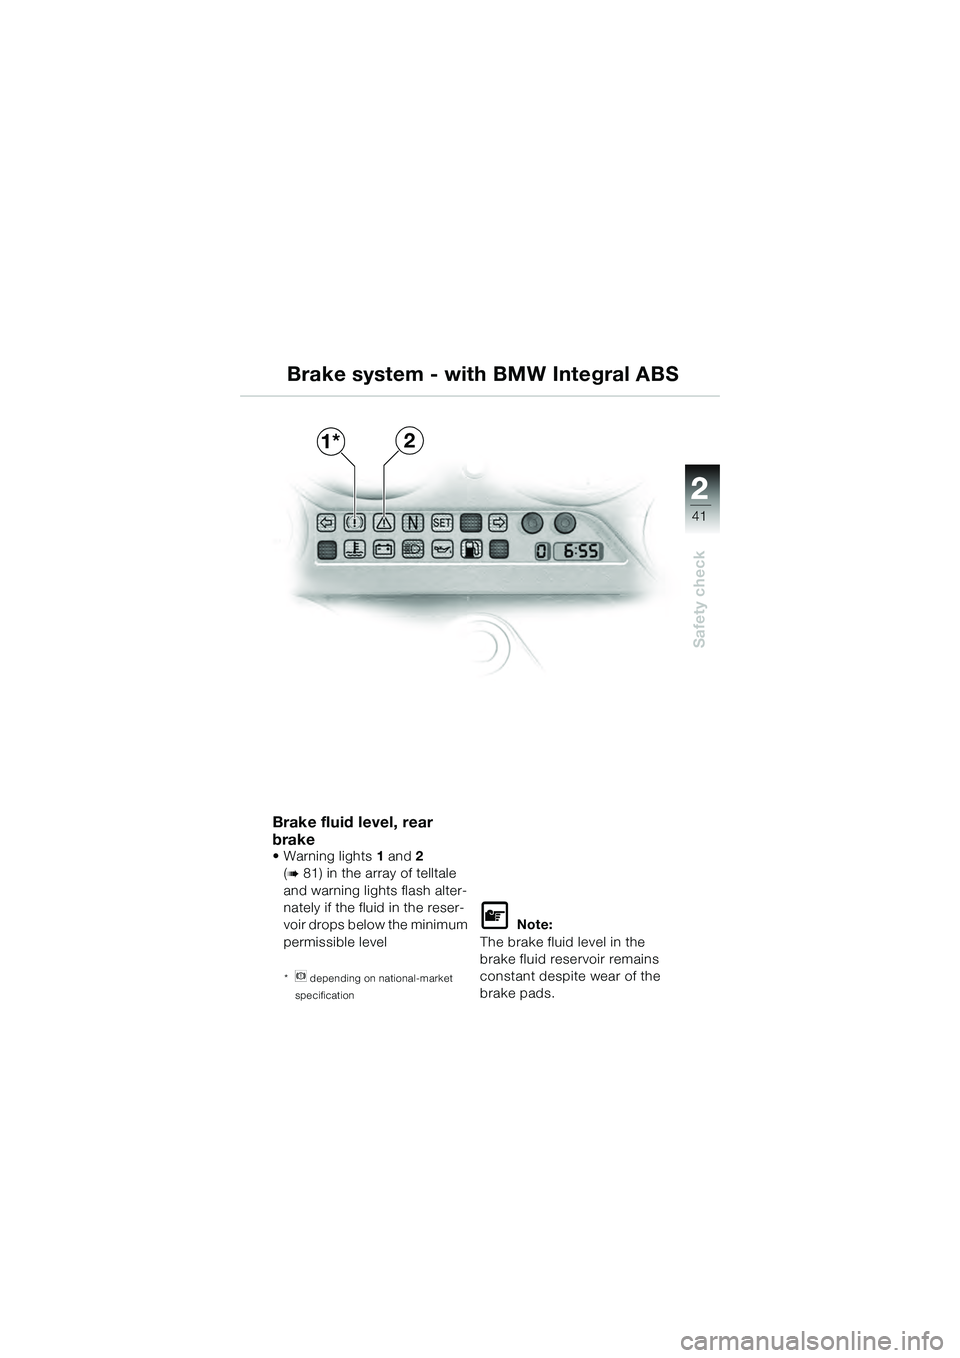
• Warning lights 1 and 2
(
� 81) in the array of telltale
and warning lights flash alter-
nately if the fluid in the reser-
voir drops below the minimum
permissible level
*n depending on national-market
specification
� Note:
The brake fluid level in the
brake fluid reservoir remains
constant despite wear of the
brake pads.
1*2
10k41bkg3.book Seite 41 Donnerstag, 27. Mai 2004 5:30 17
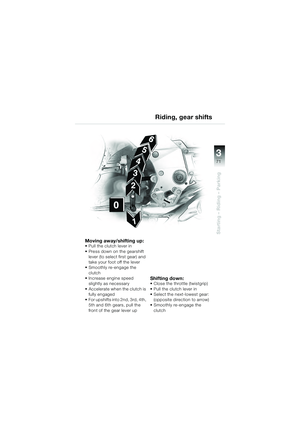
Page 44 of 100
42
Safety check
2
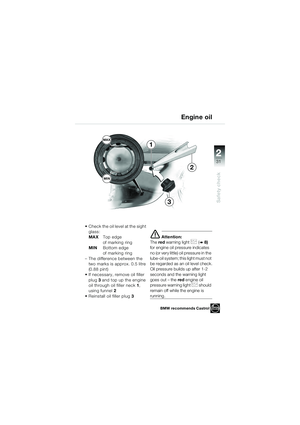
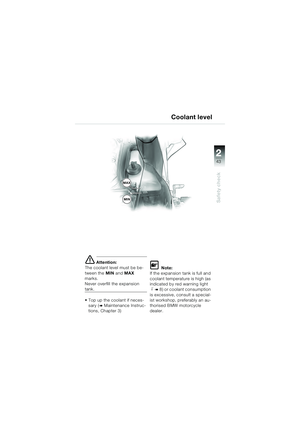
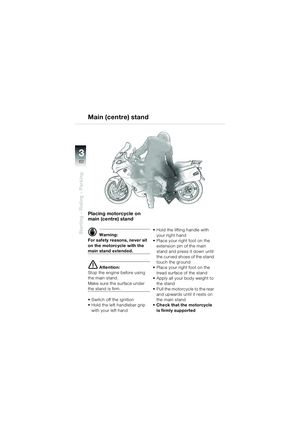
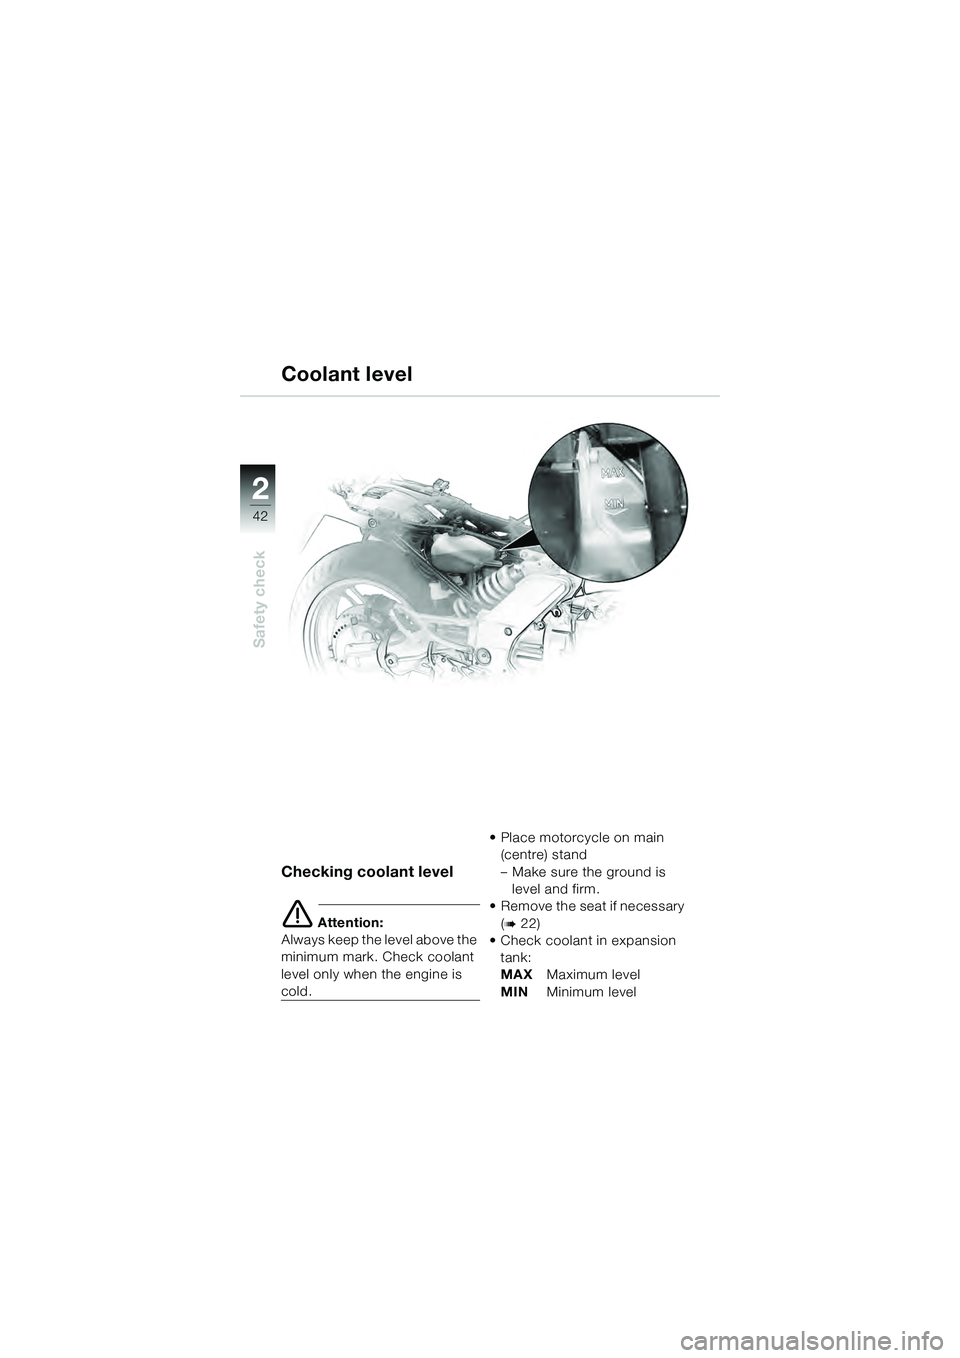
Coolant level
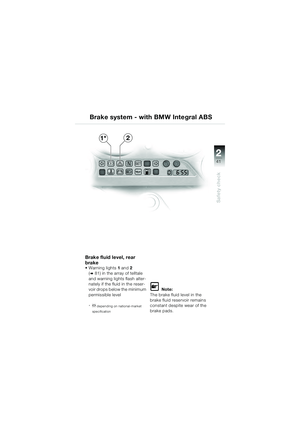
Checking coolant level
� Attention:
Always keep the level above the
minimum mark. Check coolant
level only when the engine is
cold. • Place motorcycle on main
(centre) stand
– Make sure the ground is
level and firm.
• Remove the seat if necessary
(
� 22)
• Check coolant in expansion
tank:
MAX Maximum level
MIN Minimum level
10k41bkg3.book Seite 42 Donnerstag, 27. Mai 2004 5:30 17
Page 45 of 100
22
43
Safety check
2
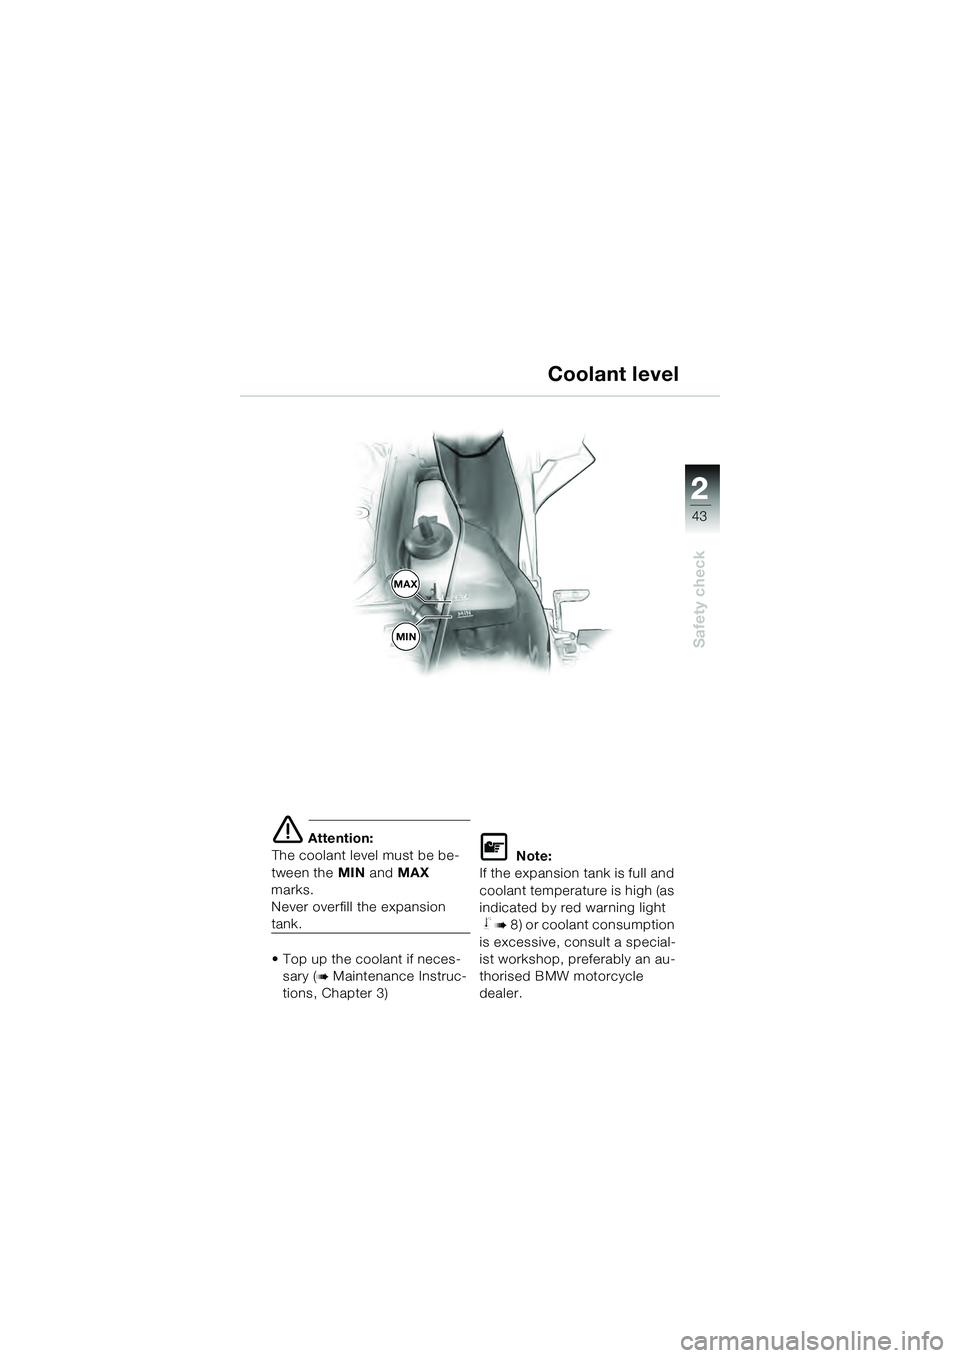
� Attention:
The coolant level must be be-
tween the MIN and MAX
marks.
Never overfill the expansion
tank.
• Top up the coolant if neces-
sary (
� Maintenance Instruc-
tions, Chapter 3)
� Note:
If the expansion tank is full and
coolant temperature is high (as
indicated by red warning light
� � 8) or coolant consumption
is excessive, consult a special-
ist workshop, preferably an au-
thorised BMW motorcycle
dealer.
Coolant level
MAX
MIN
10k41bkg3.book Seite 43 Donnerstag, 27. Mai 2004 5:30 17
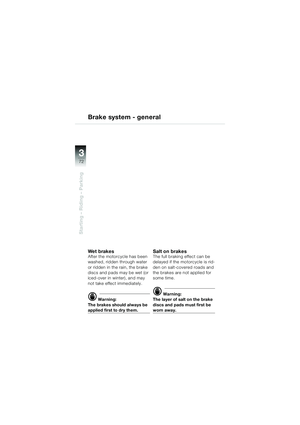
Page 46 of 100
44
Safety check
2
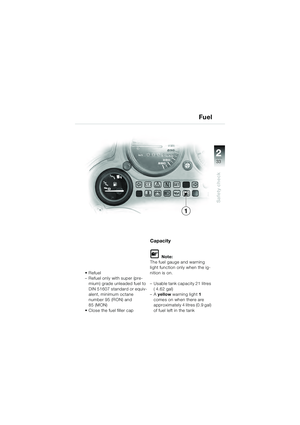
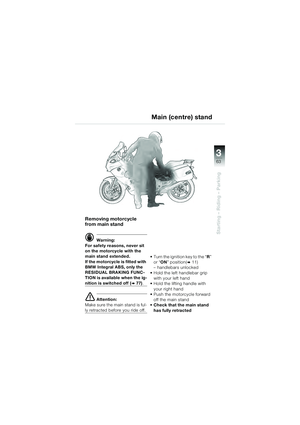
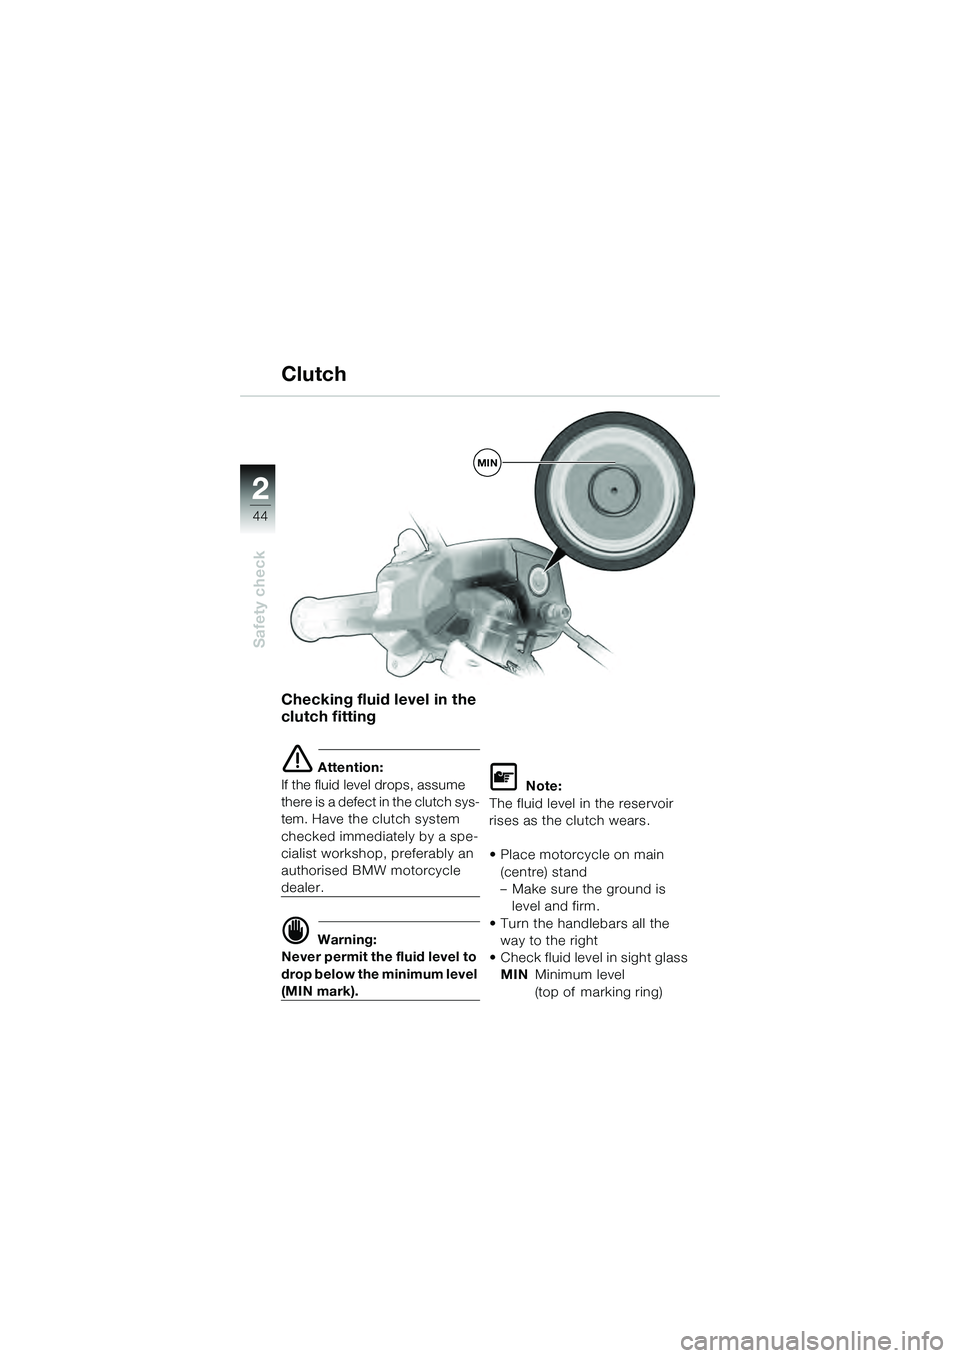
Checking fluid level in the
clutch fitting
� Attention:
If the fluid level drops, assume
there is a defect in the clutch sys-
tem. Have the clutch system
checked immediately by a spe-
cialist workshop, preferably an
authorised BMW motorcycle
dealer.
� Warning:
Never permit the fluid level to
drop below the minimum level
(MIN mark).
� Note:
The fluid level in the reservoir
rises as the clutch wears.
• Place motorcycle on main (centre) stand
– Make sure the ground is level and firm.
• Turn the handlebars all the way to the right
• Check fluid level in sight glass MIN Minimum level
(top of marking ring)
Clutch
MIN
10k41bkg3.book Seite 44 Donnerstag, 27. Mai 2004 5:30 17
Page 47 of 100
22
45
Safety check
2
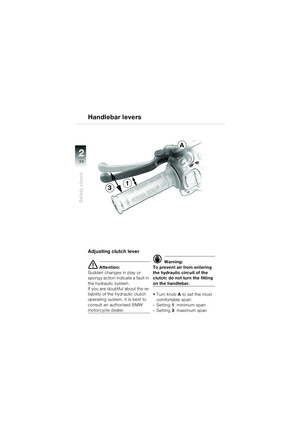
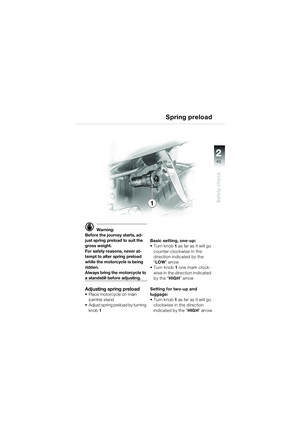
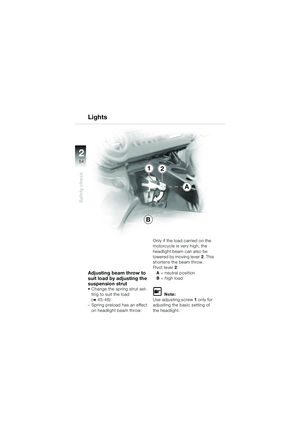
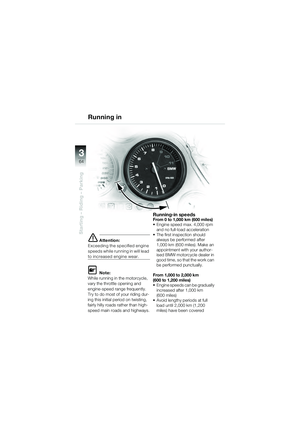
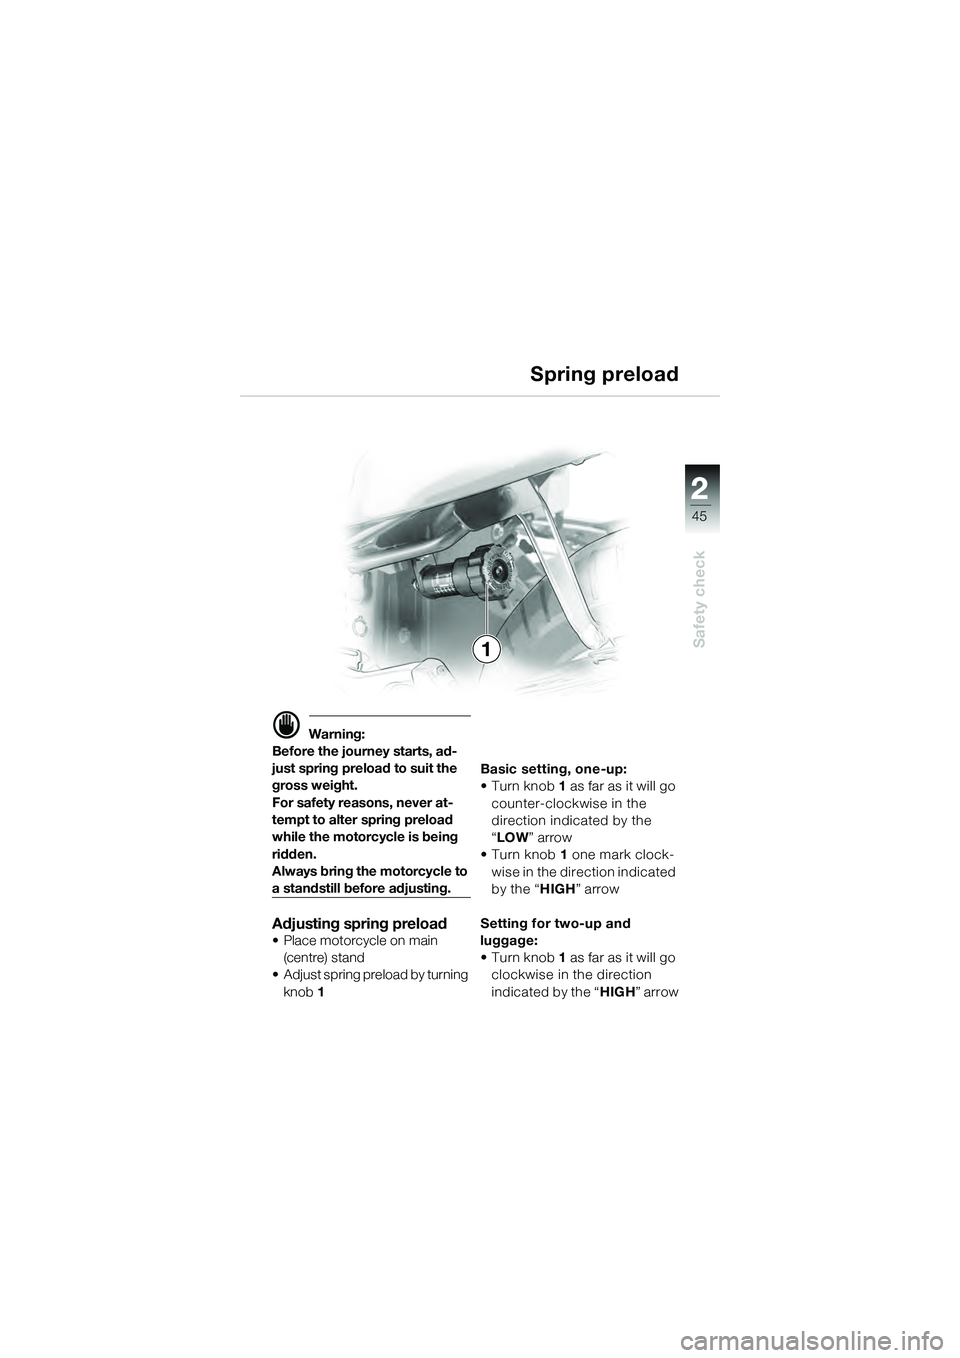
� Warning:
Before the journey starts, ad-
just spring preload to suit the
gross weight.
For safety reasons, never at-
tempt to alter spring preload
while the motorcycle is being
ridden.
Always bring the motorcycle to
a standstill before adjusting.
Adjusting spring preload• Place motorcycle on main
(centre) stand
• Adjust spring preload by turning
knob 1 Basic setting, one-up:
•Turn knob 1
as far as it will go
counter-clockwise in the
direction indicated by the
“ LOW ” arrow
•Turn knob 1 one mark clock-
wise in the direction indicated
by the “ HIGH” arrow
Setting for two-up and
luggage:
•Turn knob 1 as far as it will go
clockwise in the direction
indicated by the “ HIGH” arrow
1 Spring preload
10k41bkg3.book Seite 45 Donnerstag, 27. Mai 2004 5:30 17
Page 48 of 100
46
Safety check
2
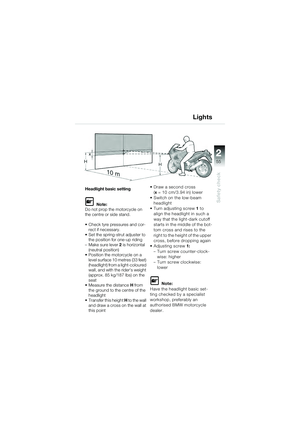
1
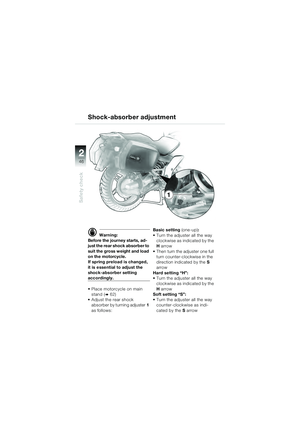
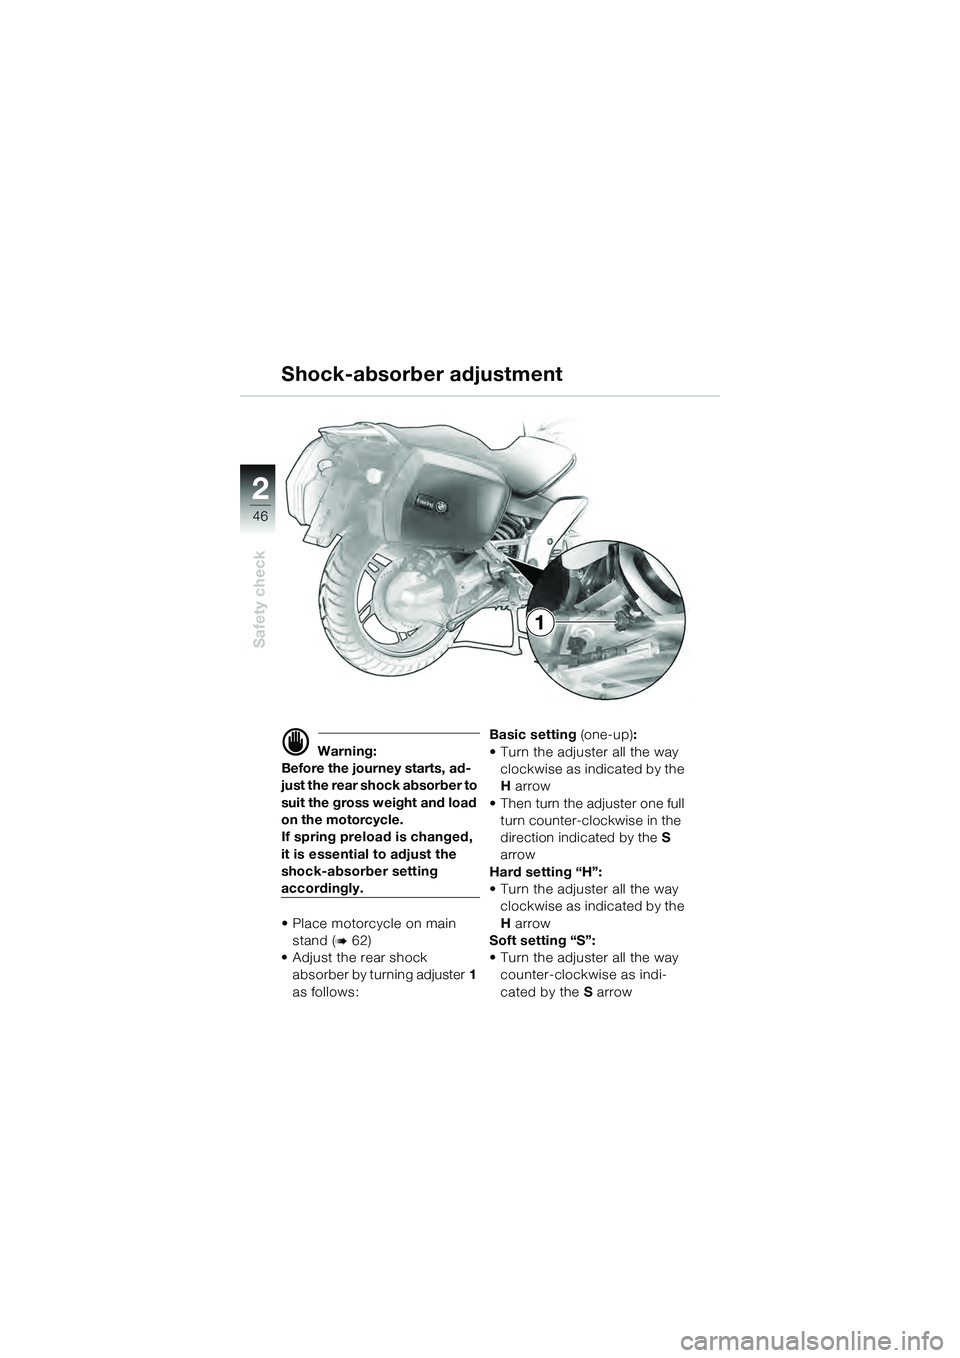
� Warning:
Before the journey starts, ad-
just the rear shock absorber to
suit the gross weight and load
on the motorcycle.
If spring preload is changed,
it is essential to adjust the
shock-absorber setting
accordingly.
• Place motorcycle on main stand (
� 62)
• Adjust the rear shock absorber by turning adjuster 1
as follows: Basic setting
(one-up):
• Turn the adjuster all the way clockwise as indicated by the
H arrow
• Then turn the adjuster one full
turn counter-clockwise in the
direction indicated by the S
arrow
Hard setting “H”:
• Turn the adjuster all the way clockwise as indicated by the
H arrow
Soft setting “S”:
• Turn the adjuster all the way counter-clockwise as indi-
cated by the S arrow
Shock-absorber adjustment
10k41bkg3.book Seite 46 Donnerstag, 27. Mai 2004 5:30 17