2004 BMW 645CI COUPE&CONVERTIBLE child lock
[x] Cancel search: child lockPage 35 of 216
Controls
33Reference
At a glance
Driving tips
Communications
Navigation
Entertainment
Mobility
Indicator lamp displays
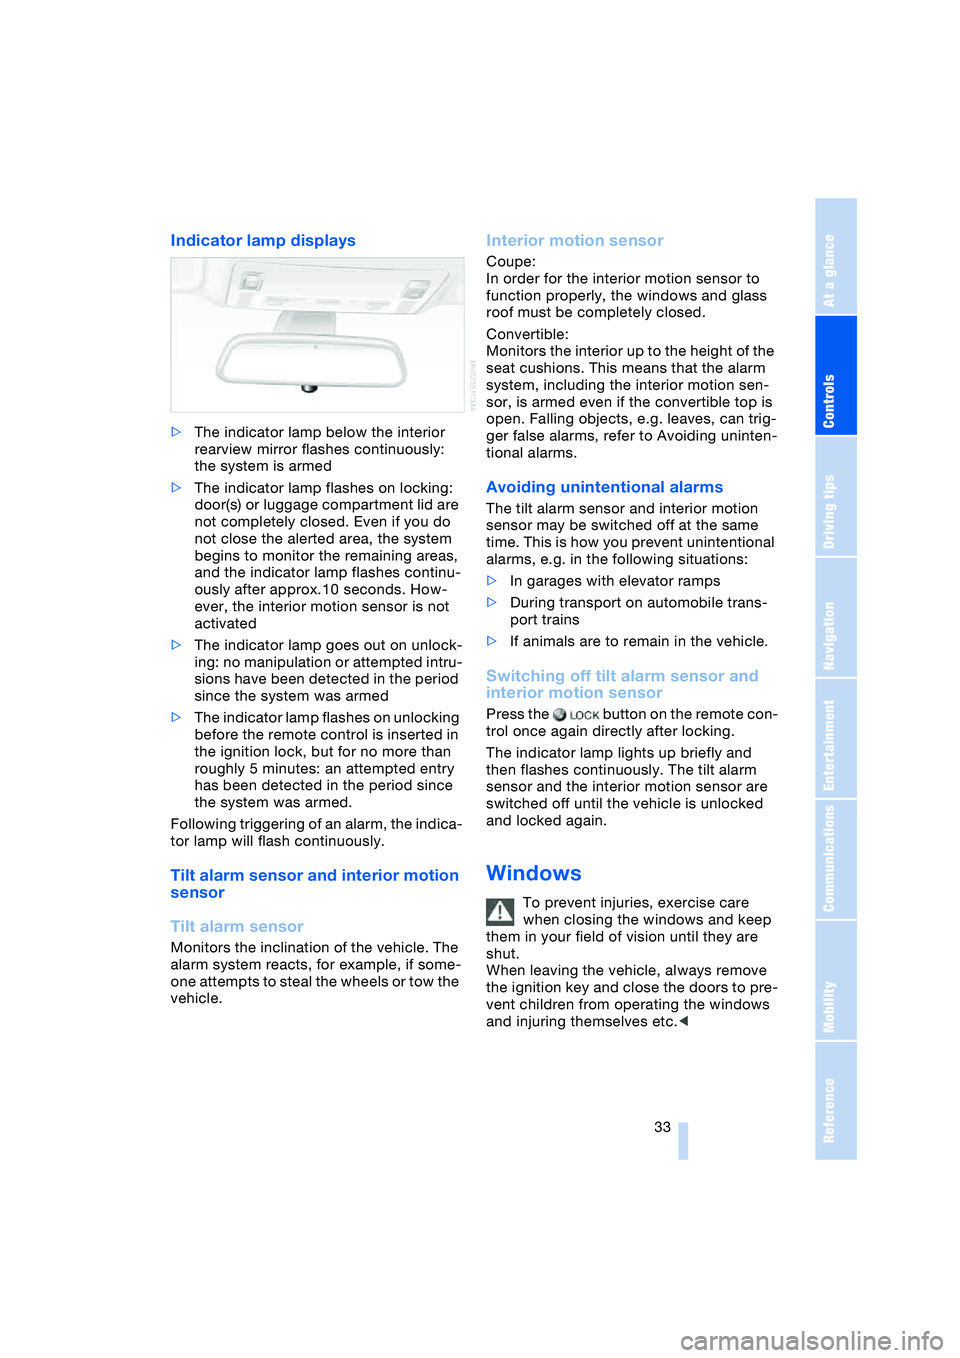
>The indicator lamp below the interior
rearview mirror flashes continuously:
the system is armed
>The indicator lamp flashes on locking:
door(s) or luggage compartment lid are
not completely closed. Even if you do
not close the alerted area, the system
begins to monitor the remaining areas,
and the indicator lamp flashes continu-
ously after approx.10 seconds. How-
ever, the interior motion sensor is not
activated
>The indicator lamp goes out on unlock-
ing: no manipulation or attempted intru-
sions have been detected in the period
since the system was armed
>The indicator lamp flashes on unlocking
before the remote control is inserted in
the ignition lock, but for no more than
roughly 5 minutes: an attempted entry
has been detected in the period since
the system was armed.
Following triggering of an alarm, the indica-
tor lamp will flash continuously.
Tilt alarm sensor and interior motion
sensor
Tilt alarm sensor
Monitors the inclination of the vehicle. The
alarm system reacts, for example, if some-
one attempts to steal the wheels or tow the
vehicle.
Interior motion sensor
Coupe:
In order for the interior motion sensor to
function properly, the windows and glass
roof must be completely closed.
Convertible:
Monitors the interior up to the height of the
seat cushions. This means that the alarm
system, including the interior motion sen-
sor, is armed even if the convertible top is
open. Falling objects, e.g. leaves, can trig-
ger false alarms, refer to Avoiding uninten-
tional alarms.
Avoiding unintentional alarms
The tilt alarm sensor and interior motion
sensor may be switched off at the same
time. This is how you prevent unintentional
alarms, e.g. in the following situations:
>In garages with elevator ramps
>During transport on automobile trans-
port trains
>If animals are to remain in the vehicle.
Switching off tilt alarm sensor and
interior motion sensor
Press the button on the remote con-
trol once again directly after locking.
The indicator lamp lights up briefly and
then flashes continuously. The tilt alarm
sensor and the interior motion sensor are
switched off until the vehicle is unlocked
and locked again.
Windows
To prevent injuries, exercise care
when closing the windows and keep
them in your field of vision until they are
shut.
When leaving the vehicle, always remove
the ignition key and close the doors to pre-
vent children from operating the windows
and injuring themselves etc.<
Page 37 of 216
Controls
35Reference
At a glance
Driving tips
Communications
Navigation
Entertainment
Mobility
Rear window
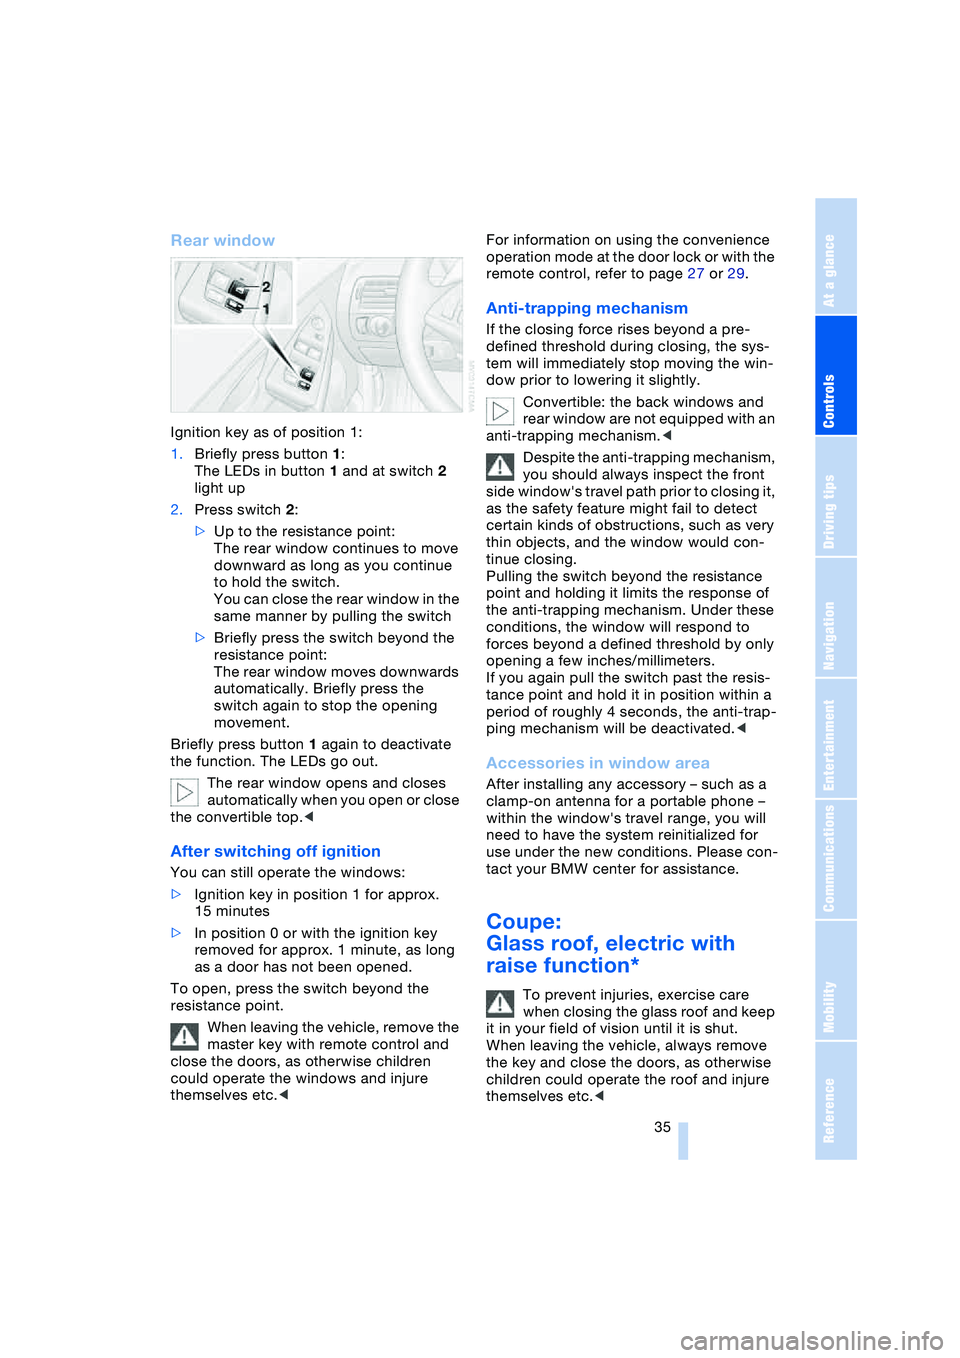
Ignition key as of position 1:
1.Briefly press button 1:
The LEDs in button 1 and at switch 2
light up
2.Press switch 2:
>Up to the resistance point:
The rear window continues to move
downward as long as you continue
to hold the switch.
You can close the rear window in the
same manner by pulling the switch
>Briefly press the switch beyond the
resistance point:
The rear window moves downwards
automatically. Briefly press the
switch again to stop the opening
movement.
Briefly press button 1 again to deactivate
the function. The LEDs go out.
The rear window opens and closes
automatically when you open or close
the convertible top.<
After switching off ignition
You can still operate the windows:
>Ignition key in position 1 for approx.
15 minutes
>In position 0 or with the ignition key
removed for approx. 1 minute, as long
as a door has not been opened.
To open, press the switch beyond the
resistance point.
When leaving the vehicle, remove the
master key with remote control and
close the doors, as otherwise children
could operate the windows and injure
themselves etc.
remote control, refer to page 27 or 29.
Anti-trapping mechanism
If the closing force rises beyond a pre-
defined threshold during closing, the sys-
tem will immediately stop moving the win-
dow prior to lowering it slightly.
Convertible: the back windows and
rear window are not equipped with an
anti-trapping mechanism.<
Despite the anti-trapping mechanism,
you should always inspect the front
side window's travel path prior to closing it,
as the safety feature might fail to detect
certain kinds of obstructions, such as very
thin objects, and the window would con-
tinue closing.
Pulling the switch beyond the resistance
point and holding it limits the response of
the anti-trapping mechanism. Under these
conditions, the window will respond to
forces beyond a defined threshold by only
opening a few inches/millimeters.
If you again pull the switch past the resis-
tance point and hold it in position within a
period of roughly 4 seconds, the anti-trap-
ping mechanism will be deactivated.<
Accessories in window area
After installing any accessory – such as a
clamp-on antenna for a portable phone –
within the window's travel range, you will
need to have the system reinitialized for
use under the new conditions. Please con-
tact your BMW center for assistance.
Coupe:
Glass roof, electric with
raise function*
To prevent injuries, exercise care
when closing the glass roof and keep
it in your field of vision until it is shut.
When leaving the vehicle, always remove
the key and close the doors, as otherwise
children could operate the roof and injure
themselves etc.<
Page 39 of 216
Controls
37Reference
At a glance
Driving tips
Communications
Navigation
Entertainment
Mobility
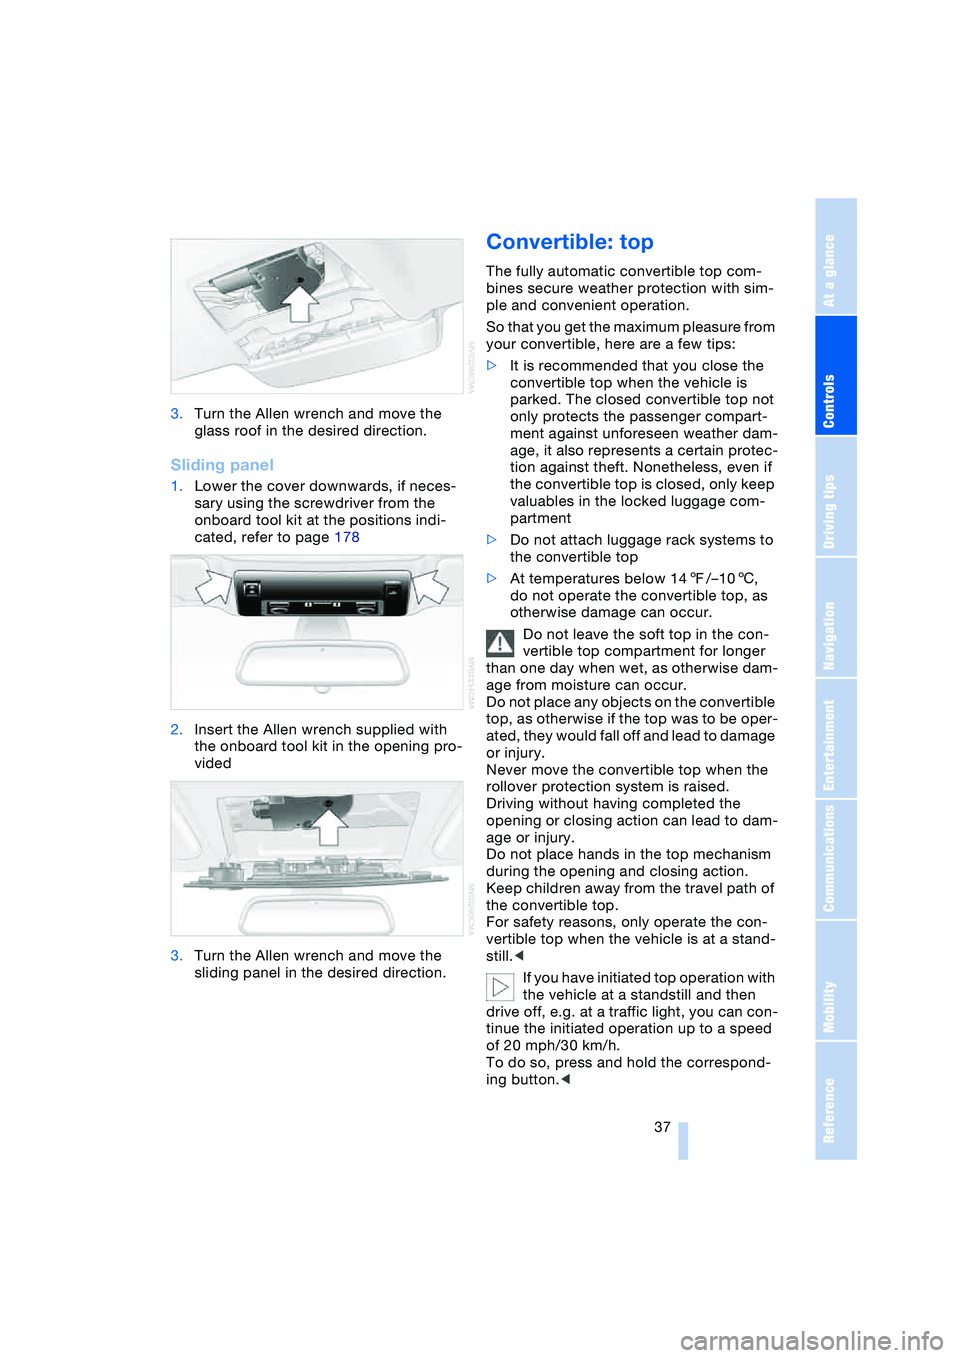
3.Turn the Allen wrench and move the
glass roof in the desired direction.
Sliding panel
1.Lower the cover downwards, if neces-
sary using the screwdriver from the
onboard tool kit at the positions indi-
cated, refer to page 178
2.Insert the Allen wrench supplied with
the onboard tool kit in the opening pro-
vided
3.Turn the Allen wrench and move the
sliding panel in the desired direction.
Convertible: top
The fully automatic convertible top com-
bines secure weather protection with sim-
ple and convenient operation.
So that you get the maximum pleasure from
your convertible, here are a few tips:
>It is recommended that you close the
convertible top when the vehicle is
parked. The closed convertible top not
only protects the passenger compart-
ment against unforeseen weather dam-
age, it also represents a certain protec-
tion against theft. Nonetheless, even if
the convertible top is closed, only keep
valuables in the locked luggage com-
partment
>Do not attach luggage rack systems to
the convertible top
>At temperatures below 147/–106,
do not operate the convertible top, as
otherwise damage can occur.
Do not leave the soft top in the con-
vertible top compartment for longer
than one day when wet, as otherwise dam-
age from moisture can occur.
Do not place any objects on the convertible
top, as otherwise if the top was to be oper-
ated, they would fall off and lead to damage
or injury.
Never move the convertible top when the
rollover protection system is raised.
Driving without having completed the
opening or closing action can lead to dam-
age or injury.
Do not place hands in the top mechanism
during the opening and closing action.
Keep children away from the travel path of
the convertible top.
For safety reasons, only operate the con-
vertible top when the vehicle is at a stand-
still.<
If you have initiated top operation with
the vehicle at a standstill and then
drive off, e.g. at a traffic light, you can con-
tinue the initiated operation up to a speed
of 20 mph/30 km/h.
To do so, press and hold the correspond-
ing button.<
Page 44 of 216
Adjustments
42
Adjustments
Sitting safely
The ideal sitting position can make a vital
contribution to relaxed, fatigue-free driving.
The sitting position also plays an important
role together with the safety belts and air-
bags in providing occupants with maximum
levels of passive safety in an accident. To
ensure that the safety systems operate with
optimal efficiency, we strongly urge you to
observe the instructions contained in the
following section.
For additional information on transporting
children safely, refer to page 51.
Sitting safely with airbags
Always maintain an adequate dis-
tance between yourself and the air-
bags. Always hold the steering wheel by
its rim with hands at the 9 o'clock and
3 o'clock positions, to minimize the risk of
injuries to your hands and arms in the event
of airbag deployment.
No one and nothing is to come between the
airbags and the seat occupant.
Do not use the cover of the front airbag on
the front passenger side as a storage area.
Make sure that the front passenger is sit-
ting correctly and does not rest feet or legs
on the instrument panel, otherwise leg inju-
ries can occur if the knee and front airbags
are triggered.
Never let an occupant's head rest near or
on a side airbag because the inflating air-
bag could cause a serious or fatal injury.<
Even if you adhere to all the instructions
injuries resulting from contact with airbags
cannot be fully excluded, depending on the
circumstances. The ignition and inflation
noise may provoke a mild – usually tempo-
rary – hearing loss in extremely sensitive
individuals.
For airbag locations and additional infor-
mation on airbags, refer to page 81.
Sitting safely with safety belts
Fasten your safety belt before starting any
trip. Airbags complement the safety belt as
an additional safety device, but they do not
represent a substitute.
Your vehicle has four seats that are all
equipped with a safety belt.
At all times, occupants should sit
upright and be properly restrained:
infants and small children in appropriate
child-restraint systems; larger children and
adults using the safety belts.
Never allow more than one person to wear
a single safety belt. Never allow infants or
small children to ride in a passenger's lap.
Expectant mothers should always wear
their safety belts, taking care to position
the lap belt against the lower hips, where it
will not exert pressure against the abdomi-
nal area.
Do not route the belt across your neck, or
run it across sharp edges. Be sure that the
belt does not become caught or jammed.
Avoid twisting the belt while routing it firmly
across the hips and shoulder. Do not allow
the belt to rest against hard or fragile
objects. Otherwise, in the event of a frontal
impact, a loose lap belt could slide over
your hips, leading to abdominal injury.
Avoid wearing clothing that prevents the
belt from fitting properly and pull the lap
belt periodically to readjust the tension
across your shoulder in order to avoid a
reduction in the retention effect of the
safety belt.<
For instructions on operating safety belts,
refer to page 47.
Page 54 of 216
Transporting children safely
52
Child seat security
All of the rear belt retractors and the front
passenger's safety belt can be locked for
mounting and securing child-restraint sys-
tems.
Information regarding this is located near
the buckle latch of each safety belt.
To lock safety belt
Pull the entire length of the belt from the
belt retractor. Allow the reel to retract the
belt somewhat and engage the buckle,
then tighten the belt against the child-
restraint system. The retraction mechanism
is now locked.
To unlock safety belt
Release the buckle, remove the child-
restraint system and allow the belt retractor
to reel the belt completely in.
Coupe: child-restraint system with
tether strap
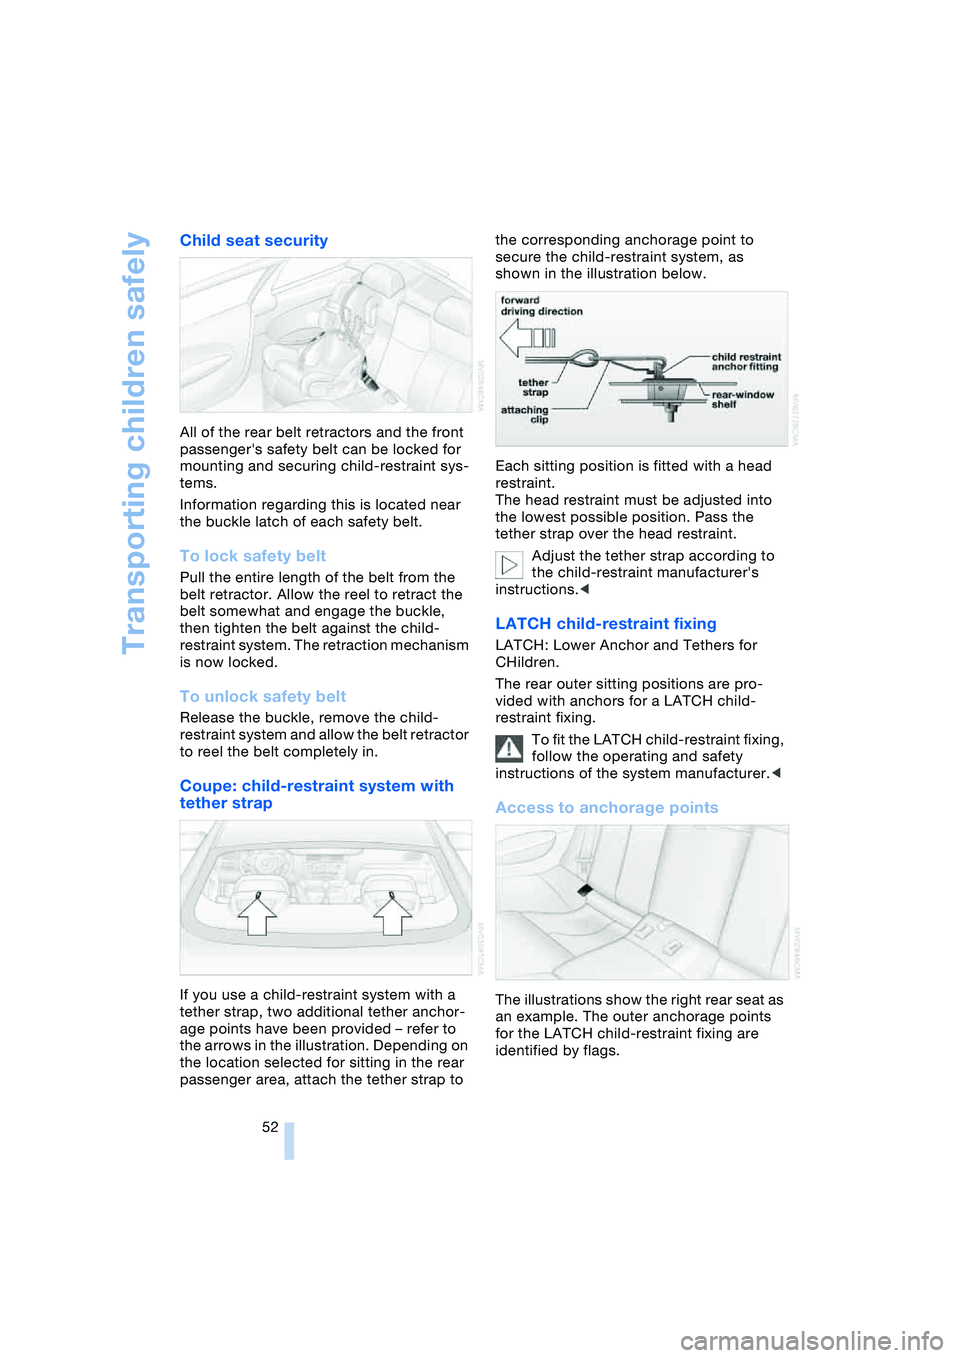
If you use a child-restraint system with a
tether strap, two additional tether anchor-
age points have been provided – refer to
the arrows in the illustration. Depending on
the location selected for sitting in the rear
passenger area, attach the tether strap to the corresponding anchorage point to
secure the child-restraint system, as
shown in the illustration below.
Each sitting position is fitted with a head
restraint.
The head restraint must be adjusted into
the lowest possible position. Pass the
tether strap over the head restraint.
Adjust the tether strap according to
the child-restraint manufacturer's
instructions.<
LATCH child-restraint fixing
LATCH: Lower Anchor and Tethers for
CHildren.
The rear outer sitting positions are pro-
vided with anchors for a LATCH child-
restraint fixing.
To fit the LATCH child-restraint fixing,
follow the operating and safety
instructions of the system manufacturer.<
Access to anchorage points
The illustrations show the right rear seat as
an example. The outer anchorage points
for the LATCH child-restraint fixing are
identified by flags.
Page 92 of 216
A congenial climate
90 rently within the vehicle. AUC executes this
function automatically.
Press the button repeatedly to run through
the following control sequence:
>Indicator lamps off: outside air flows
into the vehicle continuously
>Right indicator lamp on, AUC mode: the
system detects pollutants in the outside
air and responds by blocking the supply
of outside air when required.
Depending upon air quality require-
ments, in the automatic mode the sys-
tem alternates between its outside-air
and recirculated-air modes
>Left indicator lamp on, recirculated-air
mode: the supply of outside air into the
vehicle is continuously blocked.
If condensation starts to form on the
inside window surfaces during opera-
tion in the recirculated-air mode, you
should switch it off while also increasing
the air volume as required.
The recirculated-air mode should not be
used over a longer period of time, as the air
quality inside the vehicle deteriorates con-
tinuously.<
Residual heat mode
If you press this button with the
engine switched off, the system
uses the warmth stored in the
engine to heat the interior, for
instance, while the vehicle is
stationary at a school to pick up a child.
You can adjust the automatic climate con-
trol settings as of ignition key position 2.
Provided that the engine has warmed to its
normal operating temperature and the bat-
tery is charged, you can use this function
for up to 15 minutes after switching off the
ignition. The LED within the button lights up
to confirm compliance with both of these
conditions.
Switching off automatic climate
control
The air volume, the heater and
the cooling function are all
switched off. You can restart
the automatic climate control
by pressing any of its buttons
except the REST button.
Settings using Control Center
Ignition key:
>On vehicles with separate drives for
audio CDs and navigation DVDs, igni-
tion key in position 2
>On vehicles with one drive for audio
CDs, ignition key in position 1.
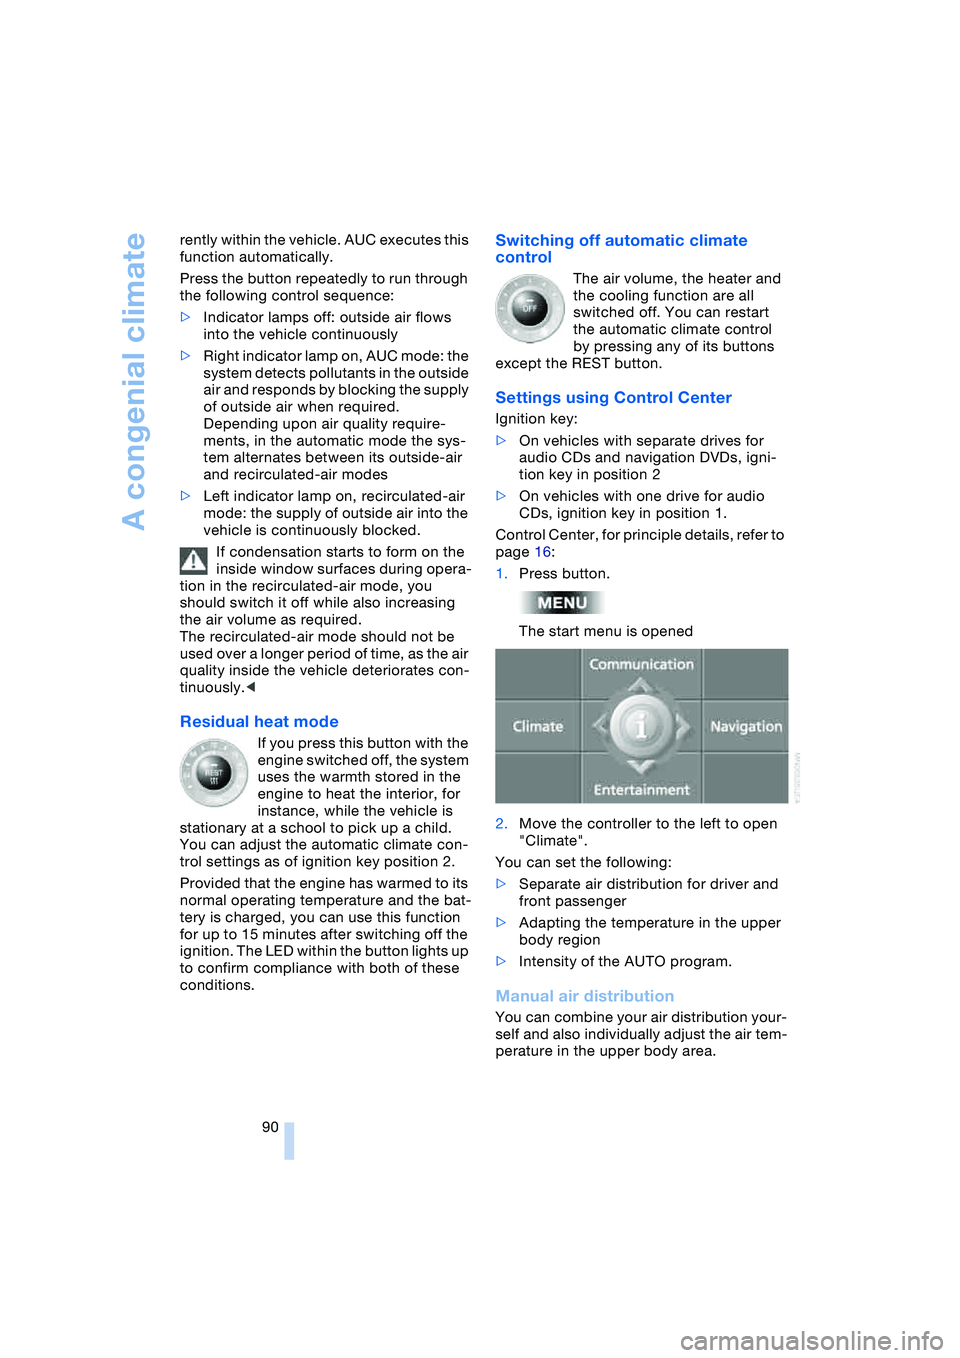
Control Center, for principle details, refer to
page 16:
1.Press button.
The start menu is opened
2.Move the controller to the left to open
"Climate".
You can set the following:
>Separate air distribution for driver and
front passenger
>Adapting the temperature in the upper
body region
>Intensity of the AUTO program.
Manual air distribution
You can combine your air distribution your-
self and also individually adjust the air tem-
perature in the upper body area.
Page 174 of 216
Under the hood
172
Topping up engine oil
Wait until the level has dropped to just on
the lower dipstick mark before adding oil.
In this area a message also appears on the
Control Display.
Store oil, grease etc., well out of the
reach of children; always observe all
warning labels on the containers.<
Specified engine oils
The quality of the engine oil selected has
critical significance for the operation and
service life of an engine. BMW continu-
ously approves specific oils after confirm-
ing their suitability for use in its vehicles
with extensive testing.
Use only approved BMW High Perfor-
mance Synthetic Oil.
If you are unable to obtain BMW High Per-
formance Synthetic Oil, you can add small
amounts of another synthetic oil between
oil changes. Use only oils with the API SH
specification or higher.
Ask your BMW center for details con-
cerning the specific BMW High Per-
formance Synthetic Oil or synthetic oils
which have been approved.<
You can also call BMW of North America
at 1-800-831-1117 or visit this website:
www.bmwusa.com to obtain this informa-
tion.
BMW engines are designed to oper-
ate without additives, and their use
could even lead to damage in some
cases.<
Viscosity ratings
Viscosity is the oil flow rating as defined in
SAE classes.
The selection of the correct SAE class
depends on the climatic conditions in the
area where you typically drive your BMW.
Approved oils are in SAE classes
5W-40 and 5W-30.<
These oils may be used for driving in all
ambient temperatures.
Coolant
Do not add coolant to the cooling sys-
tem when the engine is hot. Escaping
coolant can cause burns.<
Coolant consists of water and the addition
of antifreeze and anticorrosion agent. Not
all commercially available additives are
suitable for your BMW. Ask your BMW cen-
ter for suitable additives.
Only use suitable additives, as other-
wise engine damage may result. The
additives present a health hazard; observe
the instructions on the containers.<
Always observe all applicable envi-
ronmental rules and regulations when
disposing of used coolant additives.<
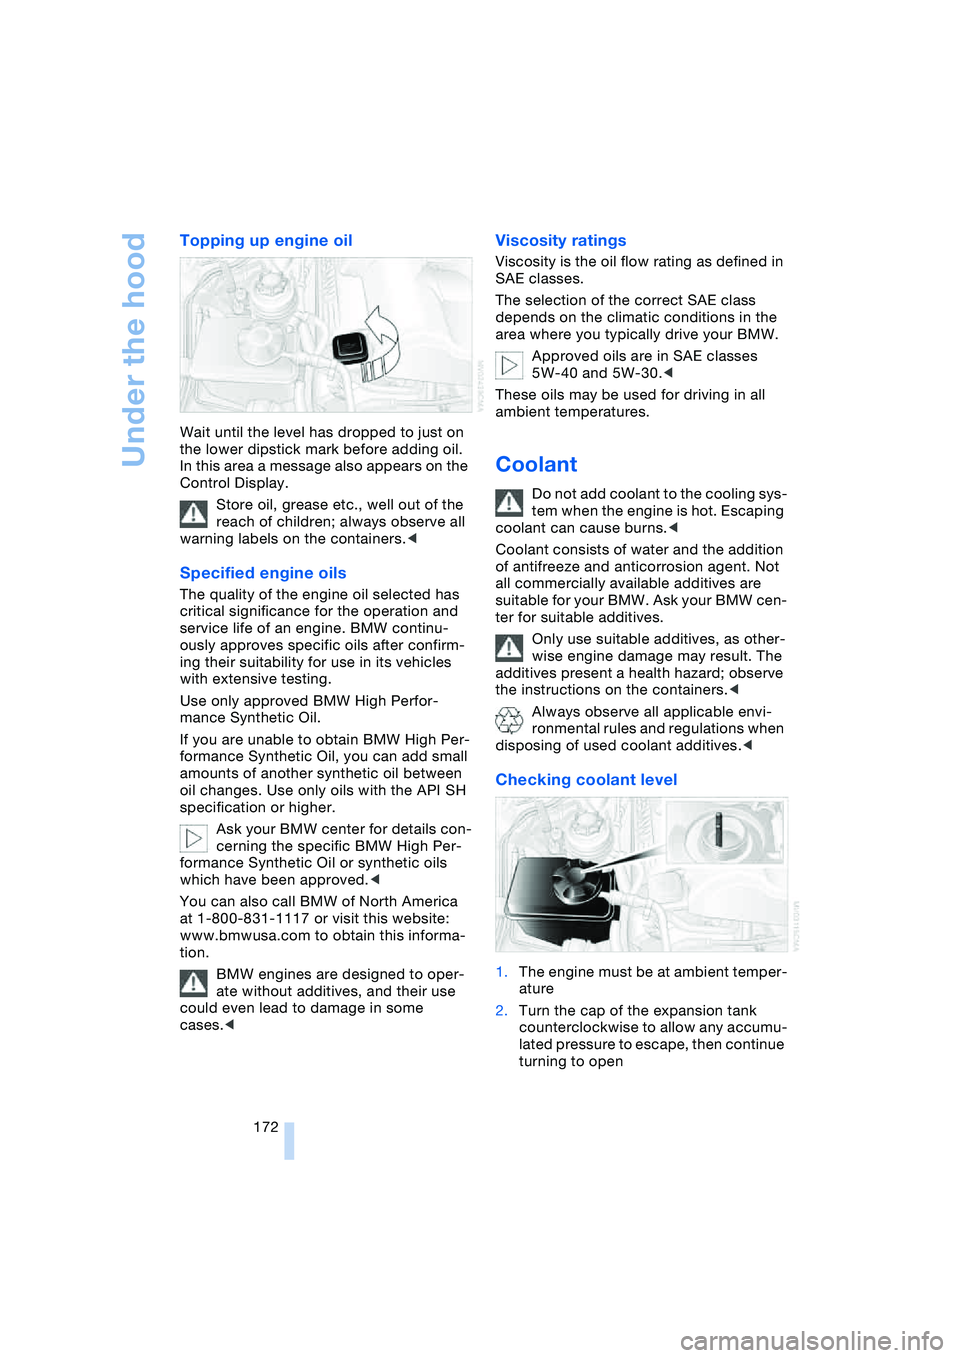
Checking coolant level
1.The engine must be at ambient temper-
ature
2.Turn the cap of the expansion tank
counterclockwise to allow any accumu-
lated pressure to escape, then continue
turning to open
Page 201 of 216
Reference 199
At a glance
Controls
Driving tips
Communications
Navigation
Entertainment
Mobility
C
California laws
– Event Data
Recorders 176
– Proposition 65
Warning 176
"Call" 148
Call
– accepting 147
– display accepted 149
– ending 148
– in absence 149
– starting 147
Calling
– from phone book 148
– from the Top 8 list 149
– redialing 149
– refer to telephone
Owner's Manual 96
"Call sender" 151
Can holder, refer to
Cup holders 97
Capacities 193
Car battery, refer to
Battery 181
Car care, refer to the Caring
for your vehicle brochure
Car-care products, refer to
the Caring for your
vehicle brochure
"Car data" 69
Care 175
Cargo, securing 105
Caring for artificial leather,
refer to the Caring for
your vehicle brochure
Caring for leather, refer to
the Caring for your
vehicle brochure
Caring for light-alloy
wheels, refer to the
Caring for your vehicle
brochure'
Caring for plastic, refer to
the Caring for your
vehicle brochure
Caring for the carpet, refer
to the Caring for your
vehicle brochureCaring for the vehicle finish,
refer to the Caring for
your vehicle brochure'
Car jacking points 181
Car keys, refer to
Key set 26
Car phone 145
– location, refer to
Center armrest 96
– refer to
Portable phone 144
– refer to separate
Owner's Manual
Car radio, refer to
Radio 130
Car wash 102
– also refer to the Caring for
your vehicle brochure
Catalytic converter, refer to
Exhaust system 102
"Categories" 135
CBC Cornering Brake
Control 76
CBS Condition Based
Service 174
"CD" 127, 137
CD changer 137
– adjusting the tone 127
– controls 126
– fast forward/reverse 140
– installation location 140
– playing a track 139
– random play
sequence 140
– repeating a track 139
– selecting a CD 137
– selecting a track 138
– switching on/off 126
– volume 127
CD player 137
– adjusting the tone 127
– controls 126
– fast forward/reverse 140
– playing a track 139
– random play
sequence 140
– repeating a track 139
– selecting a track 138
– switching on/off 126
– volume 127Center armrest
– adjusting the height 96
– front 96
Center console 14
"Central locking" 27
Central locking system 26
– from inside vehicle 29
Changes, technical, refer to
For your own safety 6
Changing a wheel 181
Changing the language on
Control Display 73
Changing the
measurement units on the
Control Display 72
Changing wheels 181
CHECK button 68
Check Control 66
"Check Control
messages" 68
Check Gas Cap 162
Checking the air pressure,
refer to Tire inflation
pressure 164
Child's seats, refer to
Child-restraint
systems 52
Child-restraint system 51
Chrome parts, care, refer
to the Caring for your
vehicle brochure
Cigarette lighter 97
Cleaning, refer to the
Caring for your vehicle
brochure
Cleaning windshield, refer
to Wiper system 61
"Climate" 90
"Climate control" 91
Clock 64
– 12/24 hour mode 73
– setting time and date 73
Closing
– from inside 29
– from outside 27
Clothes hooks, Coupe 96
Cockpit 10
Cold start, refer to
Starting the engine 54
"Communication" 146