2004 BMW 645CI COUPE&CONVERTIBLE low beam
[x] Cancel search: low beamPage 13 of 216
At a glance
11Reference
Controls
Driving tips
Communications
Navigation
Entertainment
Mobility
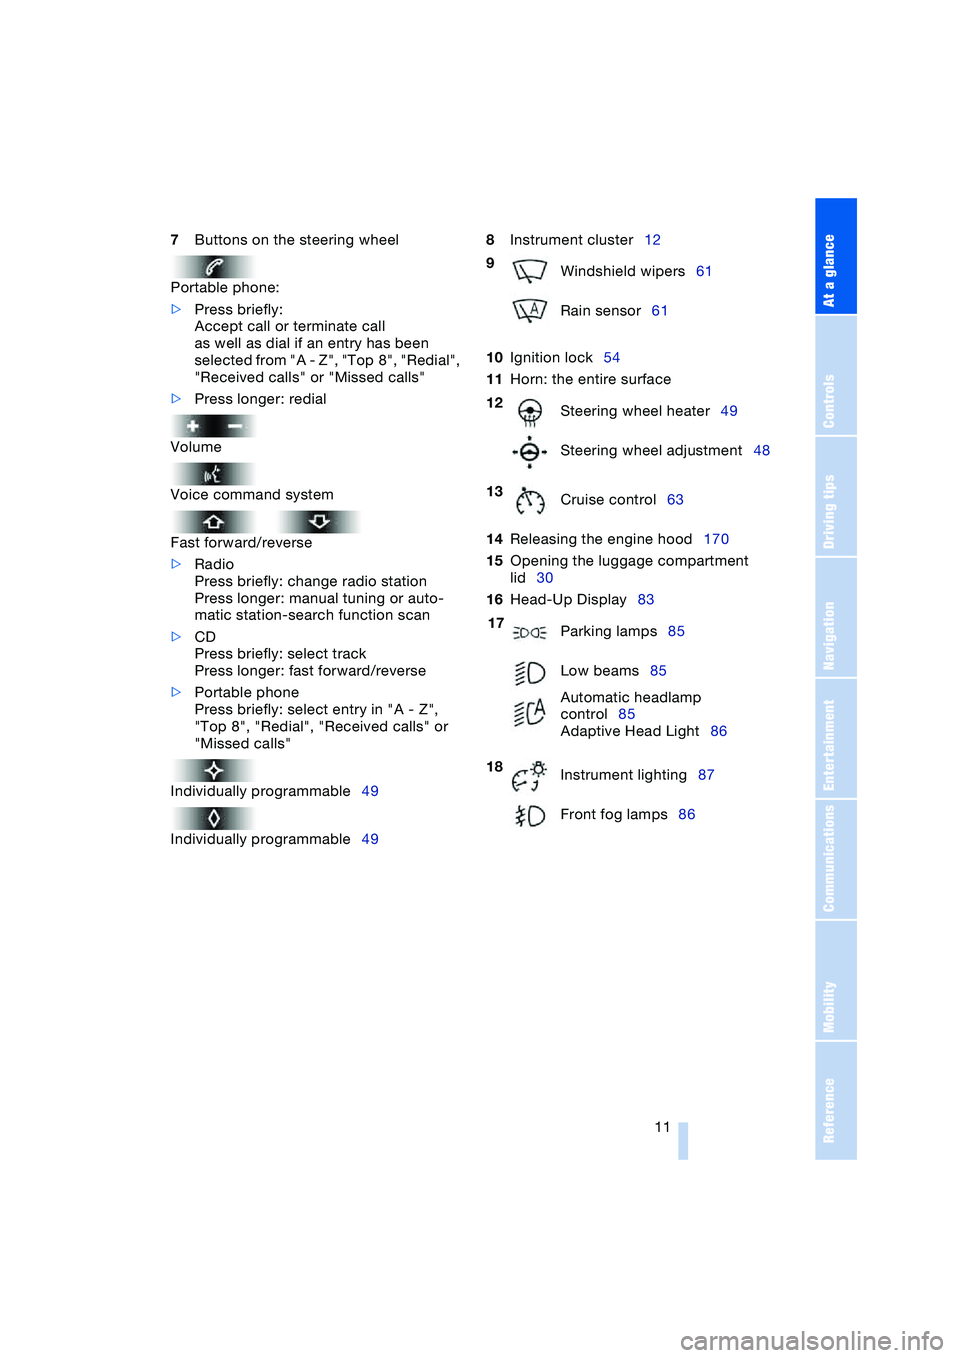
7Buttons on the steering wheel
Portable phone:
>Press briefly:
Accept call or terminate call
as well as dial if an entry has been
selected from "A - Z", "Top 8", "Redial",
"Received calls" or "Missed calls"
>Press longer: redial
Volume
Voice command system
Fast forward/reverse
>Radio
Press briefly: change radio station
Press longer: manual tuning or auto-
matic station-search function scan
>CD
Press briefly: select track
Press longer: fast forward/reverse
>Portable phone
Press briefly: select entry in "A - Z",
"Top 8", "Redial", "Received calls" or
"Missed calls"
Individually programmable49
Individually programmable498Instrument cluster12
10Ignition lock54
11Horn: the entire surface
14Releasing the engine hood170
15Opening the luggage compartment
lid30
16Head-Up Display83
9
Windshield wipers61
Rain sensor61
12
Steering wheel heater49
Steering wheel adjustment48
13
Cruise control63
17
Parking lamps85
Low beams85
Automatic headlamp
control85
Adaptive Head Light86
18
Instrument lighting87
Front fog lamps86
Page 15 of 216
At a glance
13Reference
Controls
Driving tips
Communications
Navigation
Entertainment
Mobility
Indicator and warning
lamps
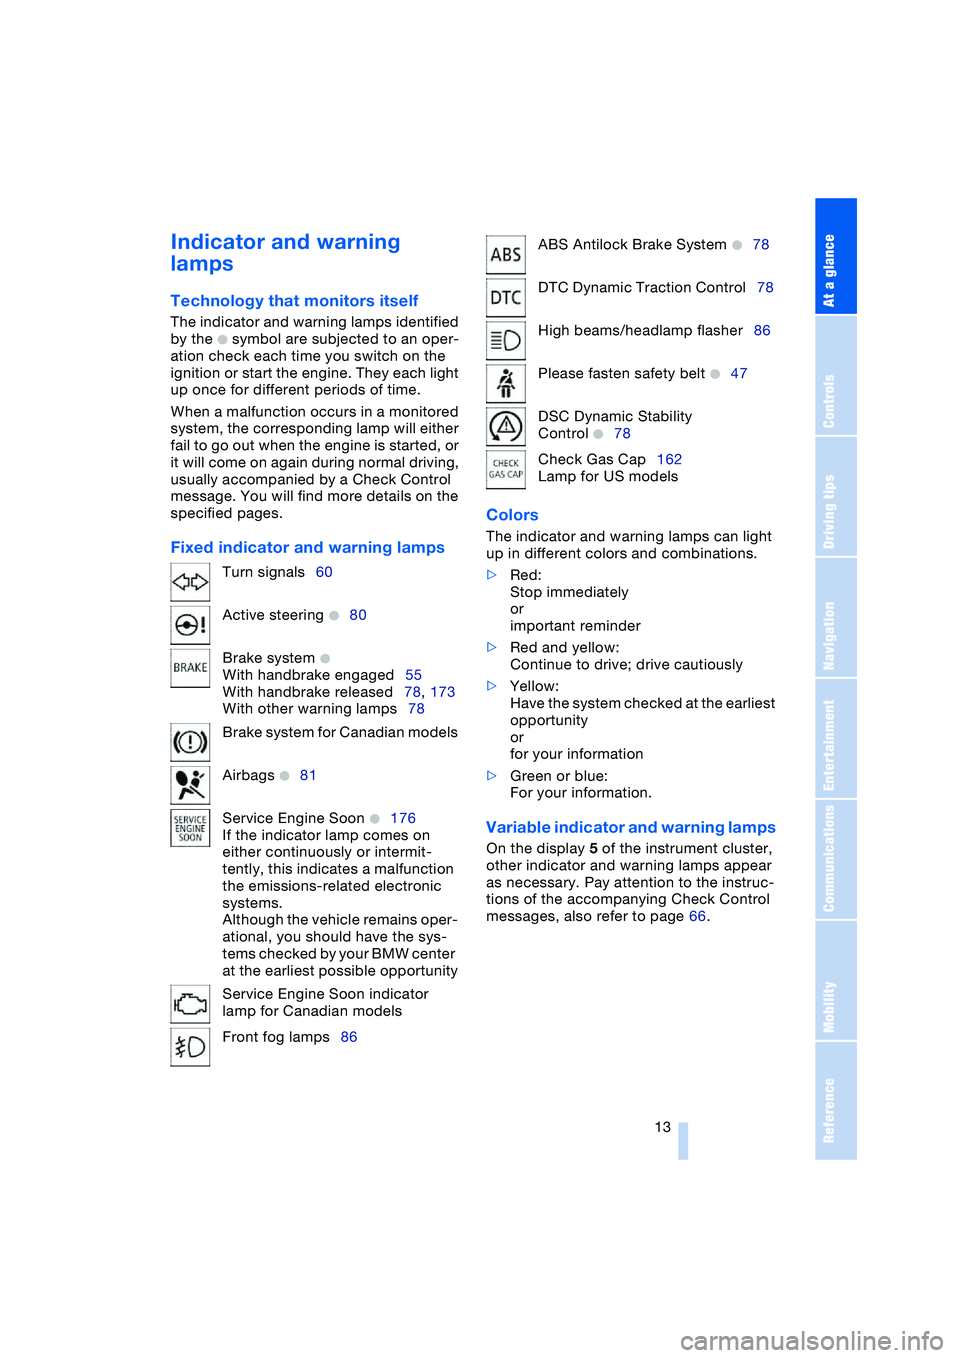
Technology that monitors itself
The indicator and warning lamps identified
by the
+ symbol are subjected to an oper-
ation check each time you switch on the
ignition or start the engine. They each light
up once for different periods of time.
When a malfunction occurs in a monitored
system, the corresponding lamp will either
fail to go out when the engine is started, or
it will come on again during normal driving,
usually accompanied by a Check Control
message. You will find more details on the
specified pages.
Fixed indicator and warning lampsColors The indicator and warning lamps can light
up in different colors and combinations.
>Red:
Stop immediately
or
important reminder
>Red and yellow:
Continue to drive; drive cautiously
>Yellow:
Have the system checked at the earliest
opportunity
or
for your information
>Green or blue:
For your information.
Variable indicator and warning lamps
On the display 5 of the instrument cluster,
other indicator and warning lamps appear
as necessary. Pay attention to the instruc-
tions of the accompanying Check Control
messages, also refer to page 66. Turn signals60
Active steering
+80
Brake system
+
With handbrake engaged55
With handbrake released78, 173
With other warning lamps78
Brake system for Canadian models
Airbags
+81
Service Engine Soon
+176
If the indicator lamp comes on
either continuously or intermit-
tently, this indicates a malfunction
the emissions-related electronic
systems.
Although the vehicle remains oper-
ational, you should have the sys-
tems checked by your BMW center
at the earliest possible opportunity
Service Engine Soon indicator
lamp for Canadian models
Front fog lamps86
ABS Antilock Brake System +78
DTC Dynamic Traction Control78
High beams/headlamp flasher86
Please fasten safety belt
+47
DSC Dynamic Stability
Control
+78
Check Gas Cap162
Lamp for US models
Page 86 of 216
Technology for comfort, convenience and safety
84 6.Press the controller.
The information appears on the
Head-Up Display.
Depending on which key you have used to
open the vehicle, the last adjustment is
applied.
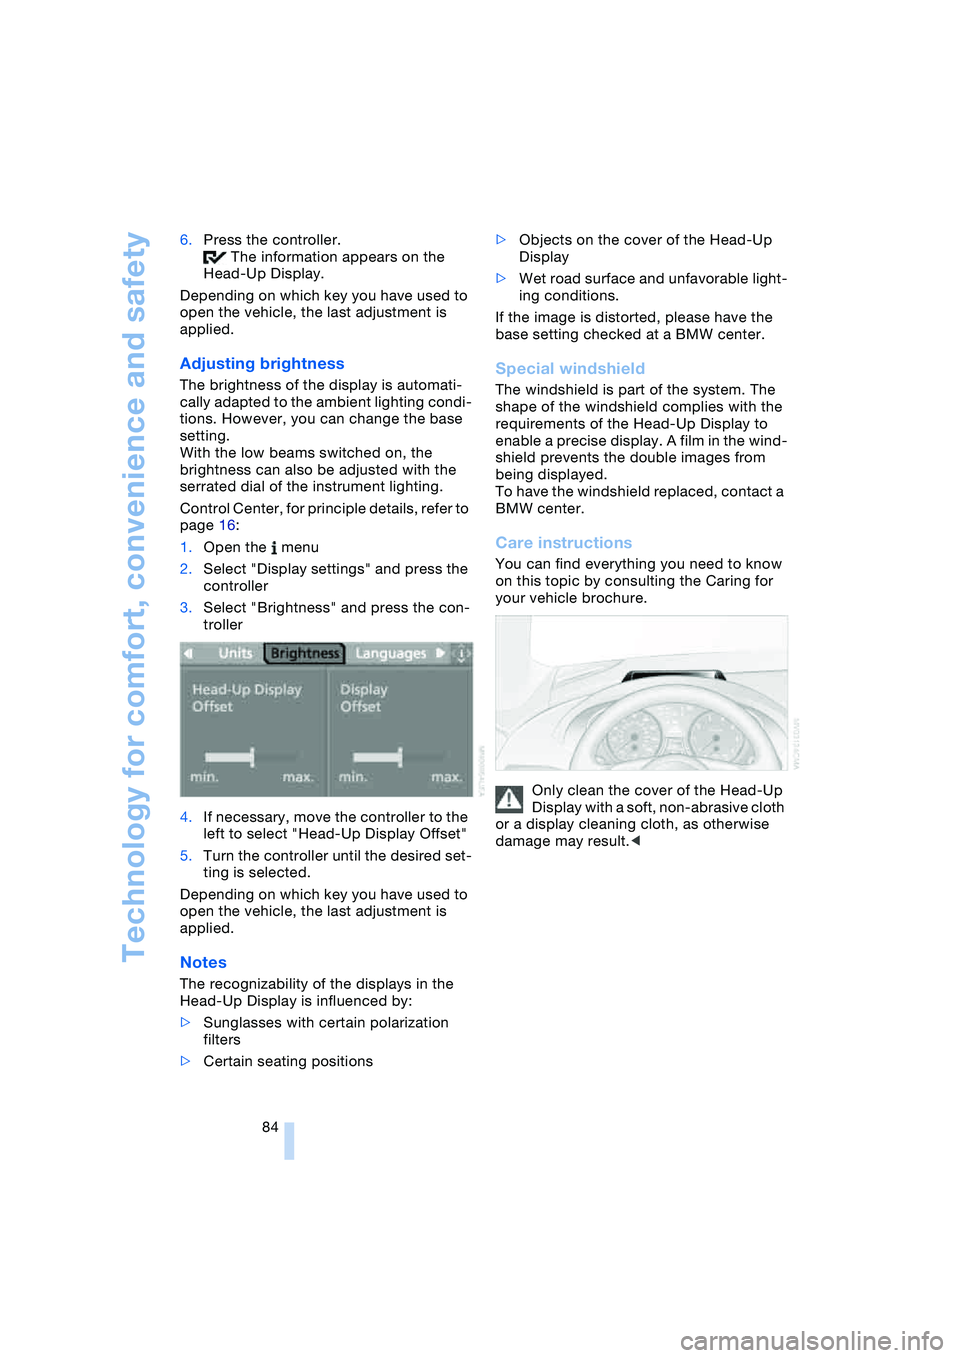
Adjusting brightness
The brightness of the display is automati-
cally adapted to the ambient lighting condi-
tions. However, you can change the base
setting.
With the low beams switched on, the
brightness can also be adjusted with the
serrated dial of the instrument lighting.
Control Center, for principle details, refer to
page 16:
1.Open the menu
2.Select "Display settings" and press the
controller
3.Select "Brightness" and press the con-
troller
4.If necessary, move the controller to the
left to select "Head-Up Display Offset"
5.Turn the controller until the desired set-
ting is selected.
Depending on which key you have used to
open the vehicle, the last adjustment is
applied.
Notes
The recognizability of the displays in the
Head-Up Display is influenced by:
>Sunglasses with certain polarization
filters
>Certain seating positions>Objects on the cover of the Head-Up
Display
>Wet road surface and unfavorable light-
ing conditions.
If the image is distorted, please have the
base setting checked at a BMW center.
Special windshield
The windshield is part of the system. The
shape of the windshield complies with the
requirements of the Head-Up Display to
enable a precise display. A film in the wind-
shield prevents the double images from
being displayed.
To have the windshield replaced, contact a
BMW center.
Care instructions
You can find everything you need to know
on this topic by consulting the Caring for
your vehicle brochure.
Only clean the cover of the Head-Up
Display with a soft, non-abrasive cloth
or a display cleaning cloth, as otherwise
damage may result.<
Page 87 of 216
Controls
85Reference
At a glance
Driving tips
Communications
Navigation
Entertainment
Mobility
Lamps
Parking lamps/low beams
Parking lamps
With the switch in this position, the
front, rear and side vehicle lighting
is switched on. You can use the
parking lamps for parking. For lighting on
one side for parking as an additional fea-
ture, refer to page 86.
Low beams
When you switch off the ignition
with the headlamps on, the head-
lamps go out, and only the parking
lamps remain on.
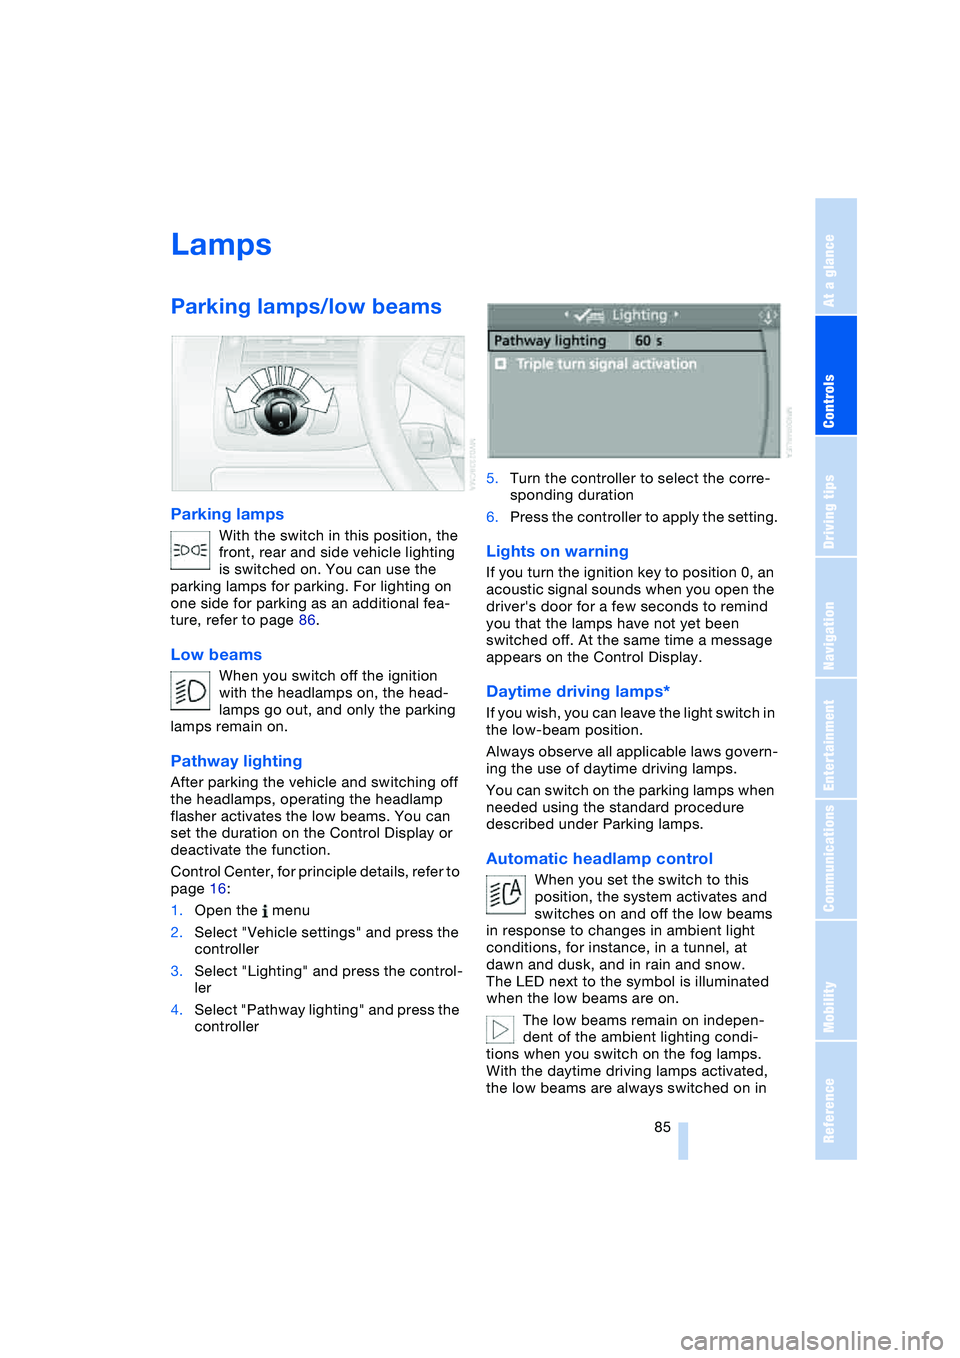
Pathway lighting
After parking the vehicle and switching off
the headlamps, operating the headlamp
flasher activates the low beams. You can
set the duration on the Control Display or
deactivate the function.
Control Center, for principle details, refer to
page 16:
1.Open the menu
2.Select "Vehicle settings" and press the
controller
3.Select "Lighting" and press the control-
ler
4.Select "Pathway lighting" and press the
controller5.Turn the controller to select the corre-
sponding duration
6.Press the controller to apply the setting.
Lights on warning
If you turn the ignition key to position 0, an
acoustic signal sounds when you open the
driver's door for a few seconds to remind
you that the lamps have not yet been
switched off. At the same time a message
appears on the Control Display.
Daytime driving lamps*
If you wish, you can leave the light switch in
the low-beam position.
Always observe all applicable laws govern-
ing the use of daytime driving lamps.
You can switch on the parking lamps when
needed using the standard procedure
described under Parking lamps.
Automatic headlamp control
When you set the switch to this
position, the system activates and
switches on and off the low beams
in response to changes in ambient light
conditions, for instance, in a tunnel, at
dawn and dusk, and in rain and snow.
The LED next to the symbol is illuminated
when the low beams are on.
The low beams remain on indepen-
dent of the ambient lighting condi-
tions when you switch on the fog lamps.
With the daytime driving lamps activated,
the low beams are always switched on in
Page 88 of 216
Lamps
86 this switch position with the ignition key in
position 2.<
The automatic headlamp control can-
not serve as a substitute for your per-
sonal judgment in determining when the
lamps should be switched on in response
to ambient lighting conditions. For exam-
ple, the system cannot detect fog. To avoid
safety risks, you should always switch on
the lamps manually under these condi-
tions.<
Adaptive Head Light*
The concept
Adaptive Head Light is a variable headlamp
control system that enables better illumina-
tion of the road surface. Depending on the
steering angle and other assumptions, the
light from the headlamp follows the course
of the road.
Activating Adaptive Head Light
In ignition key position 2, turn the
light switch to the position 'Auto-
matic headlamp control', refer to
page 85.
So that oncoming traffic is not dazzled,
Adaptive Head Light is
>not active when the vehicle is reversing
>only active toward passenger's side
when stopped.
Malfunction
The LED beside the symbol for automatic
headlamp control flashes. The Adaptive
Head Light has a malfunction or has failed.
Have the system checked as soon as pos-
sible.
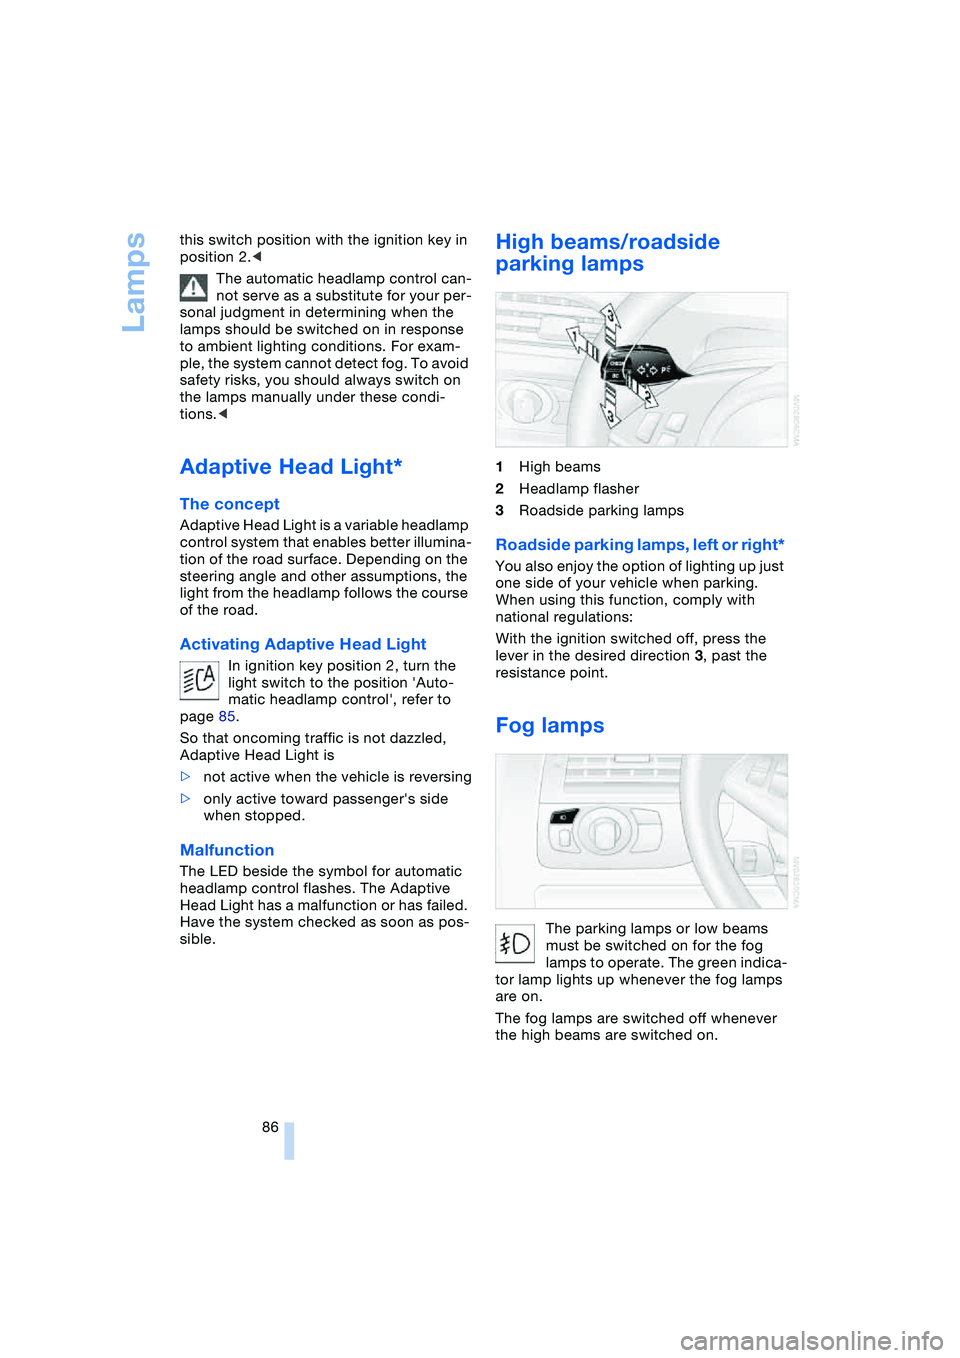
High beams/roadside
parking lamps
1High beams
2Headlamp flasher
3Roadside parking lamps
Roadside parking lamps, left or right*
You also enjoy the option of lighting up just
one side of your vehicle when parking.
When using this function, comply with
national regulations:
With the ignition switched off, press the
lever in the desired direction 3, past the
resistance point.
Fog lamps
The parking lamps or low beams
must be switched on for the fog
lamps to operate. The green indica-
tor lamp lights up whenever the fog lamps
are on.
The fog lamps are switched off whenever
the high beams are switched on.
Page 89 of 216
Controls
87Reference
At a glance
Driving tips
Communications
Navigation
Entertainment
Mobility
If the automatic headlamp control is
activated, the low beams will come on
automatically when you switch on the fog
lamps.<
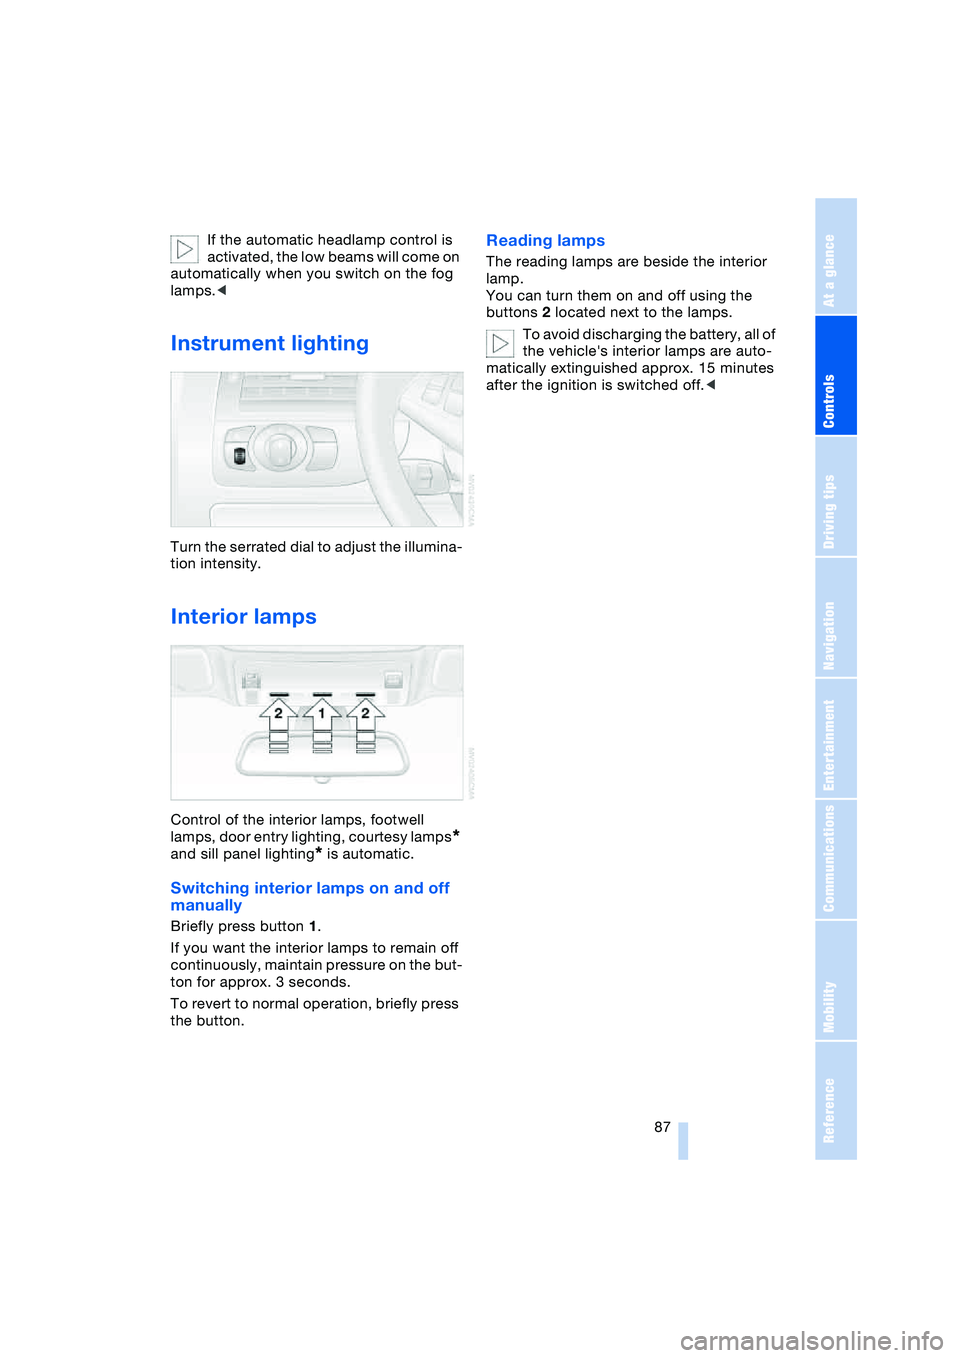
Instrument lighting
Turn the serrated dial to adjust the illumina-
tion intensity.
Interior lamps
Control of the interior lamps, footwell
lamps, door entry lighting, courtesy lamps
*
and sill panel lighting
* is automatic.
Switching interior lamps on and off
manually
Briefly press button 1.
If you want the interior lamps to remain off
continuously, maintain pressure on the but-
ton for approx. 3 seconds.
To revert to normal operation, briefly press
the button.
Reading lamps
The reading lamps are beside the interior
lamp.
You can turn them on and off using the
buttons 2 located next to the lamps.
To avoid discharging the battery, all of
the vehicle's interior lamps are auto-
matically extinguished approx. 15 minutes
after the ignition is switched off.<
Page 203 of 216
Reference 201
At a glance
Controls
Driving tips
Communications
Navigation
Entertainment
Mobility
Destination address
– deleting 115
– entering 110
Destination for navigation
– destination list 113
– entry 110
– selecting from address
book 115
– selecting using
information 113
– storing 114
Destination guidance 118
– bypassing route
sections 120
– canceling voice
instructions 50
– changing specified
route 116
– displaying route 119
– distance and arrival 118
– interrupting 118
– starting 118
– terminating/
continuing 118
– voice instructions 119
– volume of voice
instructions 119
Destination list 113
Destinations recently
driven to 113
"Dial" for portable
phone 147
"Dial number" 147
Digital clock 64
Dimensions
– Convertible 192
– Coupe 191
Dipstick for engine oil 171
Directional indicators, refer
to Turn signals 60
Direction announcements,
refer to Voice
instructions 119
Direction instructions, refer
to Voice instructions 119
Directory, refer to
Phone book 148
Directory for navigation,
refer to Address
book 114
Disc brakes 103Displacement, refer to
Engine data 190
Display, refer to
Control Center 16
"Display off" 19
Displays, refer to
Instrument cluster 12
"Display settings" 72
Displays on the windshield,
refer to Head-Up
Display 83
Disposal, vehicle
battery 181
Distance, refer to
Computer 70
Distance to destination,
refer to Computer 70
Distance warning, refer to
PDC Park Distance
Control 75
"Dist. to destination" 70
Door entry lighting 87
Door keys 26
Door lock 29
"Door locks" 27
Doors
– manual operation 29
– remote control 27
DOT Quality Grades 166
Draft-free ventilation 92
"Driver's door only" 27
Driving lamps, refer to
Parking lamps/
low beams 85
Driving notes 102
Driving route, refer to
Displaying the route 119
Driving stability control
systems 77
Driving through water 103
Driving tips, refer to
Driving notes 102
Drying the air, refer to
Cooling function 89
DSC Dynamic Stability
Control 77
– indicator lamp 13, 77
DTC Dynamic Traction
Control 77
– activating 77
– indicator lamp 13, 77DVD for navigation 108
Dynamic Brake Control,
DBC 78
Dynamic Driving Control 59
"Dynamic route" for
navigation 116
Dynamic Stability Control,
DSC 77
Dynamic Traction Control,
DTC 77
E
Easy Entry, refer to
Entry to the rear 46, 52
EBV Electronic brake-force
distribution 76
"Edit address" for
navigation 115
Eject button, refer to
Buttons on CD player 126
Electrical malfunction
– automatic transmission
with Steptronic 59
– convertible top 39
– door lock 29
– driver's door 29
– fuel filler door 162
– glass roof 36
– luggage compartment
lid 31
– SMG Sequential manual
transmission 58
Electric steering wheel
adjustment 48
Electronic brake-force
distribution, EBV 76
Emergency assistance,
refer to Roadside
Assistance 184
Emergency call 183
Emergency operation, refer
to Manual operation
– convertible top 39
– door lock 29
– driver's door 29
– fuel filler door 162
– glass roof 36
– luggage compartment
lid 30, 31
Page 206 of 216
Everything from A to Z
204 Instructions for navigation
system, refer to
Voice instructions 119
Instrument cluster 12
Instrument illumination,
refer to Instrument
lighting 87
Instrument lighting 87
Instrument panel, refer to
Instrument cluster 12
Instrument panel lighting,
refer to Instrument
lighting 87
Integrated universal remote
control 94
Interesting destination 113
"Interim time" 72
Interior lamps 87
– remote control 28
Interior mirror, automatic
dimming feature 48
Interior rearview mirror 48
Interlock, refer to
Steering locked 54
Interlock on automatic
transmission 54
Intermittent mode of the
wipers 61
J
Jacking points 181
Joystick, refer to
Control Center 16
Jump-starting 184
K
Key Memory 26
"Keypad" 150
Keys 26
Kickdown
– automatic transmission
with Steptronic 59
– SMG Sequential manual
transmission 57
Knock control 163
L
Lamps, refer to Parking
lamps/low beams 85
Lamps and bulbs 178
"Languages" 73
– for navigation 119
Lashing down loads, refer
to Securing the load 105
Lashing eyes, refer to
Securing the load 105
Last destinations, refer to
Destination list 113
"Last seat pos." 44
LATCH child-restraint
fixing 52
LEDs light-emitting
diodes 181
Length, refer to
Dimensions 191
Letter symbol with portable
phone 150
License plate lamps,
replacing bulbs 180
Light-emitting diodes
LEDs 181
Lighter 97
Lighter socket 97
"Lighting" 60, 85
Lighting
– instruments 87
– vehicle, refer to Lamps 85
Lights on warning 85
Light switch 85
"Limit" 71
Loading
– securing the load 105
– stowing cargo 105
– vehicle 104
Location, navigation
drive 108
"Lock after driving" 29
Lock buttons in the doors,
refer to Locking 30
Locking
– from inside 30
– from outside 28
Locking and unlocking
doors
– from inside 29
– from outside 27"LOGIC7", refer to
Adjusting the tone 128
Low beams 85
– automatic 85
– replacing the bulbs 178
Lower back support, refer
to Lumbar support 43
Luggage compartment
– capacity 190
– emergency release 31
– hotel function 30
– increasing the capacity,
Convertible 32
– opening/closing, refer to
Luggage compartment
lid 31
– opening from inside 31
– opening from outside 31
– opening with remote
control 28
Luggage compartment
lid 30
– emergency operation 31
– emergency release 31
– opening from inside 31
– opening from outside 31
– opening with remote
control 28
– unlocking manually 31
Lumbar support 43
LW, waveband 130
M
M+S tires, refer to
Winter tires 169
Maintenance, refer to the
Service and Warranty
Information Booklet for
US models or to the
Warranty and Service
Guide Booklet for
Canadian models 174
Maintenance system 174
Malfunction warnings, refer
to Check Control 66
Manual air distribution 90
Manual mode with
automatic transmission
with Steptronic 59
"Manual" on the radio 131