2004 BMW 645CI COUPE&CONVERTIBLE light
[x] Cancel search: lightPage 84 of 216
Technology for comfort, convenience and safety
82
Airbag system operational
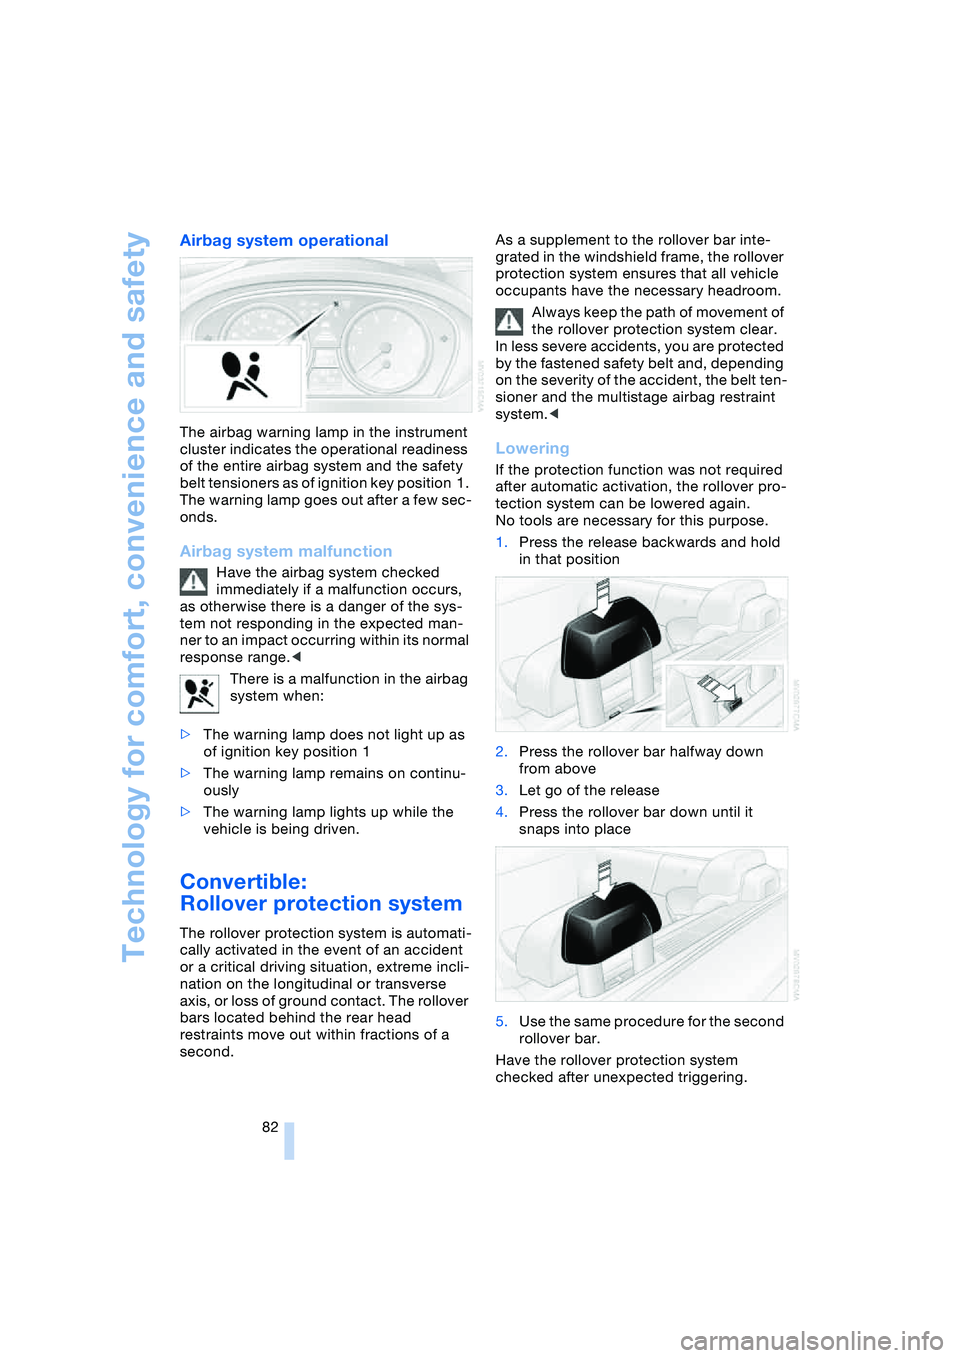
The airbag warning lamp in the instrument
cluster indicates the operational readiness
of the entire airbag system and the safety
belt tensioners as of ignition key position 1.
The warning lamp goes out after a few sec-
onds.
Airbag system malfunction
Have the airbag system checked
immediately if a malfunction occurs,
as otherwise there is a danger of the sys-
tem not responding in the expected man-
ner to an impact occurring within its normal
response range.<
There is a malfunction in the airbag
system when:
>The warning lamp does not light up as
of ignition key position 1
>The warning lamp remains on continu-
ously
>The warning lamp lights up while the
vehicle is being driven.
Convertible:
Rollover protection system
The rollover protection system is automati-
cally activated in the event of an accident
or a critical driving situation, extreme incli-
nation on the longitudinal or transverse
axis, or loss of ground contact. The rollover
bars located behind the rear head
restraints move out within fractions of a
second.As a supplement to the rollover bar inte-
grated in the windshield frame, the rollover
protection system ensures that all vehicle
occupants have the necessary headroom.
Always keep the path of movement of
the rollover protection system clear.
In less severe accidents, you are protected
by the fastened safety belt and, depending
on the severity of the accident, the belt ten-
sioner and the multistage airbag restraint
system.<
Lowering
If the protection function was not required
after automatic activation, the rollover pro-
tection system can be lowered again.
No tools are necessary for this purpose.
1.Press the release backwards and hold
in that position
2.Press the rollover bar halfway down
from above
3.Let go of the release
4.Press the rollover bar down until it
snaps into place
5.Use the same procedure for the second
rollover bar.
Have the rollover protection system
checked after unexpected triggering.
Page 86 of 216
Technology for comfort, convenience and safety
84 6.Press the controller.
The information appears on the
Head-Up Display.
Depending on which key you have used to
open the vehicle, the last adjustment is
applied.
Adjusting brightness
The brightness of the display is automati-
cally adapted to the ambient lighting condi-
tions. However, you can change the base
setting.
With the low beams switched on, the
brightness can also be adjusted with the
serrated dial of the instrument lighting.
Control Center, for principle details, refer to
page 16:
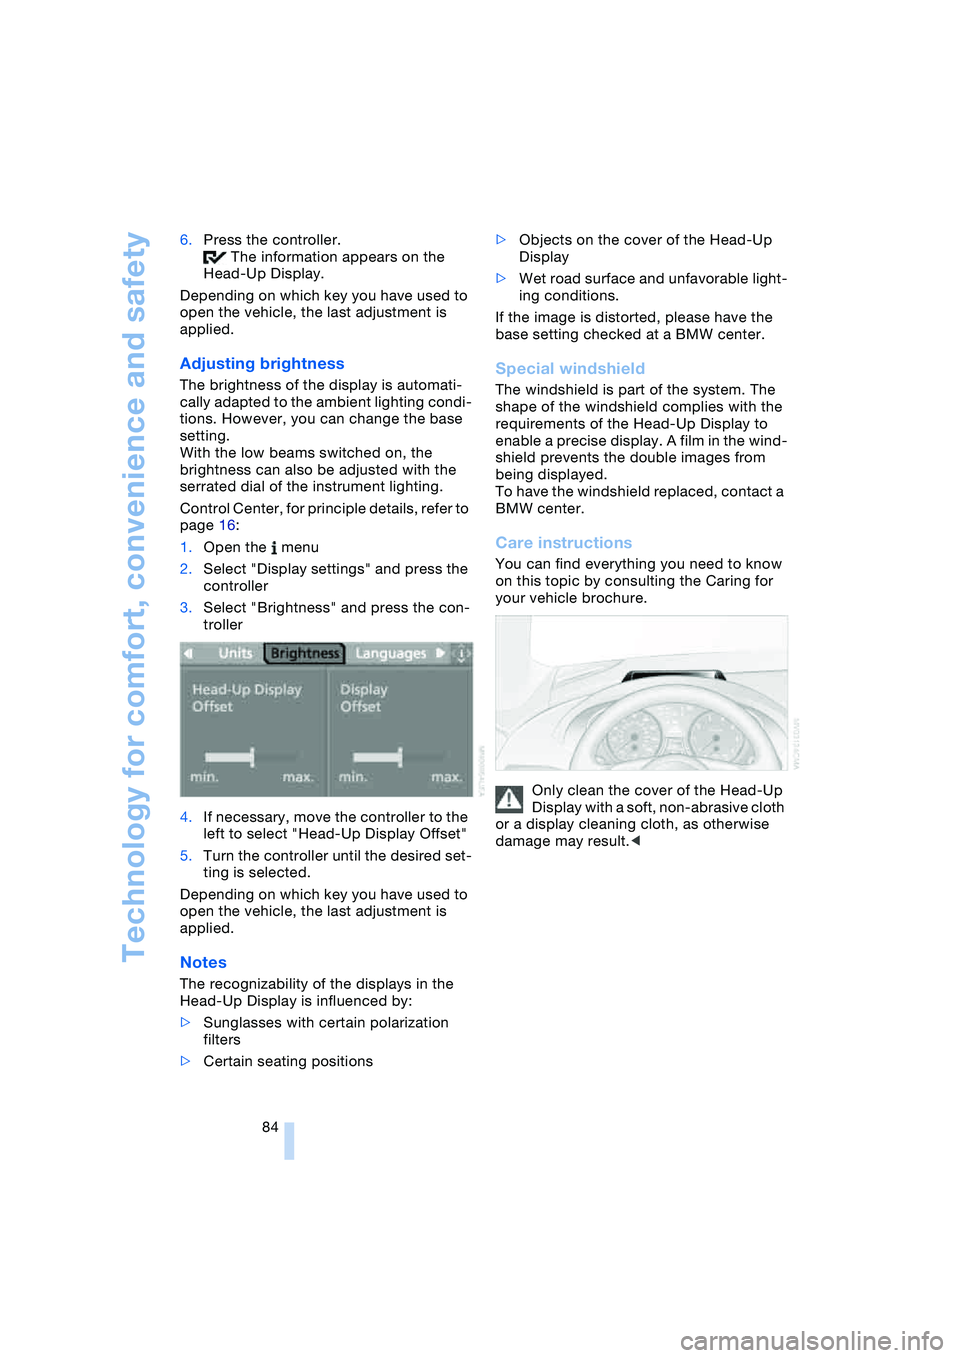
1.Open the menu
2.Select "Display settings" and press the
controller
3.Select "Brightness" and press the con-
troller
4.If necessary, move the controller to the
left to select "Head-Up Display Offset"
5.Turn the controller until the desired set-
ting is selected.
Depending on which key you have used to
open the vehicle, the last adjustment is
applied.
Notes
The recognizability of the displays in the
Head-Up Display is influenced by:
>Sunglasses with certain polarization
filters
>Certain seating positions>Objects on the cover of the Head-Up
Display
>Wet road surface and unfavorable light-
ing conditions.
If the image is distorted, please have the
base setting checked at a BMW center.
Special windshield
The windshield is part of the system. The
shape of the windshield complies with the
requirements of the Head-Up Display to
enable a precise display. A film in the wind-
shield prevents the double images from
being displayed.
To have the windshield replaced, contact a
BMW center.
Care instructions
You can find everything you need to know
on this topic by consulting the Caring for
your vehicle brochure.
Only clean the cover of the Head-Up
Display with a soft, non-abrasive cloth
or a display cleaning cloth, as otherwise
damage may result.<
Page 87 of 216
Controls
85Reference
At a glance
Driving tips
Communications
Navigation
Entertainment
Mobility
Lamps
Parking lamps/low beams
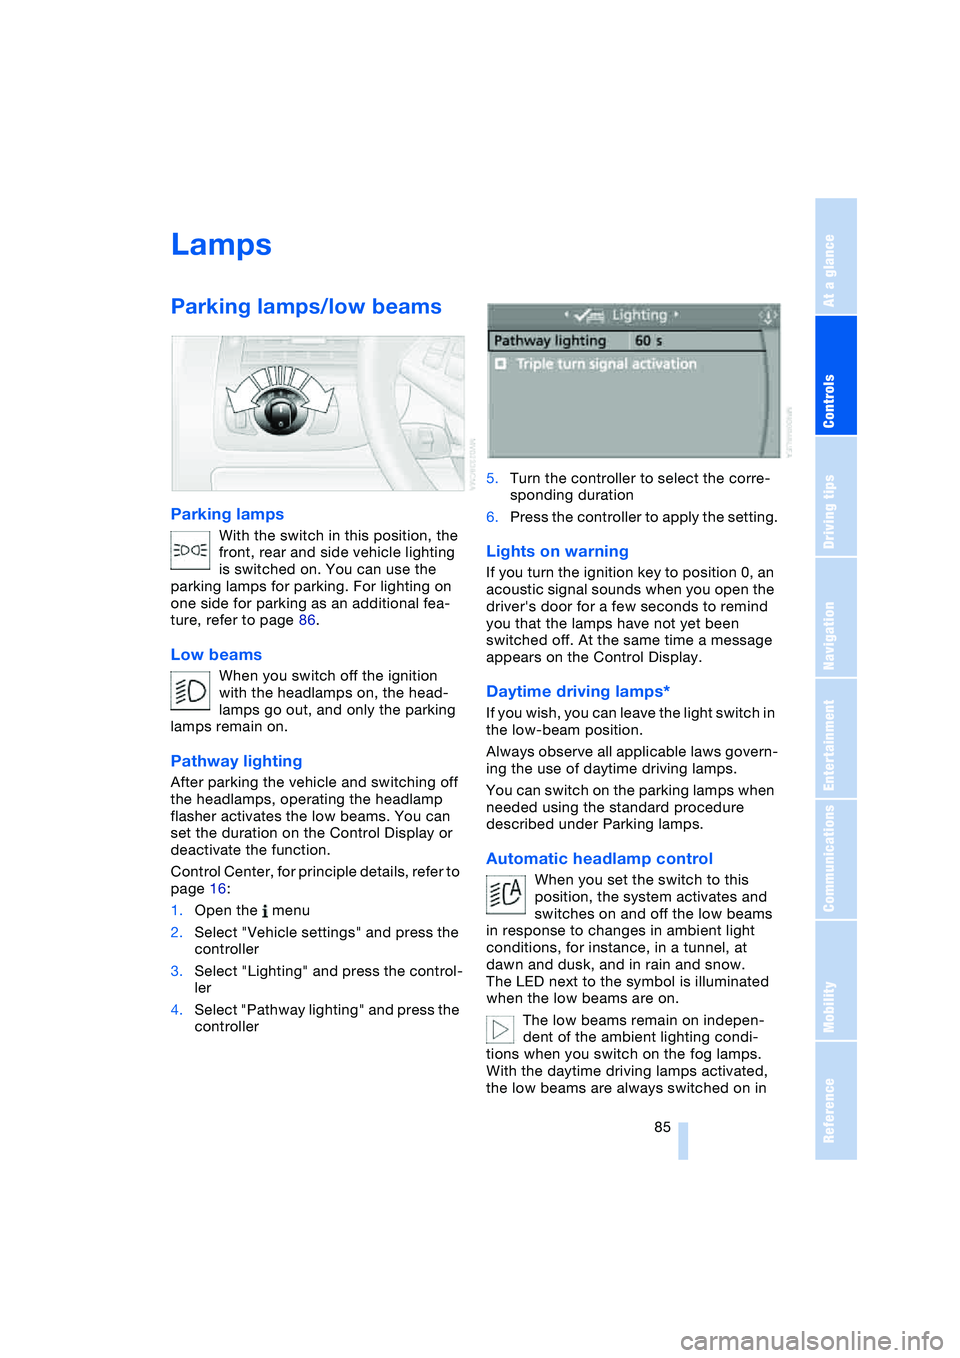
Parking lamps
With the switch in this position, the
front, rear and side vehicle lighting
is switched on. You can use the
parking lamps for parking. For lighting on
one side for parking as an additional fea-
ture, refer to page 86.
Low beams
When you switch off the ignition
with the headlamps on, the head-
lamps go out, and only the parking
lamps remain on.
Pathway lighting
After parking the vehicle and switching off
the headlamps, operating the headlamp
flasher activates the low beams. You can
set the duration on the Control Display or
deactivate the function.
Control Center, for principle details, refer to
page 16:
1.Open the menu
2.Select "Vehicle settings" and press the
controller
3.Select "Lighting" and press the control-
ler
4.Select "Pathway lighting" and press the
controller5.Turn the controller to select the corre-
sponding duration
6.Press the controller to apply the setting.
Lights on warning
If you turn the ignition key to position 0, an
acoustic signal sounds when you open the
driver's door for a few seconds to remind
you that the lamps have not yet been
switched off. At the same time a message
appears on the Control Display.
Daytime driving lamps*
If you wish, you can leave the light switch in
the low-beam position.
Always observe all applicable laws govern-
ing the use of daytime driving lamps.
You can switch on the parking lamps when
needed using the standard procedure
described under Parking lamps.
Automatic headlamp control
When you set the switch to this
position, the system activates and
switches on and off the low beams
in response to changes in ambient light
conditions, for instance, in a tunnel, at
dawn and dusk, and in rain and snow.
The LED next to the symbol is illuminated
when the low beams are on.
The low beams remain on indepen-
dent of the ambient lighting condi-
tions when you switch on the fog lamps.
With the daytime driving lamps activated,
the low beams are always switched on in
Page 88 of 216
Lamps
86 this switch position with the ignition key in
position 2.<
The automatic headlamp control can-
not serve as a substitute for your per-
sonal judgment in determining when the
lamps should be switched on in response
to ambient lighting conditions. For exam-
ple, the system cannot detect fog. To avoid
safety risks, you should always switch on
the lamps manually under these condi-
tions.<
Adaptive Head Light*
The concept
Adaptive Head Light is a variable headlamp
control system that enables better illumina-
tion of the road surface. Depending on the
steering angle and other assumptions, the
light from the headlamp follows the course
of the road.
Activating Adaptive Head Light
In ignition key position 2, turn the
light switch to the position 'Auto-
matic headlamp control', refer to
page 85.
So that oncoming traffic is not dazzled,
Adaptive Head Light is
>not active when the vehicle is reversing
>only active toward passenger's side
when stopped.
Malfunction
The LED beside the symbol for automatic
headlamp control flashes. The Adaptive
Head Light has a malfunction or has failed.
Have the system checked as soon as pos-
sible.
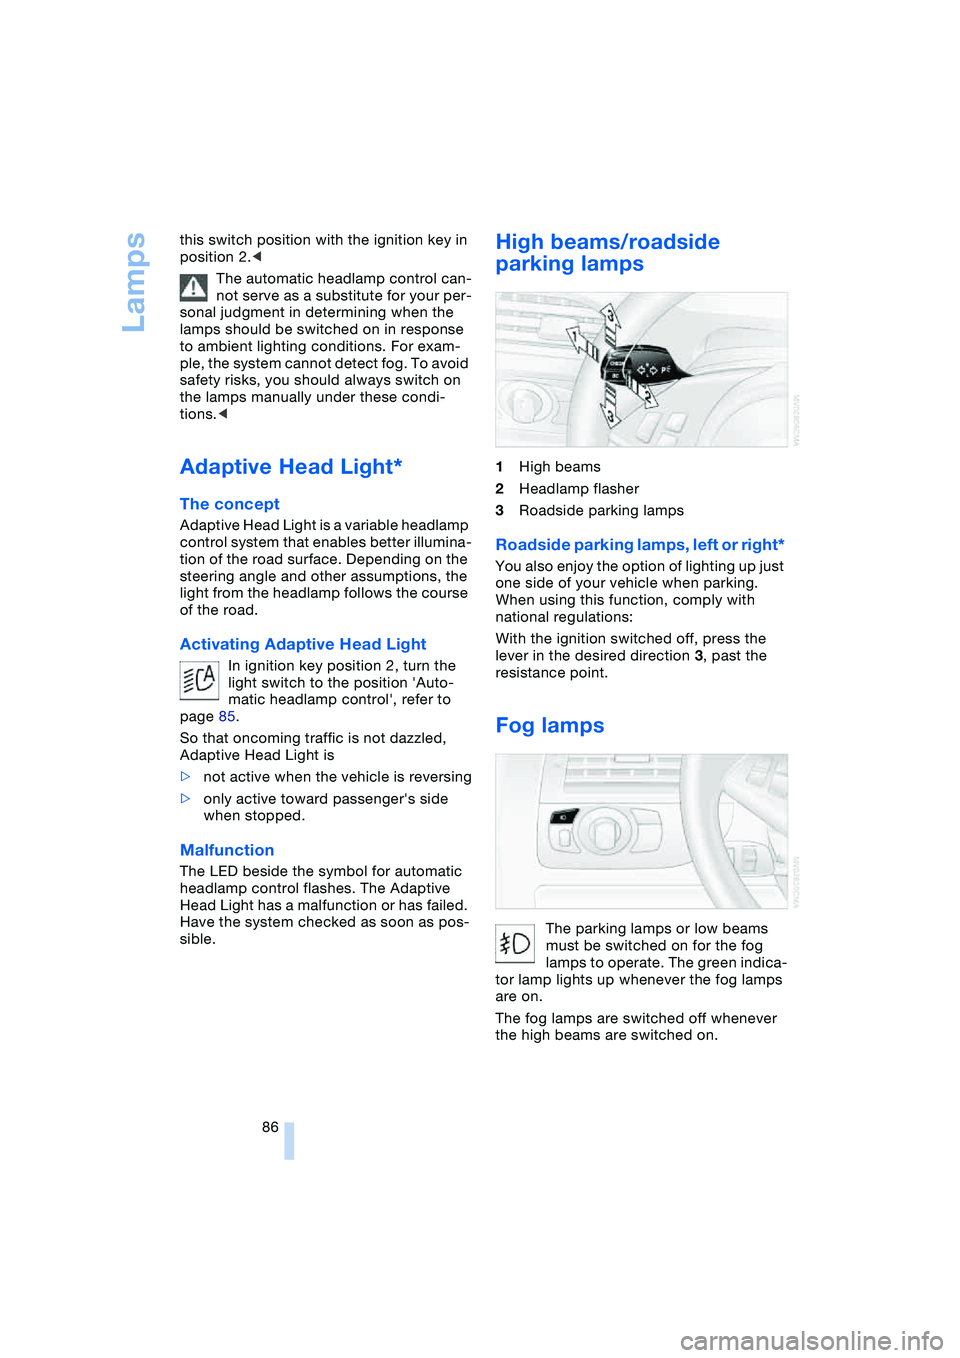
High beams/roadside
parking lamps
1High beams
2Headlamp flasher
3Roadside parking lamps
Roadside parking lamps, left or right*
You also enjoy the option of lighting up just
one side of your vehicle when parking.
When using this function, comply with
national regulations:
With the ignition switched off, press the
lever in the desired direction 3, past the
resistance point.
Fog lamps
The parking lamps or low beams
must be switched on for the fog
lamps to operate. The green indica-
tor lamp lights up whenever the fog lamps
are on.
The fog lamps are switched off whenever
the high beams are switched on.
Page 89 of 216
Controls
87Reference
At a glance
Driving tips
Communications
Navigation
Entertainment
Mobility
If the automatic headlamp control is
activated, the low beams will come on
automatically when you switch on the fog
lamps.<
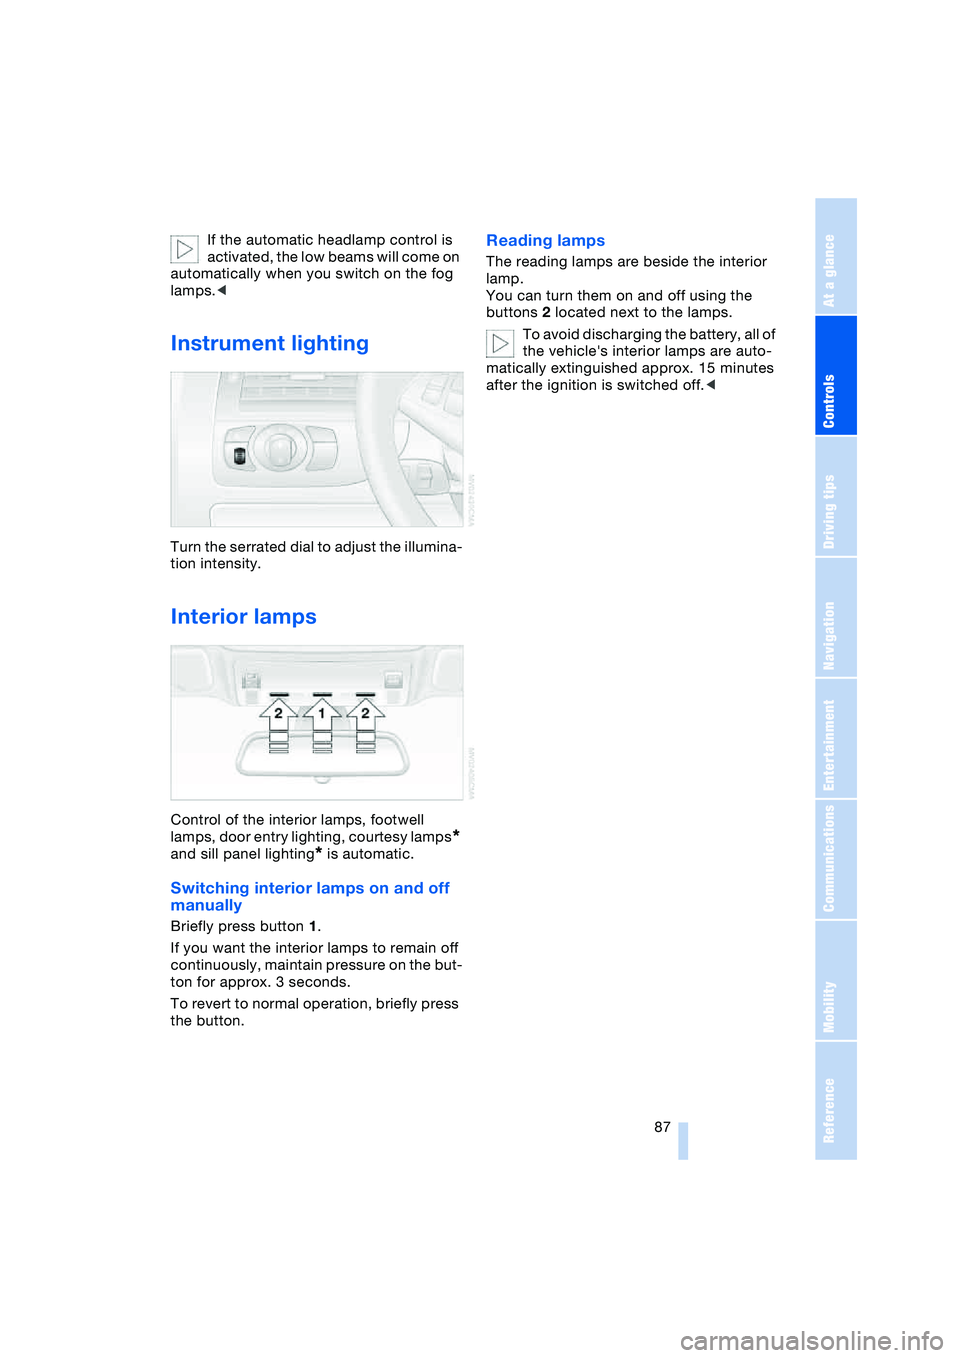
Instrument lighting
Turn the serrated dial to adjust the illumina-
tion intensity.
Interior lamps
Control of the interior lamps, footwell
lamps, door entry lighting, courtesy lamps
*
and sill panel lighting
* is automatic.
Switching interior lamps on and off
manually
Briefly press button 1.
If you want the interior lamps to remain off
continuously, maintain pressure on the but-
ton for approx. 3 seconds.
To revert to normal operation, briefly press
the button.
Reading lamps
The reading lamps are beside the interior
lamp.
You can turn them on and off using the
buttons 2 located next to the lamps.
To avoid discharging the battery, all of
the vehicle's interior lamps are auto-
matically extinguished approx. 15 minutes
after the ignition is switched off.<
Page 92 of 216
A congenial climate
90 rently within the vehicle. AUC executes this
function automatically.
Press the button repeatedly to run through
the following control sequence:
>Indicator lamps off: outside air flows
into the vehicle continuously
>Right indicator lamp on, AUC mode: the
system detects pollutants in the outside
air and responds by blocking the supply
of outside air when required.
Depending upon air quality require-
ments, in the automatic mode the sys-
tem alternates between its outside-air
and recirculated-air modes
>Left indicator lamp on, recirculated-air
mode: the supply of outside air into the
vehicle is continuously blocked.
If condensation starts to form on the
inside window surfaces during opera-
tion in the recirculated-air mode, you
should switch it off while also increasing
the air volume as required.
The recirculated-air mode should not be
used over a longer period of time, as the air
quality inside the vehicle deteriorates con-
tinuously.<
Residual heat mode
If you press this button with the
engine switched off, the system
uses the warmth stored in the
engine to heat the interior, for
instance, while the vehicle is
stationary at a school to pick up a child.
You can adjust the automatic climate con-
trol settings as of ignition key position 2.
Provided that the engine has warmed to its
normal operating temperature and the bat-
tery is charged, you can use this function
for up to 15 minutes after switching off the
ignition. The LED within the button lights up
to confirm compliance with both of these
conditions.
Switching off automatic climate
control
The air volume, the heater and
the cooling function are all
switched off. You can restart
the automatic climate control
by pressing any of its buttons
except the REST button.
Settings using Control Center
Ignition key:
>On vehicles with separate drives for
audio CDs and navigation DVDs, igni-
tion key in position 2
>On vehicles with one drive for audio
CDs, ignition key in position 1.
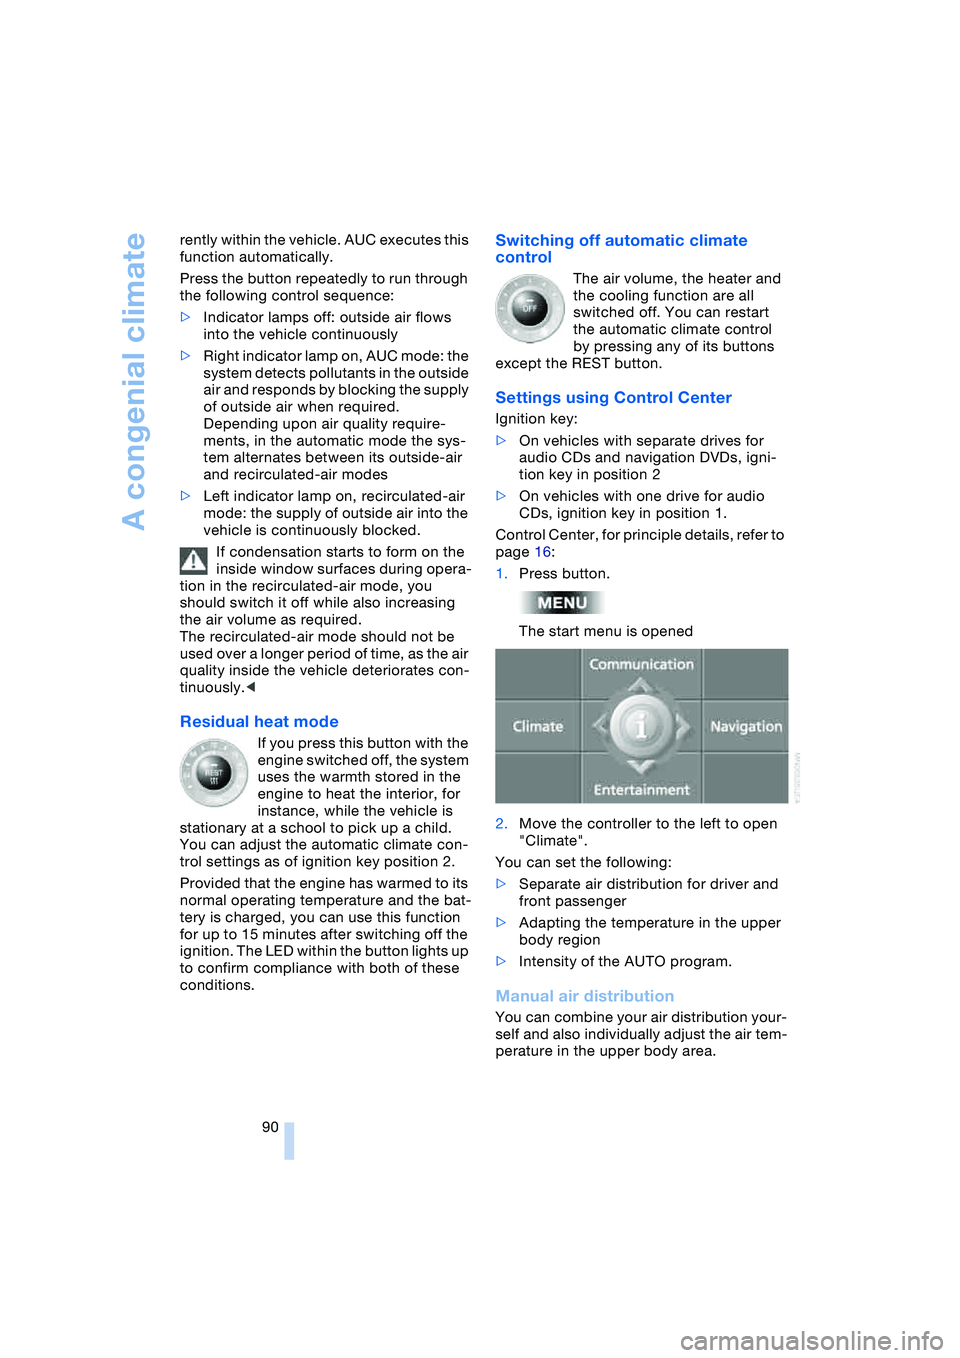
Control Center, for principle details, refer to
page 16:
1.Press button.
The start menu is opened
2.Move the controller to the left to open
"Climate".
You can set the following:
>Separate air distribution for driver and
front passenger
>Adapting the temperature in the upper
body region
>Intensity of the AUTO program.
Manual air distribution
You can combine your air distribution your-
self and also individually adjust the air tem-
perature in the upper body area.
Page 95 of 216
Controls
93Reference
At a glance
Driving tips
Communications
Navigation
Entertainment
Mobility
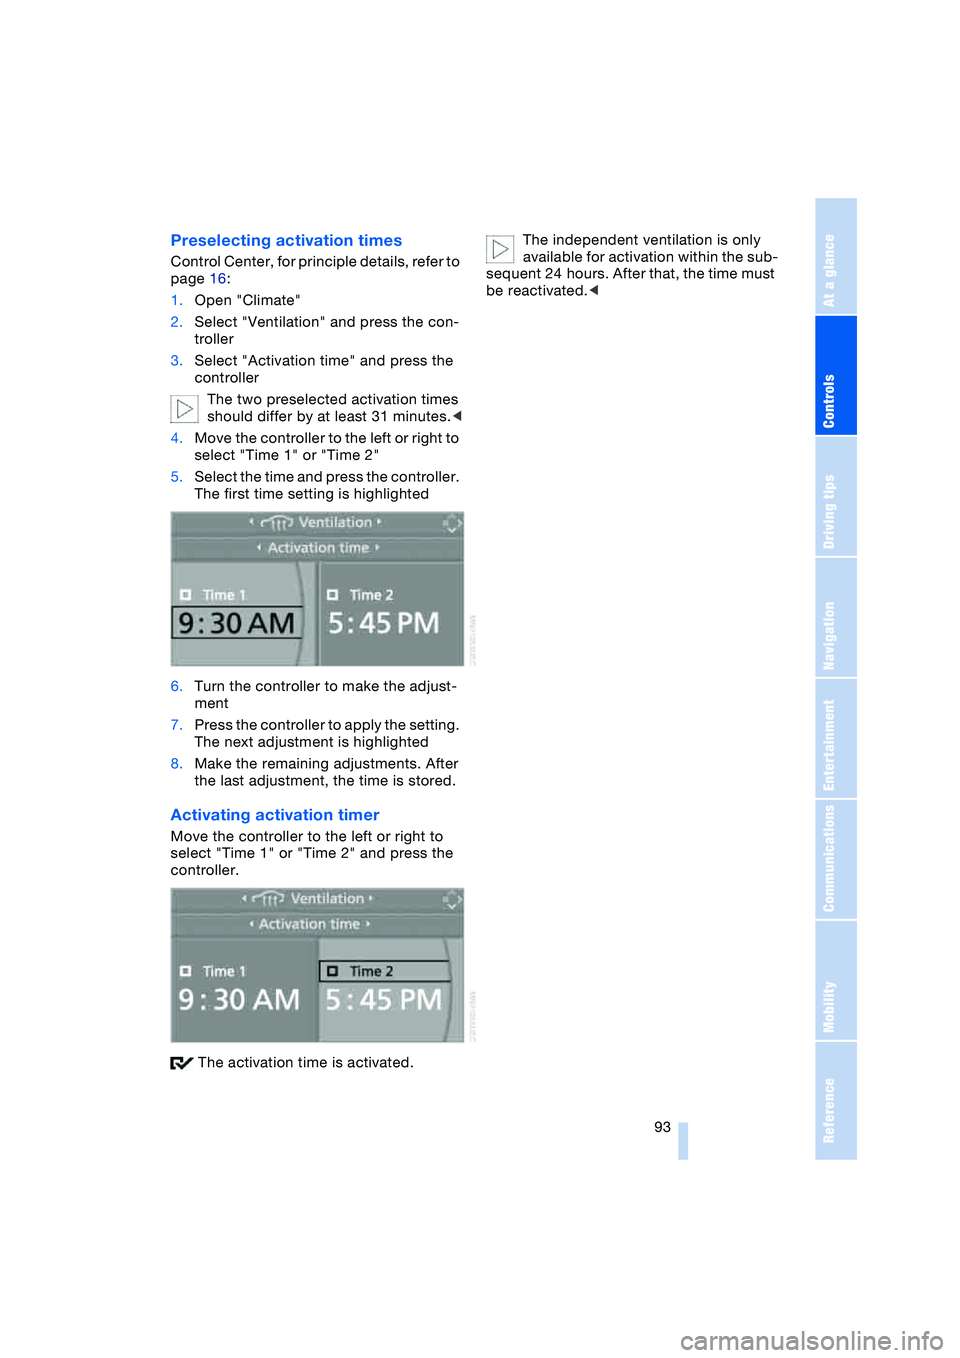
Preselecting activation times
Control Center, for principle details, refer to
page 16:
1.Open "Climate"
2.Select "Ventilation" and press the con-
troller
3.Select "Activation time" and press the
controller
The two preselected activation times
should differ by at least 31 minutes.<
4.Move the controller to the left or right to
select "Time 1" or "Time 2"
5.Select the time and press the controller.
The first time setting is highlighted
6.Turn the controller to make the adjust-
ment
7.Press the controller to apply the setting.
The next adjustment is highlighted
8.Make the remaining adjustments. After
the last adjustment, the time is stored.
Activating activation timer
Move the controller to the left or right to
select "Time 1" or "Time 2" and press the
controller.
The activation time is activated.The independent ventilation is only
available for activation within the sub-
sequent 24 hours. After that, the time must
be reactivated.<
Page 97 of 216
Controls
95Reference
At a glance
Driving tips
Communications
Navigation
Entertainment
Mobility
The corresponding memory button 1 is
now programmed with the signal of the
original hand-held transmitter.
The equipment can be used in ignition key
position 2.
If the device cannot be operated after
repeated programming, check
whether the original hand-held transmitter
uses an alternating-code system. Here,
either read the instructions for the original
hand-held transmitter or hold down the
programmed memory button 1 of the inte-
grated universal remote control. If the indi-
cator lamp 2 on the integrated universal
remote control flashes rapidly for a short
time then lights up for approx. 2 seconds,
this indicates that the original hand-held
transmitter uses an alternating-code sys-
tem. In the case of an alternating-code sys-
tem, program the memory buttons 1 as
described at Alternating-code hand-held
transmitters.<
Alternating-code hand-held
transmitters
To program the integrated universal remote
control, consult the Operating Instructions
for the equipment to be set. You will find
information there on the possibilities for
synchronization.
When programming hand-held transmitters
that employ an alternating code, please
observe the following supplementary
instructions:
Programming will be easier with the
aid of a second person.<
1.Park your vehicle within the range of the
remote-controlled equipment
2.Program the integrated universal
remote control as described above at
Fixed-code hand-held transmitters
3.Locate the button at the receiver of the
equipment to be set, e.g. on the drive
4.Press the button on the receiver of the
equipment to be set. After step 4, you
have approx. 30 seconds for step 55.Press the programmed memory
button 1 of the integrated universal
remote control three times.
The corresponding memory button 1 is
now programmed with the signal of the
original hand-held transmitter.
If you have any additional questions,
please contact your BMW center.<
Clearing memory buttons
Press both outer buttons 1 of the inte-
grated universal remote control for approx.
20 seconds, maintaining pressure until the
indicator lamp 2 starts to flash. All three
memory buttons are cleared.
The memory of individual memory but-
tons 1 cannot be cleared.
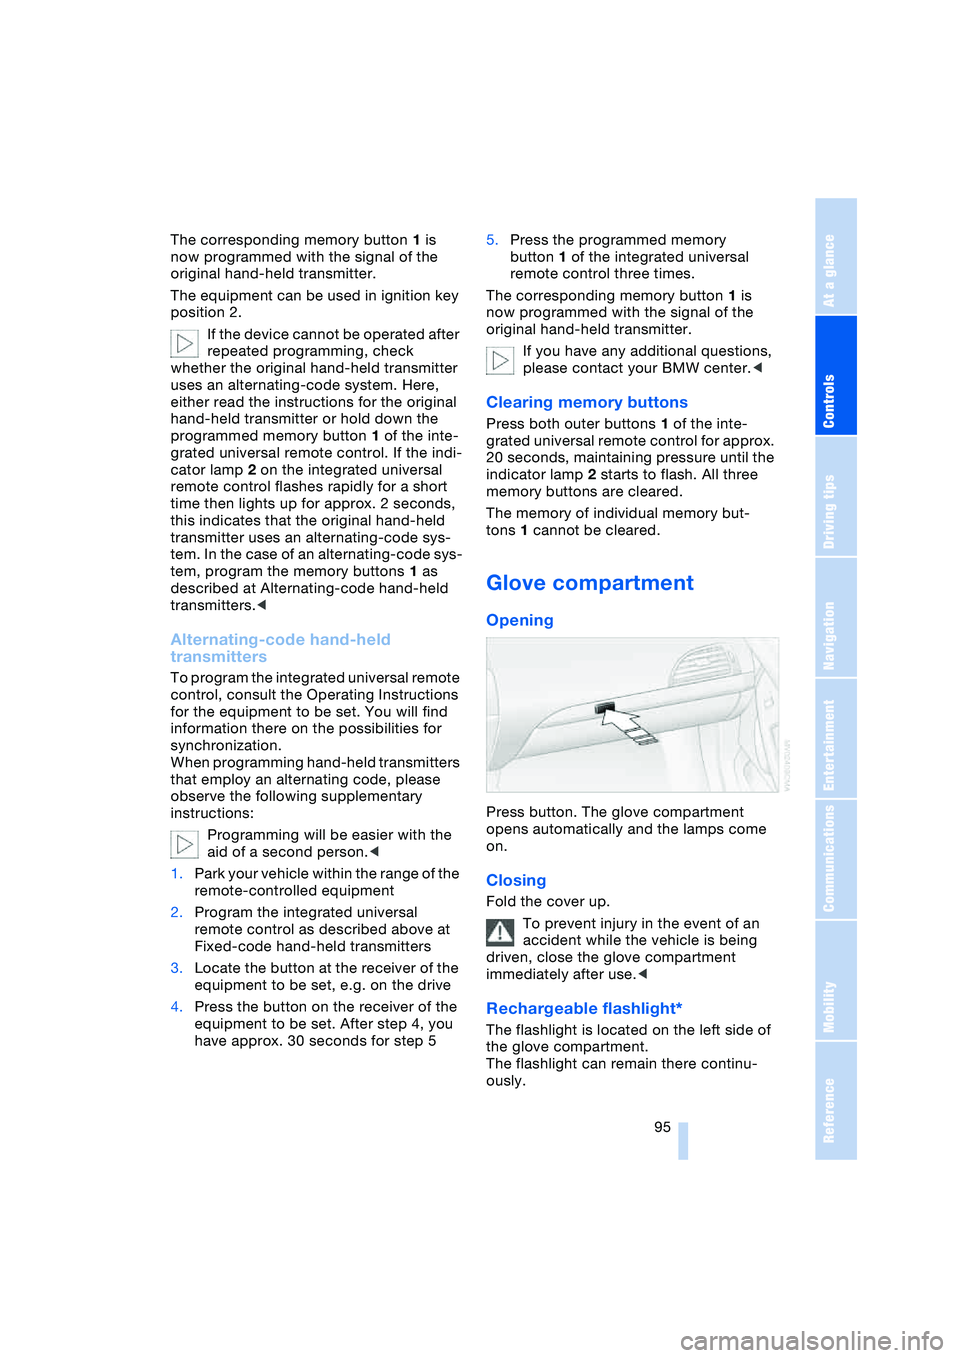
Glove compartment
Opening
Press button. The glove compartment
opens automatically and the lamps come
on.
Closing
Fold the cover up.
To prevent injury in the event of an
accident while the vehicle is being
driven, close the glove compartment
immediately after use.<
Rechargeable flashlight*
The flashlight is located on the left side of
the glove compartment.
The flashlight can remain there continu-
ously.