2004 BMW 645CI COUPE&CONVERTIBLE height
[x] Cancel search: heightPage 35 of 216
Controls
33Reference
At a glance
Driving tips
Communications
Navigation
Entertainment
Mobility
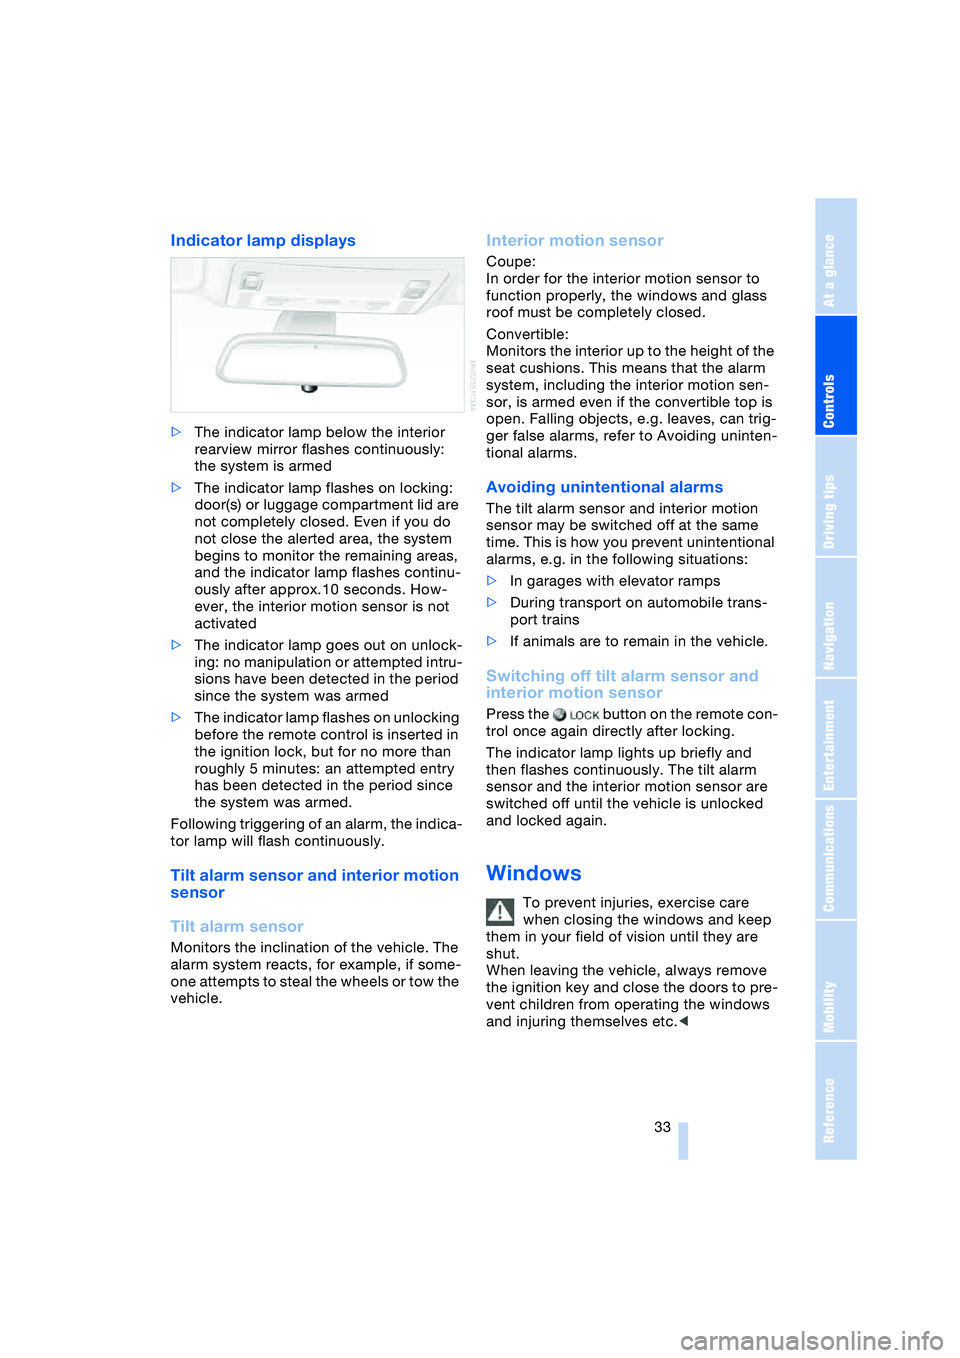
Indicator lamp displays
>The indicator lamp below the interior
rearview mirror flashes continuously:
the system is armed
>The indicator lamp flashes on locking:
door(s) or luggage compartment lid are
not completely closed. Even if you do
not close the alerted area, the system
begins to monitor the remaining areas,
and the indicator lamp flashes continu-
ously after approx.10 seconds. How-
ever, the interior motion sensor is not
activated
>The indicator lamp goes out on unlock-
ing: no manipulation or attempted intru-
sions have been detected in the period
since the system was armed
>The indicator lamp flashes on unlocking
before the remote control is inserted in
the ignition lock, but for no more than
roughly 5 minutes: an attempted entry
has been detected in the period since
the system was armed.
Following triggering of an alarm, the indica-
tor lamp will flash continuously.
Tilt alarm sensor and interior motion
sensor
Tilt alarm sensor
Monitors the inclination of the vehicle. The
alarm system reacts, for example, if some-
one attempts to steal the wheels or tow the
vehicle.
Interior motion sensor
Coupe:
In order for the interior motion sensor to
function properly, the windows and glass
roof must be completely closed.
Convertible:
Monitors the interior up to the height of the
seat cushions. This means that the alarm
system, including the interior motion sen-
sor, is armed even if the convertible top is
open. Falling objects, e.g. leaves, can trig-
ger false alarms, refer to Avoiding uninten-
tional alarms.
Avoiding unintentional alarms
The tilt alarm sensor and interior motion
sensor may be switched off at the same
time. This is how you prevent unintentional
alarms, e.g. in the following situations:
>In garages with elevator ramps
>During transport on automobile trans-
port trains
>If animals are to remain in the vehicle.
Switching off tilt alarm sensor and
interior motion sensor
Press the button on the remote con-
trol once again directly after locking.
The indicator lamp lights up briefly and
then flashes continuously. The tilt alarm
sensor and the interior motion sensor are
switched off until the vehicle is unlocked
and locked again.
Windows
To prevent injuries, exercise care
when closing the windows and keep
them in your field of vision until they are
shut.
When leaving the vehicle, always remove
the ignition key and close the doors to pre-
vent children from operating the windows
and injuring themselves etc.<
Page 45 of 216
Controls
43Reference
At a glance
Driving tips
Communications
Navigation
Entertainment
Mobility
Seats
Note before adjusting
Never attempt to adjust your seat
while operating the vehicle. The seat
could respond with unexpected move-
ment, and the ensuing loss of vehicle con-
trol could lead to an accident.
On the front passenger side as well, do not
tilt the backrest too far toward the rear
while driving. Failure to observe this pre-
caution can prevent the belt from providing
effective protection against injury, as the
passenger could slide under the belt in an
accident.
Make sure that the footwell behind the
driver's and front passenger's seat is empty
and unobstructed. If you fail to do so, any
persons or objects behind the seat could
be injured or damaged by a rearward
movement of the seat.<
Also observe the instructions regarding
damage to the safety belt on page 47.
Convertible: with the wind deflector
fitted, do not incline the front seat
backrests too far backwards if the seat is to
be moved back to the end position, as oth-
erwise the wind deflector will be dam-
aged.<
Seat adjustment
To ensure that the safety systems
continue to provide optimized protec-
tion, please observe the adjustment
instructions above.<
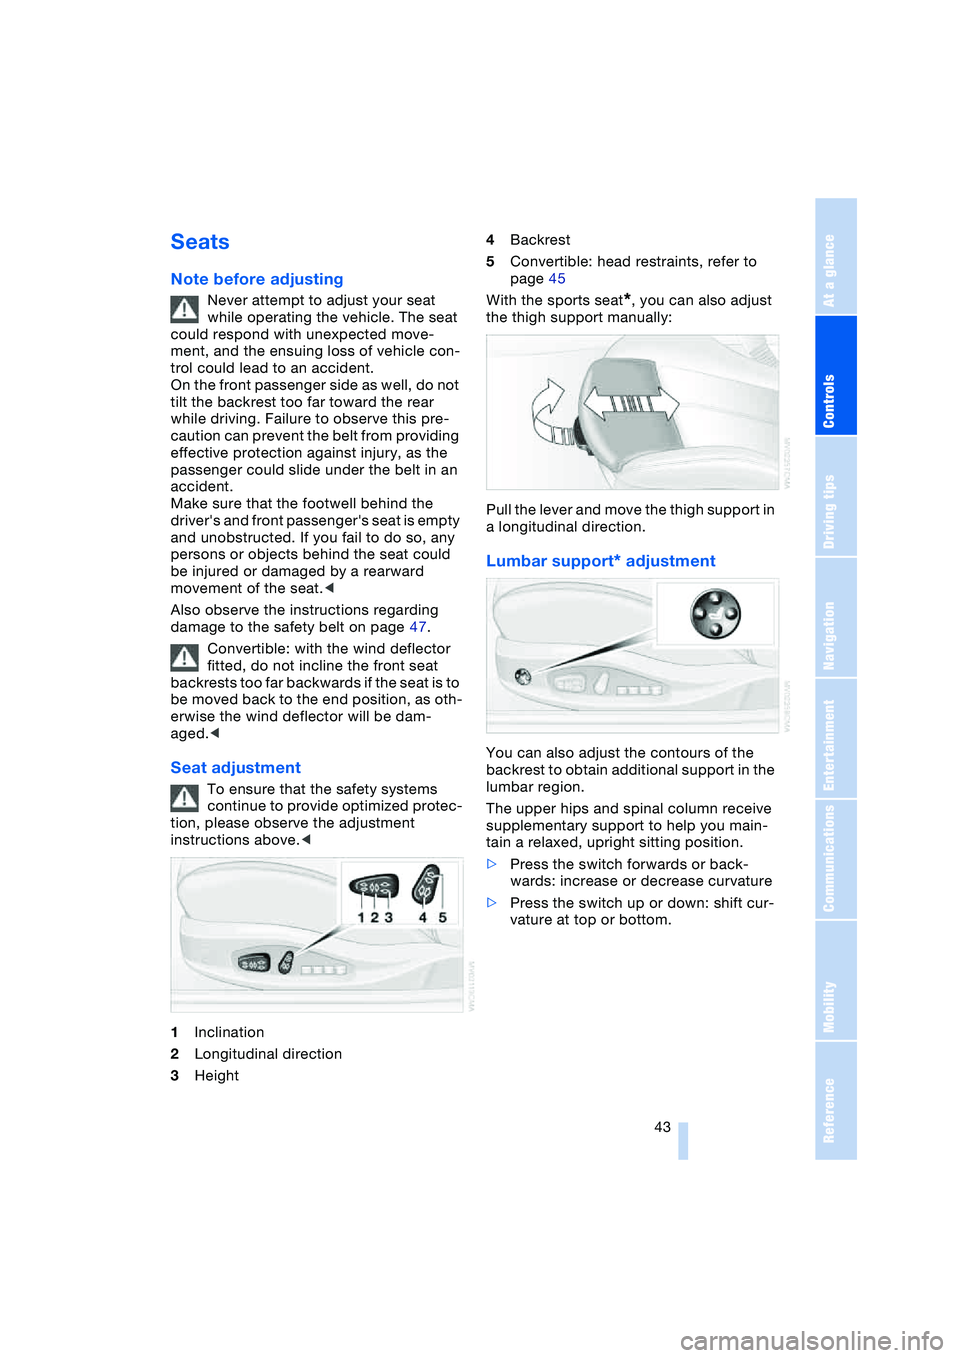
1Inclination
2Longitudinal direction
3Height4Backrest
5Convertible: head restraints, refer to
page 45
With the sports seat
*, you can also adjust
the thigh support manually:
Pull the lever and move the thigh support in
a longitudinal direction.
Lumbar support* adjustment
You can also adjust the contours of the
backrest to obtain additional support in the
lumbar region.
The upper hips and spinal column receive
supplementary support to help you main-
tain a relaxed, upright sitting position.
>Press the switch forwards or back-
wards: increase or decrease curvature
>Press the switch up or down: shift cur-
vature at top or bottom.
Page 47 of 216
Controls
45Reference
At a glance
Driving tips
Communications
Navigation
Entertainment
Mobility
Safety feature
1.Close the driver's door and turn the
ignition key to position 0 or 2
2.Press the desired memory button 1, 2
or 3 and maintain pressure until the
adjustment process has been com-
pleted.
If you press the
MEMORY button acciden-
tally:
Press the button again; the indicator lamp
goes out.
Tilt function, passenger-side mirror
Automatic curb monitor
Activating
1.Select the driver's exterior mirror with
the switch
2.When you engage reverse gear or
selector-lever position R, the exterior
mirror glass on the front passenger side
tilts downward slightly. This allows the
driver to see the area immediately adja-
cent to the vehicle – such as a curb –
when parking, etc.
Deactivating
Slide the mirror selection switch to the pas-
senger's side position.
Front head restraints
Head restraints reduce the risk of spi-
nal injury in the event of an accident.
Adjust the head restraints so that they are
centered roughly at the level of your ears.<
Coupe
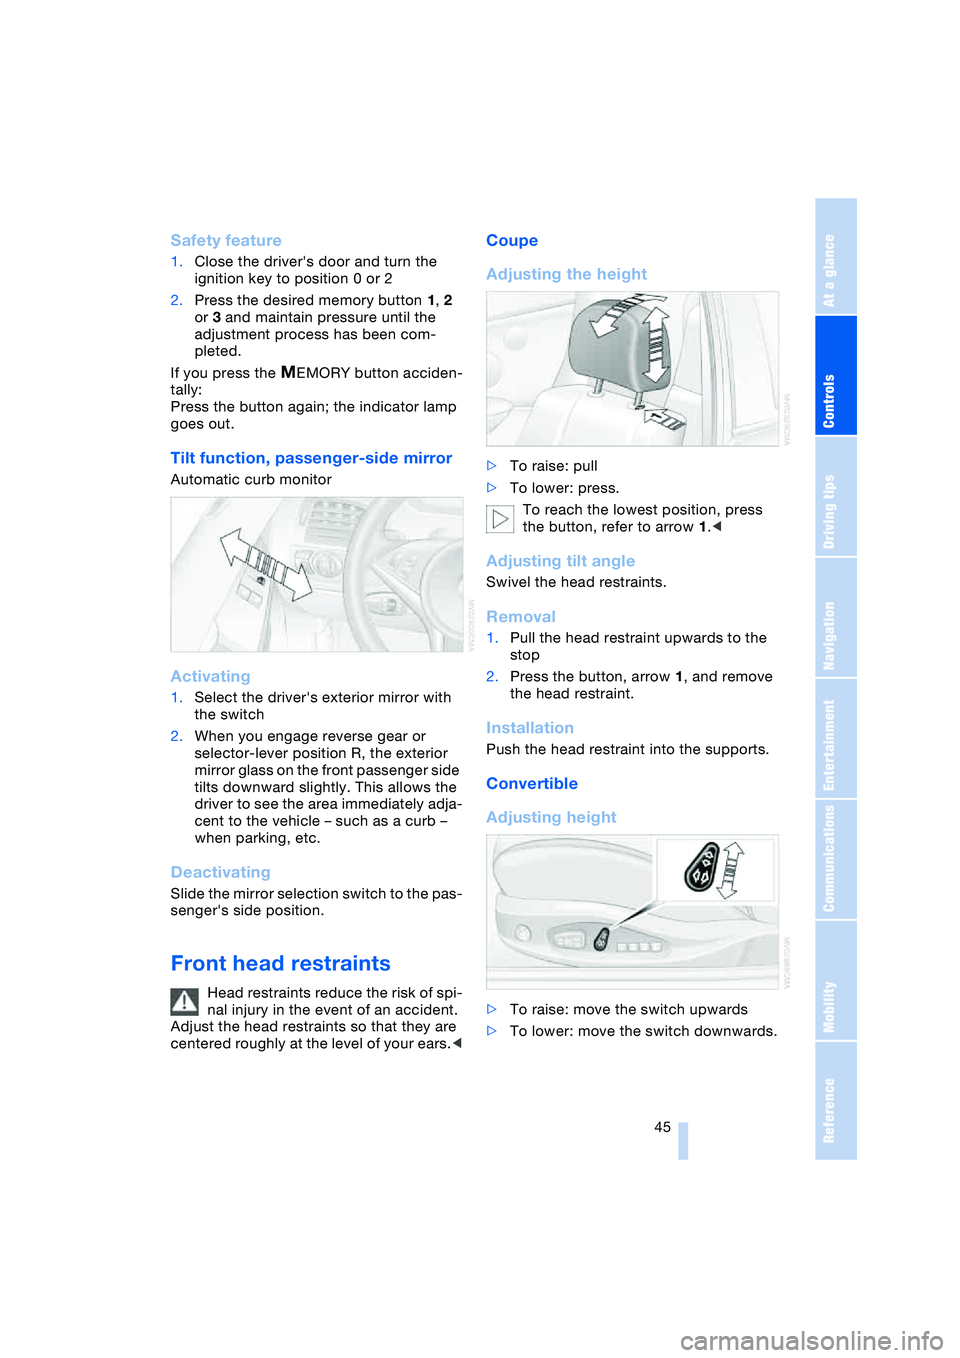
Adjusting the height
>To raise: pull
>To lower: press.
To reach the lowest position, press
the button, refer to arrow 1.<
Adjusting tilt angle
Swivel the head restraints.
Removal
1.Pull the head restraint upwards to the
stop
2.Press the button, arrow 1, and remove
the head restraint.
Installation
Push the head restraint into the supports.
Convertible
Adjusting height
>To raise: move the switch upwards
>To lower: move the switch downwards.
Page 53 of 216
Controls
51Reference
At a glance
Driving tips
Communications
Navigation
Entertainment
Mobility
Transporting children safely
The right place for children
Children always in the rear
Accident research shows that the safest
place for children in a vehicle is in the rear
seat.
Older children should be tightly secured
with a safety belt, after they have outgrown
a booster seat that is appropriate for their
age, height and weight.
Child-restraint system in the rear
Children under 13 years of age and
children less than 5 ft/150 cm tall
should always ride in the rear and the
restraint systems should be secured with
the vehicle's safety belts.<
Younger children should be secured in an
appropriate forward-facing child-restraint
system that has first been properly
secured. We strongly urge you to carefully
read and comply with the instructions for
installation and use provided by the child-
restraint's manufacturer whenever you use
such a device.
All rear sitting positions in your vehicle
meet the recommendations of SAE J1819,
an industry-recommended practice for
securing child-restraint systems in motor
vehicles.
Exception for front passenger seat
Should it become necessary to use
a child-restraint system on the front
passenger seat, the airbags on the passen-
ger's side must be deactivated. Deactivat-
ing the passenger airbags is only possible
on the Coupe. Your BMW center will be
glad to advise you.
ger seat of this vehicle if the passenger air-
bag is not deactivated. If you do so, the
child could be severely injured when the
airbag is triggered.
Your vehicle is equipped with an airbag
supplemental restraint system for the front
passenger. Because the backrest on any
rearward-facing child-restraint system – of
the kind designed for infants under 1 year
and 20 Ibs./9 kg – would be within the air-
bag's deployment range, you should never
mount such a system in the front passenger
seat, since the impact of the airbag against
the child restraint's backrest could lead to
serious or fatal injuries.<
Installing child-restraint
systems
Before installing any child-restraint system
or child seat, read the following:
Observe the child-restraint system
manufacturer's instructions for instal-
lation and use. Otherwise the degree of
protection can be reduced.
After an accident, have all parts of the
child-restraint system and of the relevant
vehicle safety belt system checked by a
BMW center and replaced if necessary.<
Commercially-available child-restraint sys-
tems are designed to be secured with a lap
belt or with the lap belt portion of a combi-
nation lap/shoulder belt. Improperly or
inadequately installed restraint systems
can increase the risk of injury to children.
Always read and follow the instructions that
come with the system.
Page 98 of 216
Practical interior accessories
96 Be sure that the flashlight is switched
off when it is inserted into its holder.
Failure to comply with this precaution
could lead to overcharging and damage.<
Center armrest
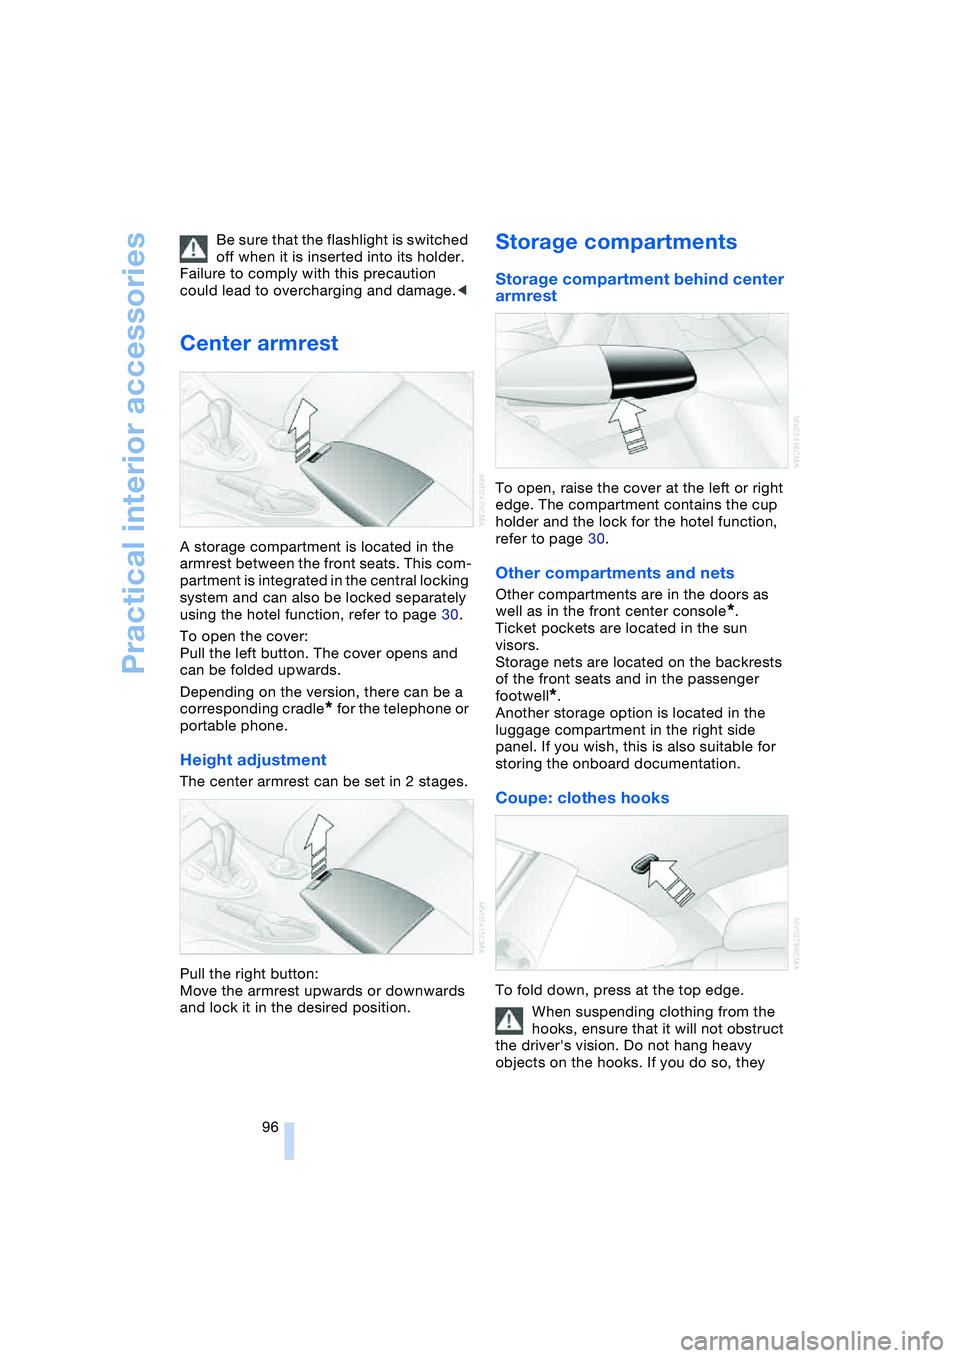
A storage compartment is located in the
armrest between the front seats. This com-
partment is integrated in the central locking
system and can also be locked separately
using the hotel function, refer to page 30.
To open the cover:
Pull the left button. The cover opens and
can be folded upwards.
Depending on the version, there can be a
corresponding cradle
* for the telephone or
portable phone.
Height adjustment
The center armrest can be set in 2 stages.
Pull the right button:
Move the armrest upwards or downwards
and lock it in the desired position.
Storage compartments
Storage compartment behind center
armrest
To open, raise the cover at the left or right
edge. The compartment contains the cup
holder and the lock for the hotel function,
refer to page 30.
Other compartments and nets
Other compartments are in the doors as
well as in the front center console
*.
Ticket pockets are located in the sun
visors.
Storage nets are located on the backrests
of the front seats and in the passenger
footwell
*.
Another storage option is located in the
luggage compartment in the right side
panel. If you wish, this is also suitable for
storing the onboard documentation.
Coupe: clothes hooks
To fold down, press at the top edge.
When suspending clothing from the
hooks, ensure that it will not obstruct
the driver's vision. Do not hang heavy
objects on the hooks. If you do so, they
Page 172 of 216
Under the hood
170
Under the hood
Never attempt to perform any service
or repair operations on your vehicle
without the required, professional technical
training. If you are unfamiliar with the ser-
vice procedures and precautions, always
have any required work on your vehicle
carried out at your BMW center. If this work
is performed inexpertly, there is a danger of
damage and associated safety risks.<
Hood
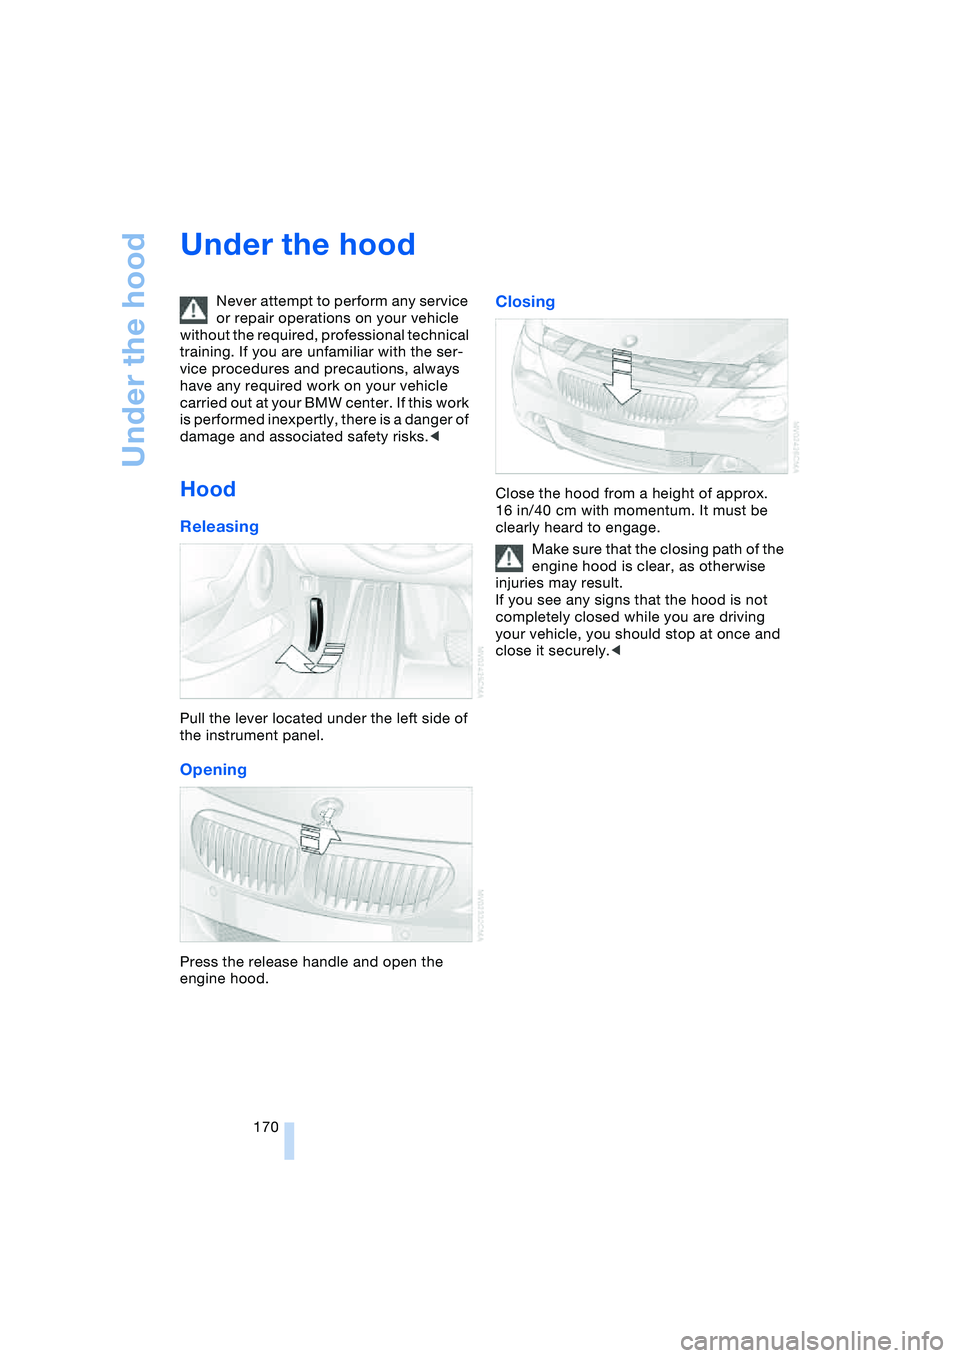
Releasing
Pull the lever located under the left side of
the instrument panel.
Opening
Press the release handle and open the
engine hood.
Closing
Close the hood from a height of approx.
16 in/40 cm with momentum. It must be
clearly heard to engage.
Make sure that the closing path of the
engine hood is clear, as otherwise
injuries may result.
If you see any signs that the hood is not
completely closed while you are driving
your vehicle, you should stop at once and
close it securely.<
Page 201 of 216
Reference 199
At a glance
Controls
Driving tips
Communications
Navigation
Entertainment
Mobility
C
California laws
– Event Data
Recorders 176
– Proposition 65
Warning 176
"Call" 148
Call
– accepting 147
– display accepted 149
– ending 148
– in absence 149
– starting 147
Calling
– from phone book 148
– from the Top 8 list 149
– redialing 149
– refer to telephone
Owner's Manual 96
"Call sender" 151
Can holder, refer to
Cup holders 97
Capacities 193
Car battery, refer to
Battery 181
Car care, refer to the Caring
for your vehicle brochure
Car-care products, refer to
the Caring for your
vehicle brochure
"Car data" 69
Care 175
Cargo, securing 105
Caring for artificial leather,
refer to the Caring for
your vehicle brochure
Caring for leather, refer to
the Caring for your
vehicle brochure
Caring for light-alloy
wheels, refer to the
Caring for your vehicle
brochure'
Caring for plastic, refer to
the Caring for your
vehicle brochure
Caring for the carpet, refer
to the Caring for your
vehicle brochureCaring for the vehicle finish,
refer to the Caring for
your vehicle brochure'
Car jacking points 181
Car keys, refer to
Key set 26
Car phone 145
– location, refer to
Center armrest 96
– refer to
Portable phone 144
– refer to separate
Owner's Manual
Car radio, refer to
Radio 130
Car wash 102
– also refer to the Caring for
your vehicle brochure
Catalytic converter, refer to
Exhaust system 102
"Categories" 135
CBC Cornering Brake
Control 76
CBS Condition Based
Service 174
"CD" 127, 137
CD changer 137
– adjusting the tone 127
– controls 126
– fast forward/reverse 140
– installation location 140
– playing a track 139
– random play
sequence 140
– repeating a track 139
– selecting a CD 137
– selecting a track 138
– switching on/off 126
– volume 127
CD player 137
– adjusting the tone 127
– controls 126
– fast forward/reverse 140
– playing a track 139
– random play
sequence 140
– repeating a track 139
– selecting a track 138
– switching on/off 126
– volume 127Center armrest
– adjusting the height 96
– front 96
Center console 14
"Central locking" 27
Central locking system 26
– from inside vehicle 29
Changes, technical, refer to
For your own safety 6
Changing a wheel 181
Changing the language on
Control Display 73
Changing the
measurement units on the
Control Display 72
Changing wheels 181
CHECK button 68
Check Control 66
"Check Control
messages" 68
Check Gas Cap 162
Checking the air pressure,
refer to Tire inflation
pressure 164
Child's seats, refer to
Child-restraint
systems 52
Child-restraint system 51
Chrome parts, care, refer
to the Caring for your
vehicle brochure
Cigarette lighter 97
Cleaning, refer to the
Caring for your vehicle
brochure
Cleaning windshield, refer
to Wiper system 61
"Climate" 90
"Climate control" 91
Clock 64
– 12/24 hour mode 73
– setting time and date 73
Closing
– from inside 29
– from outside 27
Clothes hooks, Coupe 96
Cockpit 10
Cold start, refer to
Starting the engine 54
"Communication" 146
Page 205 of 216
Reference 203
At a glance
Controls
Driving tips
Communications
Navigation
Entertainment
Mobility
Gear display
– automatic transmission
with Steptronic 58
– SMG Sequential manual
transmission 57
Gearshift lever
– automatic transmission
with Steptronic 58
– manual transmission 56
– SMG Sequential manual
transmission 56
General driving notes 102
Glass roof, electric with
raise function 35
– closing in the event of an
electrical malfunction 36
– convenience operation 29
– remote control 27
Glove compartment 95
GPS navigation, refer to
Navigation system 108
Grills, refer to
Ventilation 88
Gross vehicle weight, refer
to Weights 190
H
Handbrake 55
– indicator lamp 13, 55
Hands-free system 14, 146
Hazard warning flashers 15
Head airbags 81
Headlamp control,
automatic 85
Headlamp flasher 60
Headlamps
– care, refer to the Caring
for your vehicle brochure
– cleaning, refer to
Wiper system 61
– replacing the bulbs 178
Head Light, refer to
Adaptive Head Light 86
Head-Up Display 83
Heated mirrors 48
Heated rear window 89
Heated seats 47
Heated steering wheel 49Heating
– exterior mirrors 48
– interior 88
– rear window 89
– residual heat mode 90
– seats 47
– steering wheel 49
Heating with engine
switched off, refer to
Residual heat mode 90
Heavy cargo, refer to
Securing the load 105
Height, refer to
Dimensions 191
Height adjustment
– seats 43
– steering wheel 48
High beams 86
– headlamp flasher 86
– indicator lamp 13
– replacing the bulbs 178
Hills 103
Holder for cups 97
Horn 10
Hotel function 30
Hot exhaust system 102
"Hour memo" 73
"House number" for desti-
nation entry 111
Hydraulic Brake Assistant,
refer to DBC Dynamic
Brake Control 78
Hydroplaning 102
– also refer to Minimum
tread depth 167
I
Ice warning 64
iDrive, refer to
Control Center 16
Ignition key 26
Ignition key positions, refer
to Ignition lock 54
Ignition lock 54
Increasing luggage
compartment capacity,
Convertible 32Independent ventilation
– activating activation
timer 93
– setting the activation
time 93
– switching on and off
directly 92
Indicator/warning lamps
– ABS Antilock Brake
System 13, 78
– active steering 13, 80
– airbags 13, 82
– brake system 13, 78
– DSC Dynamic Stability
Control 13, 77
– DTC Dynamic Traction
Control 13, 77
– fastening safety
belts 13, 47
– Flat Tire Monitor 80
– fog lamps 11, 86
Indicator and warning
lamps, overview 13
Individual button
assignment options on
the steering wheel 49
Individual settings, refer to
Key Memory 26
Inflation pressure, refer to
Tire inflation
pressure 164
Inflation pressure
monitoring, refer to Flat
Tire Monitor 79
Information
– on another location 113
– on current location 113
– on destination
location 113
"Information" for
navigation 113
"Information on
destination" 114
Initiating an emergency
call 183
"Input map" 112
Installation location
– CD changer 140
– portable phone 145