2004 BMW 525I SEDAN window
[x] Cancel search: windowPage 12 of 220
Cockpit
10
Cockpit
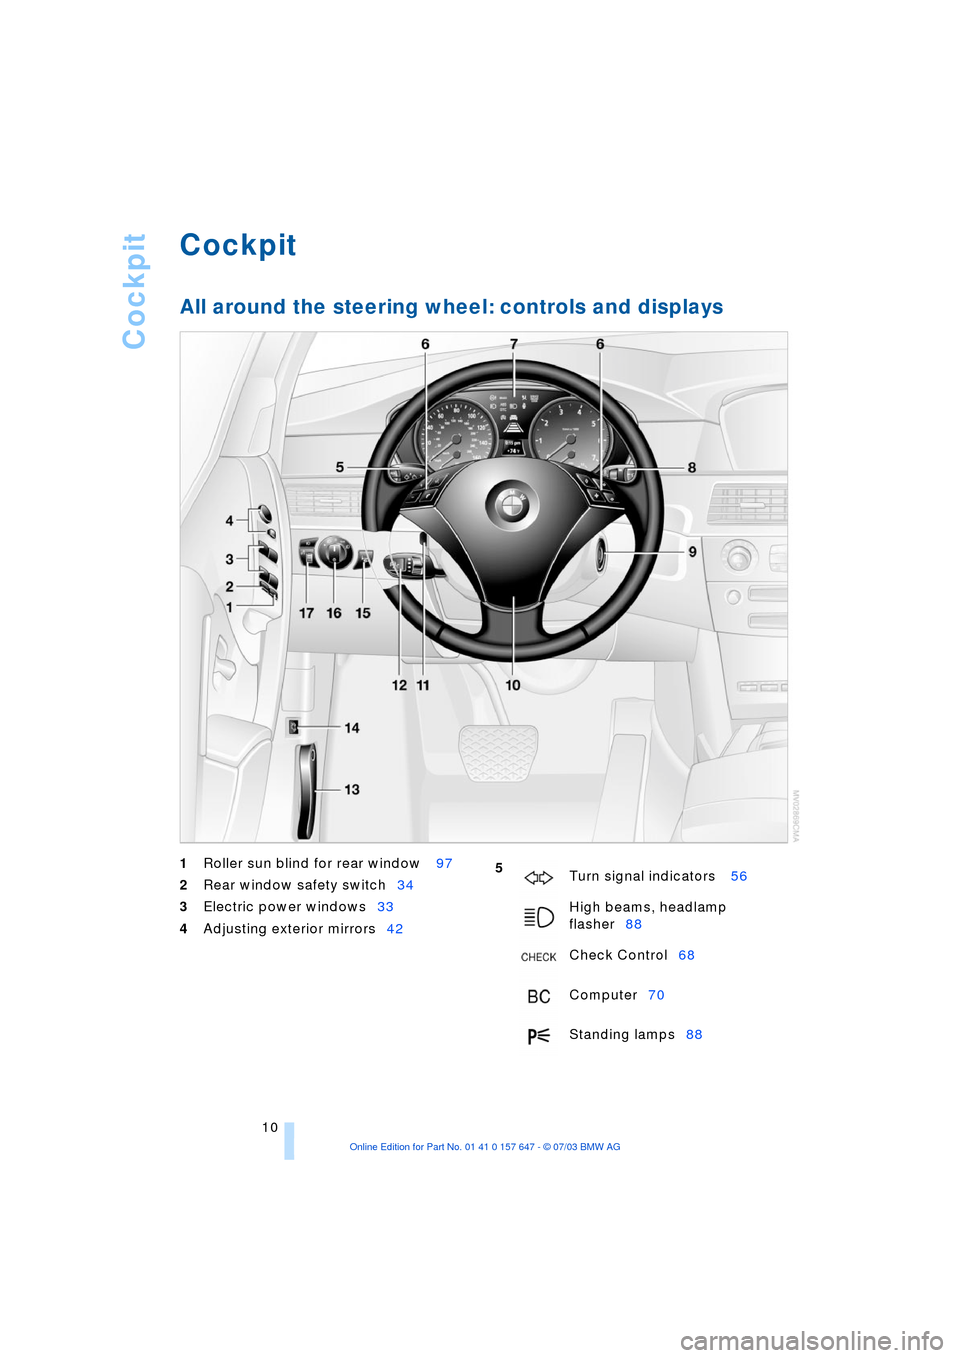
All around the steering wheel: controls and displays
1
Roller sun blind for rear window 97
2
Rear window safety switch34
3
Electric power windows33
4
Adjusting exterior mirrors42
5
Turn signal indicators 56
High beams, headlamp
flasher88
Check Control68
Computer70
Standing lamps88
Page 17 of 220

At a glance
15Reference
Controls
Driving tips
Communications
Navigation
Entertainment
Mobility
1Microphone for
>Telephone/portable phone151
>Voice command system20
2Reading lamps89
3Starting emergency call190
4Interior lamps89
5Glass roof, electric34
6Front passenger's airbag indicator
lamp84
7Control Display16
displays for menu guidance
8Hazard warning flashers
9Central locking system30
10Automatic climate control90
11Button for
>Station scan/track search130
>CD player141
>CD changer145 12Ejecting
>Navigation CD/DVD114
>Audio CD130
13Drive for navigation CD/DVD114
14Drive for audio CD130
15Switching audio sources on/off and
adjusting the volume130
16Center console switching center
17Controller16
Horizontal movement in four directions,
turn or press
18Activating voice command system20
19Open start menu17 Temperature setting,
left/right91
Automatic air distribution and
supply91
Cooling function91
Automatic recirculated-air
control AUC91
Maximum cooling91
Residual heat mode92
To switch off automatic climate
control92
Air volume91
Defrost windows91
Rear window defroster90
Heated seats 41
Active seat ventilation42
Active seat42
PDC Park Distance Control 76
DSC Dynamic Stability
Control78
Page 20 of 220
Control Center
18
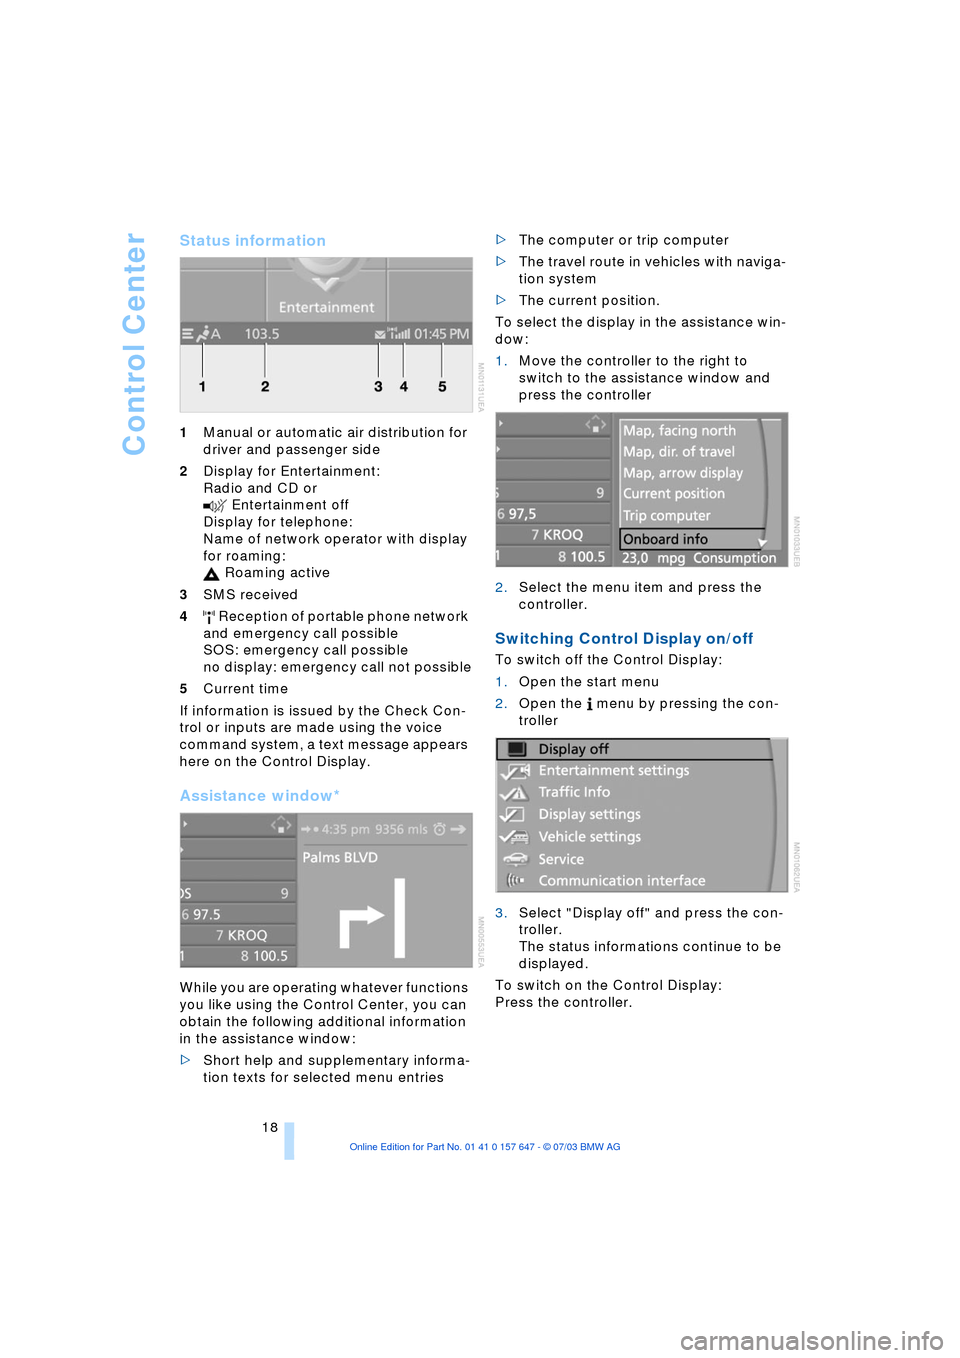
Status information
1Manual or automatic air distribution for
driver and passenger side
2Display for Entertainment:
Radio and CD or
Entertainment off
Display for telephone:
Name of network operator with display
for roaming:
Roaming active
3SMS received
4 Reception of portable phone network
and emergency call possible
SOS: emergency call possible
no display: emergency call not possible
5Current time
If information is issued by the Check Con-
trol or inputs are made using the voice
command system, a text message appears
here on the Control Display.
Assistance window*
While you are operating whatever functions
you like using the Control Center, you can
obtain the following additional information
in the assistance window:
>Short help and supplementary informa-
tion texts for selected menu entries >The computer or trip computer
>The travel route in vehicles with naviga-
tion system
>The current position.
To select the display in the assistance win-
dow:
1.Move the controller to the right to
switch to the assistance window and
press the controller
2.Select the menu item and press the
controller.
Switching Control Display on/off
To switch off the Control Display:
1.Open the start menu
2.Open the menu by pressing the con-
troller
3.Select "Display off" and press the con-
troller.
The status informations continue to be
displayed.
To switch on the Control Display:
Press the controller.
Page 24 of 220
Voice command system
22
Notes
Do not use the voice command sys-
tem in emergency situations. In stress
situations, voice and pitch can change.
Instead, use the emergency call button
near the interior rearview mirror.<
At the time of going to press, the
voice command system was available
in English. Other languages are currently
not available.
The telephone can also be operated using
voice control, refer to page 157.<
Important for voice commands
Issue the commands fluently and at normal
volume, avoiding excessing emphasis and
pauses.
The voice command system uses a special
hands-free microphone located in the front
of your vehicle's headliner. On vehicles
with telephone, two vehicle microphones
are fitted. Although the system is designed
to filter out ambient noise, you can help
ensure that your commands will be under-
stood by observing the following instruc-
tions:
>Keep the doors, windows and glass
roof closed to prevent interference from
ambient noise
>Avoid other sources of noise in the
vehicle while speaking, and ask other
vehicle occupants to refrain from talk-
ing while you are using the system
>Without a telephone, the vehicle micro-
phone is directed at the driver. This
means that the system might not be
able to register the voices of other vehi-
cle occupants properly.
Page 30 of 220
Opening and closing
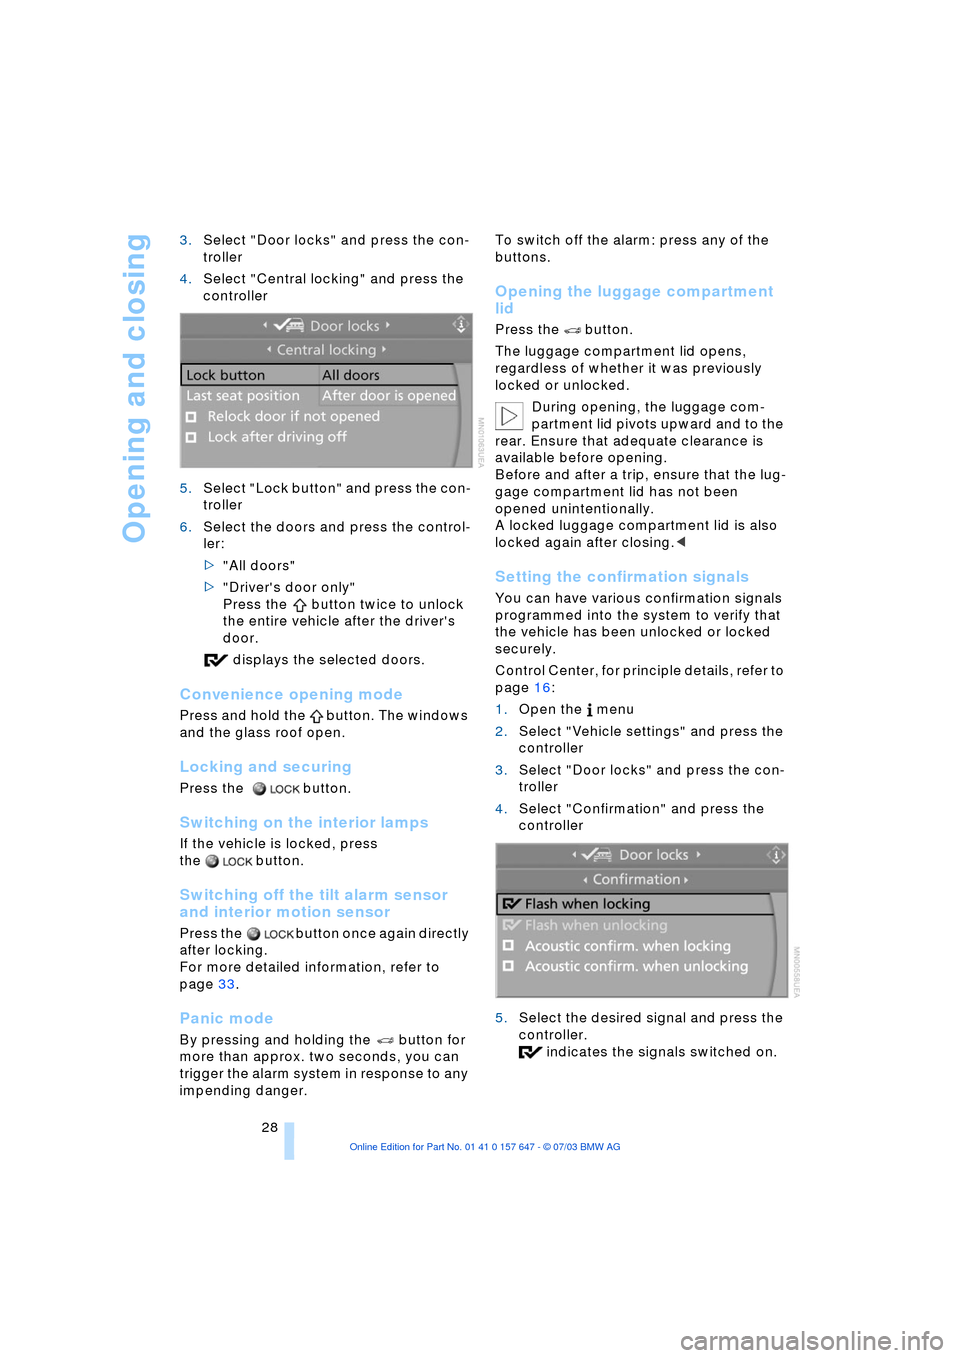
28 3.Select "Door locks" and press the con-
troller
4.Select "Central locking" and press the
controller
5.Select "Lock button" and press the con-
troller
6.Select the doors and press the control-
ler:
>"All doors"
>"Driver's door only"
Press the button twice to unlock
the entire vehicle after the driver's
door.
displays the selected doors.
Convenience opening mode
Press and hold the button. The windows
and the glass roof open.
Locking and securing
Press the button.
Switching on the interior lamps
If the vehicle is locked, press
the button.
Switching off the tilt alarm sensor
and interior motion sensor
Press the button once again directly
after locking.
For more detailed information, refer to
page 33.
Panic mode
By pressing and holding the button for
more than approx. two seconds, you can
trigger the alarm system in response to any
impending danger. To switch off the alarm: press any of the
buttons.
Opening the luggage compartment
lid
Press the button.
The luggage compartment lid opens,
regardless of whether it was previously
locked or unlocked.
During opening, the luggage com-
partment lid pivots upward and to the
rear. Ensure that adequate clearance is
available before opening.
Before and after a trip, ensure that the lug-
gage compartment lid has not been
opened unintentionally.
A locked luggage compartment lid is also
locked again after closing.<
Setting the confirmation signals
You can have various confirmation signals
programmed into the system to verify that
the vehicle has been unlocked or locked
securely.
Control Center, for principle details, refer to
page 16:
1.Open the menu
2.Select "Vehicle settings" and press the
controller
3.Select "Door locks" and press the con-
troller
4.Select "Confirmation" and press the
controller
5.Select the desired signal and press the
controller.
indicates the signals switched on.
Page 31 of 220
Controls
29Reference
At a glance
Driving tips
Communications
Navigation
Entertainment
Mobility
Malfunctions
External systems or devices may cause
local interference in the functions of the
remote control.
Should the remote control fail to operate
owing to interference of this kind, you can
respond by using the central key to unlock
your vehicle at one of the doors.
In the event of a system malfunction,
please contact your BMW center, which is
also your source for replacement keys.
When it is no longer possible to lock the
vehicle via the remote control, the battery is
discharged. Use this remote control during
an extended drive; this will recharge the
battery, refer to page 26.
For US owners only
The transmitter and receiver units comply
with part 15 of the FCC/Federal Communi-
cation Commission regulations. Operation
is governed by the following:
FCC ID: LX8766S
LX8766E
LX8CAS
Compliance statement:
This device complies with part 15 of the
FCC Rules. Operation is subject to the fol-
lowing two conditions:
>This device may not cause harmful
interference, and
>this device must accept any interfer-
ence received, including interference
that may cause undesired operation.
Any unauthorized modifications or
changes to these devices could void
the user's authority to operate this equip-
ment.<
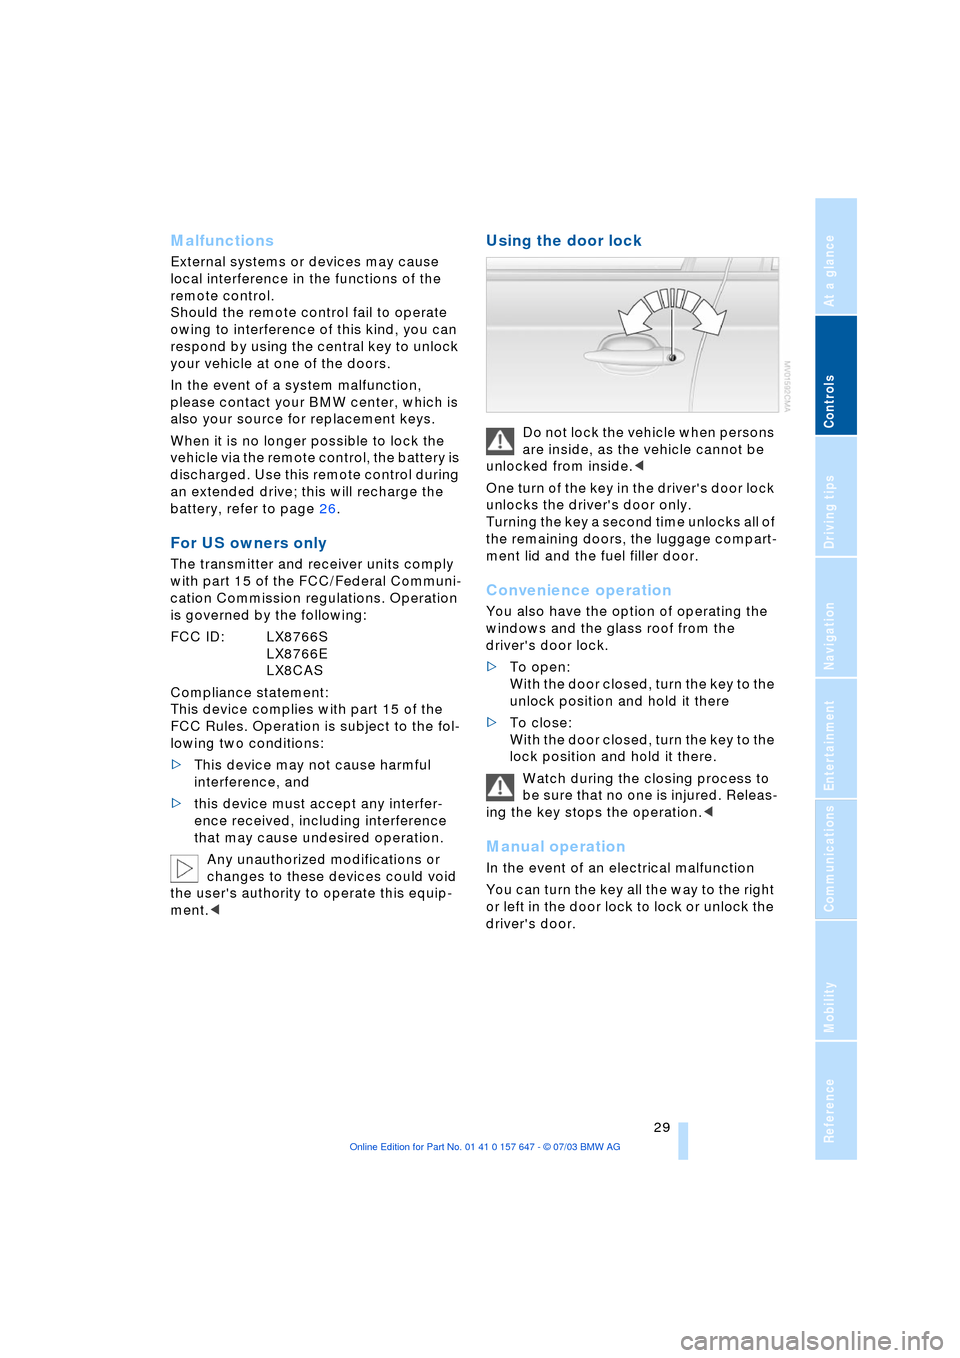
Using the door lock
Do not lock the vehicle when persons
are inside, as the vehicle cannot be
unlocked from inside.<
One turn of the key in the driver's door lock
unlocks the driver's door only.
Turning the key a second time unlocks all of
the remaining doors, the luggage compart-
ment lid and the fuel filler door.
Convenience operation
You also have the option of operating the
windows and the glass roof from the
driver's door lock.
>To open:
With the door closed, turn the key to the
unlock position and hold it there
>To close:
With the door closed, turn the key to the
lock position and hold it there.
Watch during the closing process to
be sure that no one is injured. Releas-
ing the key stops the operation.<
Manual operation
In the event of an electrical malfunction
You can turn the key all the way to the right
or left in the door lock to lock or unlock the
driver's door.
Page 34 of 220
Opening and closing
32
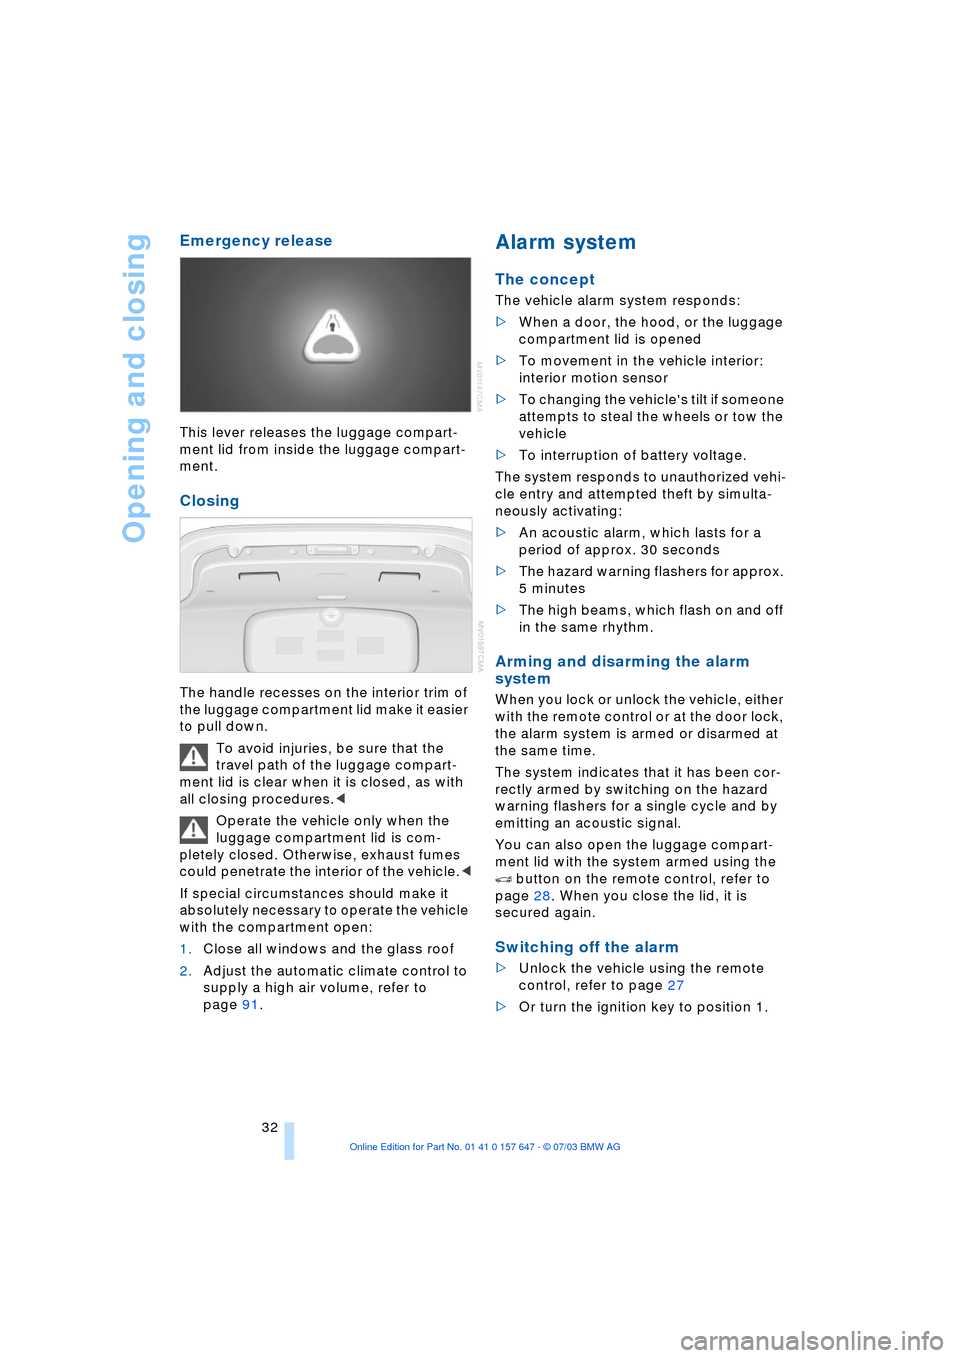
Emergency release
This lever releases the luggage compart-
ment lid from inside the luggage compart-
ment.
Closing
The handle recesses on the interior trim of
the luggage compartment lid make it easier
to pull down.
To avoid injuries, be sure that the
travel path of the luggage compart-
ment lid is clear when it is closed, as with
all closing procedures.<
Operate the vehicle only when the
luggage compartment lid is com-
pletely closed. Otherwise, exhaust fumes
could penetrate the interior of the vehicle.<
If special circumstances should make it
absolutely necessary to operate the vehicle
with the compartment open:
1.Close all windows and the glass roof
2.Adjust the automatic climate control to
supply a high air volume, refer to
page 91.
Alarm system
The concept
The vehicle alarm system responds:
>When a door, the hood, or the luggage
compartment lid is opened
>To movement in the vehicle interior:
interior motion sensor
>To changing the vehicle's tilt if someone
attempts to steal the wheels or tow the
vehicle
>To interruption of battery voltage.
The system responds to unauthorized vehi-
cle entry and attempted theft by simulta-
neously activating:
>An acoustic alarm, which lasts for a
period of approx. 30 seconds
>The hazard warning flashers for approx.
5 minutes
>The high beams, which flash on and off
in the same rhythm.
Arming and disarming the alarm
system
When you lock or unlock the vehicle, either
with the remote control or at the door lock,
the alarm system is armed or disarmed at
the same time.
The system indicates that it has been cor-
rectly armed by switching on the hazard
warning flashers for a single cycle and by
emitting an acoustic signal.
You can also open the luggage compart-
ment lid with the system armed using the
button on the remote control, refer to
page 28. When you close the lid, it is
secured again.
Switching off the alarm
>Unlock the vehicle using the remote
control, refer to page 27
>Or turn the ignition key to position 1.
Page 35 of 220
Controls
33Reference
At a glance
Driving tips
Communications
Navigation
Entertainment
Mobility
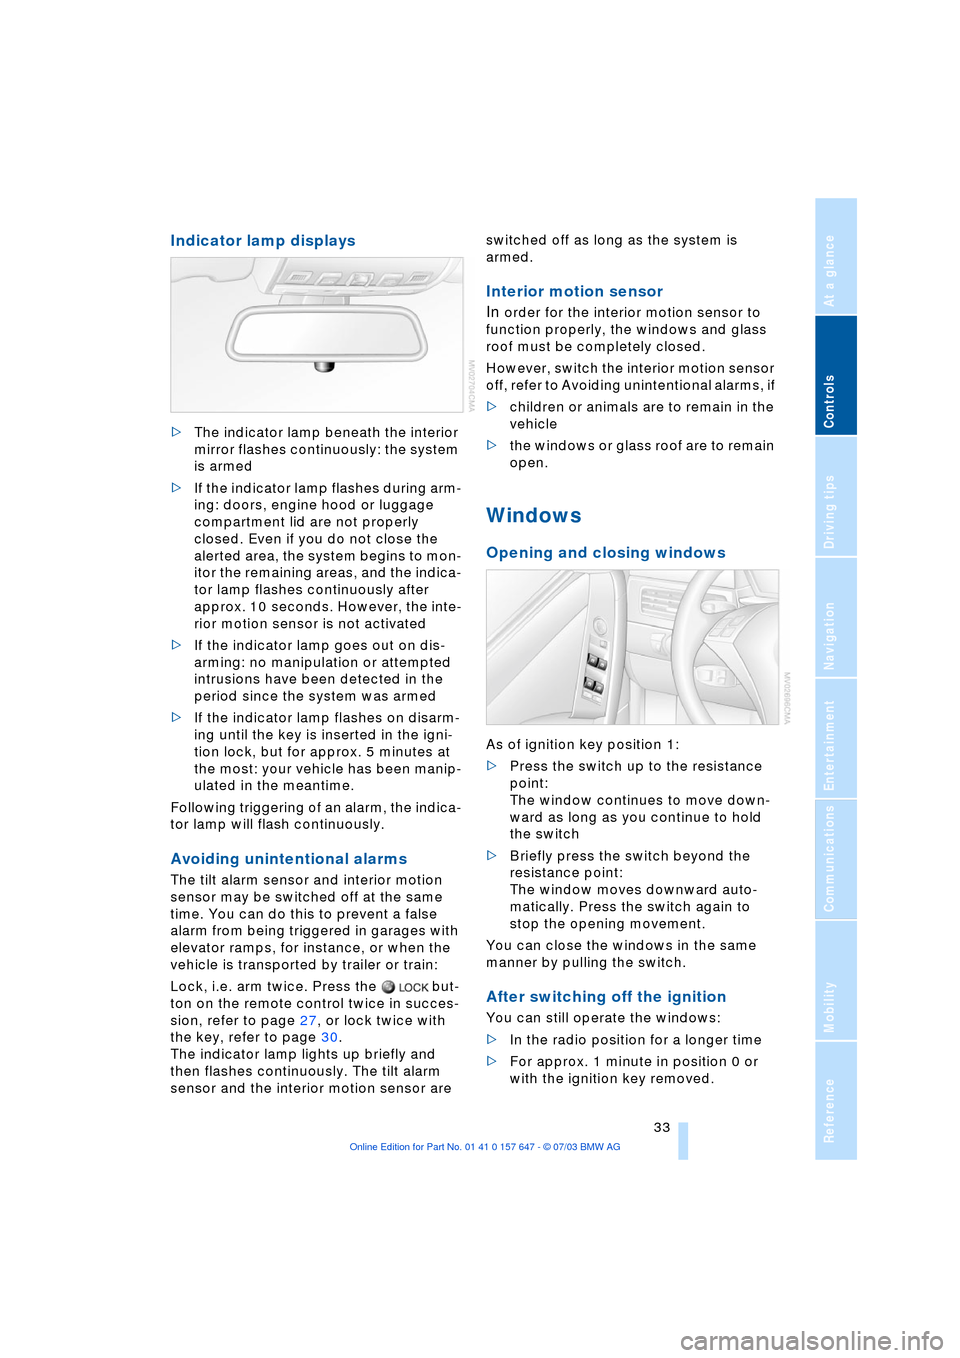
Indicator lamp displays
>The indicator lamp beneath the interior
mirror flashes continuously: the system
is armed
>If the indicator lamp flashes during arm-
ing: doors, engine hood or luggage
compartment lid are not properly
closed. Even if you do not close the
alerted area, the system begins to mon-
itor the remaining areas, and the indica-
tor lamp flashes continuously after
approx. 10 seconds. However, the inte-
rior motion sensor is not activated
>If the indicator lamp goes out on dis-
arming: no manipulation or attempted
intrusions have been detected in the
period since the system was armed
>If the indicator lamp flashes on disarm-
ing until the key is inserted in the igni-
tion lock, but for approx. 5 minutes at
the most: your vehicle has been manip-
ulated in the meantime.
Following triggering of an alarm, the indica-
tor lamp will flash continuously.
Avoiding unintentional alarms
The tilt alarm sensor and interior motion
sensor may be switched off at the same
time. You can do this to prevent a false
alarm from being triggered in garages with
elevator ramps, for instance, or when the
vehicle is transported by trailer or train:
Lock, i.e. arm twice. Press the but-
ton on the remote control twice in succes-
sion, refer to page 27, or lock twice with
the key, refer to page 30.
The indicator lamp lights up briefly and
then flashes continuously. The tilt alarm
sensor and the interior motion sensor are switched off as long as the system is
armed.
Interior motion sensor
In
order for the interior motion sensor to
function properly, the windows and glass
roof must be completely closed.
However, switch the interior motion sensor
off, refer to Avoiding unintentional alarms, if
>children or animals are to remain in the
vehicle
>the windows or glass roof are to remain
open.
Windows
Opening and closing windows
As of ignition key position 1:
>Press the switch up to the resistance
point:
The window continues to move down-
ward as long as you continue to hold
the switch
>Briefly press the switch beyond the
resistance point:
The window moves downward auto-
matically. Press the switch again to
stop the opening movement.
You can close the windows in the same
manner by pulling the switch.
After switching off the ignition
You can still operate the windows:
>In the radio position for a longer time
>For approx. 1 minute in position 0 or
with the ignition key removed.