2004 BMW 525I SEDAN ECU
[x] Cancel search: ECUPage 3 of 220
525i
530i
545i
Congratulations, and thank you for choosing a BMW.
Thorough familiarity with your vehicle will provide you with
enhanced control and security when you drive it. We there-
fore have this request:
Please take the time to read this Owner's Manual and
familiarize yourself with the information that we have com-
piled for you before starting off in your new vehicle.
It contains important data and instructions intended to
assist you in gaining maximum use and satisfaction from
your BMW's unique range of technical features. The man-
ual also contains information on maintenance designed to
enhance operating safety and contribute to maintaining the
value of your BMW throughout an extended service life.
This Owner's Manual should be considered a permanent
part of this vehicle. It should stay with the vehicle when
sold to provide the next owner with important operating,
safety and maintenance information.
This manual is supplemented by a Service and Warranty
Information Booklet for US models or a Warranty and Ser-
vice Guide Booklet for Canadian models.
We wish you an enjoyable driving experience.
BMW AG
Page 21 of 220
At a glance
19Reference
Controls
Driving tips
Communications
Navigation
Entertainment
Mobility
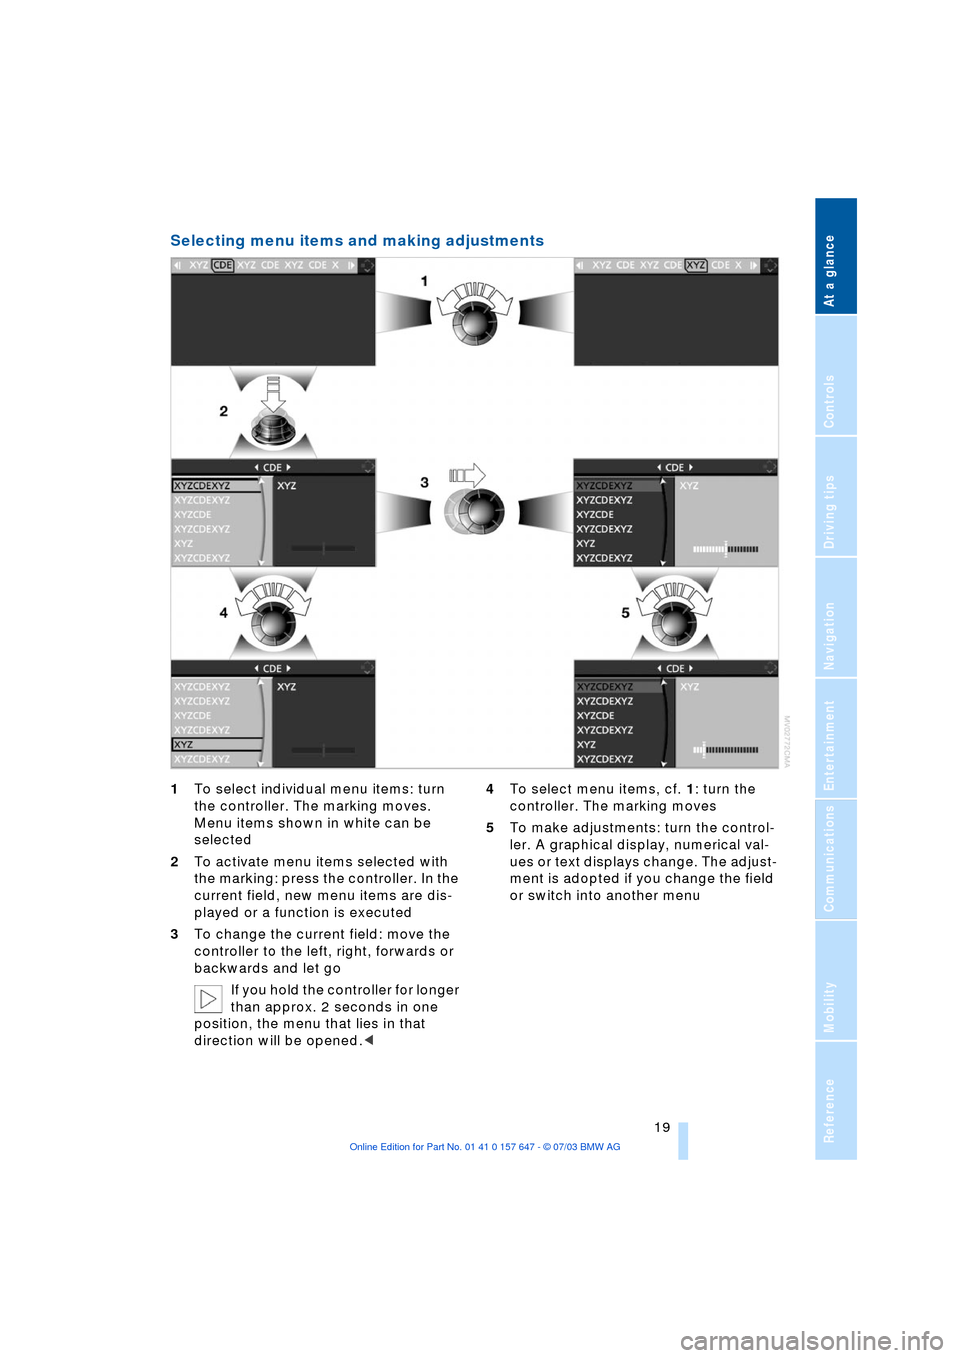
Selecting menu items and making adjustments
1To select individual menu items: turn
the controller. The marking moves.
Menu items shown in white can be
selected
2To activate menu items selected with
the marking: press the controller. In the
current field, new menu items are dis-
played or a function is executed
3To change the current field: move the
controller to the left, right, forwards or
backwards and let go
If you hold the controller for longer
than approx. 2 seconds in one
position, the menu that lies in that
direction will be opened.< 4To select menu items, cf. 1: turn the
controller. The marking moves
5To make adjustments: turn the control-
ler. A graphical display, numerical val-
ues or text displays change. The adjust-
ment is adopted if you change the field
or switch into another menu
Page 30 of 220
Opening and closing
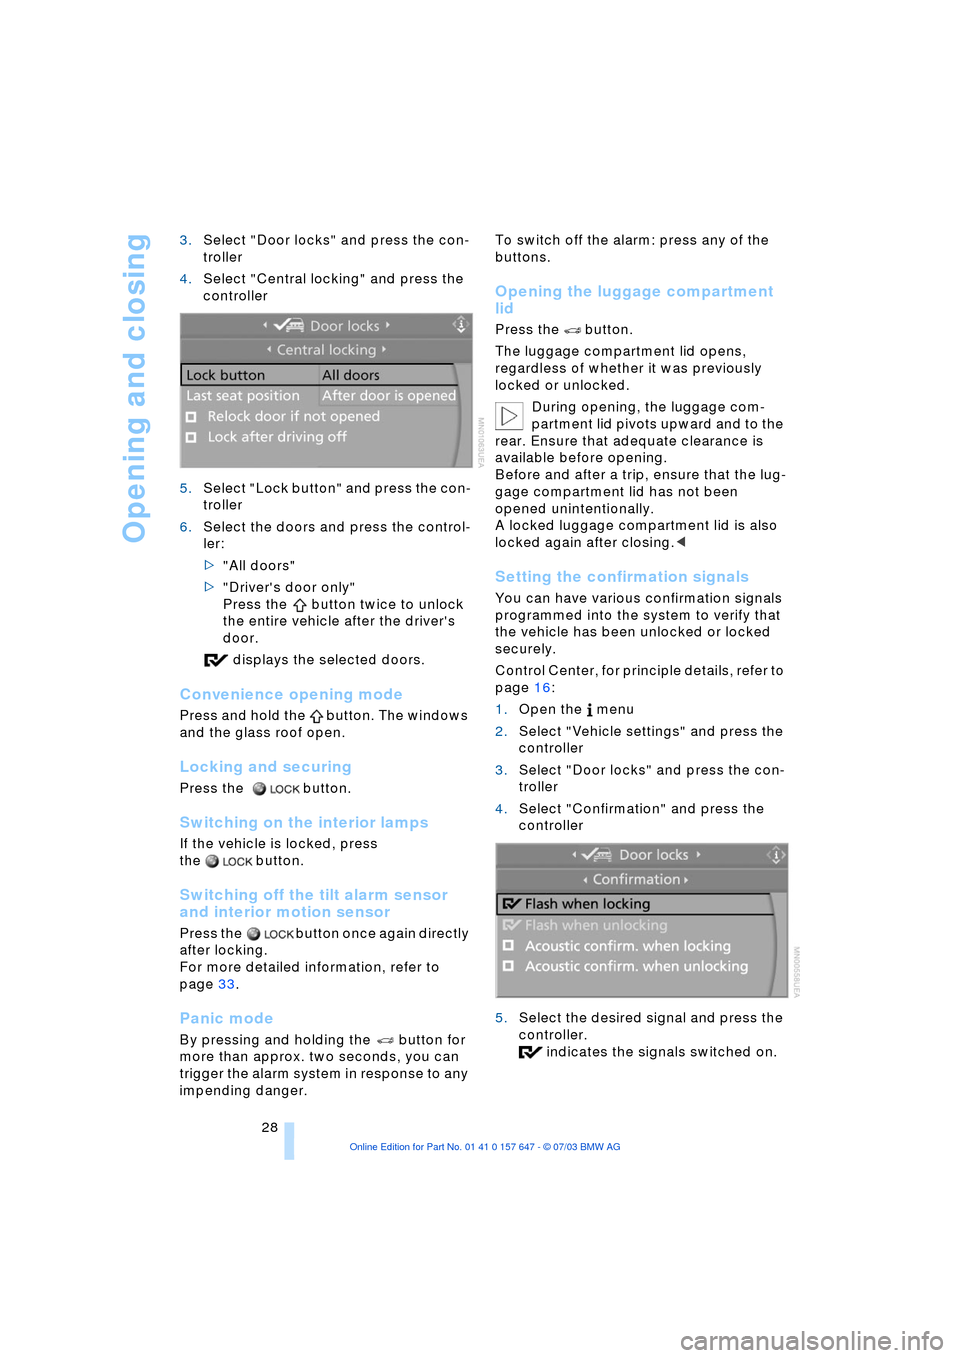
28 3.Select "Door locks" and press the con-
troller
4.Select "Central locking" and press the
controller
5.Select "Lock button" and press the con-
troller
6.Select the doors and press the control-
ler:
>"All doors"
>"Driver's door only"
Press the button twice to unlock
the entire vehicle after the driver's
door.
displays the selected doors.
Convenience opening mode
Press and hold the button. The windows
and the glass roof open.
Locking and securing
Press the button.
Switching on the interior lamps
If the vehicle is locked, press
the button.
Switching off the tilt alarm sensor
and interior motion sensor
Press the button once again directly
after locking.
For more detailed information, refer to
page 33.
Panic mode
By pressing and holding the button for
more than approx. two seconds, you can
trigger the alarm system in response to any
impending danger. To switch off the alarm: press any of the
buttons.
Opening the luggage compartment
lid
Press the button.
The luggage compartment lid opens,
regardless of whether it was previously
locked or unlocked.
During opening, the luggage com-
partment lid pivots upward and to the
rear. Ensure that adequate clearance is
available before opening.
Before and after a trip, ensure that the lug-
gage compartment lid has not been
opened unintentionally.
A locked luggage compartment lid is also
locked again after closing.<
Setting the confirmation signals
You can have various confirmation signals
programmed into the system to verify that
the vehicle has been unlocked or locked
securely.
Control Center, for principle details, refer to
page 16:
1.Open the menu
2.Select "Vehicle settings" and press the
controller
3.Select "Door locks" and press the con-
troller
4.Select "Confirmation" and press the
controller
5.Select the desired signal and press the
controller.
indicates the signals switched on.
Page 32 of 220
Opening and closing
30
Opening and closing: from
inside
You can operate the central locking system
with this button when the front doors are
closed. This only unlocks or locks the
doors and luggage compartment lid, but
not secured. Also, the fuel filler door
remains unlocked to allow refueling.
You can also make the following settings
for each specific key:
>The central locking system automati-
cally locks the vehicle as soon as you
drive off
>The central locking system automati-
cally locks the vehicle after a short time
when no door has been opened.
Control Center, for principle details, refer to
page 16:
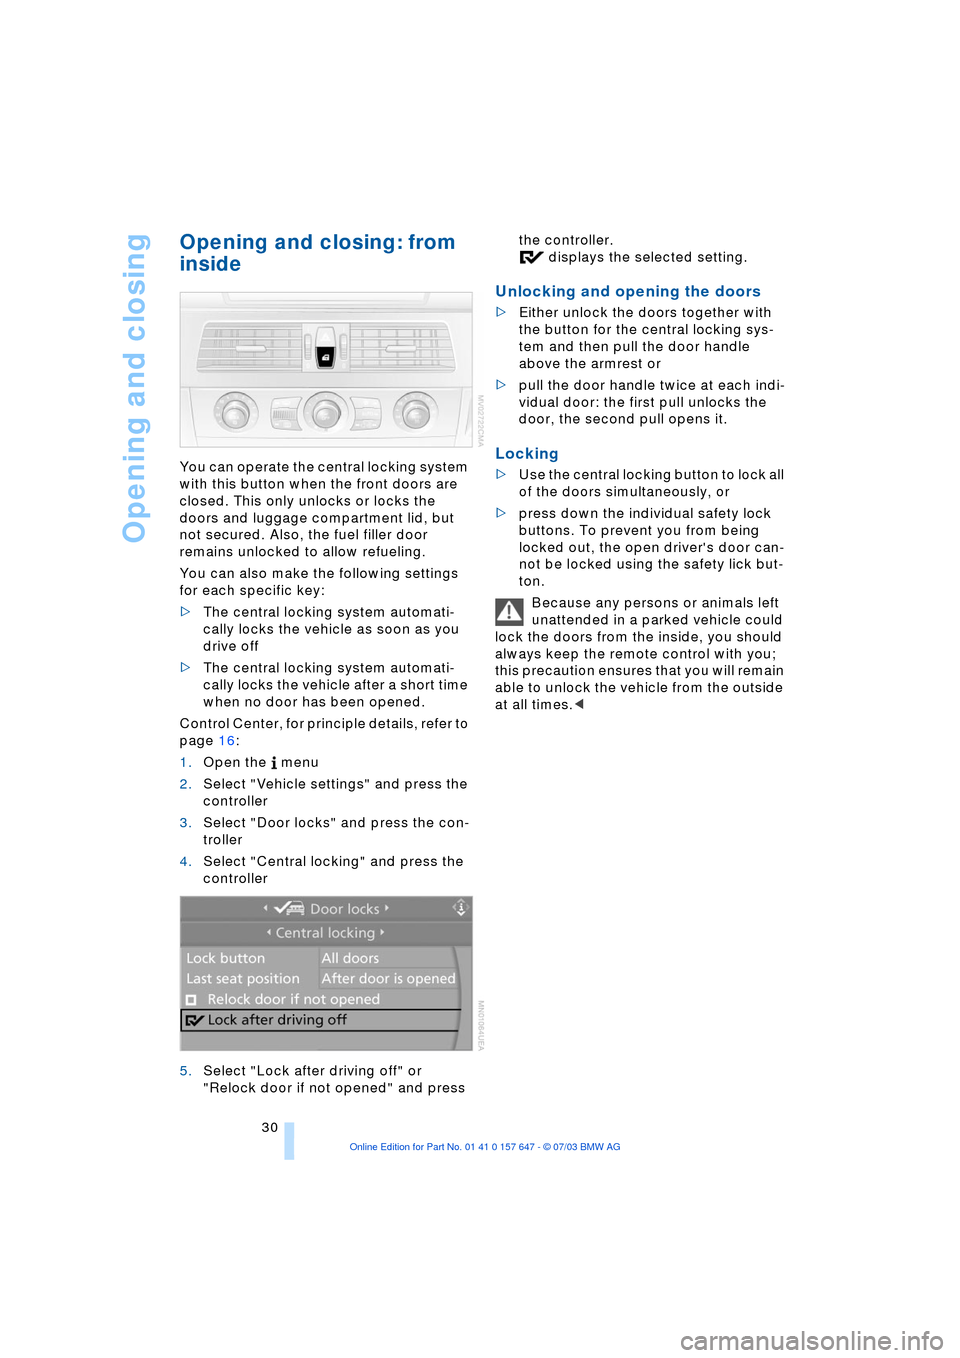
1.Open the menu
2.Select "Vehicle settings" and press the
controller
3.Select "Door locks" and press the con-
troller
4.Select "Central locking" and press the
controller
5.Select "Lock after driving off" or
"Relock door if not opened" and press the controller.
displays the selected setting.
Unlocking and opening the doors
>Either unlock the doors together with
the button for the central locking sys-
tem and then pull the door handle
above the armrest or
>pull the door handle twice at each indi-
vidual door: the first pull unlocks the
door, the second pull opens it.
Locking
>Use the central locking button to lock all
of the doors simultaneously, or
>press down the individual safety lock
buttons. To prevent you from being
locked out, the open driver's door can-
not be locked using the safety lick but-
ton.
Because any persons or animals left
unattended in a parked vehicle could
lock the doors from the inside, you should
always keep the remote control with you;
this precaution ensures that you will remain
able to unlock the vehicle from the outside
at all times.<
Page 33 of 220
Controls
31Reference
At a glance
Driving tips
Communications
Navigation
Entertainment
Mobility
Luggage compartment lid
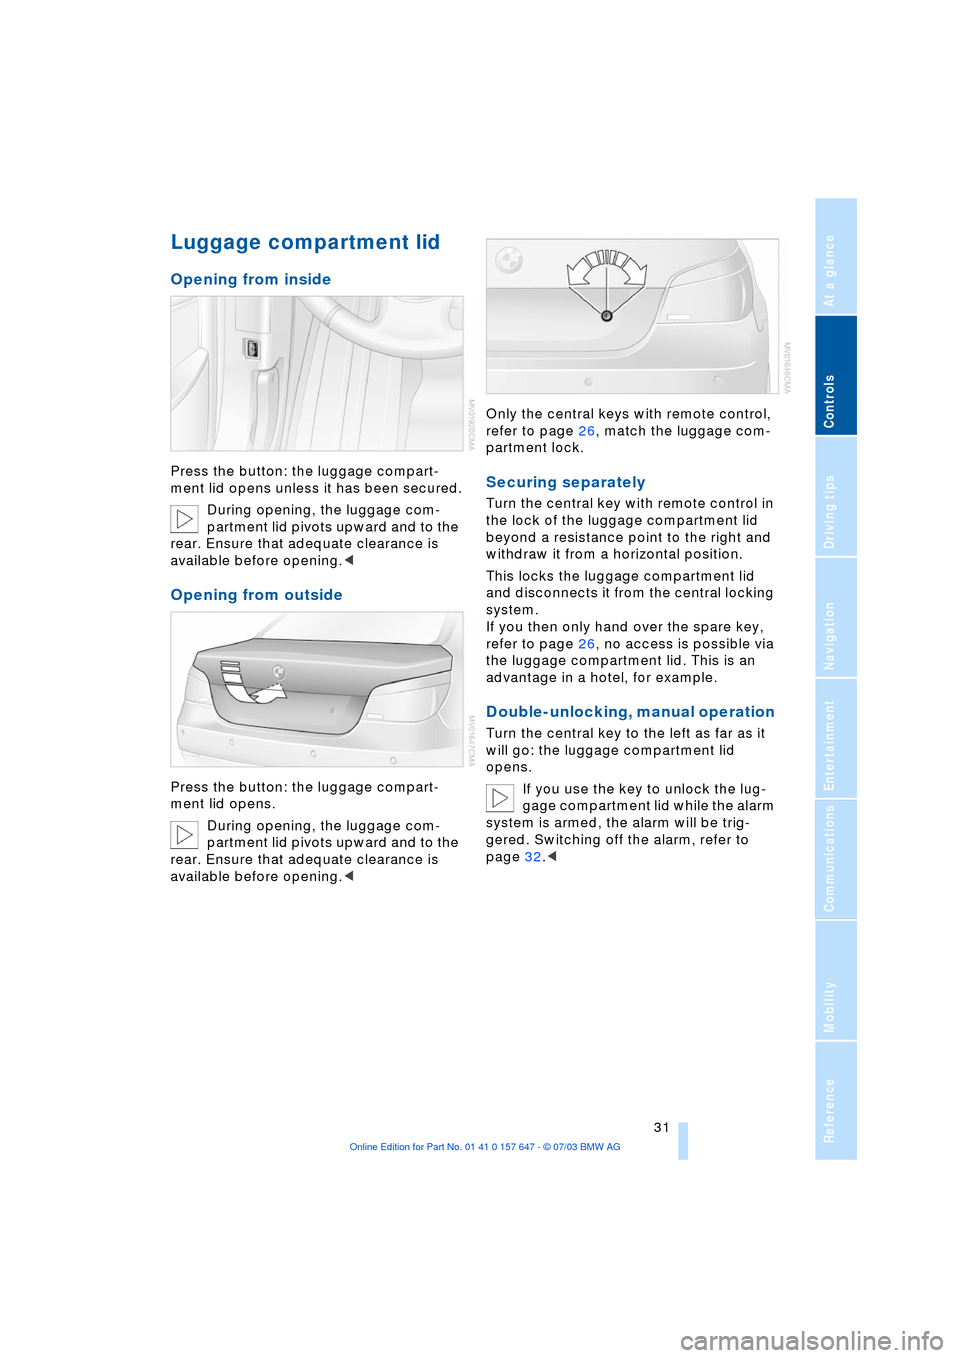
Opening from inside
Press the button: the luggage compart-
ment lid opens unless it has been secured.
During opening, the luggage com-
partment lid pivots upward and to the
rear. Ensure that adequate clearance is
available before opening.<
Opening from outside
Press the button: the luggage compart-
ment lid opens.
During opening, the luggage com-
partment lid pivots upward and to the
rear. Ensure that adequate clearance is
available before opening.
partment lock.
Securing separately
Turn the central key with remote control in
the lock of the luggage compartment lid
beyond a resistance point to the right and
withdraw it from a horizontal position.
This locks the luggage compartment lid
and disconnects it from the central locking
system.
If you then only hand over the spare key,
refer to page 26, no access is possible via
the luggage compartment lid. This is an
advantage in a hotel, for example.
Double-unlocking, manual operation
Turn the central key to the left as far as it
will go: the luggage compartment lid
opens.
If you use the key to unlock the lug-
gage compartment lid while the alarm
system is armed, the alarm will be trig-
gered. Switching off the alarm, refer to
page 32.<
Page 34 of 220
Opening and closing
32
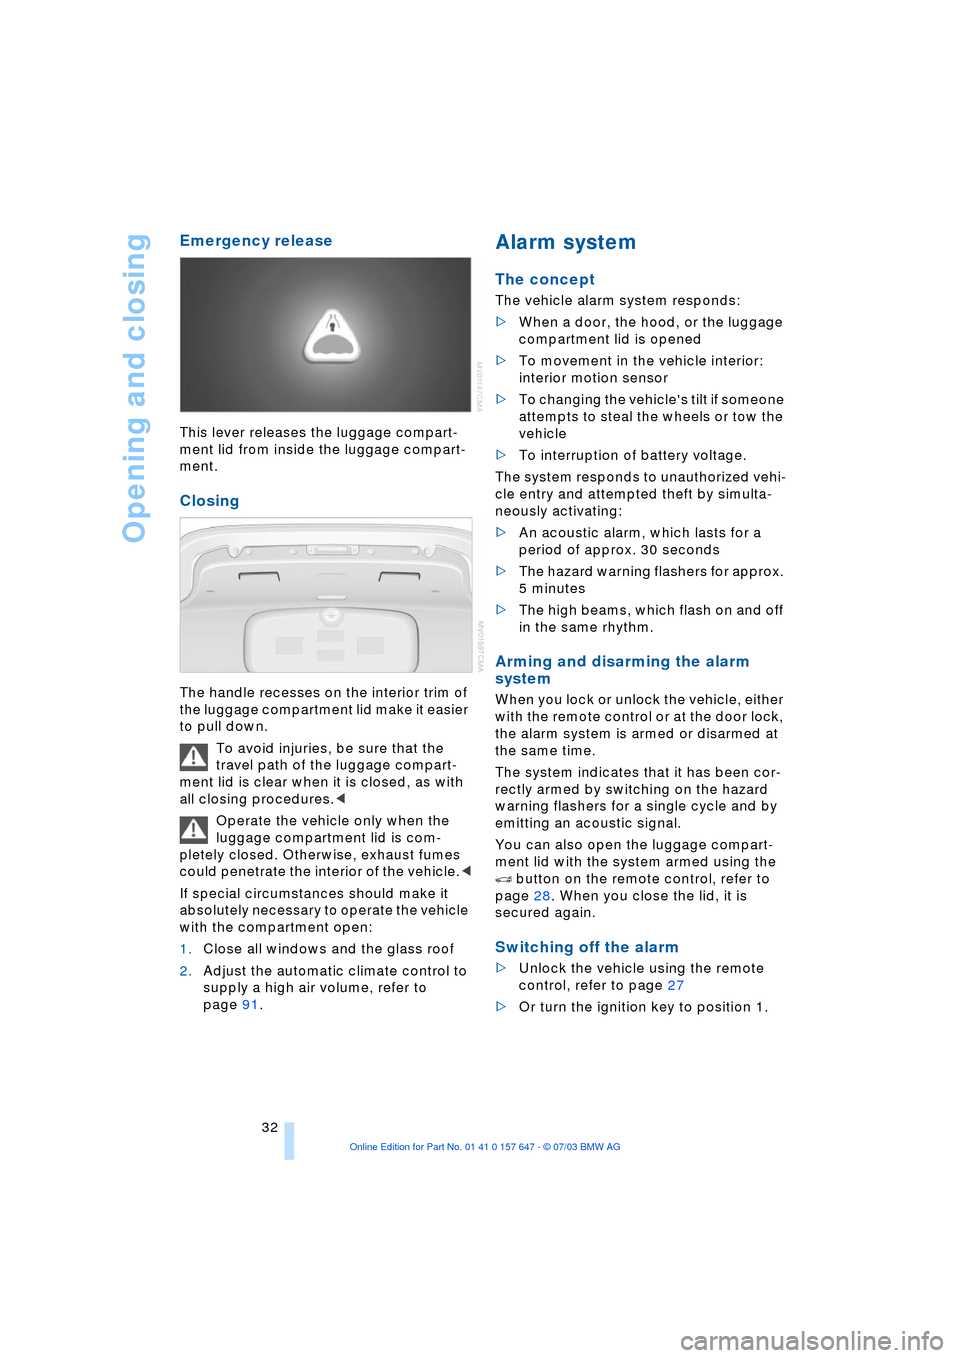
Emergency release
This lever releases the luggage compart-
ment lid from inside the luggage compart-
ment.
Closing
The handle recesses on the interior trim of
the luggage compartment lid make it easier
to pull down.
To avoid injuries, be sure that the
travel path of the luggage compart-
ment lid is clear when it is closed, as with
all closing procedures.<
Operate the vehicle only when the
luggage compartment lid is com-
pletely closed. Otherwise, exhaust fumes
could penetrate the interior of the vehicle.<
If special circumstances should make it
absolutely necessary to operate the vehicle
with the compartment open:
1.Close all windows and the glass roof
2.Adjust the automatic climate control to
supply a high air volume, refer to
page 91.
Alarm system
The concept
The vehicle alarm system responds:
>When a door, the hood, or the luggage
compartment lid is opened
>To movement in the vehicle interior:
interior motion sensor
>To changing the vehicle's tilt if someone
attempts to steal the wheels or tow the
vehicle
>To interruption of battery voltage.
The system responds to unauthorized vehi-
cle entry and attempted theft by simulta-
neously activating:
>An acoustic alarm, which lasts for a
period of approx. 30 seconds
>The hazard warning flashers for approx.
5 minutes
>The high beams, which flash on and off
in the same rhythm.
Arming and disarming the alarm
system
When you lock or unlock the vehicle, either
with the remote control or at the door lock,
the alarm system is armed or disarmed at
the same time.
The system indicates that it has been cor-
rectly armed by switching on the hazard
warning flashers for a single cycle and by
emitting an acoustic signal.
You can also open the luggage compart-
ment lid with the system armed using the
button on the remote control, refer to
page 28. When you close the lid, it is
secured again.
Switching off the alarm
>Unlock the vehicle using the remote
control, refer to page 27
>Or turn the ignition key to position 1.
Page 47 of 220
Controls
45Reference
At a glance
Driving tips
Communications
Navigation
Entertainment
Mobility
Transporting children safely
The right place for children
Children always in the rear
Accident research shows that the safest
place for children in a vehicle is in the rear
seat.
Older children should be tightly secured
with a safety belt, after they have outgrown
a booster seat that is appropriate for their
age, height and weight.
A child sitting in the rear seat and not
properly restrained may place his or
her head on or near the airbag, if so
equipped. For example, a child Ñ even
though belted Ñ may fall asleep with his or
her head against the side airbag. It may be
difficult for a driver to ensure that children
in the rear seat will remain properly posi-
tioned at all times and do not place their
heads on or near the side airbag. There-
fore, we recommend that the rear side air-
bags, if provided, be deactivated if you plan
to transport children in the rear seat.<
Deactivating the rear seat side
airbags
The rear seat side airbags may already
have been deactivated by a BMW center.
Labels in the rear door opening should indi-
cate the status of your rear seat side air-
bags. If you are uncertain of their status, or
wish to have the airbags activated or deac-
tivated, please contact your BMW center.
Child-restraint system in the rear
Children under 13 years of age and
children less than 5 ft/150 cm tall
should always ride in the rear and the
restraint systems should be secured with
the vehicle's safety belts.<
Younger children should be secured in an
appropriate forward-facing child-restraint
system that has first been properly
restrained. We strongly urge you to care-
fully read and comply with the instructions for installation and use provided by the
child restraintÕs manufacturer whenever
you use such a device.
All rear sitting positions in your vehicle
meet the recommendations of SAE J1819,
an industry-recommended practice for
securing child-restraint systems in motor
vehicles.
Exception for the front passenger
seat
Should it become necessary to use a
child-restraint system on the front
passenger seat, the airbags on the passen-
ger's side must be deactivated. The pas-
senger airbag indicator lamp above the
interior rearview mirror must light up con-
tinuously. Otherwise, the front passenger
airbags remain active and there is consid-
erable risk of injury to children if the airbags
are triggered, even with a child-restraint
system. In this case, children should be
seated in the rear and the system should be
checked at your BMW center.<
Never install a rearward-facing child-
restraint system in the front passen-
ger seat of this vehicle if the passenger air-
bag is not deactivated. If you do so, the
child could be severely injured when the
airbag is triggered.
Your vehicle is equipped with an airbag
supplemental restraint system for the front
passenger. Because the backrest on any
rearward-facing child-restraint system Ð of
the kind designed for infants under 1 year
and 20 Ibs./9 kg Ð would be within the air-
bag's deployment range, you should never
mount such a system in the front passenger
seat, since the impact of the airbag against
the child restraint's backrest could lead to
serious or fatal injuries.<
More information on automatic deactiva-
tion of the front passenger airbags, refer to
page 83.
Page 48 of 220
Transporting children safely
46
Installing child-restraint
systems
Before installing any child-restraint system
or child seat, read the following:
Observe the child-restraint system
manufacturer's instructions for instal-
lation and use. Otherwise the degree of
protection can be reduced.
Following an accident, have all parts of the
affected vehicle safety-belt system
checked and, if necessary, replaced by a
BMW center.<
Commercially-available child-restraint sys-
tems are designed to be secured with a lap
belt or with the lap belt portion of a combi-
nation lap/shoulder belt. Improperly or
inadequately installed restraint systems
can increase the risk of injury to children.
Always read and follow the instructions that
come with the system.
Child seat security
All of the rear belt retractors and the front
passenger's safety belt can be locked for
mounting and securing child-restraint sys-
tems.
Information regarding this is located near
the buckle latch of each safety belt.
To lock the safety belt
Pull the entire length of the belt from the
belt retractor. Allow the reel to retract the
belt somewhat and engage the buckle,
then tighten the belt against the child-
restraint system. The retraction mechanism
is now locked.
To unlock the safety belt
Release the buckle, remove the child-
restraint system and allow the belt retractor
to reel the belt completely in.
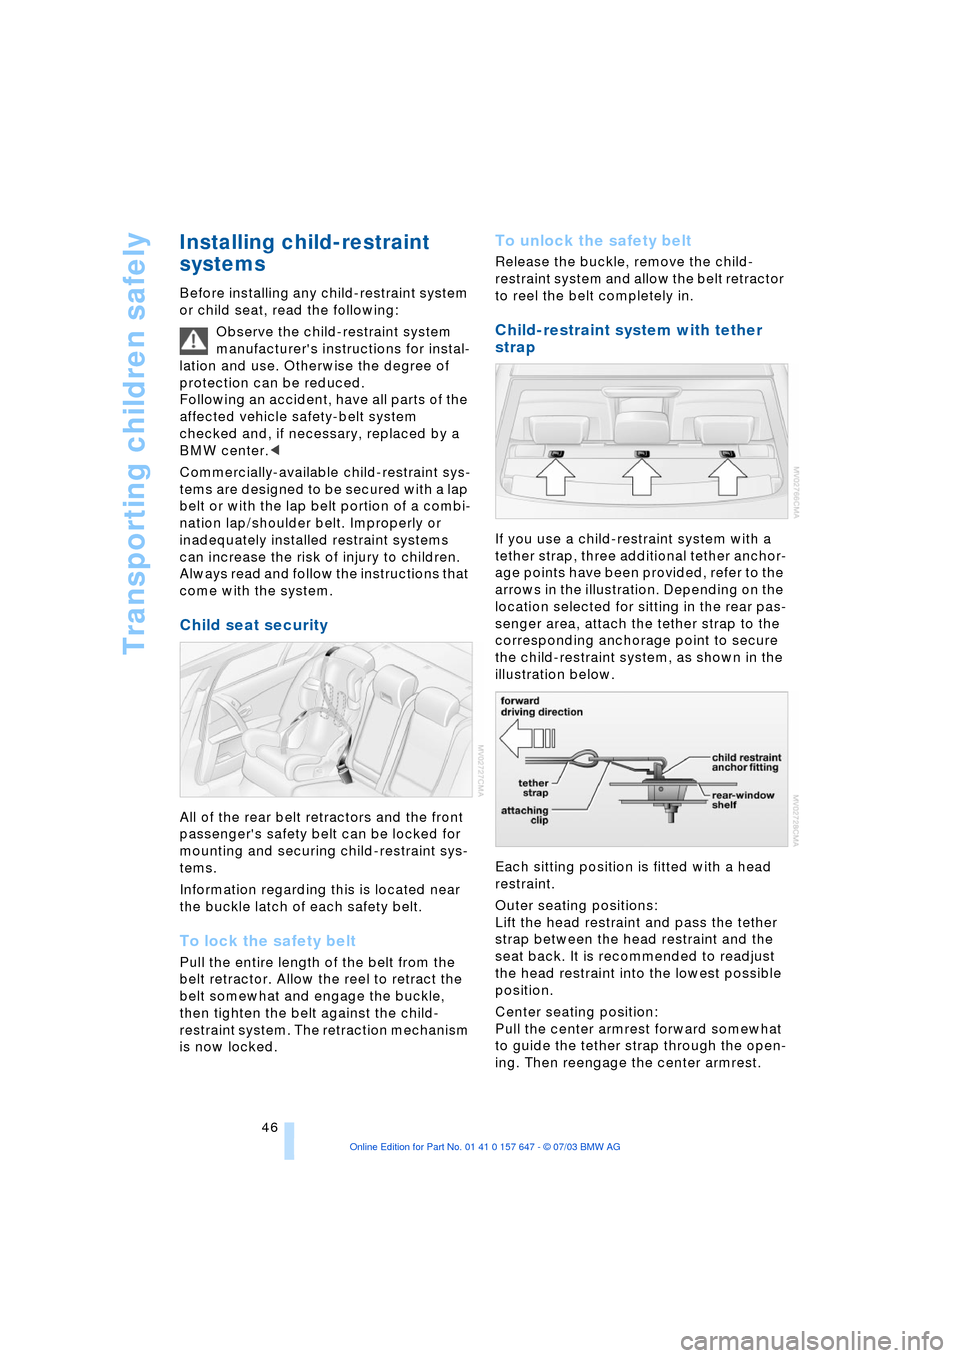
Child-restraint system with tether
strap
If you use a child-restraint system with a
tether strap, three additional tether anchor-
age points have been provided, refer to the
arrows in the illustration. Depending on the
location selected for sitting in the rear pas-
senger area, attach the tether strap to the
corresponding anchorage point to secure
the child-restraint system, as shown in the
illustration below.
Each sitting position is fitted with a head
restraint.
Outer seating positions:
Lift the head restraint and pass the tether
strap between the head restraint and the
seat back. It is recommended to readjust
the head restraint into the lowest possible
position.
Center seating position:
Pull the center armrest forward somewhat
to guide the tether strap through the open-
ing. Then reengage the center armrest.