2004 BMW 525I SEDAN ECU
[x] Cancel search: ECUPage 52 of 220
Driving
50 lever in idle position and apply the hand-
brake.
Never leave an unattended vehicle with the
engine running, as such a vehicle repre-
sents a potential safety hazard.<
Automatic transmission
1.Press the brake pedal
2.Place the selector lever in position P
or N
3.Start the engine.
To prevent the vehicle from rolling,
always select position P or N and
engage the handbrake before leaving the
vehicle with the engine running.
Never leave an unattended vehicle with the
engine running, as such a vehicle repre-
sents a potential safety hazard.<
Sequential manual transmission
SMG
1.Press the brake pedal
2.Place the selector lever in the idle posi-
tion N
3.Start the engine.
If the engine does not start, engage
the last gear selected, refer to Display
in the instrument cluster, and return the
selector lever to the idle position N.<
Before leaving the vehicle with the
engine running, place the selector
lever in position N and apply the hand-
brake.
Never leave an unattended vehicle with the
engine running, as such a vehicle repre-
sents a potential safety hazard.<
Switching off engine
Do not remove the ignition key while
the vehicle is rolling, as otherwise the
steering wheel lock would engage while
steering.
When leaving the vehicle, always remove
the ignition key and lock the steering.
When parking on downward inclines, apply
the handbrake.<
Manual transmission
Turn the ignition key to position 1 or 0.
Automatic transmission
1.Engage selector-lever position P
2.Turn the ignition key to position 1 or 0.
Sequential manual transmission
SMG
If the selector lever is in position R or in the
sequential mode and you turn the ignition
key to position 1 or 0, the gear remains
engaged automatically.
If the selector lever is in the idle position N
and you turn the ignition key to position 1
or 0, an acoustic signal and the flashing
gear indicator in the display reminds you
that the vehicle is not secured against roll-
ing away.
The warning stops sounding after approx.
9 seconds.
When parking on downward inclines,
apply the handbrake. Engaging a gear
is not sufficient to secure the vehicle from
rolling away under certain circumstances.<
Handbrake
The handbrake is primarily intended to pre-
vent the vehicle from rolling while parked; it
brakes the rear wheels.
Indicator lamp
The indicator lamp lights up with
the handbrake applied, and an
acoustic signal also sounds when
starting off.
Indicator lamp for Canadian mod-
els.
Applying
The lever locks into place automatically;
the indicator lamp in the instrument cluster
lights up in ignition key position 2.
Page 53 of 220
Controls
51Reference
At a glance
Driving tips
Communications
Navigation
Entertainment
Mobility
Releasing
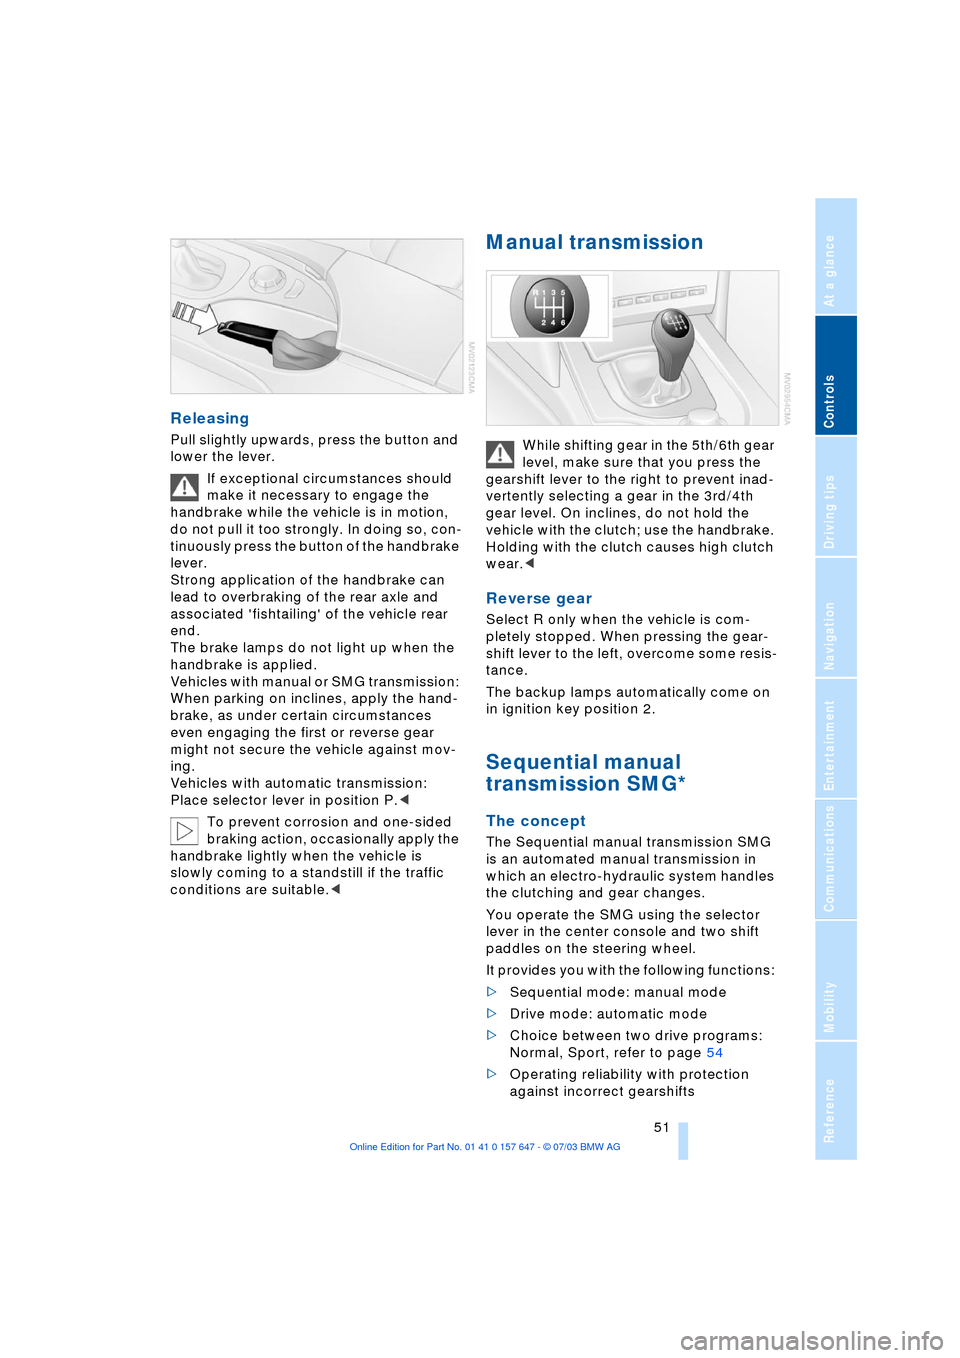
Pull slightly upwards, press the button and
lower the lever.
If exceptional circumstances should
make it necessary to engage the
handbrake while the vehicle is in motion,
do not pull it too strongly. In doing so, con-
tinuously press the button of the handbrake
lever.
Strong application of the handbrake can
lead to overbraking of the rear axle and
associated 'fishtailing' of the vehicle rear
end.
The brake lamps do not light up when the
handbrake is applied.
Vehicles with manual or SMG transmission:
When parking on inclines, apply the hand-
brake, as under certain circumstances
even engaging the first or reverse gear
might not secure the vehicle against mov-
ing.
Vehicles with automatic transmission:
Place selector lever in position P.<
To prevent corrosion and one-sided
braking action, occasionally apply the
handbrake lightly when the vehicle is
slowly coming to a standstill if the traffic
conditions are suitable.<
Manual transmission
While shifting gear in the 5th/6th gear
level, make sure that you press the
gearshift lever to the right to prevent inad-
vertently selecting a gear in the 3rd/4th
gear level. On inclines, do not hold the
vehicle with the clutch; use the handbrake.
Holding with the clutch causes high clutch
wear.<
Reverse gear
Select R only when the vehicle is com-
pletely stopped. When pressing the gear-
shift lever to the left, overcome some resis-
tance.
The backup lamps automatically come on
in ignition key position 2.
Sequential manual
transmission SMG*
The concept
The Sequential manual transmission SMG
is an automated manual transmission in
which an electro-hydraulic system handles
the clutching and gear changes.
You operate the SMG using the selector
lever in the center console and two shift
paddles on the steering wheel.
It provides you with the following functions:
>Sequential mode: manual mode
>Drive mode: automatic mode
>Choice between two drive programs:
Normal, Sport, refer to page 54
>Operating reliability with protection
against incorrect gearshifts
Page 55 of 220
Controls
53Reference
At a glance
Driving tips
Communications
Navigation
Entertainment
Mobility
towards D or change the current gear using
the shift paddles or selector lever.
Gear changes
Using selector lever
>To shift up, briefly press the selector
lever towards +
>To shift down, briefly press towards Ñ.
Using shift paddles on steering
wheel
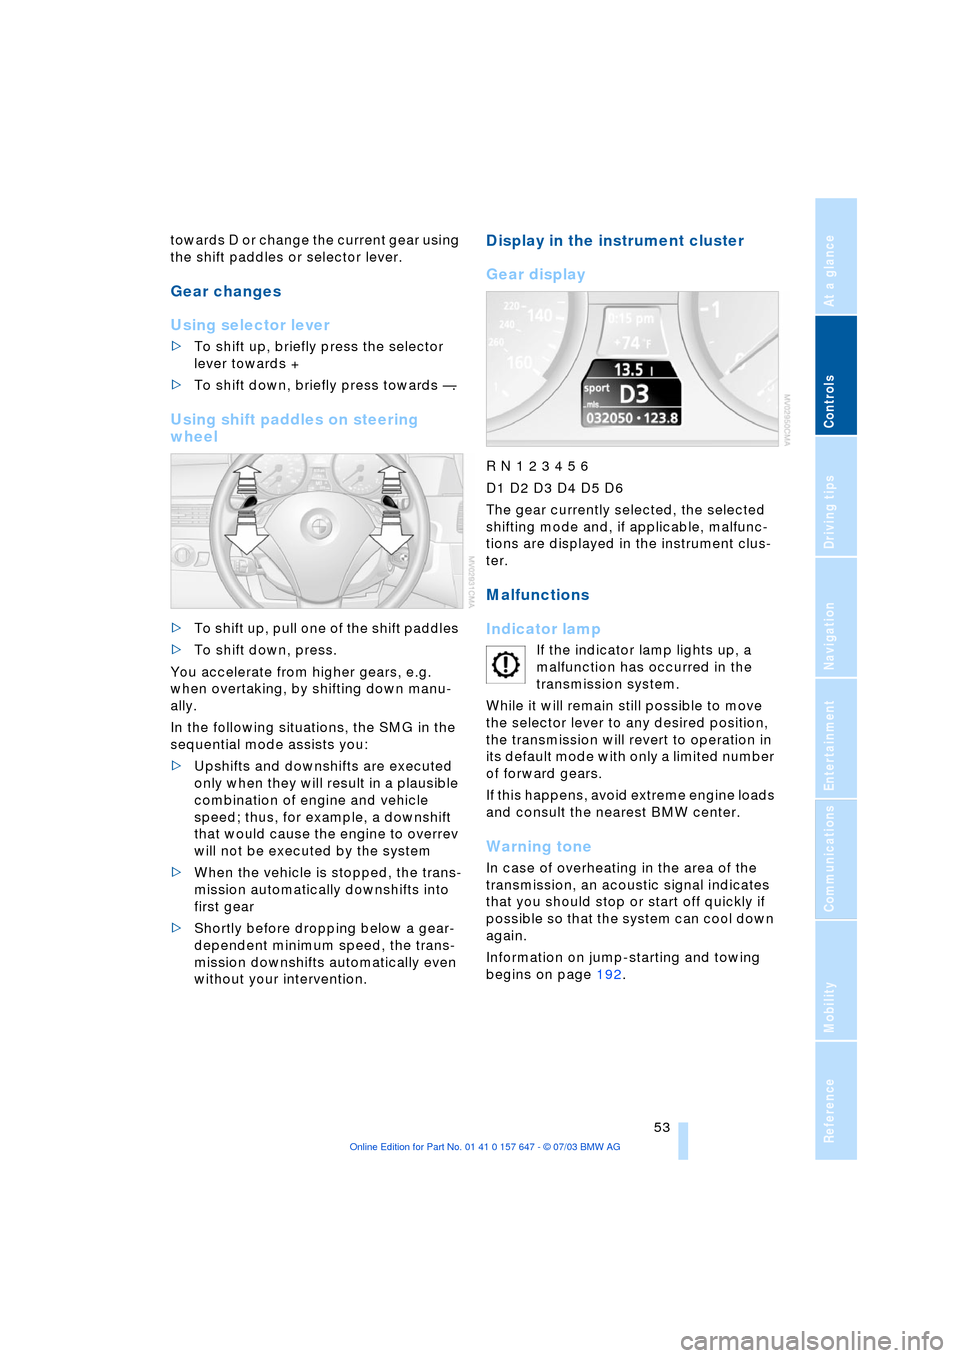
>To shift up, pull one of the shift paddles
>To shift down, press.
You accelerate from higher gears, e.g.
when overtaking, by shifting down manu-
ally.
In the following situations, the SMG in the
sequential mode assists you:
>Upshifts and downshifts are executed
only when they will result in a plausible
combination of engine and vehicle
speed; thus, for example, a downshift
that would cause the engine to overrev
will not be executed by the system
>When the vehicle is stopped, the trans-
mission automatically downshifts into
first gear
>Shortly before dropping below a gear-
dependent minimum speed, the trans-
mission downshifts automatically even
without your intervention.
Display in the instrument cluster
Gear display
R N 1 2 3 4 5 6
D1 D2 D3 D4 D5 D6
The gear currently selected, the selected
shifting mode and, if applicable, malfunc-
tions are displayed in the instrument clus-
ter.
Malfunctions
Indicator lamp
If the indicator lamp lights up, a
malfunction has occurred in the
transmission system.
While it will remain still possible to move
the selector lever to any desired position,
the transmission will revert to operation in
its default mode with only a limited number
of forward gears.
If this happens, avoid extreme engine loads
and consult the nearest BMW center.
Warning tone
In case of overheating in the area of the
transmission, an acoustic signal indicates
that you should stop or start off quickly if
possible so that the system can cool down
again.
Information on jump-starting and towing
begins on page 192.
Page 57 of 220
Controls
55Reference
At a glance
Driving tips
Communications
Navigation
Entertainment
Mobility
Changing the selector-lever
positions
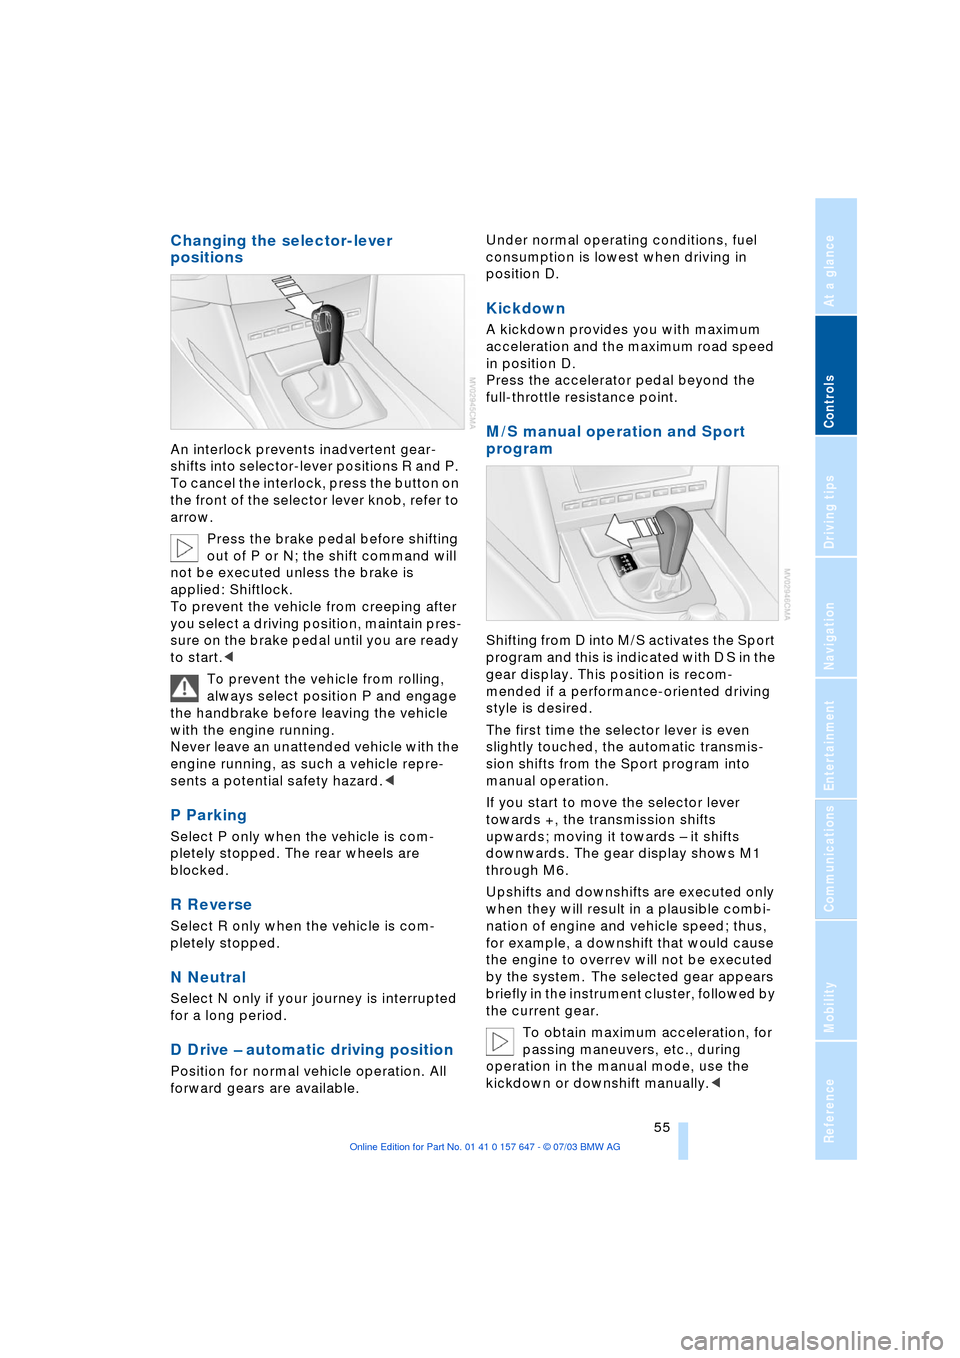
An interlock prevents inadvertent gear-
shifts into selector-lever positions R and P.
To cancel the interlock, press the button on
the front of the selector lever knob, refer to
arrow.
Press the brake pedal before shifting
out of P or N; the shift command will
not be executed unless the brake is
applied: Shiftlock.
To prevent the vehicle from creeping after
you select a driving position, maintain pres-
sure on the brake pedal until you are ready
to start.<
To prevent the vehicle from rolling,
always select position P and engage
the handbrake before leaving the vehicle
with the engine running.
Never leave an unattended vehicle with the
engine running, as such a vehicle repre-
sents a potential safety hazard.<
P Parking
Select P only when the vehicle is com-
pletely stopped. The rear wheels are
blocked.
R Reverse
Select R only when the vehicle is com-
pletely stopped.
N Neutral
Select N only if your journey is interrupted
for a long period.
D Drive Ð automatic driving position
Position for normal vehicle operation. All
forward gears are available.Under normal operating conditions, fuel
consumption is lowest when driving in
position D.
Kickdown
A kickdown provides you with maximum
acceleration and the maximum road speed
in position D.
Press the accelerator pedal beyond the
full-throttle resistance point.
M/S manual operation and Sport
program
Shifting from D into M/S activates the Sport
program and this is indicated with D S in the
gear display. This position is recom-
mended if a performance-oriented driving
style is desired.
The first time the selector lever is even
slightly touched, the automatic transmis-
sion shifts from the Sport program into
manual operation.
If you start to move the selector lever
towards +, the transmission shifts
upwards; moving it towards Ð it shifts
downwards. The gear display shows M1
through M6.
Upshifts and downshifts are executed only
when they will result in a plausible combi-
nation of engine and vehicle speed; thus,
for example, a downshift that would cause
the engine to overrev will not be executed
by the system. The selected gear appears
briefly in the instrument cluster, followed by
the current gear.
To obtain maximum acceleration, for
passing maneuvers, etc., during
operation in the manual mode, use the
kickdown or downshift manually.<
Page 71 of 220
Controls
69Reference
At a glance
Driving tips
Communications
Navigation
Entertainment
Mobility
The symbols also indicate the status of the
service requirement display, refer to
page 67.
Calling up stored messages on the
Control Display
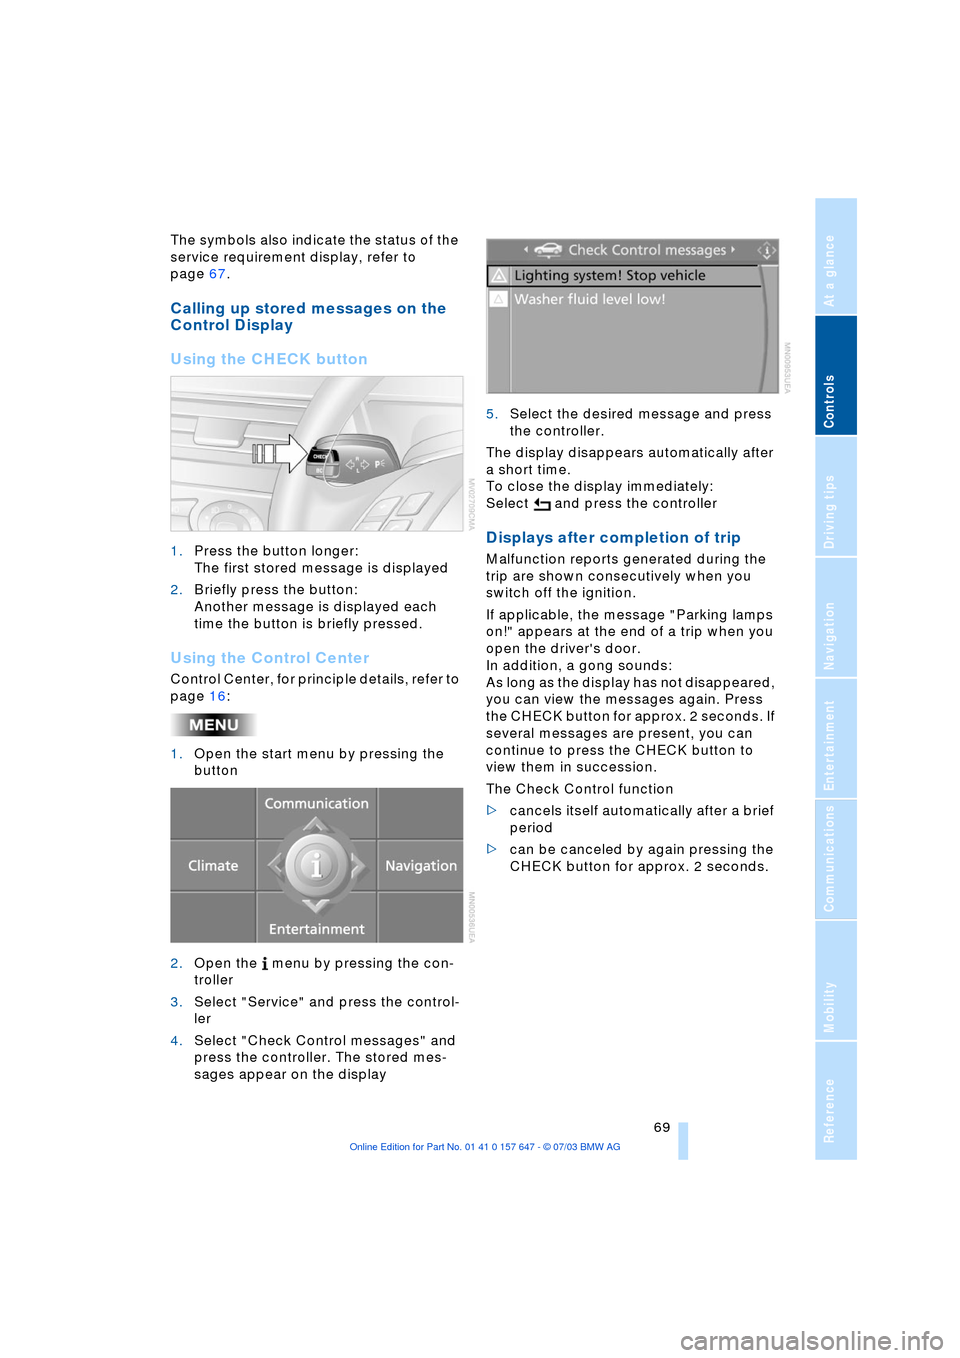
Using the CHECK button
1.Press the button longer:
The first stored message is displayed
2.Briefly press the button:
Another message is displayed each
time the button is briefly pressed.
Using the Control Center
Control Center, for principle details, refer to
page 16:
1.Open the start menu by pressing the
button
2.Open the menu by pressing the con-
troller
3.Select "Service" and press the control-
ler
4.Select "Check Control messages" and
press the controller. The stored mes-
sages appear on the display 5.Select the desired message and press
the controller.
The display disappears automatically after
a short time.
To close the display immediately:
Select and press the controller
Displays after completion of trip
Malfunction reports generated during the
trip are shown consecutively when you
switch off the ignition.
If applicable, the message "Parking lamps
on!" appears at the end of a trip when you
open the driver's door.
In addition, a gong sounds:
As long as the display has not disappeared,
you can view the messages again. Press
the CHECK button for approx. 2 seconds. If
several messages are present, you can
continue to press the CHECK button to
view them in succession.
The Check Control function
>cancels itself automatically after a brief
period
>can be canceled by again pressing the
CHECK button for approx. 2 seconds.
Page 94 of 220
A congenial climate
92 rarily suspending the supply of outside air.
The system then recirculates the air cur-
rently within the vehicle. AUC executes this
function automatically.
Press the button repeatedly to run through
the following control sequence:
>Indicator lamps off: outside air flows in
>Right indicator lamp on, AUC mode: the
system detects pollutants in the outside
air and responds by blocking the supply
of outside air when required. The sys-
tem then recirculates the air currently
within the vehicle.
Depending upon air quality require-
ments, in the automatic mode the sys-
tem alternates between its outside-air
and recirculated-air modes
>Left indicator lamp on, recirculated-air
mode: the supply of outside air is per-
manently blocked. The system then
recirculates the air currently within the
vehicle.
If condensation starts to form on the
inside window surfaces during opera-
tion in the recirculated-air mode, you
should switch it off while also increasing
the air volume as required.
The recirculated-air mode should not be
used over a sustained longer period of
time, as the air quality inside the vehicle
deteriorates continuously.<
Residual heat mode
The system uses the warmth
stored in the engine to heat the
interior when the ignition is off,
for instance, while the vehicle is
stopped at a school to pick up a
child.
You can adjust the automatic climate con-
trol settings in ignition key position 1.
Provided that the engine has warmed
to its normal operating temperature
and the battery is charged, you can use this
function for up to 15 minutes after switch-
ing off the ignition. The LED within the but-
ton lights up to confirm compliance with
these conditions.<
Switching automatic climate control
off
The air volume, the heater and
the cooling function are all
switched off. You can restart
the automatic climate control
by pressing any of its buttons
except the REST button.
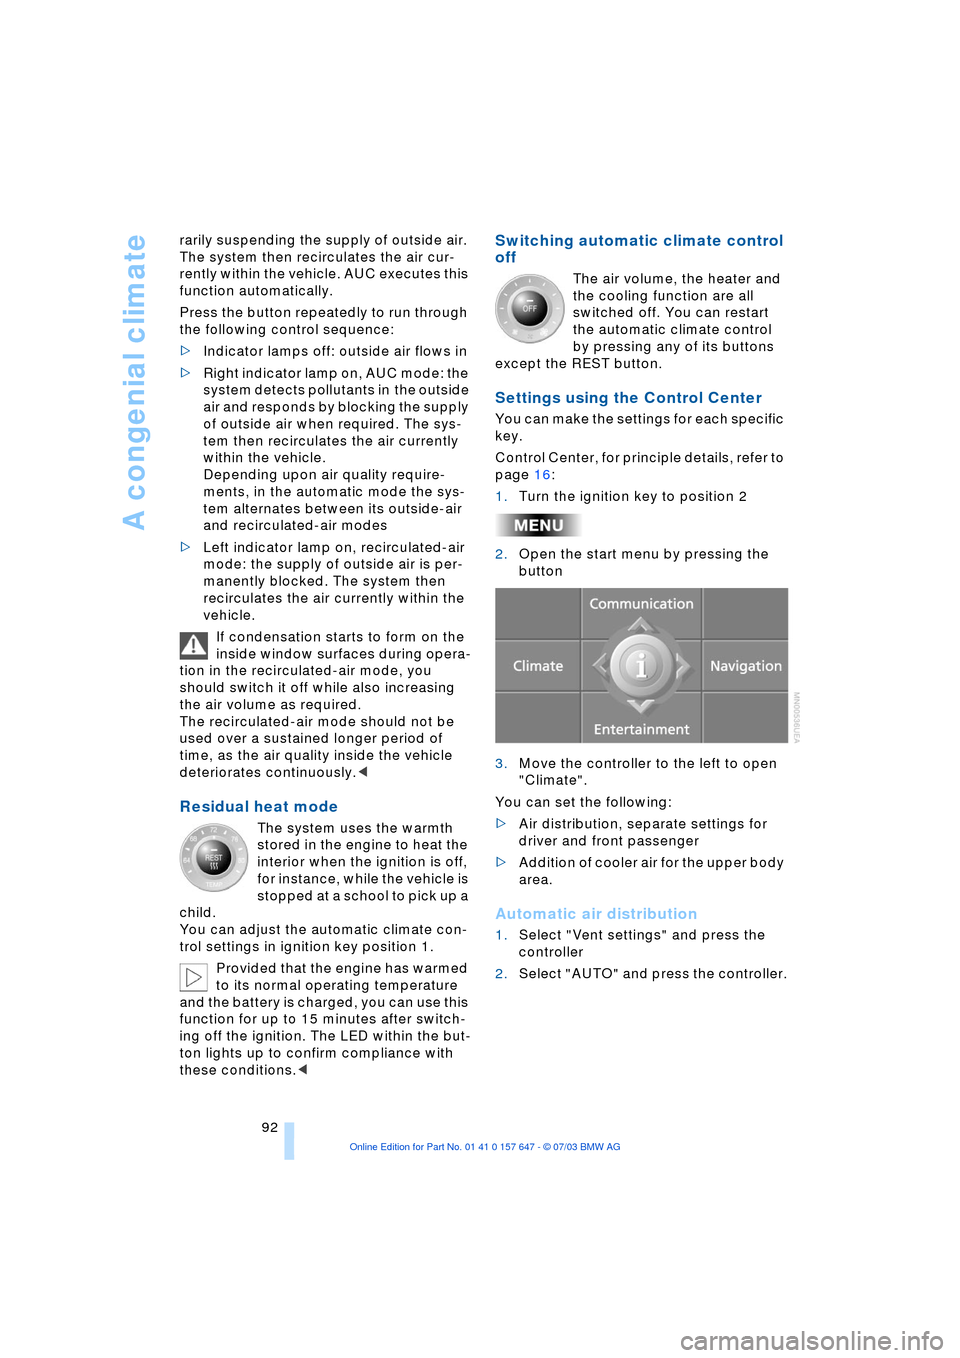
Settings using the Control Center
You can make the settings for each specific
key.
Control Center, for principle details, refer to
page 16:
1.Turn the ignition key to position 2
2.Open the start menu by pressing the
button
3.Move the controller to the left to open
"Climate".
You can set the following:
>Air distribution, separate settings for
driver and front passenger
>Addition of cooler air for the upper body
area.
Automatic air distribution
1.Select "Vent settings" and press the
controller
2.Select "AUTO" and press the controller.
Page 103 of 220
Controls
101Reference
At a glance
Driving tips
Communications
Navigation
Entertainment
Mobility
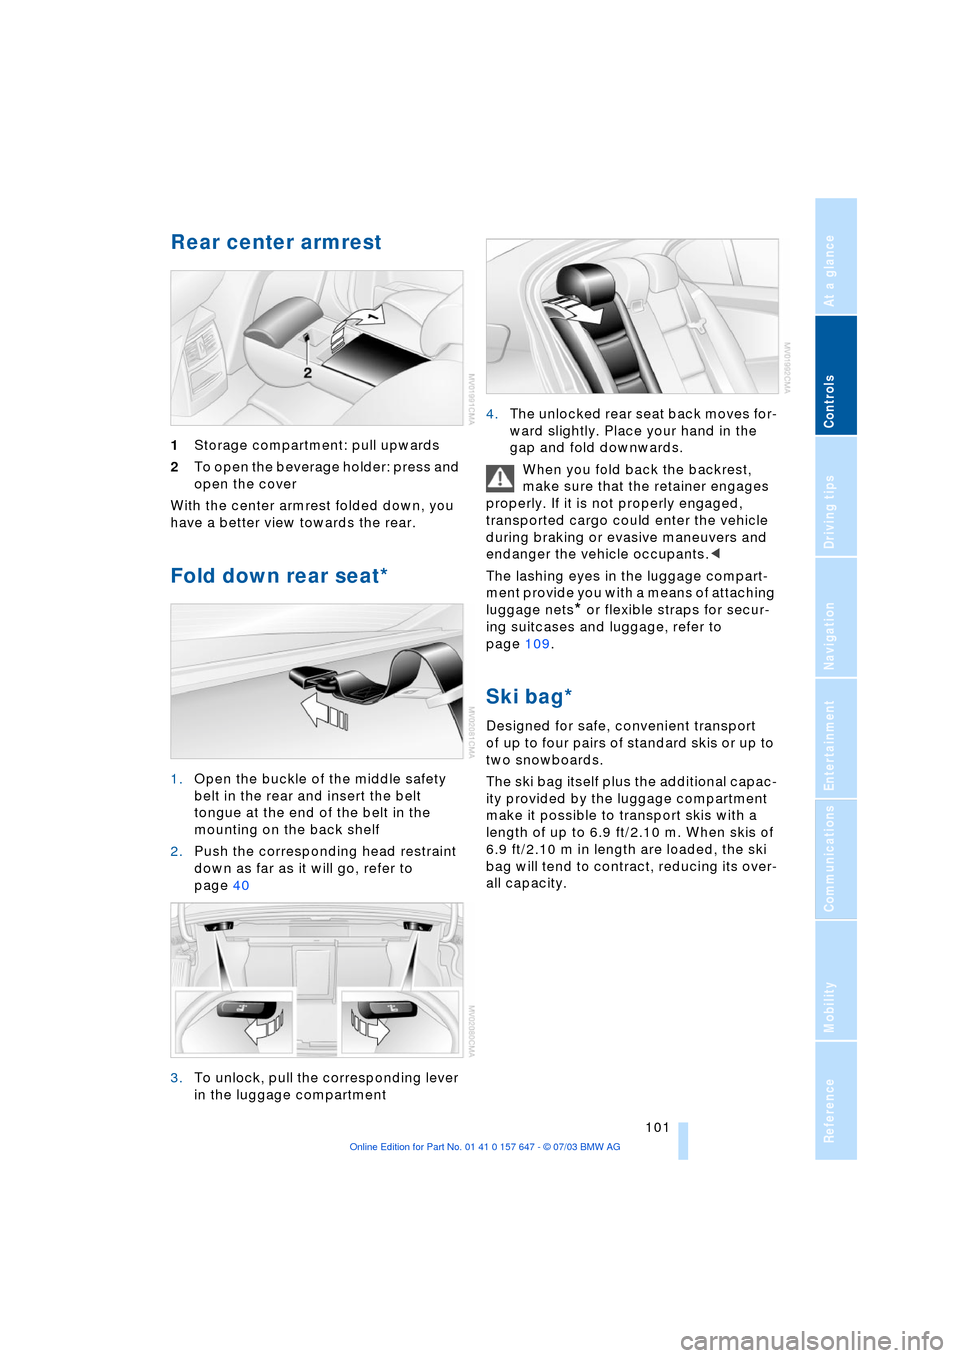
Rear center armrest
1Storage compartment: pull upwards
2To open the beverage holder: press and
open the cover
With the center armrest folded down, you
have a better view towards the rear.
Fold down rear seat*
1.Open the buckle of the middle safety
belt in the rear and insert the belt
tongue at the end of the belt in the
mounting on the back shelf
2.Push the corresponding head restraint
down as far as it will go, refer to
page 40
3.To unlock, pull the corresponding lever
in the luggage compartment 4.The unlocked rear seat back moves for-
ward slightly. Place your hand in the
gap and fold downwards.
When you fold back the backrest,
make sure that the retainer engages
properly. If it is not properly engaged,
transported cargo could enter the vehicle
during braking or evasive maneuvers and
endanger the vehicle occupants.<
The lashing eyes in the luggage compart-
ment provide you with a means of attaching
luggage nets
* or flexible straps for secur-
ing suitcases and luggage, refer to
page 109.
Ski bag*
Designed for safe, convenient transport
of up to four pairs of standard skis or up to
two snowboards.
The ski bag itself plus the additional capac-
ity provided by the luggage compartment
make it possible to transport skis with a
length of up to 6.9 ft/2.10 m. When skis of
6.9 ft/2.10 m in length are loaded, the ski
bag will tend to contract, reducing its over-
all capacity.
Page 104 of 220
Practical interior accessories
102
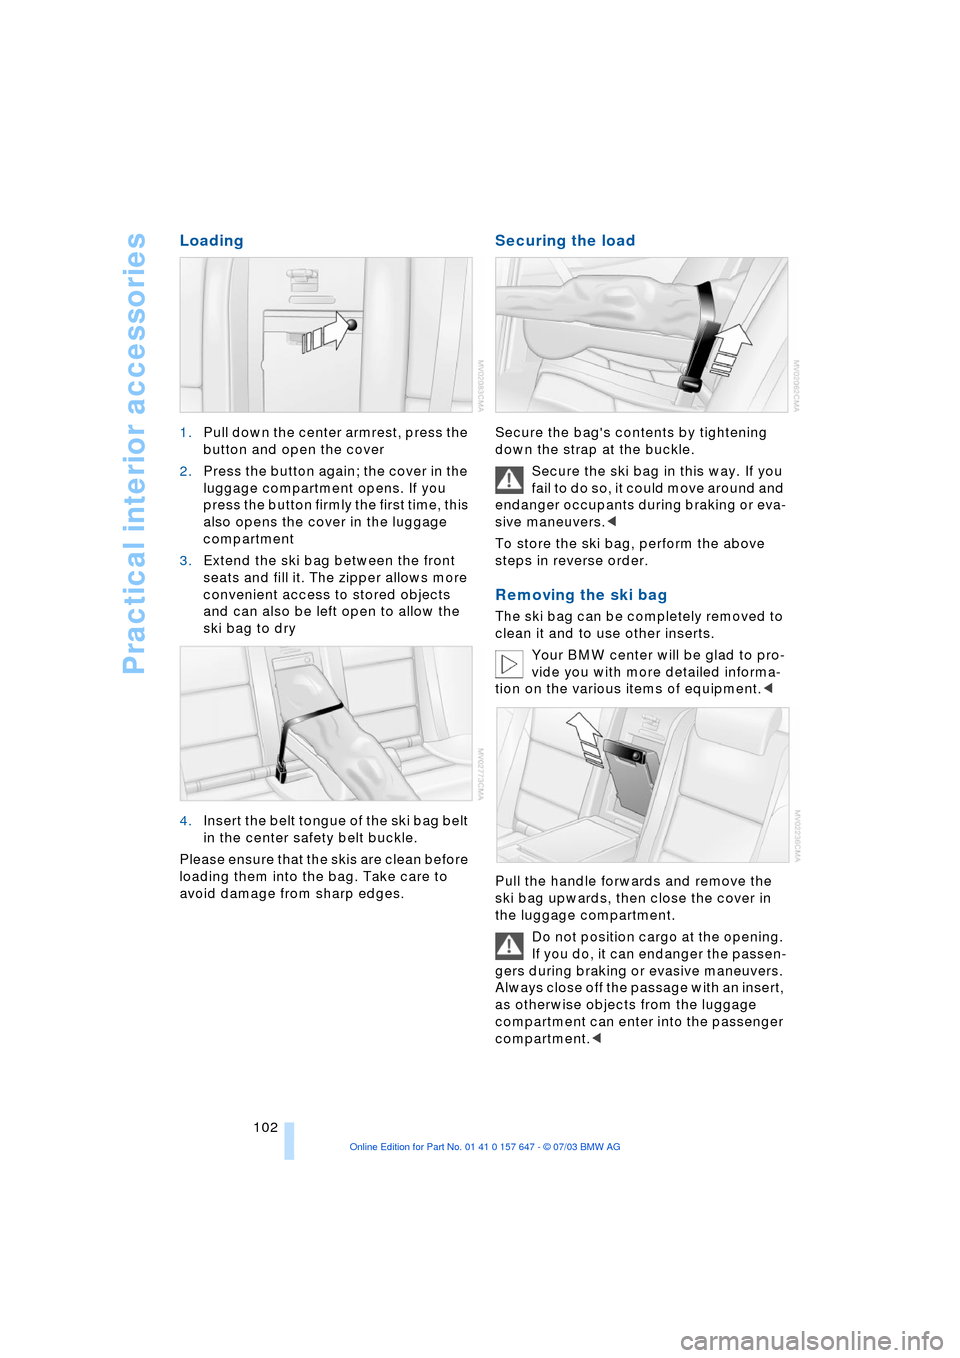
Loading
1.Pull down the center armrest, press the
button and open the cover
2.Press the button again; the cover in the
luggage compartment opens. If you
press the button firmly the first time, this
also opens the cover in the luggage
compartment
3.Extend the ski bag between the front
seats and fill it. The zipper allows more
convenient access to stored objects
and can also be left open to allow the
ski bag to dry
4.Insert the belt tongue of the ski bag belt
in the center safety belt buckle.
Please ensure that the skis are clean before
loading them into the bag. Take care to
avoid damage from sharp edges.
Securing the load
Secure the bag's contents by tightening
down the strap at the buckle.
Secure the ski bag in this way. If you
fail to do so, it could move around and
endanger occupants during braking or eva-
sive maneuvers.<
To store the ski bag, perform the above
steps in reverse order.
Removing the ski bag
The ski bag can be completely removed to
clean it and to use other inserts.
Your BMW center will be glad to pro-
vide you with more detailed informa-
tion on the various items of equipment.<
Pull the handle forwards and remove the
ski bag upwards, then close the cover in
the luggage compartment.
Do not position cargo at the opening.
If you do, it can endanger the passen-
gers during braking or evasive maneuvers.
Always close off the passage with an insert,
as otherwise objects from the luggage
compartment can enter into the passenger
compartment.<