Page 137 of 220
Navigation
Entertainment
Driving tips
135Reference
At a glance
Controls
Communications
Mobility
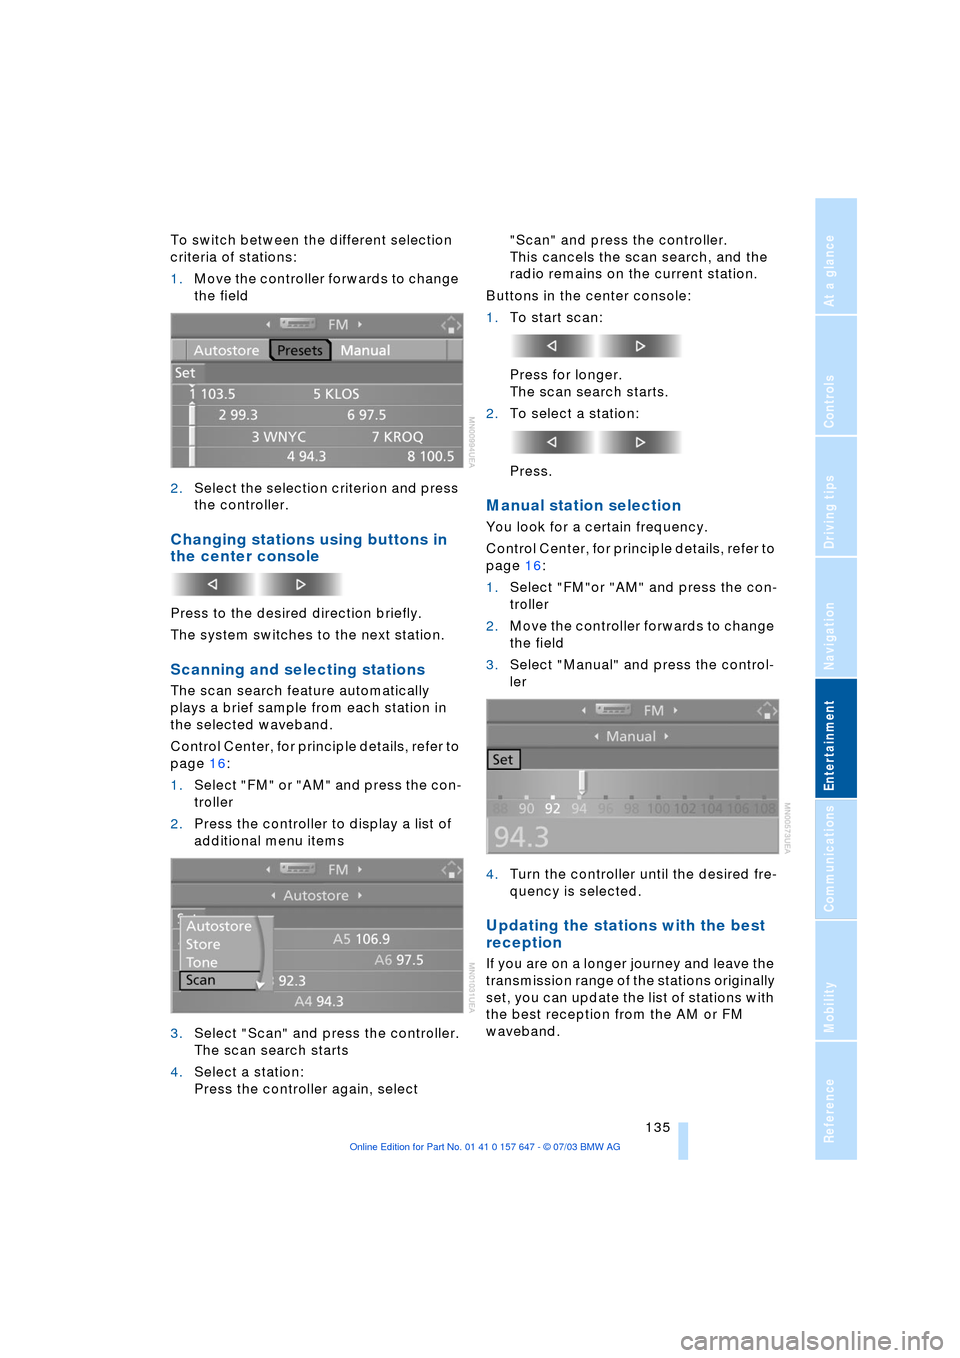
To switch between the different selection
criteria of stations:
1.Move the controller forwards to change
the field
2.Select the selection criterion and press
the controller.
Changing stations using buttons in
the center console
Press to the desired direction briefly.
The system switches to the next station.
Scanning and selecting stations
The scan search feature automatically
plays a brief sample from each station in
the selected waveband.
Control Center, for principle details, refer to
page 16:
1.Select "FM" or "AM" and press the con-
troller
2.Press the controller to display a list of
additional menu items
3.Select "Scan" and press the controller.
The scan search starts
4.Select a station:
Press the controller again, select "Scan" and press the controller.
This cancels the scan search, and the
radio remains on the current station.
Buttons in the center console:
1.To start scan:
Press for longer.
The scan search starts.
2.To select a station:
Press.
Manual station selection
You look for a certain frequency.
Control Center, for principle details, refer to
page 16:
1.Select "FM"or "AM" and press the con-
troller
2.Move the controller forwards to change
the field
3.Select "Manual" and press the control-
ler
4.Turn the controller until the desired fre-
quency is selected.
Updating the stations with the best
reception
If you are on a longer journey and leave the
transmission range of the stations originally
set, you can update the list of stations with
the best reception from the AM or FM
waveband.
Page 139 of 220
Navigation
Entertainment
Driving tips
137Reference
At a glance
Controls
Communications
Mobility
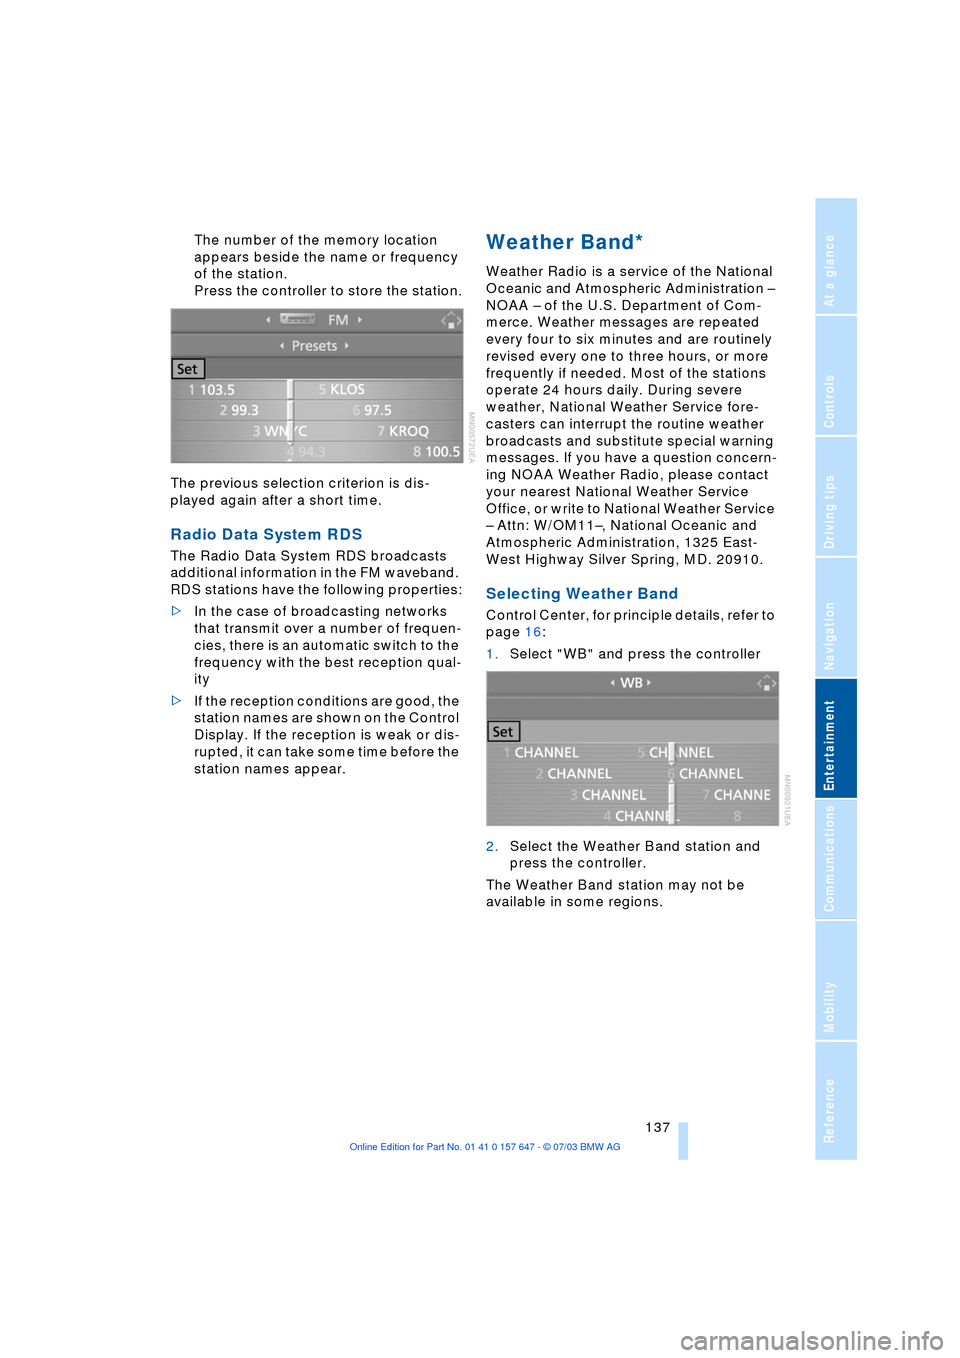
The number of the memory location
appears beside the name or frequency
of the station.
Press the controller to store the station.
The previous selection criterion is dis-
played again after a short time.
Radio Data System RDS
The Radio Data System RDS broadcasts
additional information in the FM waveband.
RDS stations have the following properties:
>In the case of broadcasting networks
that transmit over a number of frequen-
cies, there is an automatic switch to the
frequency with the best reception qual-
ity
>If the reception conditions are good, the
station names are shown on the Control
Display. If the reception is weak or dis-
rupted, it can take some time before the
station names appear.
Weather Band*
Weather Radio is a service of the National
Oceanic and Atmospheric Administration Ð
NOAA Ð of the U.S. Department of Com-
merce. Weather messages are repeated
every four to six minutes and are routinely
revised every one to three hours, or more
frequently if needed. Most of the stations
operate 24 hours daily. During severe
weather, National Weather Service fore-
casters can interrupt the routine weather
broadcasts and substitute special warning
messages. If you have a question concern-
ing NOAA Weather Radio, please contact
your nearest National Weather Service
Office, or write to National Weather Service
Ð Attn: W/OM11Ð, National Oceanic and
Atmospheric Administration, 1325 East-
West Highway Silver Spring, MD. 20910.
Selecting Weather Band
Control Center, for principle details, refer to
page 16:
1.Select "WB" and press the controller
2.Select the Weather Band station and
press the controller.
The Weather Band station may not be
available in some regions.
Page 141 of 220
Navigation
Entertainment
Driving tips
139Reference
At a glance
Controls
Communications
Mobility
3.If "Categories" was selected:
Select the desired category and press
the controller.
The channels of this category are dis-
played
4.Select a channel marked with this sym-
bol
5.Press the controller to display a list of
additional menu items
6.Select "Play" and press the controller.
Additional information
The name of the channel and additional
information on the current track are dis-
played, e.g. the name of the artist.1Artist
2Track
3Album
Storing channel
1.Select desired channel
2.Press the controller to display a list of
additional menu items
3.Select "Store" and press the controller.
"Presets" is displayed
4.Turn the controller to select a memory
location and press the controller.
The channel is stored; the previous crite-
rion appears after a short time.
Page 143 of 220
Navigation
Entertainment
Driving tips
141Reference
At a glance
Controls
Communications
Mobility
CD Compact Disc
Listening to CDs
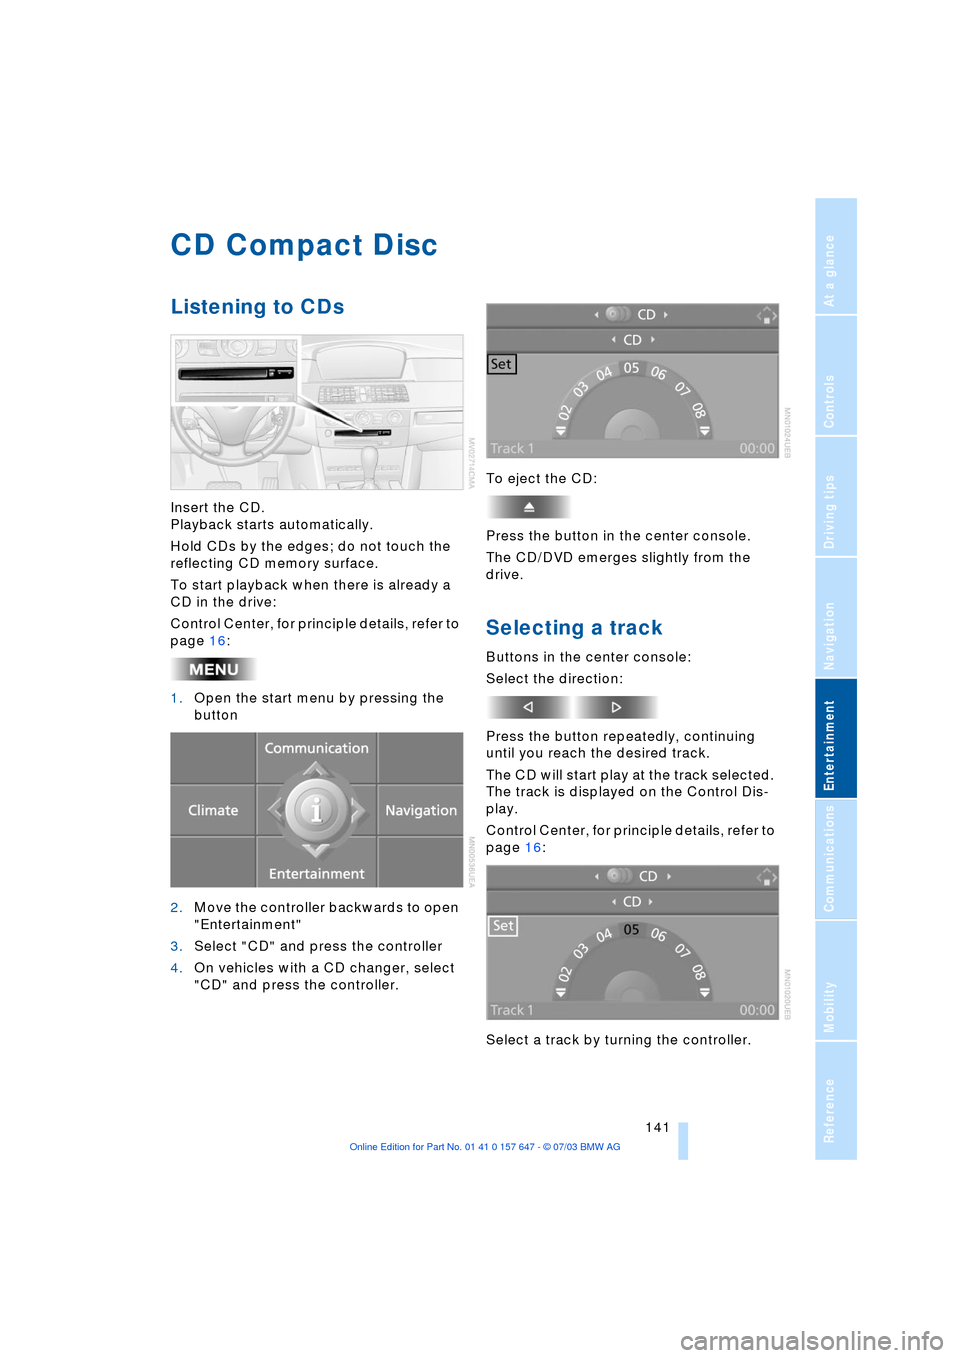
Insert the CD.
Playback starts automatically.
Hold CDs by the edges; do not touch the
reflecting CD memory surface.
To start playback when there is already a
CD in the drive:
Control Center, for principle details, refer to
page 16:
1.Open the start menu by pressing the
button
2.Move the controller backwards to open
"Entertainment"
3.Select "CD" and press the controller
4.On vehicles with a CD changer, select
"CD" and press the controller.To eject the CD:
Press the button in the center console.
The CD/DVD emerges slightly from the
drive.
Selecting a track
Buttons in the center console:
Select the direction:
Press the button repeatedly, continuing
until you reach the desired track.
The CD will start play at the track selected.
The track is displayed on the Control Dis-
play.
Control Center, for principle details, refer to
page 16:
Select a track by turning the controller.
Page 145 of 220
Navigation
Entertainment
Driving tips
143Reference
At a glance
Controls
Communications
Mobility
Malfunctions
The BMW CD player is a Class 1 laser
product. Do not operate the system if
the cover is damaged, otherwise severe
eye damage can result.
Always refer repair and maintenance oper-
ations to qualified technicians.
With self-recorded CDs, labels applied
later can become detached during play-
back due to the development of heat and
cause irreparable damage to the device.<
CDs with copy protection devices
cannot be played on your CD player
or only with certain restrictions. These CDs
differ from the CD Audio Standard Red
Book, on the basis of which all CD players
and changers are designed. In this case,
please contact the CD dealer or manufac-
turer.
You may experience playback problems,
such as skips, when using CDs that you
have copied at home.
If the display fails to detect a CD that you
have loaded in the drive, check to ensure
that the CD has been inserted correctly and
inspect it for signs of defects.
High levels of humidity inside the system
can condense on the laser's scan lens and
temporarily prevent it from reading the
CD.<
Page 147 of 220
Navigation
Entertainment
Driving tips
145Reference
At a glance
Controls
Communications
Mobility
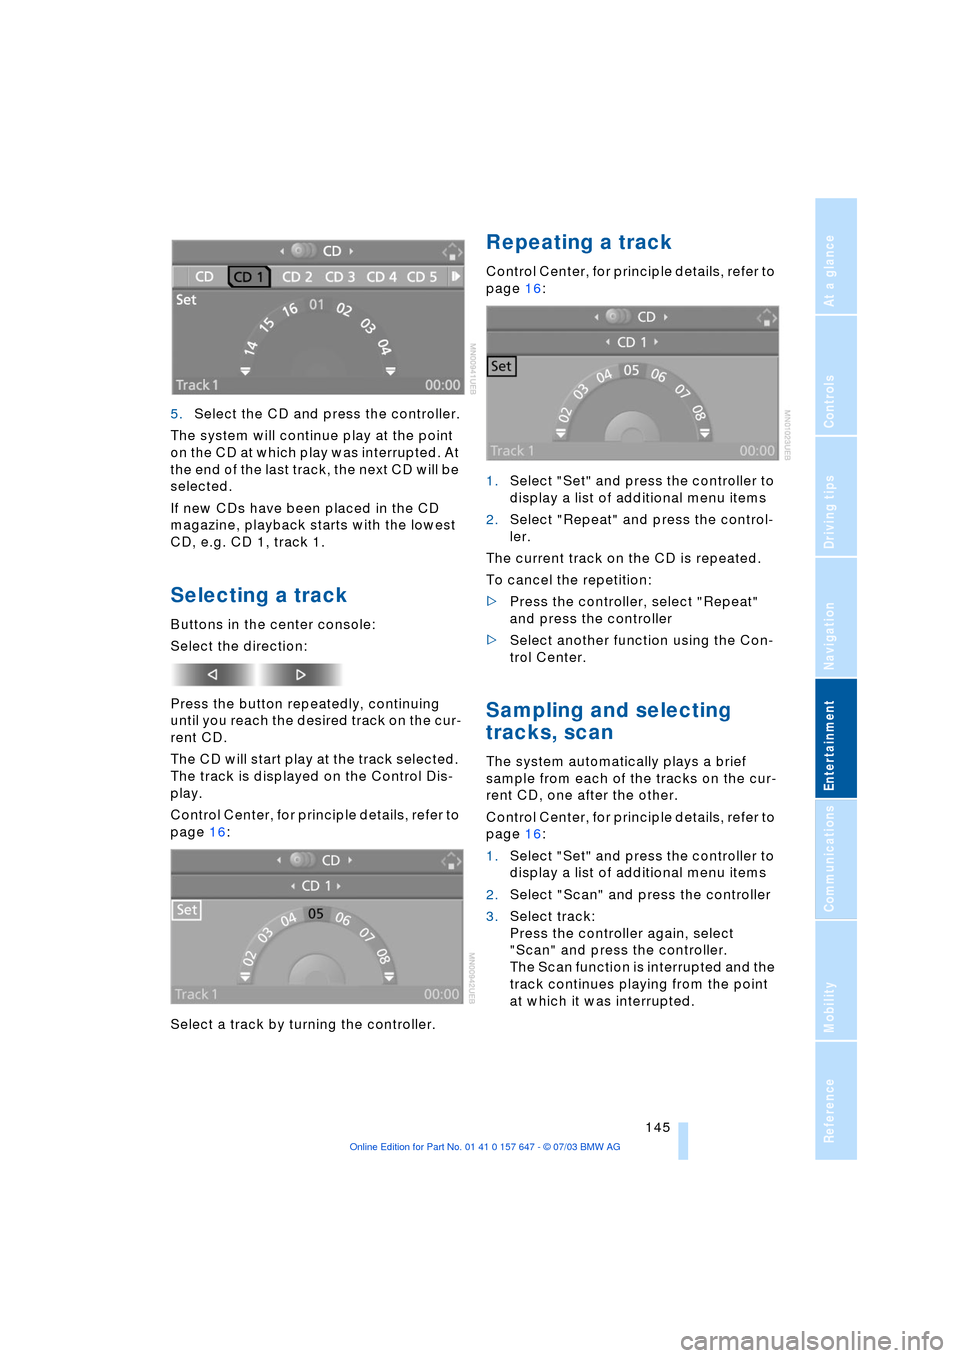
5.Select the CD and press the controller.
The system will continue play at the point
on the CD at which play was interrupted. At
the end of the last track, the next CD will be
selected.
If new CDs have been placed in the CD
magazine, playback starts with the lowest
CD, e.g. CD 1, track 1.
Selecting a track
Buttons in the center console:
Select the direction:
Press the button repeatedly, continuing
until you reach the desired track on the cur-
rent CD.
The CD will start play at the track selected.
The track is displayed on the Control Dis-
play.
Control Center, for principle details, refer to
page 16:
Select a track by turning the controller.
Repeating a track
Control Center, for principle details, refer to
page 16:
1.Select "Set" and press the controller to
display a list of additional menu items
2.Select "Repeat" and press the control-
ler.
The current track on the CD is repeated.
To cancel the repetition:
>Press the controller, select "Repeat"
and press the controller
>Select another function using the Con-
trol Center.
Sampling and selecting
tracks, scan
The system automatically plays a brief
sample from each of the tracks on the cur-
rent CD, one after the other.
Control Center, for principle details, refer to
page 16:
1.Select "Set" and press the controller to
display a list of additional menu items
2.Select "Scan" and press the controller
3.Select track:
Press the controller again, select
"Scan" and press the controller.
The Scan function is interrupted and the
track continues playing from the point
at which it was interrupted.
Page 149 of 220
Navigation
Entertainment
Driving tips
147Reference
At a glance
Controls
Communications
Mobility
Page 153 of 220
151
Entertainment
Reference
At a glance
Controls
Driving tips Communications
Navigation
Mobility
Batteries
Never attempt to disassemble your
BMW portable phone or its battery.
Use only approved battery types Ð the
wrong battery can destroy your portable
phone.
To avoid possible short circuits, after
removing a battery you should never allow
it to come into contact with metallic sur-
faces of any kind.<
Disposing of used batteries
Return used batteries to a recycling
collection point or to your BMW cen-
ter.<
Care instructions
You can find useful information on caring
for your portable phone in the separate
portable phone Owner's Manual and in the
separate Caring for your vehicle brochure.
Controls
You can operate the BMW portable phone*
using:
>The steering wheel, refer to page 11
>The Control Center, refer to page 152
>The voice control, refer to page 157.
You can use the car phone via the hands-
free unit for BMW Assist calls.
The Control Display indicates which tele-
phone you are using to establish a connec-
tion.
Telephoning with the
car phone: BMW Assist calls
You can use the car phone via the hands-
free unit for BMW Assist calls.
The car phone must have been
enabled prior to initial use. In this con-
nection, please contact your BMW cen-
ter.<
Starting the BMW portable phone*
Before starting off, place the BMW portable
phone in the cradle. If you are making a call
using the car phone, you can only use the
BMW portable phone once you have termi-
nated this call.
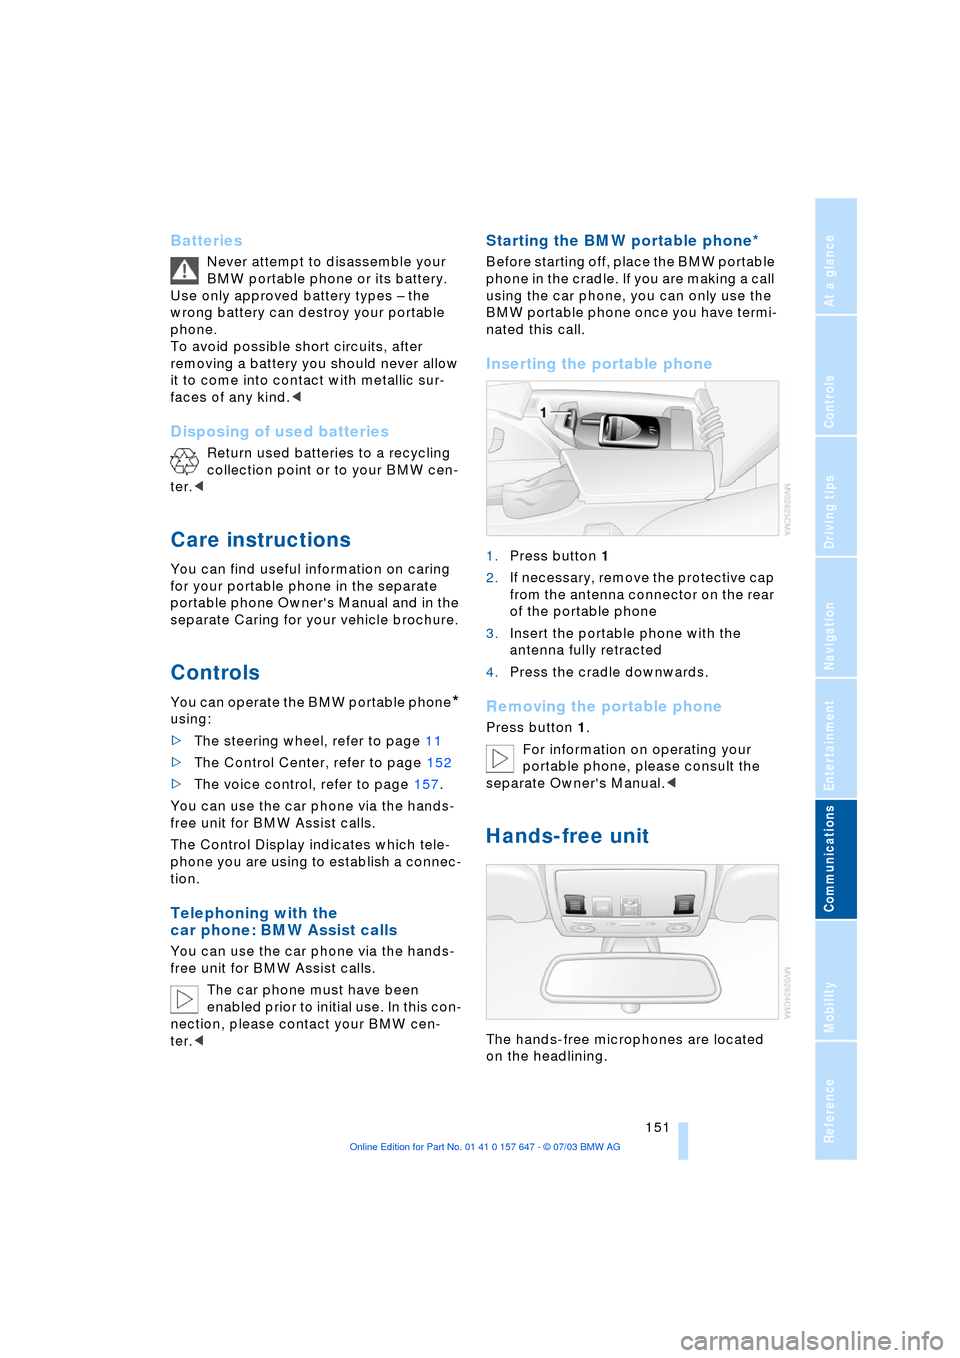
Inserting the portable phone
1.Press button 1
2.If necessary, remove the protective cap
from the antenna connector on the rear
of the portable phone
3.Insert the portable phone with the
antenna fully retracted
4.Press the cradle downwards.
Removing the portable phone
Press button 1.
For information on operating your
portable phone, please consult the
separate Owner's Manual.<
Hands-free unit
The hands-free microphones are located
on the headlining.