2004 BMW 525I SEDAN change language
[x] Cancel search: change languagePage 22 of 220

Voice command system
20
Voice command system
The concept
The voice command system allows you to
control operation of various vehicle sys-
tems without ever removing your hands
from the steering wheel.
The menu items on the Control Display
serve as voice commands for the equip-
ment that can be operated using the voice
command system. This means you can
open these menu items using the voice
command system instead of with the con-
troller.
The voice command system transforms
your oral commands into control signals for
the selected systems and provides support
in the form of instructions or questions.
Precondition
If the language of the voice command and
Control Display do not match, change the
language of the Control Display, refer to
page 74.
Symbols used
Voice commands
Activating voice command system
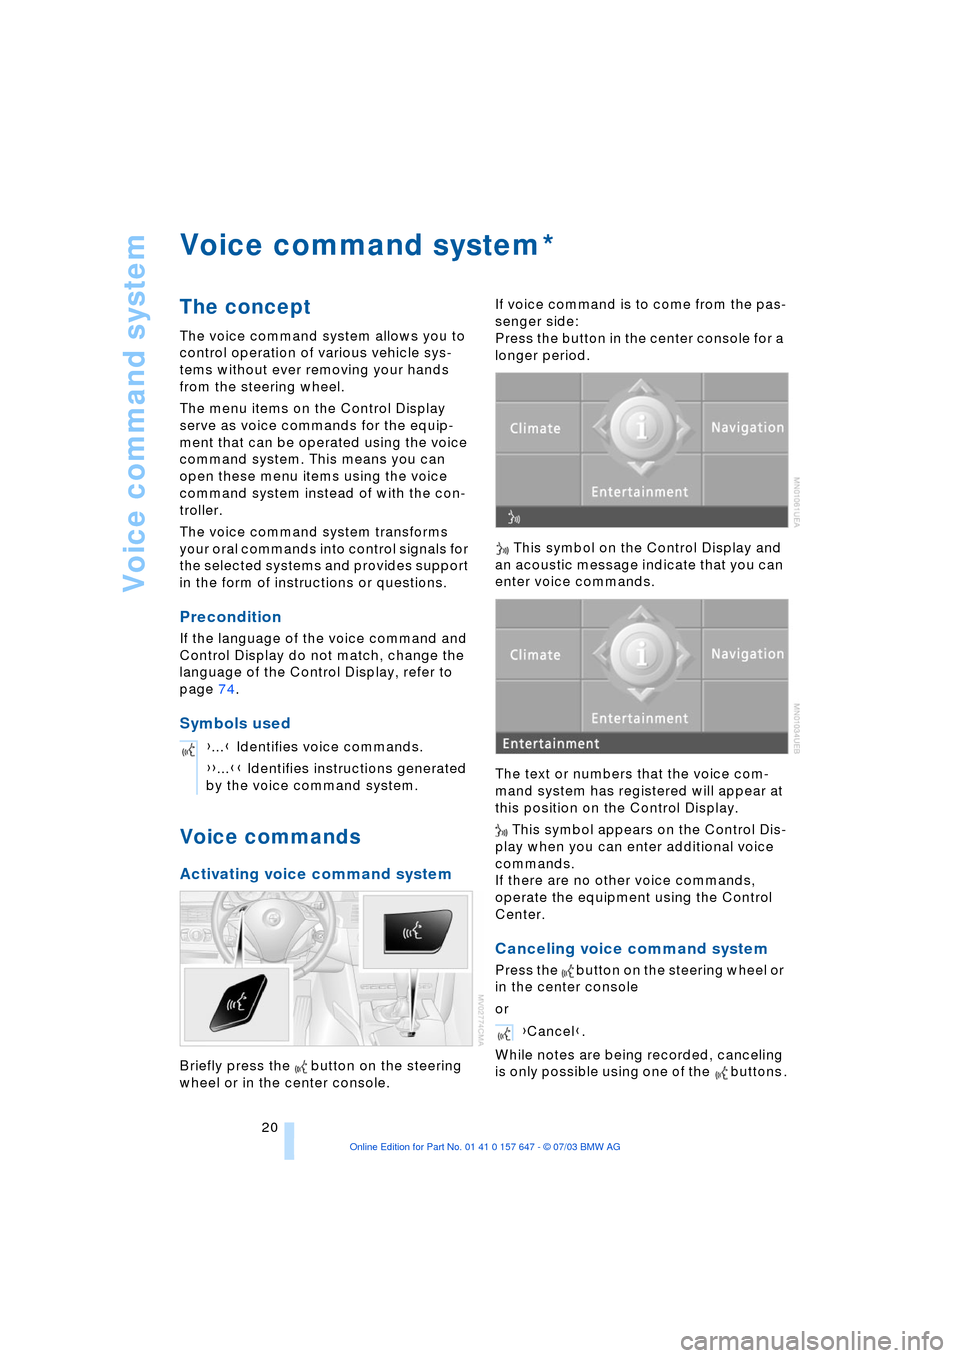
Briefly press the button on the steering
wheel or in the center console.If voice command is to come from the pas-
senger side:
Press the button in the center console for a
longer period.
This symbol on the Control Display and
an acoustic message indicate that you can
enter voice commands.
The text or numbers that the voice com-
mand system has registered will appear at
this position on the Control Display.
This symbol appears on the Control Dis-
play when you can enter additional voice
commands.
If there are no other voice commands,
operate the equipment using the Control
Center.
Canceling voice command system
Press the button on the steering wheel or
in the center console
or
While notes are being recorded, canceling
is only possible using one of the buttons .
*
{...} Identifies voice commands.
{{...}} Identifies instructions generated
by the voice command system.
Entertainment{Cancel}.
Page 24 of 220

Voice command system
22
Notes
Do not use the voice command sys-
tem in emergency situations. In stress
situations, voice and pitch can change.
Instead, use the emergency call button
near the interior rearview mirror.<
At the time of going to press, the
voice command system was available
in English. Other languages are currently
not available.
The telephone can also be operated using
voice control, refer to page 157.<
Important for voice commands
Issue the commands fluently and at normal
volume, avoiding excessing emphasis and
pauses.
The voice command system uses a special
hands-free microphone located in the front
of your vehicle's headliner. On vehicles
with telephone, two vehicle microphones
are fitted. Although the system is designed
to filter out ambient noise, you can help
ensure that your commands will be under-
stood by observing the following instruc-
tions:
>Keep the doors, windows and glass
roof closed to prevent interference from
ambient noise
>Avoid other sources of noise in the
vehicle while speaking, and ask other
vehicle occupants to refrain from talk-
ing while you are using the system
>Without a telephone, the vehicle micro-
phone is directed at the driver. This
means that the system might not be
able to register the voices of other vehi-
cle occupants properly.
Page 76 of 220

Everything under control
74
Measurement units
You can change the measurement units for
consumption, distances, temperature and
pressure for each specific key.
1.Open the menu
2.Select "Display settings" and press the
controller
3.Select "Units" and press the controller
4.Select the menu item to be adjusted
and press the controller
5.Select the desired measurement unit
and press the controller.
Language
The language on the Control Center can be
set for each specific key.
Control Center, for principle details, refer to
page 16:
1.Open the menu
2.Select "Display settings" and press the
controller
3.Select "Languages" and press the con-
troller
4.Select "Text language" and press the
controller. You can select a different
language for the text displays5.Select the desired language and press
the controller.
Setting the time
Control Center, for principle details, refer to
page 16:
1.Open the menu
2.Select "Display settings" and press the
controller
3.Select "Time" and press the controller
4.Select "Set time" and press the control-
ler. The first time setting is highlighted
5.Turn the controller to make the adjust-
ment
6.Press the controller to apply the setting.
The next adjustment is highlighted
7.Make the remaining adjustments. After
the last adjustment, the time is stored.
Changing the display format
The display mode of the clock can be set
for each specific key.
1.Select "Time format" and press the
controller
2.Select the desired format and press the
controller.
Page 206 of 220

Everything from A to Z
204 Cargo, securing 109
Cargo area
Ð locking separately 31
Caring for artificial leather,
refer to Caring for your
vehicle brochure
Caring for leather, refer to
Caring for your vehicle
brochure
Caring for light-alloy
wheels, refer to Caring for
your vehicle brochure
Caring for plastic, refer to
Caring for your vehicle
brochure
Caring for the carpet, refer
to Caring for your vehicle
brochure
Caring for the vehicle finish,
refer to Caring for your
vehicle brochure
Car jack
Ð jacking points 188
Car keys, refer to Central
keys with remote
control 26
Car phone 151
Ð installation location, refer
to Center armrest 98
Ð refer to Portable
phone 150
Ð refer to separate Owner's
Manual
Car radio, refer to
Radio 134
Car wash 106
Ð refer also to Caring for
your vehicle brochure
Catalytic converter, refer to
High temperatures 106
"Categories" 138
CBC Cornering Brake
Control 78
CBS Condition Based
Service 181
"CD" 130CD changer 144
Ð adjusting the tone 131
Ð controls 130
Ð fast forward/reverse 146
Ð installation location 144
Ð listening to a CD 144
Ð playing a track 145
Ð random order 146
Ð repeating a track 145
Ð selecting track 145
Ð switching on/off 130
Ð volume 131
CD for navigation 114
CD player 141
Ð adjusting the tone 131
Ð controls 130
Ð fast forward/reverse 142
Ð playing a track 142
Ð random order 142
Ð repeating a track 142
Ð selecting tracks 141
Ð switching on/off 130
Ð volume 131
Center armrest 98
Center console, refer to
Comfort area 14
Central keys with remote
control 26
"Central locking" 38
Central locking system 27
Ð from inside vehicle 30
Ð from outside vehicle 27
Changes, technical, refer to
Parts and accessories 6
Changing a wheel 187
Changing selector-lever
positions 55
Changing the direction
display for navigation 124
Changing the language on
the Control Display 74
Changing the
measurement units on the
Control Display 74
Changing wheels 174
CHECK button 69
Check Control 68
"Check Control
messages" 69
Check Gas Cap 168Checking the air pressure,
refer to Tire inflation
pressure 170
Child's seat 45
Child-restraint fixing
LATCH 47
Child restraints 45
Child-restraint system 45
Child-safety lock 48
Chock 187
Chrome parts, care, refer to
Caring for your vehicle
brochure
Cigarette lighter 100
Circulation of air, refer to
Recirculated-air mode 91
"City" for destination
entry 117
Cleaning, refer to Caring for
your vehicle brochure
Cleaning headlamps
Ð washer fluid 57
Cleaning windshield 57
"Climate" 41
Clock 65
Ð 12/24 hour mode 74
Ð setting the time and
date 74
Closing
Ð from inside 30
Ð from outside 27
Cockpit 10
Comfort area 14
Comfort seat 37
"Communication" 152
"Communication
interface" 161
Compact Disc
Ð refer to CD changer 144
Ð refer to CD player 141
Compact wheel
Ð inflation pressure 171
Ð wheel change 187
Compression ratio, refer to
Engine data 198
Computer 70
Ð clock, 12/24 hour
mode 74
Ð displays on the Control
Display 70
Page 210 of 220

Everything from A to Z
208 Heating 90
Ð mirrors 43
Ð steering wheel 44
Heating while stopped 92
Heavy cargo, refer to
Stowing cargo 109
Height, refer to
Dimensions 199
Height adjustment
Ð head restraints 39
Ð seats 37
Ð steering wheel 43
High beams 88
Ð headlight flasher 88
Ð indicator lamp 13
Ð replacing the bulbs 185
Hills 107
Holder for beverages 99
"Horn" 44
Horn 10
"Hour memo" 75
"House number" for
destination entry 117
Hydraulic brake assistant,
refer to DBC 79
Hydroplaning 106, 174
I
Ice warning 65
iDrive, refer to Control
Center 16
Ignition key 26
Ignition key positions, refer
to Ignition lock 49
Ignition lock 49
Independent ventilation
Ð switching on and off
directly 94
Independent ventilation/
heating
Ð entering switch-on
times 95
Ð preselecting switch-on
times 95Indicator/warning lamp
Ð active steering 82
Ð airbags 84
Ð Flat Tire Monitor 81
Ð front fog lamps 11
Ð overview 13
Ð safety belt warning 40
Individual air distribution 93
Individual button
assignment options on
steering wheel 44
Individual settings, refer to
Key Memory 26
Inflation pressure, refer to
Tire inflation
pressure 170
"Information" for
navigation 118
Information for navigation
Ð on a different city 118
Ð on city of destination 118
Ð on current position 118
"Information on
destination" 119
"Input map" 118
Installation location
Ð CD changer 144
Ð navigation computer 114
Ð portable phone 151
Instructions for navigation
system, refer to Voice
instructions 124
Instrument cluster 12
Instrument combination,
refer to Instrument
cluster 12
Instrument lighting 88
Instrument panel, refer to
Instrument cluster 10
Integrated universal remote
control 96
Interesting destination 118
"Interim time" 73
Interior lamps 89
Ð remote control 28
Interior mirror, refer to
Interior rearview mirror 43
Interior motion sensor 33
Ð switching off 28Interior rearview mirror 43
Ð automatic dimming
feature 43
Interlock, refer to Steering
locked 49
Intermittent mode of the
wipers 57
J
Jacking points 188
Joystick, refer to Control
Center 16
Jump-starting 192
K
Key Memory 26
"Keypad" 156
Keys 26
Key set, refer Central keys
with remote control 26
Kickdown 55
Knock control 169
L
Lamps and bulbs 184
"Languages" 74
"Languages" for
navigation 124
Lashing eyes, refer to
Securing the load 109
"Last seat position" 38
LATCH child-restraint
fixing 47
LEDs light-emitting
diodes 89
Length, refer to
Dimensions 199
Letter symbol on portable
phone 156
License plate light
Ð replacing the bulbs 186
Light-emitting diodes
LEDs 89
Lighter 100
Ð socket 100
"Lighting" 56, 87