Page 587 of 1574

M162 ENGINE CONTROLS 1F1-55
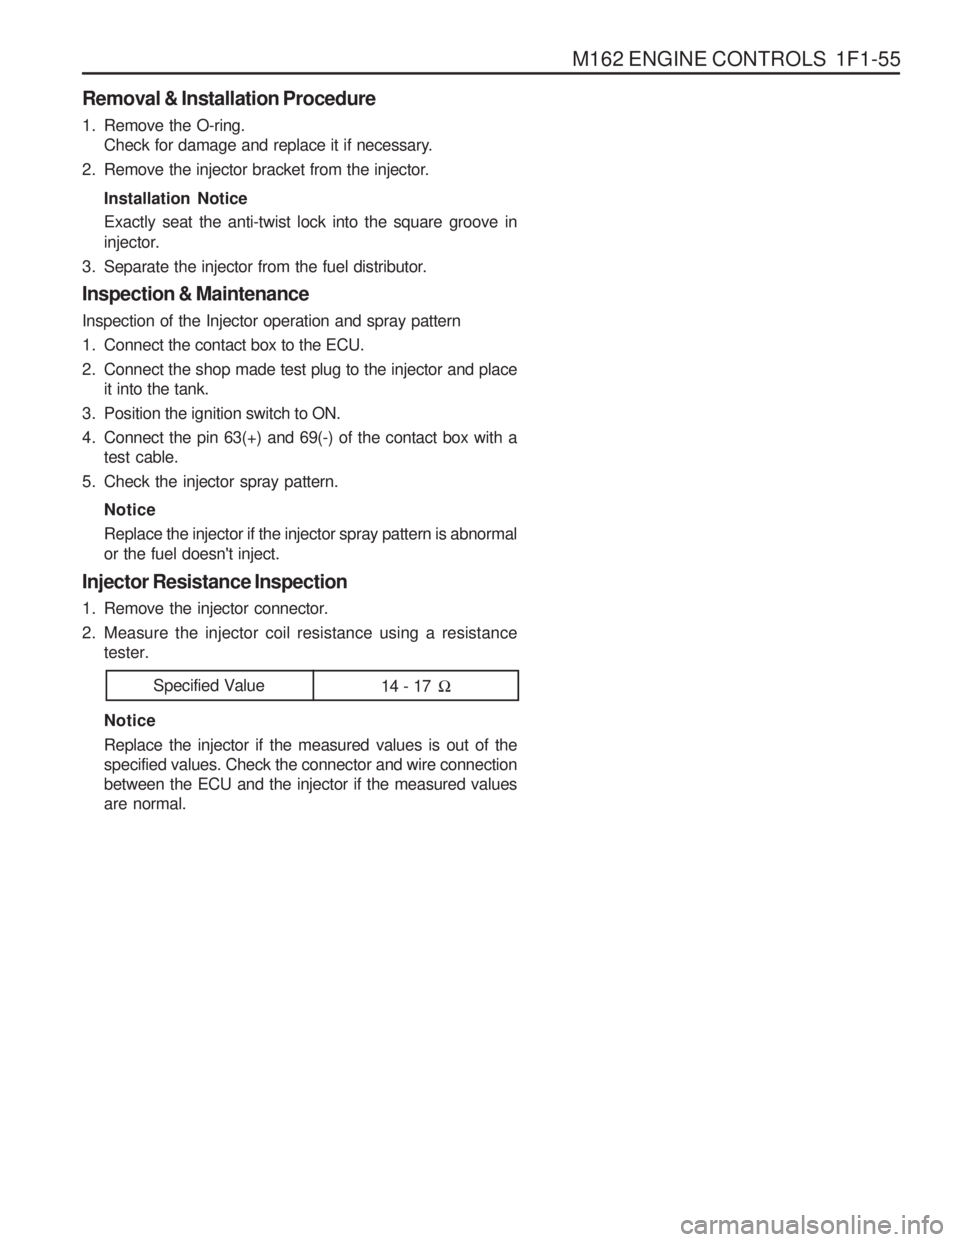
Removal & Installation Procedure
1. Remove the O-ring.Check for damage and replace it if necessary.
2. Remove the injector bracket from the injector.
Installation Notice Exactly seat the anti-twist lock into the square groove in
injector.
3. Separate the injector from the fuel distributor. Inspection & Maintenance Inspection of the Injector operation and spray pattern
1. Connect the contact box to the ECU.
2. Connect the shop made test plug to the injector and place it into the tank.
3. Position the ignition switch to ON.
4. Connect the pin 63(+) and 69(-) of the contact box with a test cable.
5. Check the injector spray pattern.
NoticeReplace the injector if the injector spray pattern is abnormal or the fuel doesn't inject.
Injector Resistance Inspection
1. Remove the injector connector.
2. Measure the injector coil resistance using a resistance tester. Notice Replace the injector if the measured values is out of the specified values. Check the connector and wire connectionbetween the ECU and the injector if the measured valuesare normal.
Specified Value 14 - 17 �
Page 640 of 1574
1F3-30 OM600 ENGINE CONTROLS
REMOVAL AND INSTALLATION OF INJECTION TIMING DEVICE Preceding Work : Removal of vacuum pump
1 Cylinder Head Cover
2 Bolt ............................................................ 10Nm
3 Gasket ................................................... Replace
4 Fuel Injection Pump
5 Seal ....................................................... Replace
6 Screw Plug ................................................. 30Nm
7 Oil Pan
8 Locking Pin
9 Injection Timing Device 10 Washer
11 Bolt (Left-Hand Thread) .............................46Nm
12 Camshaft Sprocket
13 Washer
14 12-Sided Stretch Bolt ............Check, 25Nm + 90 °
15 Timing Chain
16 Seal
17 Chain Tensioner ......................................... 80Nm
Page 648 of 1574
1F3-38 OM600 ENGINE CONTROLS
Tools Required 617 589 08 21 00 Position Sensor
Test Procedure
1. Remove the screw plug (5) and seal (4) and collect oil in a suitable vessel.
2. Install the position sensor (1) into the governor housing of
the injection pump to be the guide pin of the position sensor facing up.
3. Connect the battery terminal of position sensor (1) to positive terminal (+) of battery.
Position Sensor 617 589 08 21 00
4. Rotate the crankshaft by hand (in direction of engine rotation) until the lamp ‘B’ lights up. Rotate the crankshaft carefully
further until both lamps ‘A and B ’ come on. In this position,
check the Rl value on the crankshaft vibration damper. Notice If only lamp ‘A’ lights up, repeat the test and if out of
specification, adjust start of delivery.
Specification A TDC 14° - 16 °
Page 651 of 1574
OM600 ENGINE CONTROLS 1F3-41
With Pulse Generator
Tools Required 617 589 09 21 00 Rl Sensor
617 589 10 21 00 Timing Tester667 589 00 21 00 TDC Pulse Generator
Commercial Tools
Item
Digital Tester
Without Pulse Generator Tools
Bosch, MOT 001.03
Hartmann & Braun, EOMT3 Bosch, ETD 019.00Sun, DIT 9000
ALV, Diesel - Tester 875
Test Procedure
1. Remove the screw plug (7) and seal (8) collect oil in a suitable vessel.
2. Install the Rl sensor into the governor housing of injection pump (1).
Rl Sensor 617 589 10 21 00
3. Connect the digital tester and TDC pulse sender unit according to connection diagram.
4. Run the engine at idle speed and check the Rl value on the digital tester Notice
If out of standard, adjust the start of delivery.
5. Stop the engine.
6. Remove the Rl sensor, digital tester and TDC pulse sender unit.
7. Replace the seal and tighten the plug.
8. Check engine oil level and adjust if necessary.
Rl value A TDC 14° - 16 °
Tightening Torque 30 Nm
Page 700 of 1574

SUSPENSION DIAGNOSIS 2A-3
DIAGNOSIS
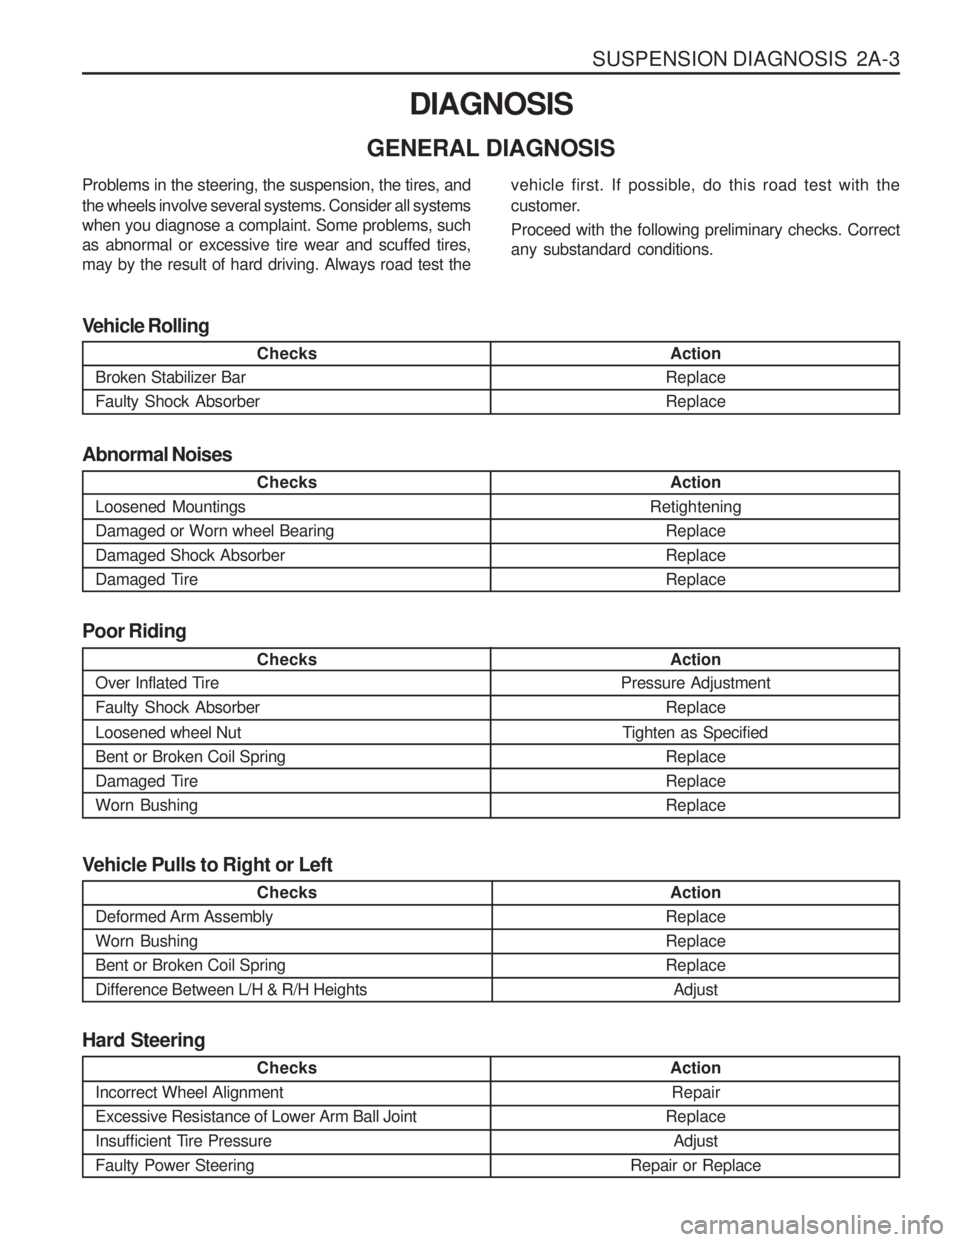
GENERAL DIAGNOSIS
Checks
Loosened Mountings Damaged or Worn wheel BearingDamaged Shock Absorber
Damaged Tire Action
Retightening ReplaceReplaceReplace
Abnormal Noises
Checks
Broken Stabilizer Bar Faulty Shock Absorber Action
ReplaceReplace
Vehicle Rolling
Checks
Over Inflated Tire Faulty Shock Absorber Loosened wheel Nut Bent or Broken Coil Spring
Damaged TireWorn Bushing Action
Pressure Adjustment
Replace
Tighten as Specified ReplaceReplaceReplace
Poor Riding
Problems in the steering, the suspension, the tires, and the wheels involve several systems. Consider all systems when you diagnose a complaint. Some problems, suchas abnormal or excessive tire wear and scuffed tires,may by the result of hard driving. Always road test the
vehicle first. If possible, do this road test with the
customer. Proceed with the following preliminary checks. Correct any substandard conditions.
Checks
Incorrect Wheel Alignment Excessive Resistance of Lower Arm Ball Joint
Insufficient Tire PressureFaulty Power Steering
Action Repair
Replace Adjust
Repair or Replace
Hard Steering
Checks
Deformed Arm Assembly Worn BushingBent or Broken Coil SpringDifference Between L/H & R/H Heights Action
ReplaceReplaceReplace Adjust
Vehicle Pulls to Right or Left
Page 701 of 1574
2A-4 SUSPENSION DIAGNOSISChecks
Worn or Broken Coil Spring Checks
Incorrect Front wheel Alignment Worn or Loosened Lower Arm Bushing
Action
Replace
Repair or Replace
Steering Instability
Action
Replace
Vehicle Bottoming
Page 735 of 1574

2D-2 REAR SUSPENSIONDIAGNOSIS
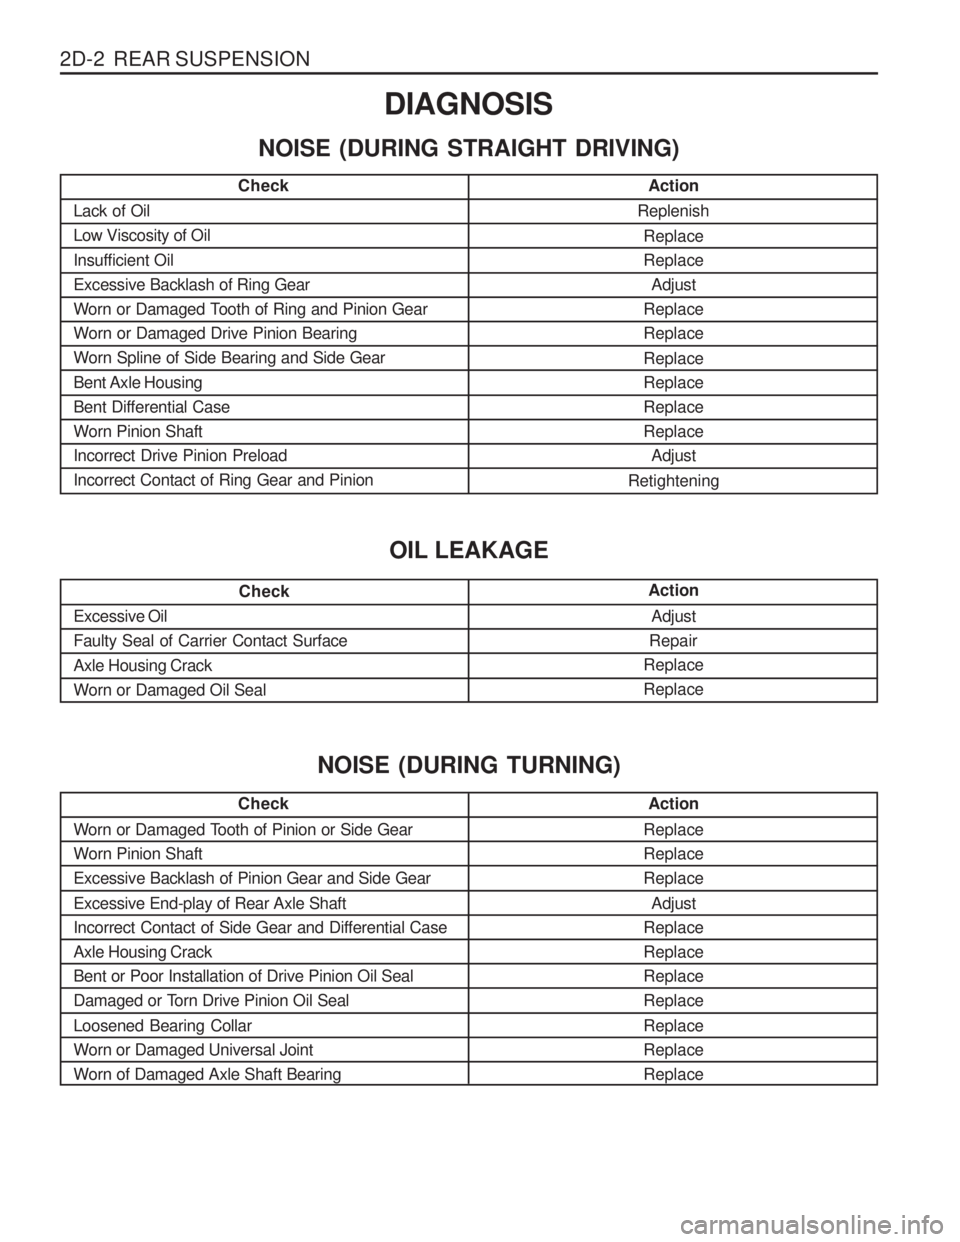
NOISE (DURING STRAIGHT DRIVING)
Check
Lack of Oil
Low Viscosity of Oil Insufficient Oil Excessive Backlash of Ring Gear
Worn or Damaged Tooth of Ring and Pinion GearWorn or Damaged Drive Pinion BearingWorn Spline of Side Bearing and Side Gear Bent Axle Housing Bent Differential CaseWorn Pinion ShaftIncorrect Drive Pinion PreloadIncorrect Contact of Ring Gear and Pinion Action
Replenish ReplaceReplace Adjust
ReplaceReplace Replace ReplaceReplaceReplace Adjust
Retightening
NOISE (DURING TURNING)
Check
Worn or Damaged Tooth of Pinion or Side Gear Worn Pinion ShaftExcessive Backlash of Pinion Gear and Side Gear Excessive End-play of Rear Axle Shaft Incorrect Contact of Side Gear and Differential CaseAxle Housing CrackBent or Poor Installation of Drive Pinion Oil Seal
Damaged or Torn Drive Pinion Oil Seal Loosened Bearing Collar Worn or Damaged Universal JointWorn of Damaged Axle Shaft Bearing Action
ReplaceReplaceReplace Adjust
ReplaceReplaceReplaceReplace Replace ReplaceReplace
OIL LEAKAGE
Check
Excessive Oil Faulty Seal of Carrier Contact Surface Axle Housing Crack Worn or Damaged Oil Seal Action
Adjust
Repair
ReplaceReplace
Page 736 of 1574
REAR SUSPENSION 2D-3
HEATING
Check
Lack of Oil Insufficient Backlash of GearsExcessive Preload of Bearing Action
Replenish Adjust Adjust