2003 PONTIAC GRAND PRIX reset
[x] Cancel search: resetPage 130 of 378
Resuming a Set Speed
Suppose you set the cruise control at a desired speed
and then you apply the brake. This, of course, shuts
off the cruise control. But you don’t need to reset it.
Once you’re going about 25 mph (40 km/h) or
more again, you can move the cruise control switch
from
ON to R/A (Resume/Accelerate) briefly. You’ll go
right back up
to your chosen speed and stay there.
Increasing Speed While Using Cruise
Control
There are two ways to go to a higher speed:
e
e Use the accelerator pedal to get to the higher
speed. Push in the §ET button, then release
the button and the accelerator pedal. You’ll now
cruise at the higher speed.
Move the cruise switch from
ON to R/A. Hold it
there until you get up to the speed you want,
and then release the switch. To increase your speed
in very small amounts, move the switch
to R/A
briefly and then release it. Each time you do this,
your vehicle will go about
1 mph (1.6 km/h) faster.
The accelerate feature
will only work after you set the
cruise control speed by pushing the
SET button.
Reducing Speed While Using Cruise
Control
There are two ways to reduce your speed while using
cruise control:
e
e Push in the SET button until you reach the lower
speed you want, then release it.
To
slow down in very small amounts, push the SET
button briefly. Each time you do this, you’ll go about
1 mph (1.6 km/h) slower.
Passing Another Vehicle While Using
Cruise Control
Use the accelerator pedal to increase your speed.
When you take your foot
off the pedal, the vehicle will
slow down to the cruise control speed you set earlier.
Using Cruise Control on Hills
How well the cruise control will work on hills depends
upon your speed, load and the steepness of the
hills. When going up steep hills, you may have
to step
on the accelerator pedal to maintain your speed.
When going downhill, you may have
to brake or shift to
a lower gear to keep your speed down. Of course,
applying the brake takes you out of cruise control. Many
drivers find this
to be too much trouble and don’t use
cruise control on steep hills.
3-9
Page 146 of 378
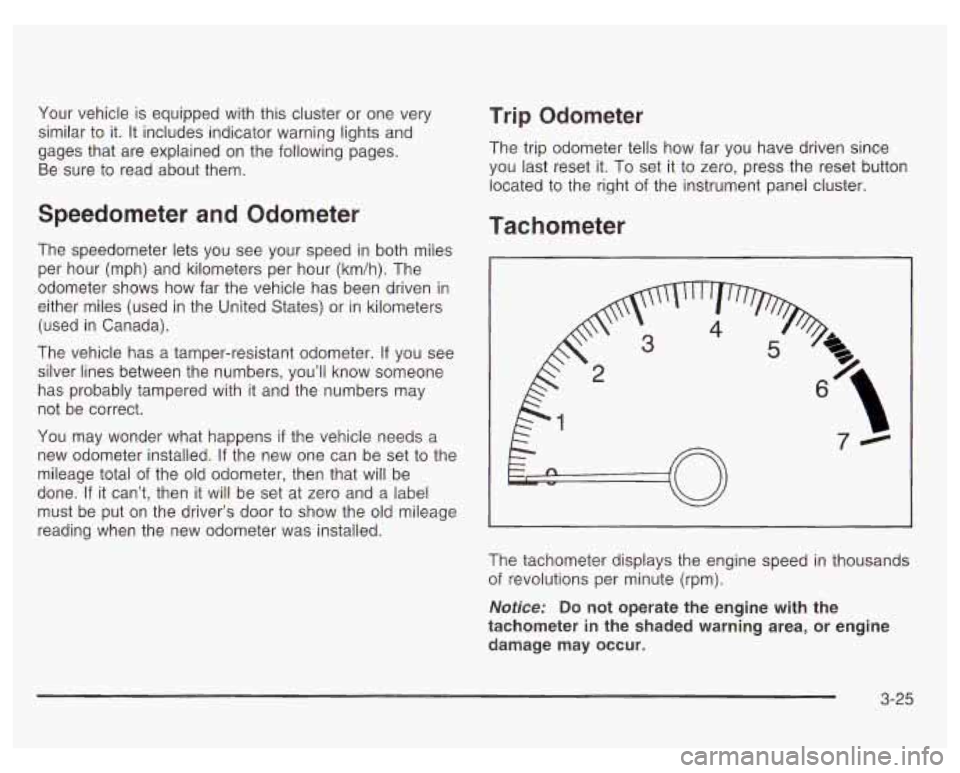
Your vehicle is equipped with this cluster or one very
similar to it. It includes indicator warning lights and
gages that are explained on the following pages.
Be sure to read about them.
Speedometer and Odometer
The speedometer lets you see your speed in both miles
per hour (mph) and kilometers per hour (km/h). The
odometer shows how far the vehicle has been driven in
either miles (used in the United States) or in kilometers
(used in Canada).
The vehicle has a tamper-resistant odometer.
If you see
silver lines between the numbers, you’ll know someone
has probably tampered with
it and the numbers may
not be correct.
You may wonder what happens
if the vehicle needs a
new odometer installed.
If the new one can be set to the
mileage total of the old odometer, then that will be
done.
If it can’t, then it will be set at zero and a label
must be put on the driver’s door to show the old mileage
reading when the new odometer was installed.
Trip Odometer
The trip odometer tells how far you have driven since
you last reset it.
To set it to zero, press the reset button
located to the right of the instrument panel cluster.
Tachometer
The tachometer displays the engine speed in thousands
of revolutions per minute (rpm).
Notice: Do not operate the engine with the
tachometer in the shaded warning area, or engine
damage may occur.
3-25
Page 150 of 378
Anti-Lock Brake System Warning Light
if your vehicle has the
optional anti-lock brake
system, this light will come
on when your engine is
started and may stay on
for several seconds.
That’s normal.
If the anti-lock brake system warning light stays on
longer than normal after you’ve started your engine, turn
the ignition
off. If the light comes on and stays on
while you’re driving, stop as soon as possible and turn
the ignition
off. Then start the engine again to reset
the system.
If the light still stays on, or comes on again
while you’re driving, your vehicle needs service.
If
the light is on and the regular brake system warning
light isn’t on, you still have brakes, but you don’t have
anti-lock brakes.
The anti-lock brake system warning light should come
on briefly when you turn the ignition key to
RUN. This is
normal.
If the light doesn’t come on then, have it
fixed
so it will be ready to warn you if there is a problem.
Traction Control System (TCS)
Warning Light
TCS
OFF
If your vehicle is
equipped with the 3800
supercharged V6 engine,
the traction control
system warning light
may come on for the
following reasons:
If you turn the system off by pressing the TCS
button located on the far right side of the trip
computer, the warning light will come on and stay
on. To turn the system back on, press the button
again. The warning light should go
off. See Traction
Control System (TCS) on page
4-10 for more
information.
@ If there’s a brake system problem that is specifically
related to traction control, the traction control
system will turn
off and the warning light will come
on. If your brakes begin to overheat, the traction
control system will turn
off and the warning light will
come on until your brakes cool down.
If the traction control system warning light comes on
and stays on for an extended period of time when the
system
is turned on, your vehicle needs service.
3-29
Page 160 of 378

The Driver Information Center (DIC) gives you important
safety and maintenance facts. When you turn the
ignition on, all of the DIC lights illuminate for a few
seconds. After this, the DIC will begin working.
Functions
__ (Door Ajar): If one of the doors is ajar, this light
will appear next to that door on the vehicle outline.
CHANGE OIL SOON: This light will appear when the
system indicates that it’s time for an oil change. The
system predicts remaining oil life using data from length
of drives, coolant temperature, engine rpm and
vehicle speed. It alerts you to change the oil on a
schedule consistent with the vehicle’s driving conditions.
After changing the oil, the system must be reset. See
How to Reset the GM
Oil Life SystemTM under
Engine
Oil on page 5- 18.
e LOW: This light will come on when the ignition is
on and the fluid in the washer fluid container is low.
AJAR: This light alerts you that the trunk is not
fully closed.
LOW TRAC (Low Traction): If your vehicle is equipped
with anti-lock brakes, this light will come on when the
enhanced traction system is limiting wheel spin. See Enhanced Traction System (ETS) on page 4-
I I or
Low Traction Light on page 3-30.
TRAC OFF (Traction Off): If your vehicle is equipped
with anti-lock brakes, this light lets you know that
the enhanced traction system has been disabled and
will not limit wheel spin. See Enhanced Traction System
Warning Light
on page 3-30 or Low Traction Light on
page 3-30.
TRAC (Traction): If the vehicle has anti-lock brakes
and the enhanced traction system, you will have a
disable button on the far right side of the DIC.
The enhanced traction system is automatically activated
when you turn the ignition on. This button will
activate/deactivate the system. If you need to disable
the system, such
as when you are stuck and are rocking
the vehicle back and forth, push this button. See If
You Are Stuck: in Sand, Mud, Ice or Snow on
page 4-32.
3-39
Page 161 of 378
Trip Computer
ENG/MET
RESET
0 AVG --RANGE
3800 V6 Engine Vehicles Equipped with the ABS Brake System
3-40
Page 163 of 378
Control Buttons
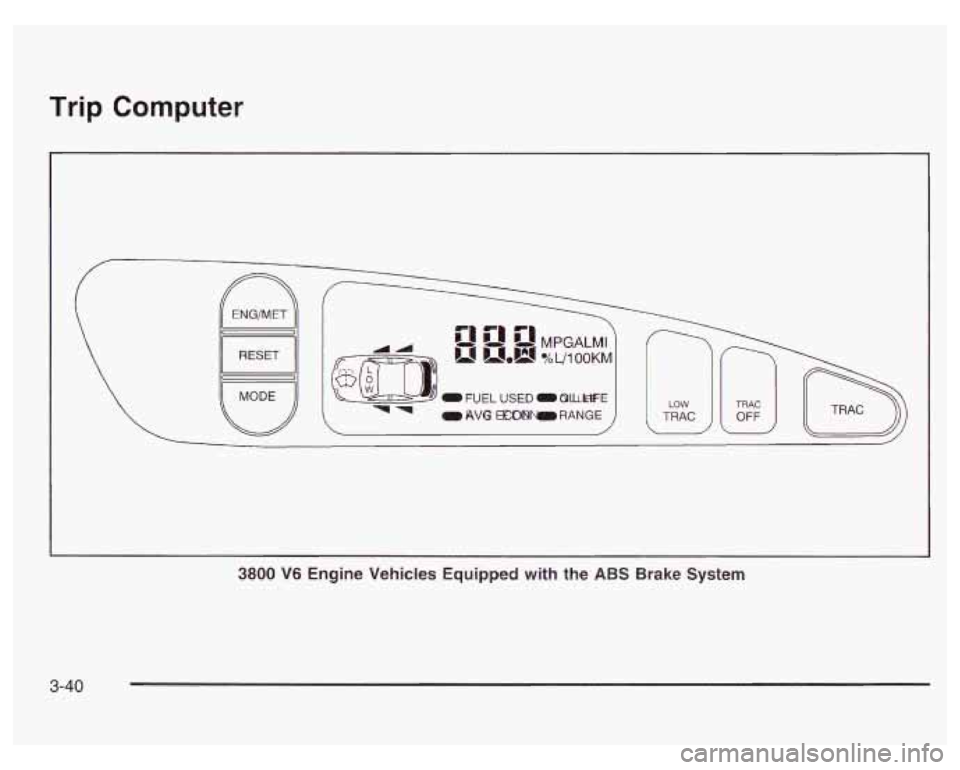
The trip computer has three buttons that control its
functions.
ENG/MET (English/Metric): Press this button to
change the display from English
to metric units or metric
to English.
RESET: Press this button for two seconds to reset the
mode displayed.
MODE: Press this button to change the function mode,
(Fuel Used, AVG ECON, OIL LIFE, RANGE) being
displayed.
OIL LIFE: This shows a percentage of the engine’s oil
remaining useful life. The system predicts remaining
oil life using data from length of drives, coolant
temperature, engine rpm and vehicle speed. Each time
you get an oil change, be sure to reset this function
so that it will give you an accurate percentage. See
“How to Reset the GM Oil Life System” under Engine
Oil on page
5-18.
RANGE: This mode shows how much farther you can
travel with the fuel you have remaining in the gas
tank before refueling. When the range displays
L, for
40 to
50 miles (64.36 to 80.45 km), the display will flash
LOW continuously. The range is calculated from the
AVG ECON value multiplied by the fuel remaining in
the tank.
Functions
LOW: This light will come on the vehicle outline when
FUEL USED: This mode shows the total amount of fuel the ignition is on and the fluid in the washer fluid
used since you last reset it. The amount can be container is low.
displayed in gallons or liters.
AVG ECON (Average Economy): This mode shows
the average fuel economy since you last reset
it.
3-42
Page 166 of 378
Radio with Cassette
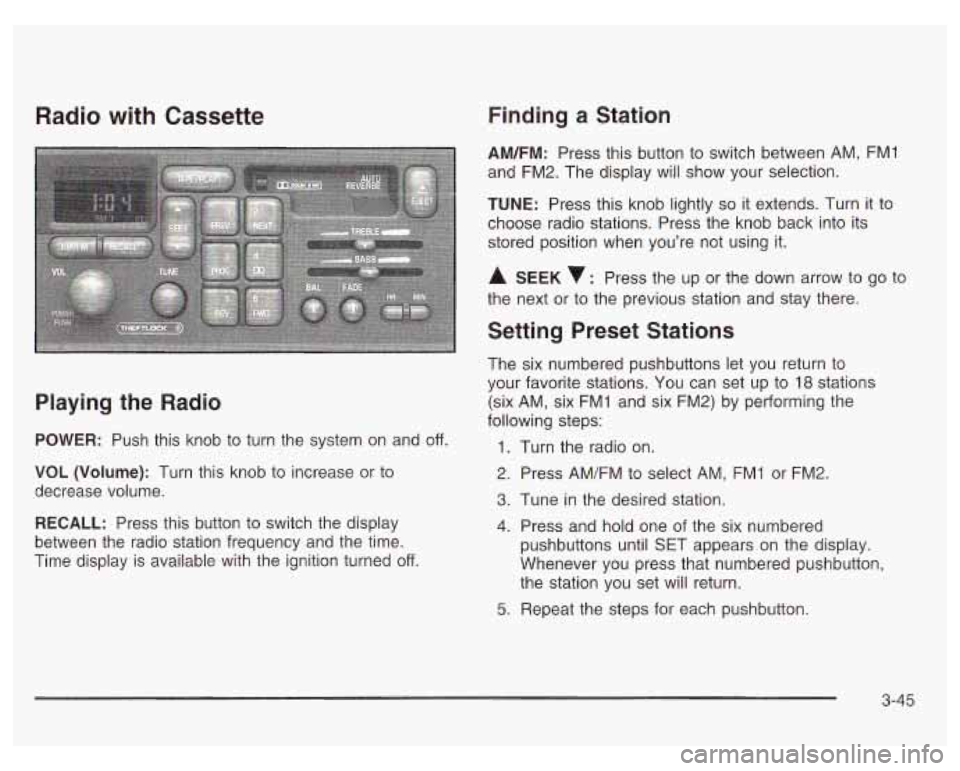
Playing the Radio
POWER: Push this knob to turn the system on and off.
VOL (Volume): Turn this knob to increase or to
decrease volume.
RECALL: Press this button to switch the display
between the radio station frequency and the time.
Time display is available with the ignition turned
off.
Finding a Station
AM/FM: Press this button to switch between AM, FMI
and FM2. The display will show your selection.
TUNE: Press this knob lightly so it extends. Turn it to
choose radio stations. Press the knob back into its
stored position when you’re not using it.
A SEEK : Press the up or the down arrow to go to
the next or to the previous station and stay there.
Setting Preset Stations
The six numbered pushbuttons let you return to
your favorite stations. You can set up to
18 stations
(six AM, six FMI and six FM2) by performing the
following steps:
1.
2.
3.
4.
5.
Turn the radio on.
Press AM/FM to select AM, FMI or FM2.
Tune
in the desired station.
Press and hold one of the six numbered
pushbuttons until SET appears on the display.
Whenever you press that numbered pushbutton,
the station you set will return.
Repeat the steps for each pushbutton.
3-45
Page 170 of 378
Finding a Station
AM/FM: Press this button to switch between AM, FMl
and FM2. The display
will show your selection.
TUNE: Press this knob lightly so it extends. Turn it to
choose radio stations. Press the knob back into its
stored position when you’re not using it.
A SEEK v: Press the up or the down arrow to go to
the next or to the previous station and stay there.
Setting Preset Stations
The six numbered pushbuttons let you return to
your favorite stations. You can set up to
18 stations
(six AM, six
FMI and six FM2) by performing the
following steps:
1.
2.
3.
4.
5.
Turn the radio on.
Press AM/FM to select AM, FMI or FM2.
Tune in the desired station.
Press and hold one of the six numbered
pushbuttons until §ET appears on the display.
Whenever you press that numbered pushbutton,
the station you set will return.
Repeat the steps for each pushbutton.
Setting the Tone (BasdTreble)
BASS: Slide the lever to the right or to the left to
increase or to decrease bass.
TREBLE: Slide the lever to the right or to the left to
increase
or to decrease treble. If a station is weak
or noisy, you may want to decrease the treble.
Adjusting the Speakers (Balance/Fade)
BAL (Balance): Press this knob lightly so it extends.
Turn it to move the sound toward the left or the
right speakers.
FADE: Press this knob lightly so it extends. Turn it to
move the sound toward the front or the rear speakers.
Press these knobs back into their stored positions when
you’re not using them.
3-49