2003 PONTIAC GRAND PRIX dead battery
[x] Cancel search: dead batteryPage 87 of 378

Notice: If your key seems stuck in LOCK and you
can’t turn it, be sure you are using the correct key;
if
so, is it all the way in? Turn the key only with
your hand. Using a tool to force it could break the
key or the ignition switch. If none
of these works,
then your vehicle needs service.
B (LOCK): This position locks the ignition, steering
wheel and transaxle. It’s a theft-deterrent feature. It’s also
the only position from which you can remove the key.
C (OFF): This position lets you turn off the engine but
still turn the steering wheel. It doesn’t lock the
steering wheel like LOCK. Use
OFF if you must have
the vehicle pushed or towed.
D (RUN): This position is where the key returns to after
you start the vehicle. With the engine
off, you can use
RUN to display some of the warning and indicator lights.
E (START): This position starts the engine.
A warning chime will sound
if you open the driver’s door
while the ignition is in
OFF, LOCK or ACCESSORY
and the key is in the ignition.
Retained Accessory Power (RAP)
With Retained Accessory Power, (RAP), the power
windows, audio system and sunroof will continue to work
up to
10 minutes after the ignition key is turned to
OFF and none of the doors are opened.
Starting Your Engine
Move your shift lever to PARK (P) or NEUTRAL (N).
Your engine won’t start in any other position - that’s a
safety feature. To restart while you’re already moving,
use NEUTRAL
(N) only.
Nofice: Don’t try to shift to PARK (P) if your
vehicle is moving.
If you do, you could damage the
transaxle. Shift to
PARK (P) only when your
vehicle is stopped.
Shift Lock Release
This vehicle is equipped with an electric shift lock
release system. The shift lock release is designed to
do the following:
Prevent ignition key removal unless the shift lever is
in PARK (P) with the shift lever button fully released.
Prevent movement of the shift lever out of PARK (P)
unless the ignition is in a position other than
OFF or
LOCK. The shift lock release is always functional
except in the case
of a dead or low voltage
(less than
9 V) battery.
2-20
Page 88 of 378
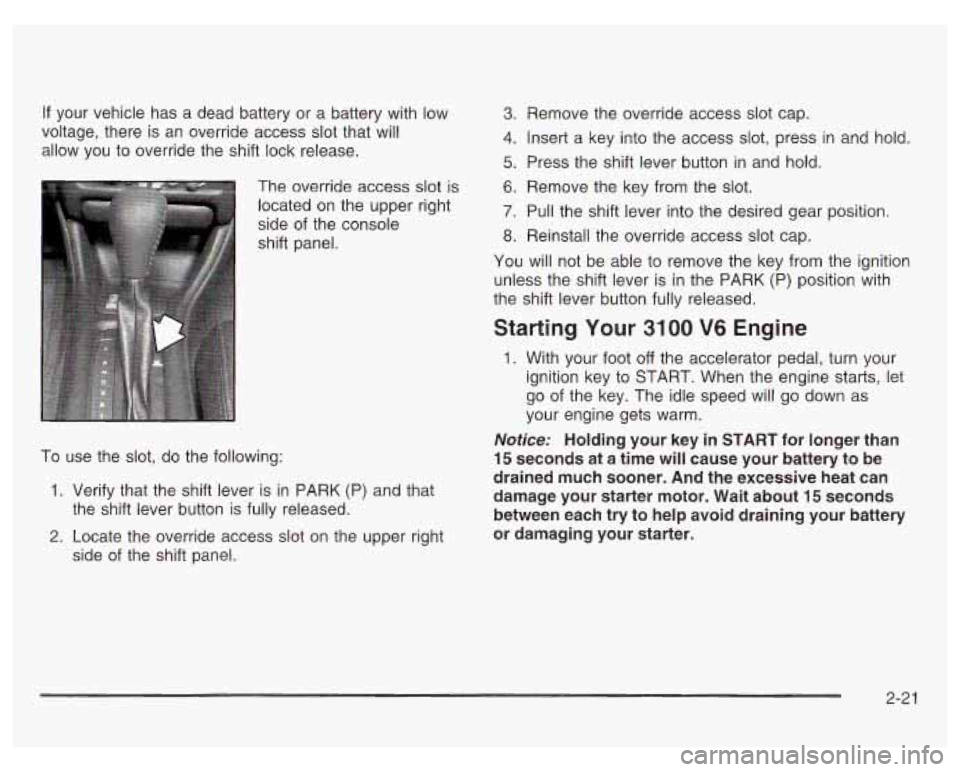
If your vehicle has a dead battery or a battery with low
voltage, there is an override access slot that will
allow you to override the shift lock release.
. ": The override access slot is
located on the upper right
side of the console
shift panel.
To use the slot, do the following:
1. Verify that the shift lever is in PARK (P) and that
2. Locate the override access slot on the upper right
the shift lever button
is fully released.
side of the shift panel.
3. Remove the override access slot cap.
4. insert a key into the access slot, press in and hold.
5. Press the shift lever button in and hold.
6. Remove the key from the slot.
7. Pull the shift lever into the desired gear position.
8. Reinstall the override access slot cap.
You will not be able to remove the key from the ignition
unless the shift lever is in the PARK (P) position with
the shift lever button fully released.
Starting Your 3100 V6 Engine
1. With your foot off the accelerator pedal, turn your
ignition key to START. When the engine starts, let
go of the key. The idle speed will go down as
your engine gets warm.
Notice: Holding your key in START for longer than
15 seconds at a time will cause your battery to be
drained much sooner. And the excessive heat can
damage your starter motor. Wait about
15 seconds
between each try to help avoid draining your battery
or damaging your starter.
2-21
Page 212 of 378
vehicle. This can cause deadly CO (carbon
monoxide) gas to get inside. CO could
overcome you and kill you. You can’t see
it or
smell
it, so you might not know it is in your
vehicle. Clear away snow from around the
base
of your vehicle, especially any that is
blocking your exhaust pipe. And check around
again from time to time to be sure snow
doesn’t collect there.
Open a window just a little on the side of the
vehicle that’s away from the wind. This will
help keep
CO out. I
Run your engine only as long as you must. This saves
fuel. When you run the engine, make it go a little
faster than just idle. That is, push the accelerator
slightly. This uses less fuel for the heat that you get
and it keeps the battery charged. You will need a
well-charged battery to restart the vehicle, and possibly
for signaling later on with your headlamps. Let the
heater run for a while.
Then, shut the engine
off and close the window almost
all the way to preserve the heat. Start the engine
again and repeat this only when you feel really
uncomfortable from the cold. But do it as little as
possible. Preserve the fuel as long as you can.
To help
keep warm, you can get out of the vehicle and do
some fairly vigorous exercises every half hour or
so
until help comes.
4-3 1
Page 277 of 378
Replacing Brake System Parts
The braking system on a vehicle is complex. Its many
parts have to be of top quality and work well together
if
the vehicle is to have really good braking. Your
vehicle was designed and tested with top-quality
GM
brake parts. When you replace parts of your braking
system
- for example, when your brake linings
wear down and you need new ones put in
- be sure
you get new approved
GM replacement parts. If
you don’t, your brakes may no longer work properly.
For example,
if someone puts in brake linings that are
wrong for your vehicle, the balance between your
front and rear brakes can change
- for the worse.
The braking performance you’ve come to expect can
change in many other ways
if someone puts in the
wrong replacement brake parts.
Battery
Your new vehicle comes with a maintenance free
ACDelco@ battery. When it’s time for a new battery, get
one that has the replacement number shown on the
original battery’s label. We recommend an ACDelco@
battery. See Engine Compartment Overview on
page
5- 12 for battery location.
Warning: Battery posts, terminals and related
accessories contain lead and lead compounds,
chemicals known to the State of California to cause
cancer and reproductive harm. Wash hands after
handling.
If your battery has a very low charge or is dead, you
may not be able to remove the ignition key from
the ignition switch or shift out of Park (P). Refer to
Shifting Out of Park
(P) on page 2-30.
5-52
Page 281 of 378
5. Check that the jumper cables don’t have loose or
missing insulation.
If they do, you could get a
shock. The vehicles could be damaged too. Don’t connect positive
(+) to
negative (-), or you’ll get a
short that would damage the battery and maybe
other parts, too. And don’t connect the negative
(-)
cable to the negative (-) terminal on the dead battery
because this can cause sparks.
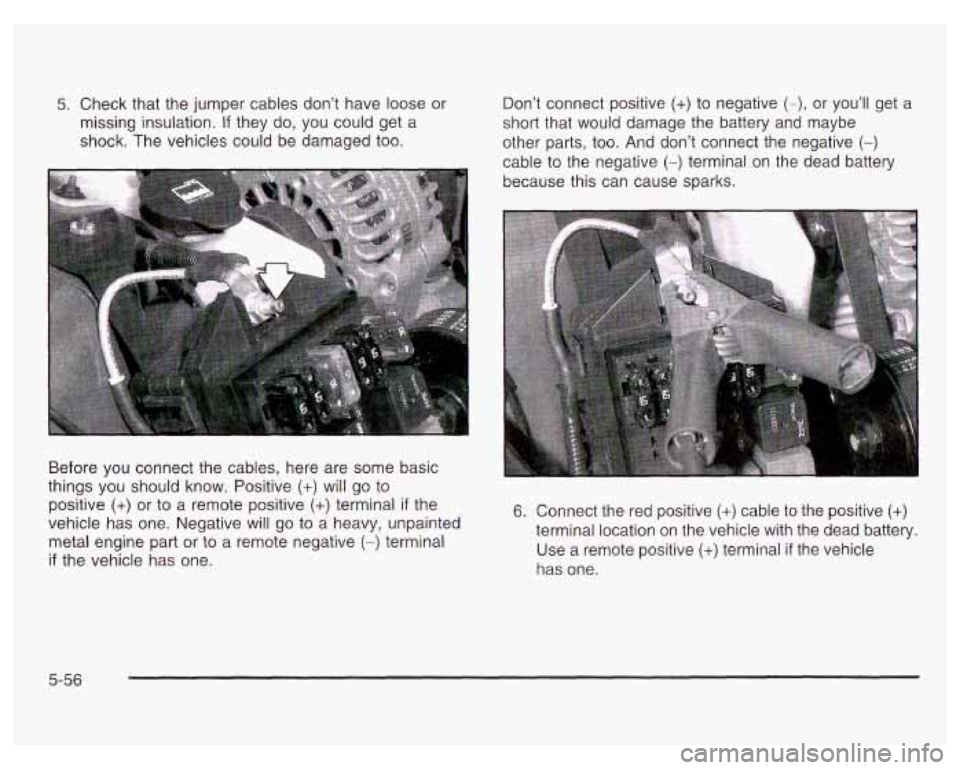
Before you connect the cables, here are some basic
things you should know. Positive
(+) will go to
positive
(+) or to a remote positive (+) terminal if the
vehicle has one. Negative will go to a heavy, unpainted
metal engine part or to a remote negative
(-) terminal
if the vehicle has one.
6. Connect the red positive (+) cable to the positive (+)
terminal location on the vehicle with the dead battery.
Use a remote positive
(+) terminal if the vehicle
has one.
5-56
Page 282 of 378
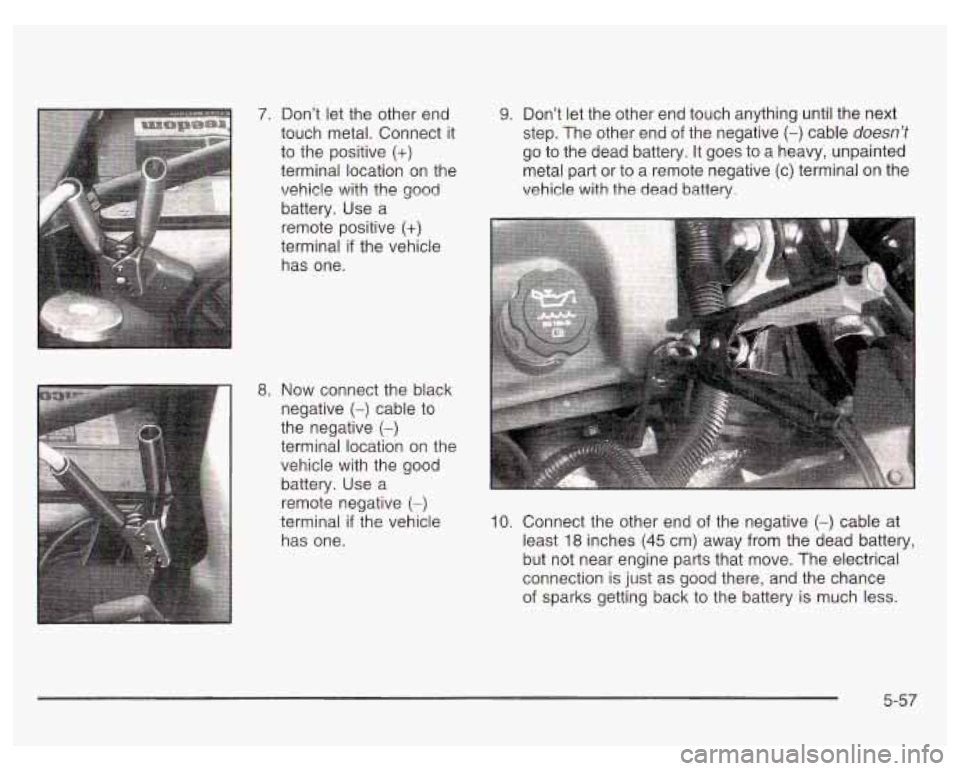
7. Don't let the other end
touch metal. Connect it
to the positive
(+)
terminal location on the
vehicle with the good
battery. Use a
remote positive
(+)
terminal if the vehicle
has one.
9. Don't let the other end touch anything until the next
step. The other end
of the negative (-) cable doesn't
go to the dead battery. It goes to a heavy, unpainted
metal part or to
a remote negative (c) terminal on the
vehicle with the dead battery.
8. Now connect the black
negative
(-) cable to
the negative
(-)
terminal location on the vehicle with the good
battery. Use a
remote negative
(-)
terminal if the vehicle
has one. 10. Connect the other end of the negative (-) cable at
least
18 inches (45 cm) away from the dead battery,
but not near engine parts that move. The electrical
connection is just
as good there, and the chance
of sparks getting back to the battery is much less.
5-57
Page 283 of 378

11. Now start the vehicle with the good battery and run
the engine for a while.
12. Try to start the vehicle that had the dead battery.
If
it won’t start after a few tries, it probably needs
service.
Notice: Damage to your vehicle may result from
electrical shorting
if jumper cables are removed
incorrectly. To prevent electrical shorting, take care
that the cables don’t touch each other or any
other metal. The repairs wouldn’t be covered by
your warranty.
I
w
A. Heavy, Unpainted Metal Engine Part
B. Good Battery or Remote Positive
(+) Terminal
C. Dead Battery or Remote Positive (+) Terminal
To disconnect the jumper cables from both vehicles,
do the following:
1. Disconnect the black negative (-) cable from the
vehicle that had the dead battery.
2. Disconnect the black negative (-) cable from the
vehicle with the good battery.
3. Disconnect the red positive (+) cable from the
vehicle with the good battery.
4. Disconnect the red positive (+) cable from the other
vehicle.
5. Return the remote positive (+) terminal cover to its
original position.
Jumper Cable Removal
5-58