2003 PONTIAC GRAND PRIX CD player
[x] Cancel search: CD playerPage 122 of 378

Section 3 Instrument Panel
Instrument Panel Overview .......................... -3-2
Hazard Warning Flashers
-3-3
Other Warning Devices ................................... 3.4
Horn
............................................................. 3.4
Tilt Wheel
..................................................... 3.4
Turn Signal/Multifunction Lever
......................... 3.5
Exterior Lamps
............................................. 3.10
Interior Lamps
.............................................. 3.12
Head-Up Display (HUD)
................................. 3-15
Accessory Power Outlets
............................... 3.18
Auxiliary Power Connection (Power Drop)
......... 3.19
Ashtrays and Cigarette Lighter
........................ 3-19
Climate Controls ............................................ 3.20
Dual Climate Control System
.......................... 3.20
Outlet Adjustment
......................................... 3.22
Warning Lights, Gages and Indicators ............. 3.23
Instrument Panel Cluster
................................ 3.24
Speedometer and Odometer
........................... 3.25
Tachometer
................................................. 3.25
Safety Belt Reminder Light
............................. 3.26
Air Bag Readiness Light
................................ 3-26
Charging System Light
.................................. 3.27
Brake System Warning Light
......................... -3-28
Anti-Lock Brake System Warning Light
............. 3.29
Traction Control System (TCS) Warning Light
...... 3.29
Enhanced Traction System Warning Light
........ -3-30
.. ...............................
Low Traction Light ....................................... -3-30
Engine Coolant Temperature Gage
.................. 3-31
Malfunction Indicator Lamp
............................ -3-32
Oil Pressure Light
........................................ -3-35
Security Light
............................................... 3-36
Fuel Gage
................................................... 3-37
Low Fuel Warning Light
................................. 3-37
Driver Information Center (DE) ....................... 3-38
Trip Computer ................................... ..... 3-40
Control Buttons
............................................ 3-42
Functions
.................................................... 3-42
Audio System(s) ............................................. 3-44
Setting the Time
........................................... 3-44
Radio with Cassette
...................................... 3-45
Radio with CD (Base Level)
........................... 3-48
Radio with CD
(Up Level) .............................. 3-51
Theft-Deterrent Feature
.................................. 3-54
Engine
Coolant Temperature 'Warning Light
...... 3.31
Low Oil Level Light ....................................... 3-36
Audio Steering Wheel Controls
....................... 3-56
Understanding Radio Reception
...................... 3-57
Care of Your Cassette Tape Player
................. 3-58
Care
of Your CDs ......................................... 3-59
Care of Your CD Player
................................ 3-59
Backglass Antenna
....................................... 3-59
3-
1
Page 139 of 378
If You Can’t See the HUD Image When
the Ignition
Is On
Is anything covering the HUD unit?
Is the HUD dimmer setting bright enough?
Is the HUD image adjusted to the proper height?
Still no HUD image? Check the fuse in the
instrument panel fuse block. See Fuses and
Circuit
Breakers on page 5-97.
If the HUD Image Is Not Clear
Is the HUD image too bright?
Are the windshield and HUD lens clean?
The windshield is part of the HUD system.
If you ever
need a new windshield, be sure to get one designed for
HUD.
If you don’t, the HUD image may look blurred
and out of focus.
Accessory Power Outlets
Your vehicle has a 12-volt outlet which can be used
to plug in electrical equipment such as a cellular
telephone, a compact disc player, etc. It is located on
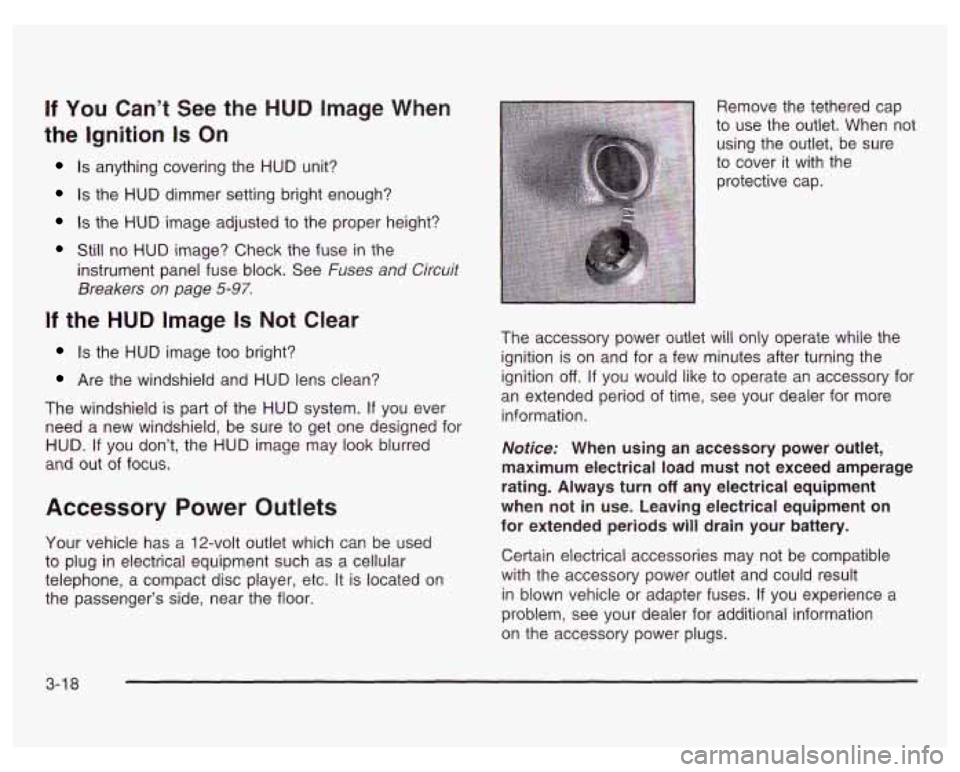
the passenger’s side, near the floor. Remove the tethered cap
to use the outlet. When not
using the outlet, be sure
to cover it with the
protective cap.
The accessory power outlet will only operate while the
ignition is on and for a few minutes after turning the
ignition
off. If you would like to operate an accessory for
an extended period of time, see your dealer for more
information.
Notice: When using an accessory power outlet,
maximum electrical load must not exceed amperage
rating. Always turn
off any electrical equipment
when not in use. Leaving electrical equipment on
for extended periods will drain your battery.
Certain electrical accessories may not be compatible
with the accessory power outlet and could result
in blown vehicle or adapter fuses.
If you experience a
problem, see your dealer for additional information
on the accessory power plugs.
3-1 8
Page 165 of 378
Audio System(s) Your vehicle may have a feature called Retained
Accessory Power (RAP). With RAP, you can play your
audio system even after the ignition is turned
off.
See “Retained Accessory Power (RAP)” under Ignition
Positions on
page 2- 19.
Notice: Before you add any sound equipment to
your vehicle
- like a tape player, CB radio, mobile
telephone or two-way radio
- be sure you can
add what you want. If you can, it’s very important to
do
it properly. Added sound equipment may Setting the Time
interfere with the operation of your vehicle’s engine,
Delphi Electronics radio or other systems, and
Press RECALL, then press and hold HR or MIN for two
even damage them. Your vehicle’s systems may seconds. Then press and hold HR until the correct
interfere with the operation of sound equipment that hour appears on the display. AM or PM will also appear.
has been added improperly. Press and hold MIN until the correct minute appears ~~
So, before adding sound equipment, check with
your dealer and be sure to check federal rules
covering mobile radio and telephone units.
Your audio system has been designed to operate easily
and to give years
of listening pleasure. You will get the
most enjoyment out of it
if you acquaint yourself with it
first. Find out what your audio system can do and how to
operate all
of its controls to be sure you’re getting the
most out
of the advanced engineering that went into it. on
the display. The time can only be set with the
ignition
off.
3-44
Page 167 of 378
Setting the Tone (Bassnreble)
BASS: Slide the lever to the right or to the left to
increase or to decrease bass.
TREBLE: Slide the lever to the right or to the left to
increase or to decrease treble.
If a station is weak
or noisy, you may want to decrease the treble.
Adjusting the Speakers (Balance/Fade)
BAL (Balance): Press this knob lightly so it extends.
Turn this knob to move the sound toward the left or the
right speakers.
FADE: Press this knob lightly so it extends. Turn this
knob to move the sound toward the front or the rear
speakers.
Press these knobs back into their stored positions when
you’re not using them.
Playing a Cassette Tape
Your tape player is built to work best with tapes that are
up to
30 to 45 minutes long on each side. Tapes
longer than that are
so thin they may not work well in
this player. While
the tape is playing, use the VOL, FADE, BAL,
BASS and TREBLE controls just as you
do for the radio.
The display will show an arrow to show which side
of
the tape is playing. When the down indicator arrow is lit,
selections listed on the bottom side of the cassette
are playing. When the up arrow is lit, selections listed
on the top side of the cassette are playing. The
tape player automatically begins playing the other side
when it reaches the end of the tape.
If an error appears on the display, see ‘Cassette Tape
Messages” later in this section.
1 PREV (Previous): Your tape must have at least three
seconds
of silence between each selection for previous
to work. Press this pushbutton to search for the
previous selection on the tape. Press PREV again or
the SEEK down arrow to stop searching.
2 NEXT: Your tape must have at least three seconds of
silence between each selection for next or seek to
work. Press this pushbutton to search for the next
selection on the tape.
If you hold the pushbutton, the
player will continue moving forward through the
tape. Press NEXT again or the SEEK
up arrow to stop
searching.
3 PROG (Program): Press this pushbutton to play the
other side
of the tape.
3-46
Page 168 of 378
4 00 (Dolby): Press this pushbutton to reduce
background noise. The double-D symbol will appear
on the display.
Dolby Noise Reduction is manufactured under a
license from Dolby Laboratories Licensing Corporation.
Dolby and the double-D symbol are trademarks
of
Dolby Laboratories Licensing Corporation.
5 REV (Reverse): Press this pushbutton to reverse the
tape rapidly. Press it again to return to playing speed.
The radio will play while the tape reverses. You
may select stations during reverse operation using
SEEK or TUNE.
6 FWD (Forward): Press this pushbutton to advance
quickly. Press the pushbutton again to return to playing
speed. The radio will play while the tape advances.
You may select stations during forward operation using
SEEK or TUNE.
A SEEK : Press the up or the down arrow to seek
to the next or to the previous selection on the tape.
AM/FM: Press this button to listen to the radio when a
tape
is playing.
TAPE/PLAY: Press this button to change to playing a
tape when listening to the radio. The tape symbol
with an arrow will appear on the display while the tape
is active.
A EJECT: Press this button to stop a tape when it is
playing and to remove a tape when it is not playing.
The eject button may be activated with either the ignition
or radio
off. Cassettes may be loaded with the radio
and ignition
off if this button is pressed first.
Cassette Tape Messages
E (Error): If this message and a number appears while
trying to play a cassette tape, it could be one of the
following:
0 ElO: The tape is tight and the player can’t turn the
tape hubs. Remove the tape. Hold the tape with
the open end down and try to turn the right
hub counterclockwise with a pencil. Turn the tape
over and repeat. If the hubs do not turn easily, your
tape may be damaged and should not be used in
the player. Try a new tape to make sure your player
is working properly.
El 1 : The tape is broken. Try a new tape.
0 E14: Wrapped tape. Try a new tape.
3-47
Page 169 of 378
CLN (Clean): If this message appears on the display,
the cassette tape player needs to be cleaned. It will
still play tapes, but you should clean it as soon as
possible to prevent damage to the tapes and player.
See Care
of Your Cassette Tape Player on page 3-58.
If any error occurs repeatedly or if an error can’t be
corrected, contact your dealer. If your radio displays an
error number, write it down and provide it to your
dealer when reporting the problem.
CD Adapter Kits
It is possible to use a portable CD player adapter kit
with your cassette tape player after activating the bypass
feature on your tape player.
To activate the bypass feature, use the following steps:
1. Turn the ignition on.
2. Turn the radio off.
3. Press and hold TAPE/PLAY for three seconds.
The tape symbol on the display will flash for two
seconds, indicating the feature is active.
power up the radio and begin playing.
4. Insert the adapter into the cassette slot. It will
The override feature will remain active until EJECT is pressed.
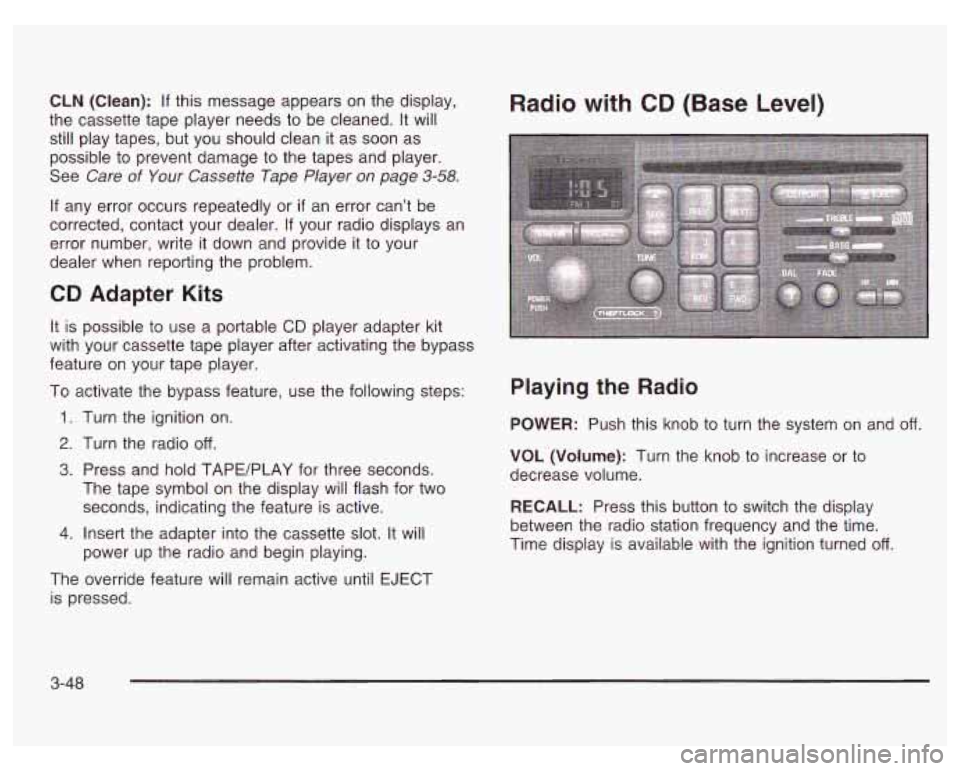
Radio with CD (Base Level)
Playing the Radio
POWER: Push this knob to turn the system on and off.
VOL (Volume): Turn the knob to increase or to
decrease volume.
RECALL: Press this button to switch the display
between the radio station frequency and the time.
Time display is available with the ignition turned
off.
3-48
Page 171 of 378
Playing a Compact Disc
Insert a disc partway into the slot, label side up.
The player will pull it in. The compact disc symbol will
appear on the display. If the ignition and the radio
are on, the disc will begin playing. CD will appear on
the display next to the compact disc symbol.
If you want
to insert a disc when the ignition is
off, first press the
EJECT button.
The integral CD player can play the smaller
8 cm single
discs with an adapter ring. Full-size compact discs
and the smaller discs are loaded in the same manner.
If an error appears on the display, see “Compact
Disc Messages” later in this section.
1 PREV (Previous): Press this pushbutton to go to the
start
of the current track if more than eight seconds
have played.
If you hold the pushbutton or press it more
than once, the player will continue moving back
through the disc.
2 NEXT: Press this pushbutton to go to the start of
the next track.
If you hold the pushbutton or press
it more than once, the player will continue moving
forward through the disc.
3 RDM (Random): Press this pushbutton to hear the
tracks in random, rather than sequential, order. The
display will show RDM. Press RDM again to turn
off random play.
5 REV (Reverse): Press and hold this pushbutton to
quickly reverse within a track. You will hear sound at a
reduced volume. The display will show elapsed time.
6 FWD (Forward): Press and hold this pushbutton to
quickly advance within a track. You wiil hear sound at a
reduced volume. The display will show elapsed time.
A SEEK v: Press the up or the down arrow to go to
the next or to the previous selection on the tape.
RECALL: Press this button to see what track is
currently playing. Press it again within five seconds
to
see how long the track has been playing. When a
new track starts
to play, the track number will also
appear. Press it
a third time and the time of day will be
displayed.
AM/FM: Press this button to listen to the radio when
a CD is playing. The CD will stop but remain in the
player.
CD/PLAY: Press this button to play a CD when
listening
to the radio.
4 EJECT: Press this button to stop a CD when it is
playing or
to remove a CD when it is not playing.
The EJECT button will work with the radio
off.
3-50
Page 174 of 378
Playing a Compact Disc
Insert a disc partway into the slot, label side up. The
player will pull it in. The compact disc symbol will appear
on the display. If the ignition and the radio are on, the disc
will begin playing. CD will appear on the display next to
the compact disc symbol. If you want to insert a disc
when the ignition is
off, first press the EJECT button.
The integral CD player can play the smaller
8 cm single
discs. Full-size compact discs and the smaller discs
are loaded in the same manner.
If an error appears on the display, see “Compact Disc
Messages” later in this section.
1 PREV (Previous): Press this pushbutton to go to the
start of the current track
if more than eight seconds
have played. If you hold the pushbutton or press it more
than once, the player will continue moving back
through the disc.
2 NEXT: Press this pushbutton to go to the start of
the next track.
If you hold the pushbutton or press
it more than once, the player will continue moving
forward through the disc.
3 RDM (Random): Press this pushbutton to hear the
tracks in random, rather than sequential, order. The
display will show RDM. Press RDM again to turn
off random play.
5 REV (Reversej: Press and hoid this pushbutton to
quickly reverse within a track. You will hear sound at a
reduced volume. The display will show elapsed time.
6 FWD (Forward): Press and hold this pushbutton
to quickly advance forward within a track. You will hear
sound at a reduced volume. The display will show
elapsed time.
A SEEK : Press the up or the down arrow to go to
the next or to the previous track.
RECALL: Press this button to see what track is
currently playing. Press it again within five seconds to
see how long the track has been playing. When
a
new track starts to play, the track number will also
appear. Press it a third time and the time of day will be
displayed.
AM/FM: Press this button to listen to the radio when a
disc is playing. The disc will stop but remain in the
player.
3-53