2003 PONTIAC GRAND PRIX change time
[x] Cancel search: change timePage 3 of 378

PONTIAC I ~~
GENERAL MOTORS, GM, the GM Emblem, PONTIAC,
the PONTIAC Emblem and the name GRAND PRlX
are registered trademarks of General Motors
Corporation.
This manual includes the latest information at the time it
was printed. We reserve the right to make changes
after that time without further notice. For vehicles first
sold in Canada, substitute the name “General Motors of
Canada Limited” for Pontiac Division whenever it
appears in this manual.
Please keep this manual in your vehicle,
so it will be
there
if you ever need it when you’re on the road. If you
sell the vehicle, please leave this manual in it
so the
new owner can use it.
Canadian Owners
You can obtain a French copy of this manual from your
dealer or from:
Helm, Incorporated P.O. Box 07130
Detroit,
MI 48207
How to Use This Manual
Many people read their owner’s manual from beginning
to end when they first receive their new vehicle.
If
you do this, it will help you learn about the features and
controls for your vehicle. In this manual, you’ll find
that pictures and words work together to explain things.
Index
A good place to look for what you need is the Index in
back of the manual. It’s an alphabetical list of what’s
in the manual, and the page number where you’ll find it.
Litho in U.S.A. OCopyright General Motors Corporation 06/26/02
Part No. 10325260 A First Edition All Rights Reserved
ii
Page 39 of 378

Infants and Young Children
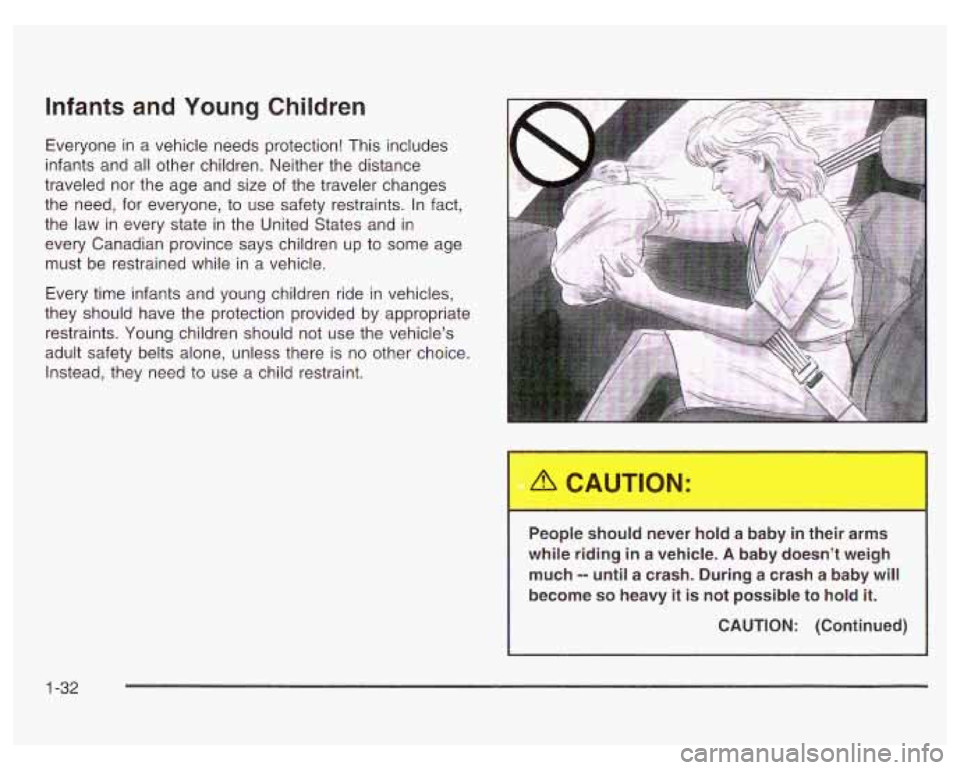
Everyone in a vehicle needs protection! This includes
infants and all other children. Neither the distance
traveled nor the age and size of the traveler changes
the need, for everyone, to use safety restraints. In fact,
the law in every state in the United States and in
every Canadian province says children up to some age
must be restrained while in a vehicle.
Every time infants and young children ride in vehicles,
they should have the protection provided
by appropriate
restraints. Young children should not use the vehicle’s
adult safety belts alone, unless there is no other choice.
Instead, they need to use a child restraint.
c
People should never hold a baby in their arms
while riding in
a vehicle. A baby doesn’t weigh
much
-- until a crash. During a crash a baby will
become
so heavy it is not possible to hold it.
CAUTION: (Continued)
1 -32
Page 73 of 378

UNLOCK: When you press the UNLOCK button, only
the driver’s door will unlock.
If you press UNLOCK again
within five seconds, all the doors will unlock. If you
would like all the doors to unlock the first time you press
UNLOCK, see Power Door
Locks on page 2-9 The
UNLOCK button on the remote keyless entry transmitter
will disarm the content theft deterrent system. See
Content Theft-Deterrent
on page 2-75 for more details.
(Open Trunk): Press the button with the trunk
symbol to open your trunk. The transaxle must be
in PARK
(P) for this feature to operate.
.& (Remote Alarm): When you press the button with
the horn symbol, the headlamps will flash and the
horn will sound. This will allow you to attract attention
if needed.
Your vehicle may have Remote Lock/Unlock
Confirmation. This feature provides feedback to the
holder of the remote keyless entry transmitter that
a command has been received by the keyless entry
receiver.
To signal that a command has been received,
the headlamps will flash and the horn may sound
briefly. See Vehicle Personalization on page
2-43 for
programming information.
Matching Transmitter(s) to Your
Vehicle
Each remote keyless entry transmitter is coded to
prevent another transmitter from unlocking your vehicle.
If a transmitter is lost or stolen, a replacement can
be purchased through your dealer. Remember to bring
any remaining transmitters with you when you go to
your dealer. When the dealer matches the replacement
transmitter to your vehicle, any remaining transmitters
must
also be matched. Once your dealer has coded the
new transmitter, the lost transmitter will not unlock
your vehicle. Each vehicle can have a maximum of four
transmitters matched to it.
Battery Replacement
Under normal use, the battery in your remote keyless
entry transmitter should last about three years.
You can tell the battery is weak
if the transmitter won’t
work at the normal range in any location. If you have
to get close to your vehicle before the transmitter works,
it’s probably time to change the battery.
Page 84 of 378

Changes or modifications to this system by other than
an authorized service facility could void authorization to
use this equipment.
PASS-Key@
Ill uses a radio frequency transponder in
the key that matches a decoder in your vehicle.
PASS-Key@ 111 Operation
Your vehicle is equipped with PASS-Key@ Ill
(Personalized Automotive Security System)
theft-deterrent system. PASS-Key@
Ill is a passive
theft-deterrent system. This means you don’t have to do
anything special to arm or disarm the system. It works
when you insert or remove the key from the ignition.
When the PASS-Key@
Ill system senses that someone
is using the wrong key, it shuts down the vehicle’s
starter and fuel systems. The starter will not work and
fuel will stop being delivered
to the engine. Anyone
using a trial-and-error method to start the vehicle will
be
discouraged because of the high number of electrical
key codes.
When trying to start the vehicle
if the engine does not
start and the SECURITY light comes on, the key
may have a damaged transponder. Turn the ignition
off and try again.
If the engine still does not start, and the key appears
to be undamaged, try another ignition key. At this time,
you may also want to check the fuse, see Fuses
and Circuit Breakers
on page 5-97. If the engine still
does not start with the other key, your vehicle needs
service.
If your vehicle does start, the first key may
be faulty. See your dealer who can service the
PASS-Key@
Ill to have a new key made. In an
emergency, contact Pontiac Roadside Assistance.
See Roadside Assistance Program
on page 7-5 for
more information.
It is possible for the PASS-Key@
Ill decoder to learn
the transponder value of a new or replacement key.
Up to
10 additional keys may be programmed for
the vehicle. This procedure is for learning additional
keys only.
If all the currently programmed keys are lost
or do not operate, you must see your dealer or a
locksmith who can service PASS-Key@
Ill to have keys
made and programmed to the system.
See your dealer or a locksmith who can service
PASS-Key@
Ill to get a new key blank that is cut exactly
as the ignition key that operates the system.
2-1 7
Page 89 of 378

2. If your engine won’t start (or starts but then stops),
it could be flooded with too much gasoline. Try
pushing your accelerator pedal all the way to the
floor and holding it there as you hold the key
in START for not more than 15 seconds at a time.
This clears the extra gasoline from the engine.
Notice: Your engine is designed to work with the
electronics
in your vehicle. If you add electrical
parts or accessories, you could change the way the
engine operates. Before adding electrical equipment,
check with your dealer. If you don’t, your engine might not perform properly.
Starting Your 3800 Series II V6 Engine
1. With your foot off the accelerator pedal, turn
your ignition key to START. When the engine starts,
let go of the key. The idle speed will go down as
your engine gets warm.
Notice: Holding your key in START for longer than
15 seconds at a time will cause your battery to be
drained much sooner. And
the excessive heat can
damage your starter motor. Wait about
15 seconds
between each try to help avoid draining your battery
or damaging your starter.
2. If it doesn’t start within 10 seconds, hold your key in
START for about 10 seconds at a time until your
engine starts. Wait about 15 seconds between
each try.
3. If your engine still won’t start (or starts but then
stops), it could be flooded with too much gasoline.
Try pushing your accelerator pedal all the way to the
floor and holding it there as you hold the key in
START for about three seconds. If the vehicle starts
briefly but then stops again, do the same thing.
This time keep the pedal down for five or six
seconds to clear the extra gasoline from the engine.
After waiting about 15 seconds, repeat the normal
starting procedure.
Notice: Your engine is designed to work with the
electronics in your vehicle.
If you add electrical
parts or accessories, you could change the way the
engine operates. Before adding electrical equipment,
check with your dealer. If you don’t, your engine
might not perform properly.
2-22
Page 100 of 378

Mirrors
Manual Rearview Mirror
To reduce glare from lamps behind you, pull the lever
located in the center of the bottom of the mirror
toward you to the night position. To return the mirror
back
to the day position, push the lever away from you. The mirror also has an eight-point compass and
temperature display in the
upper right corner on the
mirror face and a three-button Onstar@ system.
When the automatic dimming feature is turned on,
the mirror automatically changes
to reduce glare from
headlamps behind you. A photocell
on the mirror senses
when it is becoming dark outside. Another photocell
built into the mirror face senses when headlamps
are behind you.
Automatic Dimming Rearview
Mirror with Onstar@, Compass and
a few seconds. The mirror will return to its clear,
Temperature Display
At night, when the glare is too bright, the mirror will
gradually darken to reduce glare. This change may take
daytime state when the glare is reduced.
Mirror Operation
(On/Off): The button with this symbol is the on/off
button for the mirror functions such as automatic
dimming and temperature display. It is the far left button
located on the lower part of the mirror face.
A light on the mirror will be lit while the feature is
turned on.
Your vehicle may have an automatic-dimming rearview
mirror with a compass and temperature display and
the Onstar@ system.
2-33
Page 111 of 378

Entering Programming Mode
To program features, your vehicle must be in this
programming mode. Follow these steps:
1. Turn the ignition key to LOCK or OFF.
2. Remove the MALL
PGM fuse from the instrument
panel fuse block. See Fuses and Circuit Breakers
on page
5-97.
3. Turn the ignition key to ACCESSORY.
4. Count the number of chimes you hear. You will
hear up to four chimes, depending on vehicle
content. See “Vehicle Personalization’’ listed
previously.
YOU can now program your choices. After programming
a feature, you can exit the programming mode at
any time.
Delayed Illumination and Exit
Lighting
With delayed illumination, the interior lamps will stay on
for about 25 seconds after all doors are closed.
With exit lighting, the interior lamps will come on and
stay on for about
25 seconds whenever you remove the
key from the ignition.
Programmable Modes
Mode 1: Both Features Off - The interior lamps will
turn on or off at the same instant that a door is opened
or closed.
Mode 2: Delayed Illurnination Only -The interior lamps
will stay on for about
25 seconds after all the doors
are closed, or until you lock the doors.
Mode 3: Exit Lighting Only -The interior lamps will
come on whenever you remove the key from the ignition
and stay
on for about 25 seconds, or until you lock
the doors.
Mode 4: Both Features On -This combines Modes 2
and 3.
Before your vehicle was shipped from the factory, it was
programmed to Mode
4. The mode to which your
vehicle was programmed may have been changed since
it left the factory. To determine the mode
to which
your vehicle is programmed or to program your vehicle
to a different mode, do the following:
1. Follow the instructions for Entering Programming
2. Turn the interior lamps thumbwheel all the way to
Mode
on page 2-44.
the right
and then back slightly to the left.
2-44
Page 132 of 378

Daytime Running Lamps (DRL) /
Automatic Headlamp System
Daytime Running Lamps (BRL) can make it easier for
others
to see the front of y~ur vehicle during the
day. DRL can be helpful in many different driving
conditions, but they can be especially helpful in the short
periods after dawn and before sunset. Fully functional
daytime running lamps are required on all vehicles
first sold in Canada.
A light sensor on top of the instrument panel makes the
DRL work,
so be sure it isn’t covered.
The DRL system will make your low-beam headlamps
come on at a reduced brightness when the following
conditions are met:
The ignition is on,
0 the exterior lamps control is off,
0 the transaxle is not in PARK (P) and
the parking brake is released. When
the DRL are on, only your low-beam headlamps,
at a reduced brightness, will be on. The taillamps,
sidemarker and other lamps won’t be on. Your
instrument panel won’t be lit up either.
When it’s dark enough outside, your headlamps
will
change to full brightness. The other lamps that come on
with your headlamps will also come on.
When it’s bright enough outside, the headlamps will go
out, and your low-beam headlamps will change to
the reduced brightness of DRL.
To idle your vehicle with the DRL off, set the parking
brake while the ignition is in OFF or LOCK. Then
start your vehicle. The DRL will stay
off until you shift
out of PARK (P) and release the parking brake.
As with any vehicle, you should turn on the regular
headlamps system when you need
it.
3-1 1