2003 PONTIAC GRAND PRIX fuses
[x] Cancel search: fusesPage 84 of 378

Changes or modifications to this system by other than
an authorized service facility could void authorization to
use this equipment.
PASS-Key@
Ill uses a radio frequency transponder in
the key that matches a decoder in your vehicle.
PASS-Key@ 111 Operation
Your vehicle is equipped with PASS-Key@ Ill
(Personalized Automotive Security System)
theft-deterrent system. PASS-Key@
Ill is a passive
theft-deterrent system. This means you don’t have to do
anything special to arm or disarm the system. It works
when you insert or remove the key from the ignition.
When the PASS-Key@
Ill system senses that someone
is using the wrong key, it shuts down the vehicle’s
starter and fuel systems. The starter will not work and
fuel will stop being delivered
to the engine. Anyone
using a trial-and-error method to start the vehicle will
be
discouraged because of the high number of electrical
key codes.
When trying to start the vehicle
if the engine does not
start and the SECURITY light comes on, the key
may have a damaged transponder. Turn the ignition
off and try again.
If the engine still does not start, and the key appears
to be undamaged, try another ignition key. At this time,
you may also want to check the fuse, see Fuses
and Circuit Breakers
on page 5-97. If the engine still
does not start with the other key, your vehicle needs
service.
If your vehicle does start, the first key may
be faulty. See your dealer who can service the
PASS-Key@
Ill to have a new key made. In an
emergency, contact Pontiac Roadside Assistance.
See Roadside Assistance Program
on page 7-5 for
more information.
It is possible for the PASS-Key@
Ill decoder to learn
the transponder value of a new or replacement key.
Up to
10 additional keys may be programmed for
the vehicle. This procedure is for learning additional
keys only.
If all the currently programmed keys are lost
or do not operate, you must see your dealer or a
locksmith who can service PASS-Key@
Ill to have keys
made and programmed to the system.
See your dealer or a locksmith who can service
PASS-Key@
Ill to get a new key blank that is cut exactly
as the ignition key that operates the system.
2-1 7
Page 111 of 378
Entering Programming Mode
To program features, your vehicle must be in this
programming mode. Follow these steps:
1. Turn the ignition key to LOCK or OFF.
2. Remove the MALL
PGM fuse from the instrument
panel fuse block. See Fuses and Circuit Breakers
on page
5-97.
3. Turn the ignition key to ACCESSORY.
4. Count the number of chimes you hear. You will
hear up to four chimes, depending on vehicle
content. See “Vehicle Personalization’’ listed
previously.
YOU can now program your choices. After programming
a feature, you can exit the programming mode at
any time.
Delayed Illumination and Exit
Lighting
With delayed illumination, the interior lamps will stay on
for about 25 seconds after all doors are closed.
With exit lighting, the interior lamps will come on and
stay on for about
25 seconds whenever you remove the
key from the ignition.
Programmable Modes
Mode 1: Both Features Off - The interior lamps will
turn on or off at the same instant that a door is opened
or closed.
Mode 2: Delayed Illurnination Only -The interior lamps
will stay on for about
25 seconds after all the doors
are closed, or until you lock the doors.
Mode 3: Exit Lighting Only -The interior lamps will
come on whenever you remove the key from the ignition
and stay
on for about 25 seconds, or until you lock
the doors.
Mode 4: Both Features On -This combines Modes 2
and 3.
Before your vehicle was shipped from the factory, it was
programmed to Mode
4. The mode to which your
vehicle was programmed may have been changed since
it left the factory. To determine the mode
to which
your vehicle is programmed or to program your vehicle
to a different mode, do the following:
1. Follow the instructions for Entering Programming
2. Turn the interior lamps thumbwheel all the way to
Mode
on page 2-44.
the right
and then back slightly to the left.
2-44
Page 127 of 378
As you signal a turn or a lane change, if the arrow
flashes faster than normal, a signal bulb may be burned
out and other drivers won’t see your turn signal.
If a bulb is burned out, replace it to help avoid an
accident.
If the arrows don’t go on at all when you signal
a turn, check for burned-out bulbs and then check the
fuse. See Fuses and Circuit Breakers
on page 5-97.
A chime will sound if you leave the turn signal on
for more than
3/4 mile (1.2 km).
Headlamp High/Low-Beam Changer
To change the headlamps from low-beam to high-beam,
or high to low, pull the multifunction lever
all the way
toward you. Then release it.
When the high beams are
on, this light on the
instrument panel cluster
will appear. While the high-beam headlamps are
on, the fog lamps will
not illuminate.
If your vehicle is equipped with the Head-Up-Display
(HUD), an arrow will appear in the display area to
indicate that the high beams are on. See Head-Up
Display
(HUD) on page 3-75 for more information.
Flash-to-Pass
This feature lets you use the high-beam headlamps to
signal a driver in front of you that you want to pass.
It works even
if your headlamps are in the automatic or
off position.
To use it, pull the turn signal lever toward you, then
release it.
If the headlamps are in the automatic position or on
low-beam, the high-beam headlamps will turn on and the
high-beam indicator on the instrument panel cluster
will come on. They will stay on as long as you hold the
lever toward you. Release the lever to return to the
initial position.
If your vehicle is equipped with the Head-Up-Display
(HUD), an arrow will appear in the display area to
indicate that the high beams are on.
3-6
Page 139 of 378
If You Can’t See the HUD Image When
the Ignition
Is On
Is anything covering the HUD unit?
Is the HUD dimmer setting bright enough?
Is the HUD image adjusted to the proper height?
Still no HUD image? Check the fuse in the
instrument panel fuse block. See Fuses and
Circuit
Breakers on page 5-97.
If the HUD Image Is Not Clear
Is the HUD image too bright?
Are the windshield and HUD lens clean?
The windshield is part of the HUD system.
If you ever
need a new windshield, be sure to get one designed for
HUD.
If you don’t, the HUD image may look blurred
and out of focus.
Accessory Power Outlets
Your vehicle has a 12-volt outlet which can be used
to plug in electrical equipment such as a cellular
telephone, a compact disc player, etc. It is located on
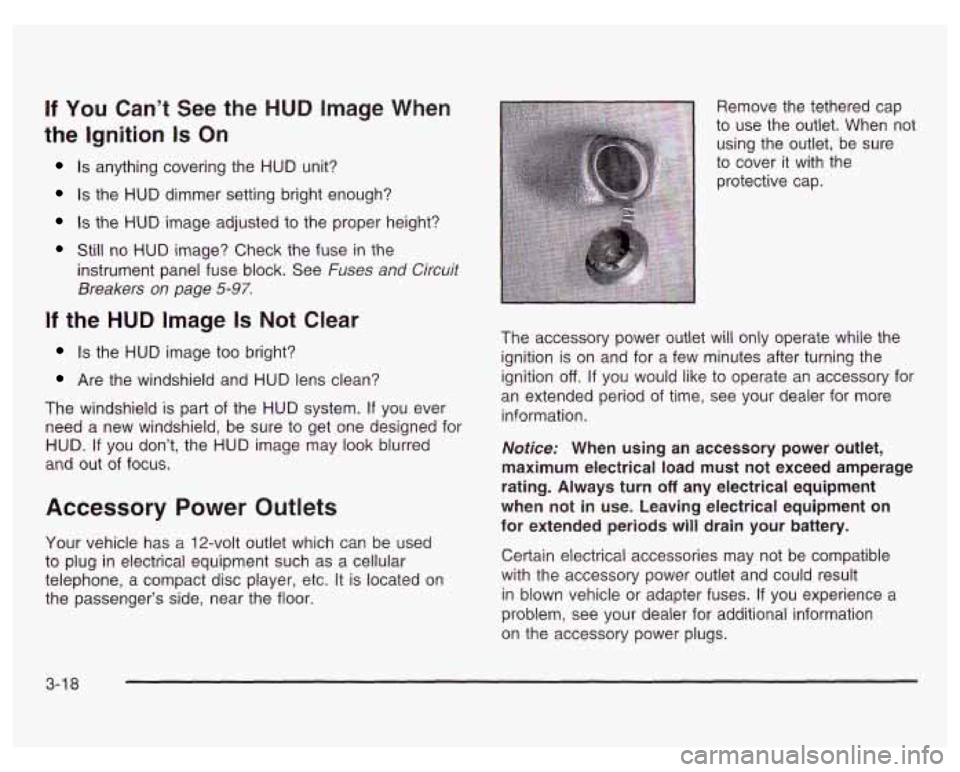
the passenger’s side, near the floor. Remove the tethered cap
to use the outlet. When not
using the outlet, be sure
to cover it with the
protective cap.
The accessory power outlet will only operate while the
ignition is on and for a few minutes after turning the
ignition
off. If you would like to operate an accessory for
an extended period of time, see your dealer for more
information.
Notice: When using an accessory power outlet,
maximum electrical load must not exceed amperage
rating. Always turn
off any electrical equipment
when not in use. Leaving electrical equipment on
for extended periods will drain your battery.
Certain electrical accessories may not be compatible
with the accessory power outlet and could result
in blown vehicle or adapter fuses.
If you experience a
problem, see your dealer for additional information
on the accessory power plugs.
3-1 8
Page 227 of 378
Section 5 Service and Appearance Care
Appearance Care ............................................ 5.88
Cleaning the Inside of Your Vehicle ................. 5-88
Weatherstrips ............................................... 5-91
Sheet Metal Damage
..................................... 5-93
Finish Damage
............................................. 5-93
Underbody Maintenance
................................ 5-93
Chemical Paint Spotting
................................. 5-94
GM Vehicle CarelAppearance Materials
......... -5-94
Vehicle Identification ...................................... 5-96
Vehicle Identification Number (VIN)
................. 5-96
Service Parts Identification Label
..................... 5-96
Care
of Safety Belts
...................................... 5-91
Cleaning the Outside of Your Vehicle
.............. 5-91
Electrical System .................................... 5.97
Add-on Electrical Equipment
.......................... 5.97
Headlamp Wiring
......................................... 5-97
Windshield Wiper Fuses
................................ 5.97
Power Windows and Other Power Options
....... 5-97
Fuses and Circuit Breakers
........................... 5-97
Capacities and Specifications ........................ 5.102
Capacities and Specifications
........................ 5.102
Normal Maintenance Replacement Parts ......... 5.104
Normal Maintenance Replacement Parts
......... 5.104
5-2
Page 322 of 378
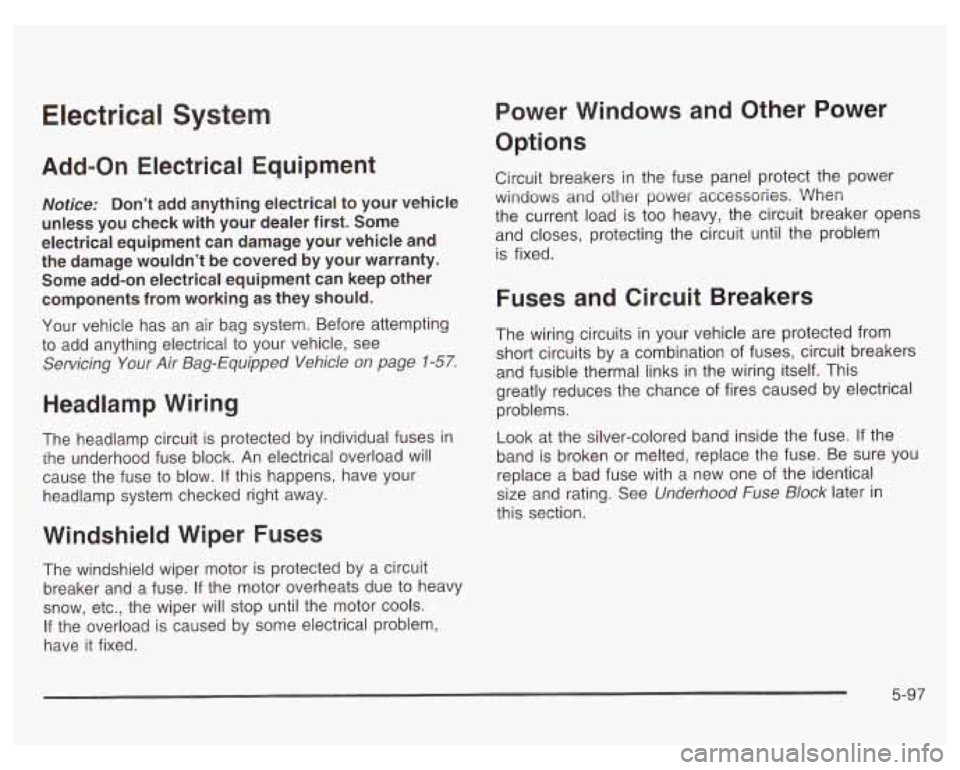
Electrical System
Add-on Electrical Equipment
Notice: Don’t add anything electrical to your vehicle
unless you check with your dealer first. Some
electrical equipment can damage your vehicle and
the damage wouldn’t be covered by your warranty.
Some add-on electrical equipment can keep other
components from working as they should.
Your vehicle has an air bag system. Before attempting
to add anything electrical to your vehicle, see
Servicing Your Air Bag-Equipped Vehicle on page
1-57.
Headlamp Wiring
The headlamp circuit is protected by individual fuses in
the underhood fuse block. An electrical overload will
cause the fuse to blow. If this happens, have your
headlamp system checked right away.
Windshield Wiper Fuses
The windshield wiper motor is protected by a circuit
breaker and
a fuse. If the motor overheats due to heavy
snow, etc., the wiper will stop until the motor cools.
If the overload is caused by some electrical problem,
have it fixed.
Power Windows and Other Power
Options
Circuit breakers in the fuse panel protect the power
windows
and other power accessories. When
the current load is too heavy, the circuit breaker opens
and closes, protecting the circuit until the problem
is fixed.
Fuses and Circuit Breakers
The wiring circuits in your vehicle are protected from
short circuits by a combination of fuses, circuit breakers
and fusible thermal links in the wiring itself. This
greatly reduces the chance of fires caused by electrical
problems.
Look at the silver-colored band inside the fuse. If the
band is broken or melted, replace the fuse. Be sure you
replace a bad fuse with a new one of the identical
size and rating. See Underhood Fuse Block later in
this section.
5-97
Page 323 of 378

Instrument Panel Fuse Block
Some fuses are in a fuse block located inside of the
glove box behind a small bin on the right side.
To open,
pull the cover out. The fuse block is inside. On the
back edge of this cover is a fuse usage chart.
To reinstall the bin, position the lower end and turn the
top into position. Press on the sides until it snaps
into place.
CIRCUIT
BREAKERS
(HEADLAMPI
I
I I MALLPGM I MALL I WIPER I I STR WHL
ILLUM I 'TT:rL SUNROOF RADIO
PASSKEY
111
CRUISE
I PWR LOCK
HAZARD
r
FUSE USAGE CHARTI I
STOP LAMP
I/P-IGN HSEATILUM
PWR MIR
ONSTAR
SIR
HVAC
CTRL
R DEFOG
HVAC
HI
TURN
BTSl
DICIHVAC
For More Information. See Owner's Manual
Circuit
Usage
Breakers
HEADLAMP Headlamps
SEAT Power Seat, Power Lumbar
BLANK Blank
PWR WDO Power Windows
I BLANK Bian k
BLANK Blank
BLANK Blank
5-98
Page 325 of 378
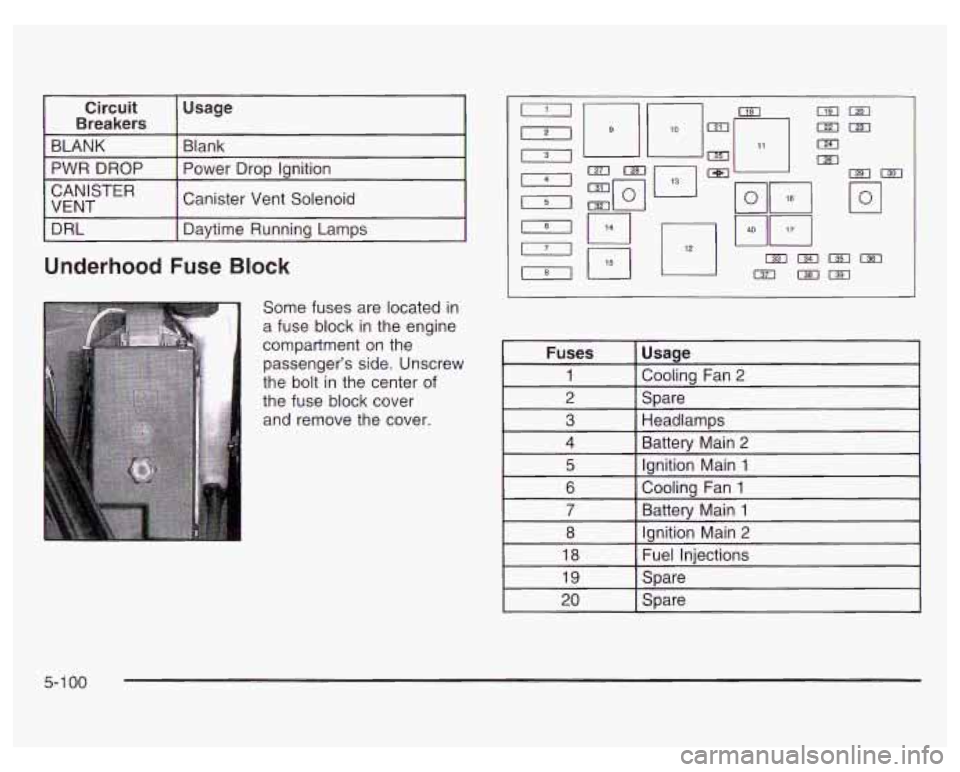
Circuit Usage
Breakers
BLANK Blank - -. . . . . - . - . . . -
I PWR DROP I Power Droo lanition
CAN I
STE R
VENT
1- il
Canister Vent Solenoid
I DRL I Davtime Runnina Lamos I
Underhood Fuse Block
Fuses Usage
Cooling Fan 2
Spare
Headlamps
4 Battery Main 2
5 Ignition Main 1
5-1 00