Page 3473 of 3502

FRONT WIPER AND WASHER SYSTEM
WW-35
C
D
E
F
G
H
I
J
L
MA
B
WW
INSTALLATION
1. Install front wiper drive assembly to the vehicle.
2. Connect wiper motor connector. Turn front wiper switch ON to operate wiper motor, and then turn front
wiper switch OFF (auto stop).
3. Install cowl top cover. Refer to EI-21, "
COWL TOP" .
4. Install wiper arms and arm caps. Refer to WW-34, "
INSTALLATION" .
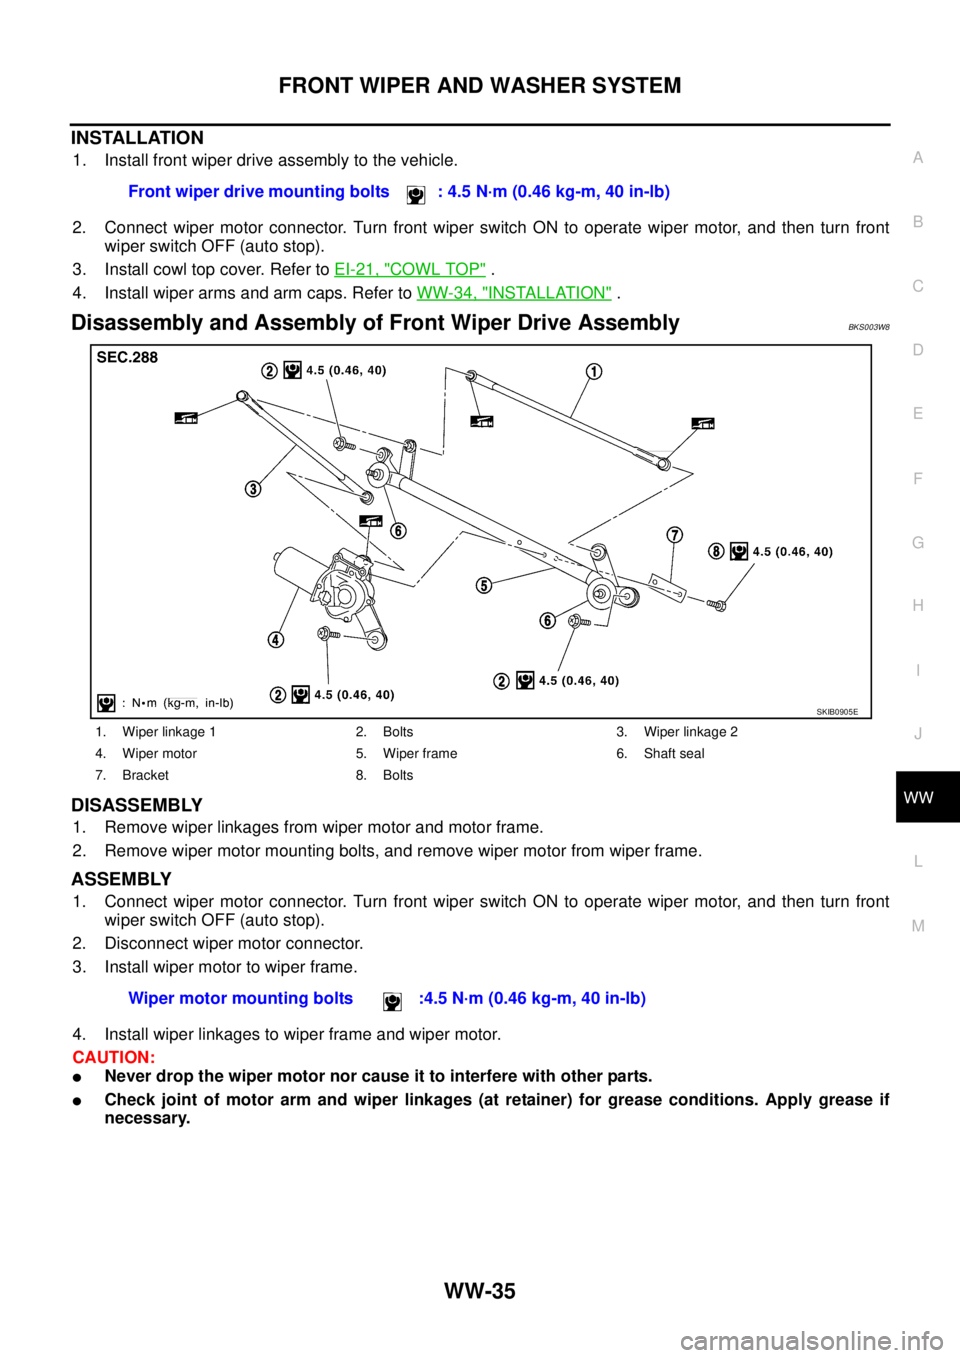
Disassembly and Assembly of Front Wiper Drive AssemblyBKS003W8
DISASSEMBLY
1. Remove wiper linkages from wiper motor and motor frame.
2. Remove wiper motor mounting bolts, and remove wiper motor from wiper frame.
ASSEMBLY
1. Connect wiper motor connector. Turn front wiper switch ON to operate wiper motor, and then turn front
wiper switch OFF (auto stop).
2. Disconnect wiper motor connector.
3. Install wiper motor to wiper frame.
4. Install wiper linkages to wiper frame and wiper motor.
CAUTION:
�Never drop the wiper motor nor cause it to interfere with other parts.
�Check joint of motor arm and wiper linkages (at retainer) for grease conditions. Apply grease if
necessary.Front wiper drive mounting bolts : 4.5 N·m (0.46 kg-m, 40 in-lb)
1. Wiper linkage 1 2. Bolts 3. Wiper linkage 2
4. Wiper motor 5. Wiper frame 6. Shaft seal
7. Bracket 8. Bolts
SKIB0905E
Wiper motor mounting bolts :4.5 N·m (0.46 kg-m, 40 in-lb)
Page 3475 of 3502

FRONT WIPER AND WASHER SYSTEM
WW-37
C
D
E
F
G
H
I
J
L
MA
B
WW
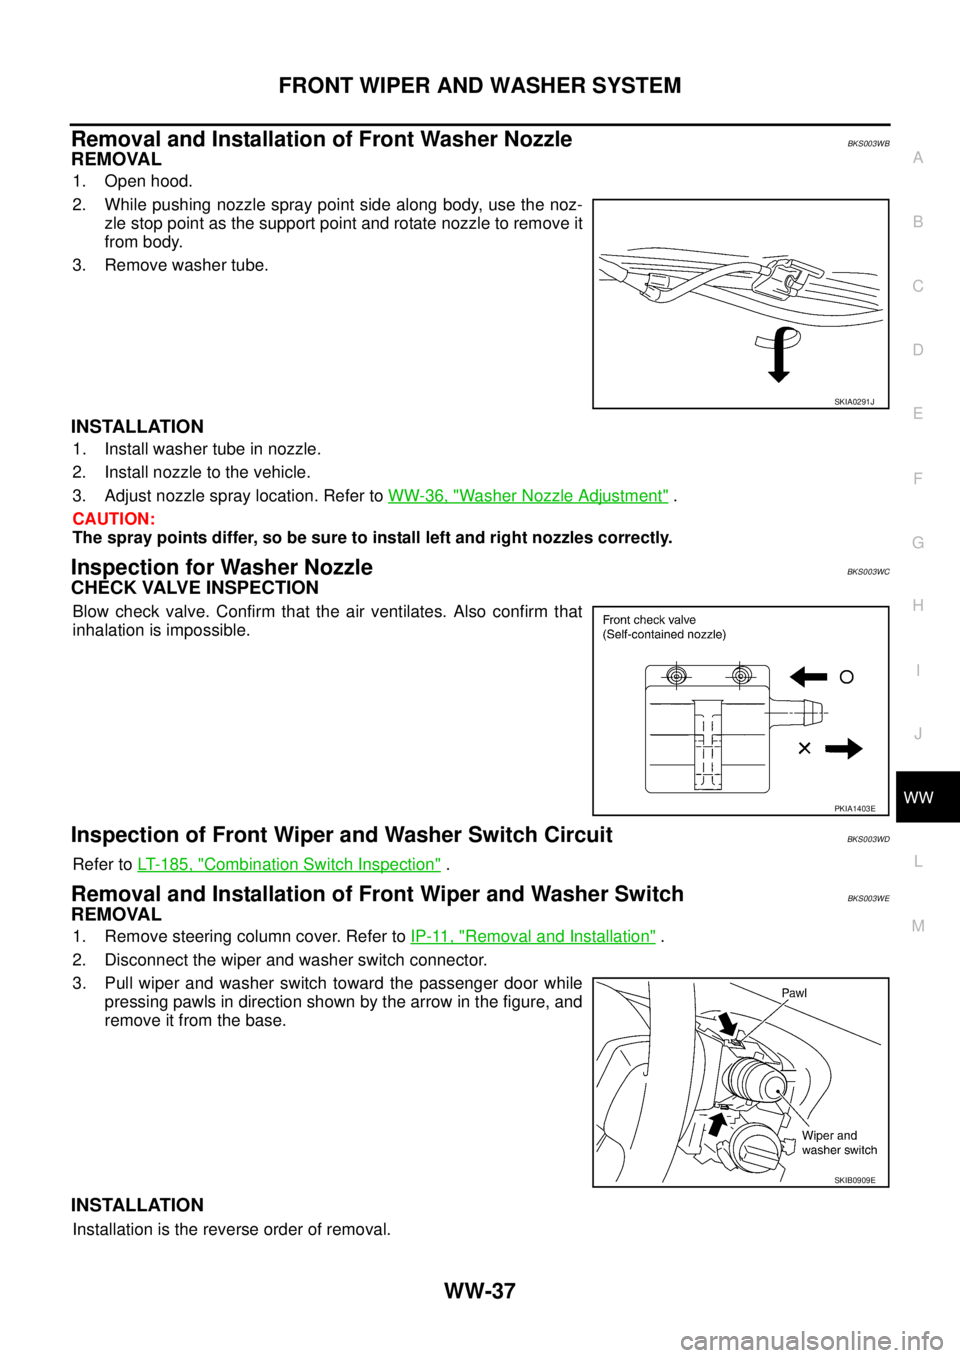
Removal and Installation of Front Washer NozzleBKS003WB
REMOVAL
1. Open hood.
2. While pushing nozzle spray point side along body, use the noz-
zle stop point as the support point and rotate nozzle to remove it
from body.
3. Remove washer tube.
INSTALLATION
1. Install washer tube in nozzle.
2. Install nozzle to the vehicle.
3. Adjust nozzle spray location. Refer to WW-36, "
Washer Nozzle Adjustment" .
CAUTION:
The spray points differ, so be sure to install left and right nozzles correctly.
Inspection for Washer NozzleBKS003WC
CHECK VALVE INSPECTION
Blow check valve. Confirm that the air ventilates. Also confirm that
inhalation is impossible.
Inspection of Front Wiper and Washer Switch CircuitBKS003WD
Refer to LT- 1 8 5 , "Combination Switch Inspection" .
Removal and Installation of Front Wiper and Washer SwitchBKS003WE
REMOVAL
1. Remove steering column cover. Refer to IP-11, "Removal and Installation" .
2. Disconnect the wiper and washer switch connector.
3. Pull wiper and washer switch toward the passenger door while
pressing pawls in direction shown by the arrow in the figure, and
remove it from the base.
INSTALLATION
Installation is the reverse order of removal.
SKIA0291J
PKIA1403E
SKIB0909E
Page 3495 of 3502
HEADLAMP WASHER
WW-57
C
D
E
F
G
H
I
J
L
MA
B
WW
Removal and Installation of Headlamp Washer NozzleBKS002EX
REMOVAL
1. Pull out headlamp washer nozzle from a bumper, remove pawl
(A), and remove headlamp washer nozzle cover (1).
2. Remove undercover one.
3. Remove fender protector. Refer to EI-23, "
FENDER PROTEC-
TOR" .
4. Remove front bumper. Refer to EI-14, "
FRONT BUMPER" .
5. Remove headlamp washer tube (1). Refer to WW-58, "
Removal
and Installation of Headlamp Washer Tube Connector" .
6. Removal headlamp washer nozzle retainer (A).
7. Removal headlamp washer nozzle bracket (2).
8. Remove headlamp washer nozzle assembly (3).
�The check valve is installed in headlamp washer nozzle
assembly.
�The check valve prevents backflow of washer fluid.
INSTALLATION
Installation is the reverse order of removal.
CAUTION:
When installing nozzle, there should be no packing twist, etc.
AdjustmentBKS002EY
PKIC9877E
PKIC9878E
PKIC9879E
a: 45° ±3°
b: 46° ±3°
c: 14° ±3°
d: 11° ±3°