Page 2860 of 4500

b. Turn the ignition switch to the ON position and push the hand-held tester main switch ON.
c. Select the item "DIAGNOSIS/ENHANCED OBD II/DTC INFO/CURRENT CODES".
d. Read the DTCs using the hand-held tester.
Result:
DTC OUTPUT RESULT TABLE
HINT:
If any other codes besides "P2714" are output, perform troubleshooting for those DTCs first.
B: GO TO RELEVANT DTC CHART (See DIAGNOSTIC TROUBLE CODE CHART
)
A: Go to next step
2.INSPECT SHIFT SOLENOID VALVE (SLT)
a. Remove the shift solenoid valve SLT.
b. Measure the resistance according to the value(s) in the table below.
Standard:
SHIFT SOLENOID VALVE (SLT) - RESISTANCE TABLE
c. Connect the positive (+) lead with a 21 W bulb to terminal 2 and the negative (-) lead to
terminal 1 of the solenoid valve connector, then check the movement of the valve.
OK:
The solenoid makes an operating noise.
Display (DTC output)Proceed to
Only "P2714" is outputA
"P2714" and other DTCsB
Tester ConnectionSpecified Condition 20°C (68°F)
1 - 25.0 to 5.6 ohms
Page 2863 of 4500
MONITOR STRATEGY TABLE
TYPICAL ENABLING CONDITIONS
TYPICAL ENABLING CONDITIONS TABLE
TYPICAL MALFUNCTION THRESHOLDS
TYPICAL MALFUNCTION THRESHOLDS TABLE
COMPONENT OPERATING RANGE
COMPONENT OPERATING RANGE TABLE
WIRING DIAGRAM
Related DTCsP2716: Shift solenoid valve SLT/Range check
Required sensors/ComponentsShift solenoid valve SLT
Frequency of operationContinuous
Duration1 sec.
MIL operationImmediate
Sequence of operationNone
The monitor will run whenever this DTC is not
present.See LIST OF DISABLE A MONITOR
Solenoid current cut statusNot cut
CPU command duty ratio to SLT19% or more
Battery voltage11 V or more
Ignition switchON
StarterOFF
Solenoid status (SLT) from ICFail (Open or short)
Output signal dutyLess than 100%
Page 2874 of 4500

a. Warm up the engine.
b. Turn the ignition switch off.
c. Connect the hand-held tester together with the CAN VIM (controller area network vehicle interface
module) to the DLC3.
d. Turn the ignition switch to the ON position.
e. Push the "ON" button of the hand-held tester.
f. Clear the DTC.
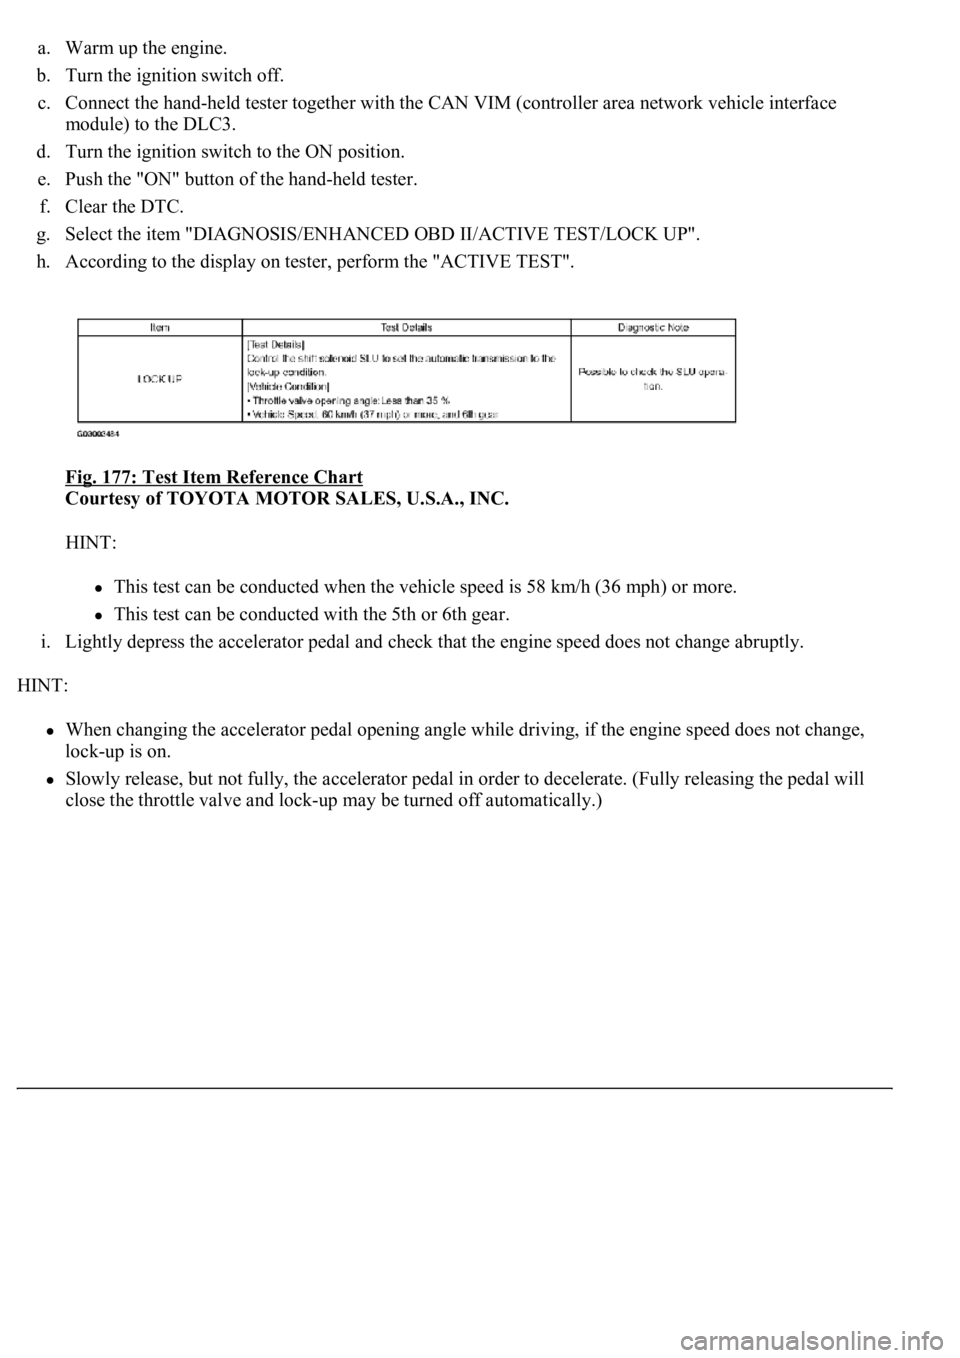
g. Select the item "DIAGNOSIS/ENHANCED OBD II/ACTIVE TEST/LOCK UP".
h. According to the display on tester, perform the "ACTIVE TEST".
Fig. 177: Test Item Reference Chart
Courtesy of TOYOTA MOTOR SALES, U.S.A., INC.
HINT:
This test can be conducted when the vehicle speed is 58 km/h (36 mph) or more.
This test can be conducted with the 5th or 6th gear.
i. Lightly depress the accelerator pedal and check that the engine speed does not change abruptly.
HINT:
When changing the accelerator pedal opening angle while driving, if the engine speed does not change,
lock-up is on.
Slowly release, but not fully, the accelerator pedal in order to decelerate. (Fully releasing the pedal will
close the throttle valve and loc
k-up may be turned off automatically.)
Page 2875 of 4500
Fig. 178: Identifying Accelerator Pedal Opening Angle Diagram
Courtesy of TOYOTA MOTOR SALES, U.S.A., INC.
1.CHECK OTHER DTCS OUTPUT (IN ADDITION TO DTC P2757)
a. Connect the hand-held tester to the DLC3.
b. Turn the ignition switch to the ON position and push the hand-held tester main switch ON.
c. Select the item "DIAGNOSIS/ENHANCED OBD II/DTC INFO/CURRENT CODES".
d. Read the DTCs using the hand-held tester.
Result:
DTC OUTPUT RESULT TABLE
HINT:
If any other codes besides "P2757" are output, perform troubleshooting for those DTCs first.
B: GO TO RELEVANT DTC CHART (See DIAGNOSTIC TROUBLE CODE CHART
)
A: Go to next step
2.INSPECT SHIFT SOLENOID VALVE (SLU)
a. Remove the shift solenoid valve SLU.
b. Measure the resistance according to the value(s) in the table below.
Display (DTC output)Proceed to
Only "P2757" is outputA
"P2757" and other DTCsB
Page 2880 of 4500
TYPICAL ENABLING CONDITIONS
TYPICAL ENABLING CONDITIONS TABLE
TYPICAL MALFUNCTION THRESHOLDS
TYPICAL MALFUNCTION THRESHOLDS TABLE
COMPONENT OPERATING RANGE
COMPONENT OPERATING RANGE TABLE
WIRING DIAGRAM
Fig. 183: DTC P2759 - Wiring Diagram
Courtesy of TOYOTA MOTOR SALES, U.S.A., INC.
INSPECTION PROCEDURE
Duration1 sec.
MIL operationImmediate
Sequence of operationNone
The monitor will run whenever this DTC is not
present.SEE LIST OF DISABLE A MONITOR
Solenoid current cut statusNot cut
CPU commanded duty ratio to SLU19% or more
Battery voltage11 V or more
Ignition switchON
StarterOFF
Solenoid status (SLU) from ICFail (Open or short)
Output signal dutyLess than 100%
Page 2891 of 4500
Fig. 194: Transmission Control Switch Reference Chart
Courtesy of TOYOTA MOTOR SALES, U.S.A., INC.
NG: REPLACE TRANSMISSION CONTROL SWITCH (See COMPONENTS
)
OK: Go to next step
4.CHECK HARNESS AND CONNECTOR (TRANSMISSION CONTROL SWITCH - ECM)
a. Connect the transmission control switch connector of shift lock control unit assy.
b. Turn the ignition switch to the ON position, and measure the voltage according to the value(s) in
the table below when the shift lever is moved to each position.
Page 2892 of 4500
Fig. 195: Identifying ECM Connector Terminals
Courtesy of TOYOTA MOTOR SALES, U.S.A., INC.
Standard:
Fig. 196: Transmission Control Switch Reference Chart
Courtesy of TOYOTA MOTOR SALES, U.S.A., INC.
c. Turn the ignition switch to the LOCK position.
d. Disconnect the ECM connector.
Page 2943 of 4500
ON-VEHICLE INSPECTION
1.INSPECTION THROTTLE BODY
a. Inspect the throttle control motor for operating sound.
1. Turn the ignition switch ON.
2. When turning the accelerator pedal position sensor lever, check the running sound of the
motor. The motor should be running smoothly without friction sounds.
If operation is not as specified, check the throttle control motor, wiring and ECM (see DTC P2118:
THROTTLE ACTUATOR CONTROL MOTOR CURRENT RANGE/PERFORMANCE ).
Fig. 3: Identifying Throttle Body
Courtesy of TOYOTA MOTOR SALES, U.S.A., INC.
b. Inspect the throttle position sensor.