Page 179 of 317

on loose or
uneven surf aces, such as gravel or
snow, than a vehicle without anti-
lock. Slow down and allow a greater
distance between vehicles under
those conditions.
it
only helps with steering control
during braking. You should always
maintain a saf e f ollowing distance
f rom other vehicles.
such as trying to take a
corner too f ast or making a sudden
lane change. Always drive at a safe,
prudent speed f or the road and
weather conditions.
Always steer moderately
when you are braking hard. Severe
or sharp steering wheel movement
can still cause your car to veer into
oncoming traffic or off the road.
Activation varies with the amount of
traction your tires have. On dry
pavement, you will need to press on
thebrakepedalveryhardbeforeyou
activate the ABS. However, you may
feel the ABS activate immediately if
you are trying to stop on snow or ice.
The Braking System
Driving
A vehicle with A BS may require a
longer distance to stop
A BS does not reduce the time or
distance it takes to stop the car;
A BS will not prevent a skid that
results f rom changing direction
abruptly,
A BS cannot prevent a loss of
stability.Import ant Saf et y Reminders
176
Page 180 of 317
�Î
�Î
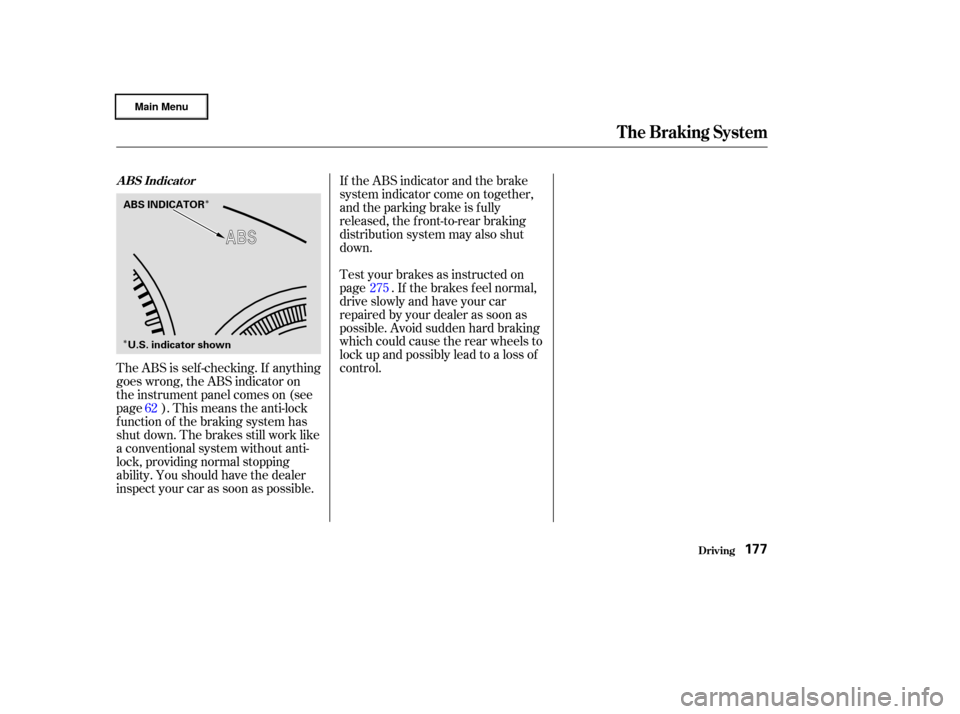
The ABS is self -checking. If anything
goes wrong, the ABS indicator on
the instrument panel comes on (see
page ). This means the anti-lock
f unction of the braking system has
shut down. The brakes still work like
a conventional system without anti-
lock, providing normal stopping
ability. You should have the dealer
inspect your car as soon as possible. If the ABS indicator and the brake
system indicator come on together,
and the parking brake is f ully
released, the front-to-rear braking
distribution system may also shut
down.
Test your brakes as instructed on
page . If the brakes f eel normal,
drive slowly and have your car
repaired by your dealer as soon as
possible. Avoid sudden hard braking
which could cause the rear wheels to
lock up and possibly lead to a loss of
control.
62 275
The Braking System
Driving
A BS Indicat or
177
ABS INDICATOR
U.S. indicator shown
Page 182 of 317
. In the
winter, mount snow tires on all f o")
�µCheck your tires
f requently f or wear and proper
pressure. Both are important in
preventing ‘‘hydroplaning’’ (loss of
traction on a wet surface). In the
winter, mount snow tires on all f our
wheels f or the best handling.
Watch road conditions caref ully,
they can change f rom moment to
moment. Wet leaves can be as slip-
pery as ice. ‘‘Clear’’ roads can have
patches of ice. Driving conditions
can be very hazardous when the
outside temperature is near f reezing.
The road surf ace can become
covered with areas of water puddles
mixed with areas of ice, so your
traction can change without warning.
Be caref ul when downshif ting. If
traction is low, you can lock up the
drive wheels f or a moment and cause
askid. Be very cautious when passing, or
beingpassedbyothervehicles.The
spray f rom large vehicles reduces
your visibility, and the wind buf f eting
can cause you to lose control.Your vehicle is not designed to tow a
trailer. Attempting to do so can void
your warranties.
Driving in Bad Weather, Towing a Trailer
Driving
Towing a Trailer
Traction
179
Page 191 of 317
 or 6 monthsCheck oil and coo")
�µ
�Î
�Ì
�Ì�Ì�Î
Maint enance188
Service at the indicated distance or time whichever comes first. miles x 1,000
km x 1,000
months
Replace every 5,000 miles (8,000 km) or 6 monthsCheck oil and coolant at each fuel stop
10
16
50
8070
112 110
176
20
32 30
4840
64 60
9680
128 90
144 100
160 120
192
Every 30,000 miles (48,000 km) or 2 years
Service the following items at the recommended intervals.Every 15,000 miles (24,000 km) in dusty conditions, otherwise use normal schedule
Every 110,000 miles (176,000 km)
Inspect every 110,000 miles (176,000 km), otherwise adjust only if noisy Every 110,000 miles (176,000 km) or 7 years
Check engine oil and coolant
Replace engine oil
Rotate tires (Check tire inflation and condition at least once per month)
Replace engine oil filter
Inspect front and rear brakes
Lubricate all hinges, locks, and latches
Visually inspect the following items:
Tie rod ends, steering gear box and boots
Suspension components
Driveshaft boots
Check parking brake adjustment
Visually inspect the following items: Brake hoses and lines (including ABS)
All fluid levels and condition of fluidsExhaust system, Fuel lines and connections
Lights and controls, Vehicle underbody
Inspect and adjust drive belts
Replace dust and pollen filter
Replace transmission fluid
Replace air cleaner element
Replace spark plugs
Inspect valve clearance
Inspect idle speed
Replace engine coolant
Replace brake fluid At 120,000 miles (192,000 km) or 10 years,
then every 60,000 miles (96,000 km) or 5 years Every 3 years (independent of mileage)
See dust and pollen filter on page for replacement information under special driving conditions.
See information on maintenance and emissions warranty, last column, page . 24
4872
12 3660
M/T
CVT
: : 185
222
Maintenance Schedule for Severe Conditions
Page 192 of 317

�µ�µ
�Ø
�Ø
�Ø
�Ø �Ø
�Ø
�Ø
�Ø
�Ø
�Ø
�Ø
�Ø
�Ø
�Ø
�Ø
�Ø
�Ø
�Ø
�Ø
�Ø
�Ø
�Ø
�Ø
�Ì
�Ì
�Î
CONT INUED
Maint enance189
U.S. Owners
Canadian Owners A, B, C, D, E, F
A
B
C
D
E
F
Refer to page to determine which schedule to use.
Use the Maintenance Schedule for Severe Conditions.
Service at the indicated distance or time, whichever comes first. Do the items in
as required for each distance/time.
Do items in A.
Do items in A, B.
Do items in A, E.
DoitemsinA,B,C.
Do items in A.
Do item in E. Replace transmission fluid (CVT).
DoitemsinA,B,D.
Do items in A.
DoitemsinA,B,C.
Do items in A, E.
Do item in F.
Do items in A, B.
Do items in A.
Do item in E. Replace transmission fluid (M/T).
DoitemsinA,B,C,D. Replace transmission fluid (CVT).
Do items in A.
Do items in A, B.
Do items in A, E.
DoitemsinA,B,C.
Do items in A.
Do item in E.
DoitemsinA,B,D. Replace transmission fluid (CVT).
5,000 mi/8,000 km
10,000 mi/16,000 km/1 yr
15,000 mi/24,000 km
20,000 mi/32,000 km/1 yr
25,000 mi/40,000 km
30,000 mi/48,000 km
30,000 mi/48,000 km/2 yrs
35,000 mi/56,000 km
40,000 mi/64,000 km/2 yrs
45,000 mi/72,000 km
3yrs
50,000 mi/80,000 km/3 yrs
55,000 mi/88,000 km
60,000 mi/96,000 km
60,000 mi/96,000 km/3 yrs
60,000 mi/96,000 km/4 yrs
65,000 mi/104,000 km
70,000 mi/112,000 km/4 yrs
75,000 mi/120,000 km
80,000 mi/128,000 km/4 yrs
85,000 mi/136,000 km
90,000 mi/144,000 km
90,000 mi/144,000 km/5 yrs
90,000 mi/144,000 km/6 yrs Replace engine oil.
Replace engine oil filter.
Inspect front and rear brakes.
Rotate tires (follow pattern on page
228).
Lubricate all hinges, locks, and latches with
multipurpose grease.
Inspect tie rod ends, steering gear box and boots.
Inspect suspension components.
Inspect driveshaft boots.
Check parking brake adjustment.
Inspect brake hoses and lines (including ABS).
Check all fluid levels, condition of fluids, and check
for leaks. Inspect exhaust system.
Inspect fuel lines and connections.
Check all lights.
Inspect the underbody.
Inspect and adjust drive belts.
Replace dust and pollen filter .
Replace air cleaner element every 15,000 mi/
24,000 km (independent of time).
Replace brake fluid every 3 years (independent of
mileage).
184Maintenance Schedule for Severe Conditions (listed by distance/time)
Page 201 of 317

Turn of f the engine, let it sit f or
several minutes, then check the oil
level. If necessary, add oil to bring
the level to the upper mark on the
dipstick.
Put the under cover back in place
and reinstall the nine holding clips.
Lock the clips securely by pushing
on the center of each clip.
Put a new washer on the drain bolt,
then reinstall the drain bolt.
Tighten it to:
Refill the engine with the recom-
mended oil.
Engine oil change capacity
(including f ilter):
Replace the engine oil f ill cap.
Start the engine. The oil pressure
indicator light should go out within
f ive seconds. If it does not, turn of f
the engine and reinspect your
work.
Let the engine run f or several
minutes and check the drain bolt
and oil f ilter f or leaks.
Remove the oil f ilter and let the
remaining oil drain. A special
wrench (available from your
Honda dealer) is required to
remove the f ilter.
Install a new oil f ilter according to
instructions that come with it. 7.
8.
9.
10. 12. 11.
5.
6.
Engine Oil
Maint enance198
OIL FILTER
29 lbf·ft (39 N·m , 4.0 kgf·m)
3.4 US qt (3.2
, 2.8 Imp qt) Improper disposal of engine oil can be
harmf ul to the environment. If you
change your own oil, please dispose of
the used oil properly. Put it in a sealed
container and take it to a recycling
center. Do not discard it in a trash bin
or dump it on the ground.
Page 203 of 317
Remove the radiator cap by
pushing down and turning
counterclockwise. Turn the radiator cap counter-
clockwise, without pressing down
on it, until it stops. This relieves
any pressure remaining in the
cooling system.The coolant level should be up to
the base of the f iller neck. Add
coolant if it is low.Put the radiator cap back on.
Tighten it f ully.
Pour coolant into the reserve tank.
Fill it to half way between the MAX
and MIN marks. Put the cap back
on the reserve tank.
Do not add any rust inhibitors or
other additives to your car’s cooling
system. They may not be compatible
with the coolant or engine compo-
nents.
Pour the coolant slowly and caref ully
so you do not spill. Clean up any
spills immediately. Spilled coolant
could damage components in the
engine compartment.
2.
3.
4.5.
6.
Cooling Syst em
Maint enance200
RADIATOR CAP
RESERVE TANK
Page 205 of 317
�µ
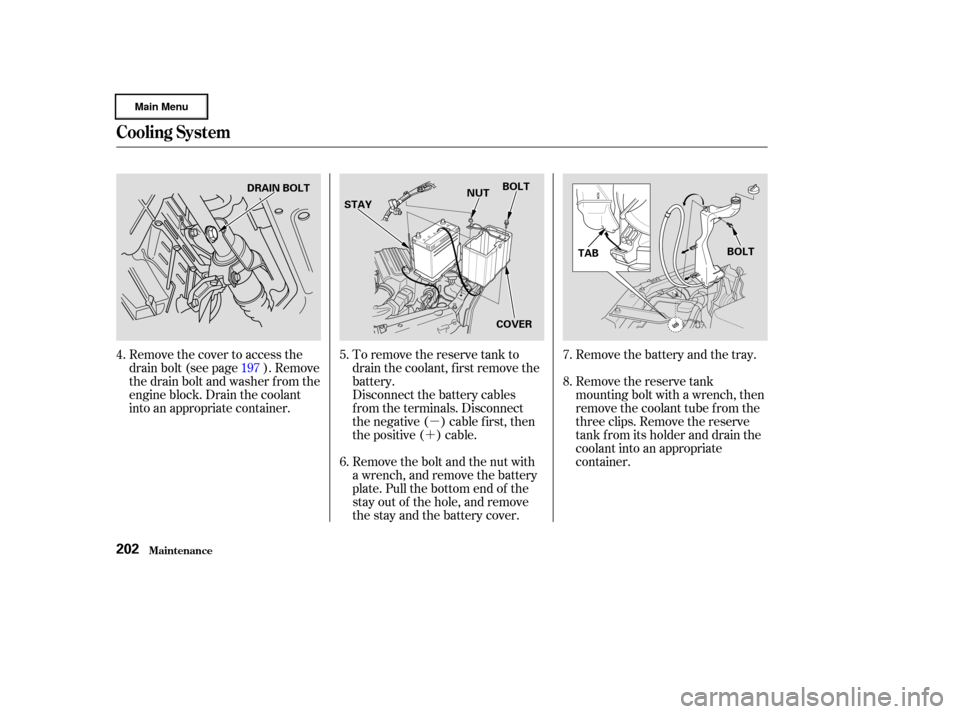
�´ Remove the battery and the tray.
Remove the reserve tank
mounting bolt with a wrench, then
remove the coolant tube f rom the
three clips. Remove the reserve
tank f rom its holder and drain the
coolant into an appropriate
container.
To remove the reserve tank to
drain the coolant, f irst remove the
battery.
Disconnect the battery cables
f rom the terminals. Disconnect
the negative ( ) cable first, then
the positive ( ) cable.
Remove the bolt and the nut with
a wrench, and remove the battery
plate. Pull the bottom end of the
stay out of the hole, and remove
the stay and the battery cover.
Remove the cover to access the
drain bolt (see page ). Remove
the drain bolt and washer f rom the
engine block. Drain the coolant
into an appropriate container.
4.
5.
6.7.
8.
197
Cooling Syst em
Maint enance202
DRAIN BOLT
STAY NUT
BOLT
COVER TAB
BOLT