2003 GMC SIERRA DENALI instrument panel
[x] Cancel search: instrument panelPage 2 of 428

The 2003 GMC Sierra Denali Owner Manual a
Seats and Restraint Systems ........................... 1-1
Front Seats ............................................... 1-2
Rear Seats
............................................... 1-7
Safety Belts
.............................................. 1-8
Child Restraints
....................................... 1-30
Air Bag Systems
...................................... 1-57
Restraint System Check
............................ 1-73
Features and Controls
..................................... 2-1
Keys
........................................................ 2-2
Doors and Locks
....................................... 2-6
Windows
................................................. 2-1 0
Theft-Deterrent Systems ............................ 2-1 3
Starting and Operating Your Vehicle ........... 2-15
Mirrors
.................................................... 2-28
Onstar@ System
...................................... 2-33
HomeLink@ Transmitter
............................. 2-35
Storage Areas
......................................... 2-39
Instrument Panel
............................................. 3-1
Vehicle
Personalization
............................. 2-42
Instrument Panel Overview
.......................... 3-2
Climate Controls
...................................... 3-1 8
Warning Lights, Gages and Indicators
......... 3-24
Driver Information Center (DIC)
.................. 3-43
Audio System(s)
....................................... 3-61 Driving Your Vehicle
....................................... 4-1
Your
Driving, the Road, and Your Vehicle ..... 4-2
Towing
................................................... 4-45
Service and Appearance Care
.......................... 5-1
Service
..................................................... 5-3
Fuel
......................................................... 5-5
Checking Things Under the Hood
............................................. 5-10
All-Wheel Drive
........................................ 5-49
Rear Axle
............................................... 5-50
Front Axle
............................................... 5-51
Bulb Replacement
.................................... 5-52
Windshield Wiper Blade Replacement
......... 5-60
Tires
...................................................... 5-61
Appearance Care
..................................... 5-86
Vehicle Identification
................................. 5-94
Electrical System
...................................... 5-95
Capacities and Specifications
................... 5-1 04
Normal Maintenance Replacement Parts
.... 5-1 05
Maintenance Schedule
..................................... 6-1
Maintenance Schedule
................................ 6-2
Customer Assistance Information
.................... 7-1
Customer Assistance Information
.................. 7-2
Reporting Safety Defects
............................ 7-9
Index
................................................................. 1
Page 5 of 428
Vehicle Damage Warnings
Also, in this book you will find these notices:
Notice: These mean there is something that could
damage
your vehicle.
A notice will tell you about something that can damage
your vehicle. Many times, this damage would not be
covered by your warranty, and it could be costly. But the
notice will tell you what to do to help avoid the
damage.
When you read other manuals, you might see CAUTION
and NOTICE warnings in different colors or
in different
words.
You’ll also see warning labels on your vehicle. They use
the same words, CAUTION or NOTICE.
Vehicle Symbols
Your vehicle has components and labels that use
symbols instead
of text. Symbols, used on your vehicle,
are shown along with the text describing the operation
or information relating to a specific component, control,
message, gage or indicator.
If you need help figuring out a specific name of a
component, gage or indicator reference the following
topics in the Index:
Seats and Restraint Systems in Section 1
Features and Controls in Section 2
Instrument Panel Overview in Section 3
Climate Controls in Section 3
Warning Lights, Gages and Indicators in Section 3
Audio System(s) in Section 3
Engine Compartment Overview in Section 5
iv
Page 57 of 428
5. To tighten the belt, pull its free end while you push
down on the child restraint as you tighten the belt.
directions to be sure it is secure.
6. Push and pull the child restraint in different
To remove the child restraint, just unbuckle the vehicle’s
safety belt. It will be ready to work for an adult or
larger child passenger. Your
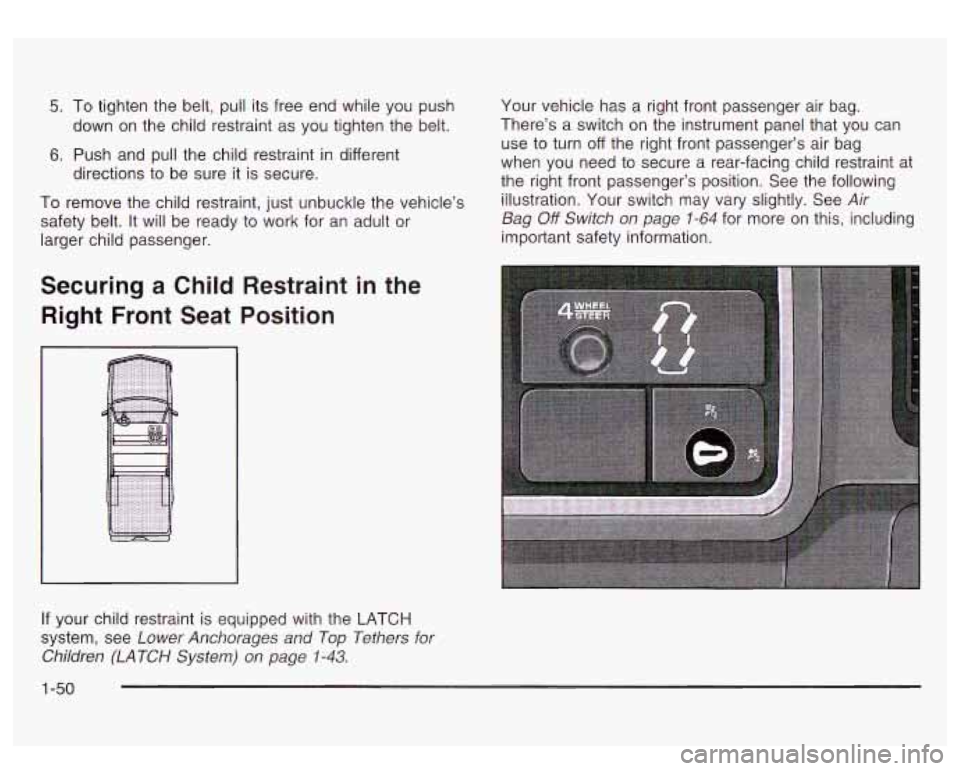
vehicle has a right front passenger air bag.
There’s a switch on the instrument panel that you can
use to turn
off the right front passenger’s air bag
when you need to secure a rear-facing child restraint at
the right front passenger’s position. See the following
illustration. Your switch may vary slightly. See
Air
Bag
Off Switch on page 1-64 for more on this, including
important safety information.
Securing a Child Restraint in the
Right Front Seat Position
If your child restraint is equipped with the LATCH
system, see Lower Anchorages and Top Tethers for
Children (LATCH System) on page
1-43.
1-50
Page 58 of 428
Never put a rear facing child restraint in the right front
passenger seat unless the air bag is
off. Here’s why:
A child in a rear-facing child restraint ca
seriously injured or killed if the right front passenger’s air bag inflates. This is because
the back of the rear-facing child restraint
would be very close to the inflating air bag. Be
sure to turn
off the air bag before using a
rear-facing child restraint
in the right front seat
position. If a forward-facing child restraint
is
suitable for your child, always move the passenger seat as far back as
it will go.
A rear seat is a safer place to secure a forward-facing
child restraint. If you need to secure a forward-facing
child restraint in the right front seat position, see
Where
to Put the Restraint
on page 1-38
If the air bag readiness light in the instrument
panel cluster ever comes on when you have
turned
off the air bag, it means that something
may be wrong with the air bag system. The
right front passenger’s air bag could inflate
even though the switch
is off. If this ever
happens, have the vehicle serviced promptly.
Until you have the vehicle serviced, don’t let
anyone whom the national government has identified as a member of a passenger air bag
risk group
sit in the right front passenger’s
position (for example, don’t secure a
rear-facing child restraint
in your vehicle). See
”Air Bag Off Switch’’
in the Index.
In addition to the
AIR BAG OFF switch, your vehicle
may have the passenger sensing system. See
Passenger Sensing System on page 1-68 and
Passenger Air Bag Status Indicator on page 3-30 for
more on this, including important safety information.
1-51
Page 59 of 428
The passenger sensing system is designed to turn off
the right front passenger’s frontal air bag when a
rear facing child restraint is in the right front seat. In
addition to the passenger sensing system, you may use
the AIR BAG
OFF switch located on the instrument
panel to turn the air bag
off. Never put a rear facing child
restraint in the right front passenger seat unless the
air bag is
off. Here’s why:
A child in a rear-facing child restraint can be
seriously injured or killed if the right front
passenger’s air bag inflates. This is because
the back of the rear facing child restraint
would be very close to the inflating air bag. Be
sure the air bag
is off before using a
rear-facing child restraint
in the right front seat
position.
CAUTION: (Continued)
’ Even though the passenger sensing system is
~ designed to turn off the passenger’s frontal air
~ bag if the system detects a rear-facing child
restraint, no system is fail-safe, and no one
can guarantee that an air bag
will not deploy
under some unusual circumstance, even
though
it is turned off. General Motors
therefore recommends that rear-facing child restraints be secured in the rear seat whenever
possible, even if the air bag is
off.
You’ll be using the lap-shoulder belt. See Top Strap on
page
1-40 if the child restraint has one. Be sure to
follow the instructions that came with the child restraint.
Secure the child in the child restraint when and as
the instructions say.
1. Your vehicle has a right front passenger’s air bag. If
you are using a rear-facing child restraint in this seat,
make sure the air bag is turned
off. See Air Bag Off
Switch on page 1-64 and Passenger Sensing
System
on page 1-68. Always move the seat as far
back as it will
go before securing the child restraint in
this seat. See ‘Seats” in the Index.
1-52
Page 60 of 428
When either the passenger sensing system and/or
the AIR BAG
OFF switch has turned off the
right front passenger’s frontal air bag, the
off
indicator in the passenger air bag status indicator
on the rearview mirror will light and stay lit
when
y-” turn the ignition to RUN or START.
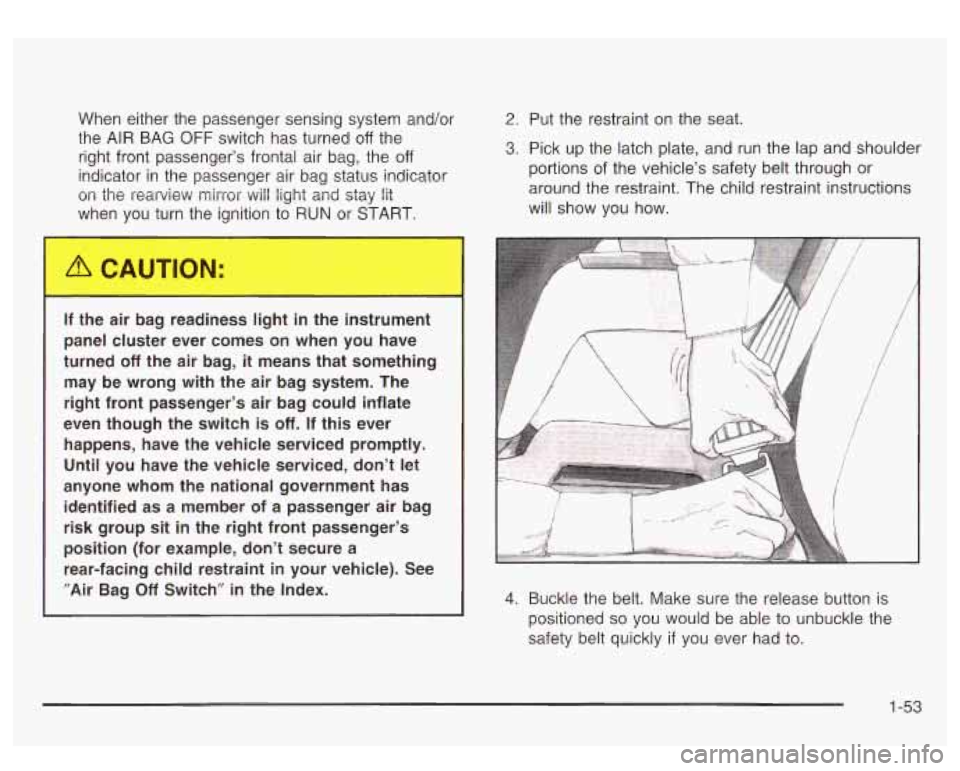
2. Put the restraint on the seat.
3. Pick up the latch plate, and run the lap and shoulder
portions
of the vehicle’s safety belt through or
around the restraint. The child restraint instructions
will show you how.
If the air bag readiness light
in the instrument
panel cluster ever comes
on when you have
turned
off the air bag, it means that something
may be wrong with the air bag system. The
right front passenger’s air bag could inflate
even though the switch
is off. If this ever
happens, have the vehicle serviced promptly.
Until
you have the vehicle serviced, don’t let
anyone whom the national government has identified as a member of a passenger air bag
risk group sit in the right front passenger’s
position (for example, don’t secure a
rear-facing child restraint
in your vehicle). See
”Air Bag
Off Switch” in the Index. 4. Buckle the belt. Make sure the release button is
positioned
so you would be able to unbuckle the
safety belt quickly
if you ever had to.
1-53
Page 66 of 428
r
There is an air bag
readiness light on the
instrument panel cluster,
which shows the air
bag
symbol.
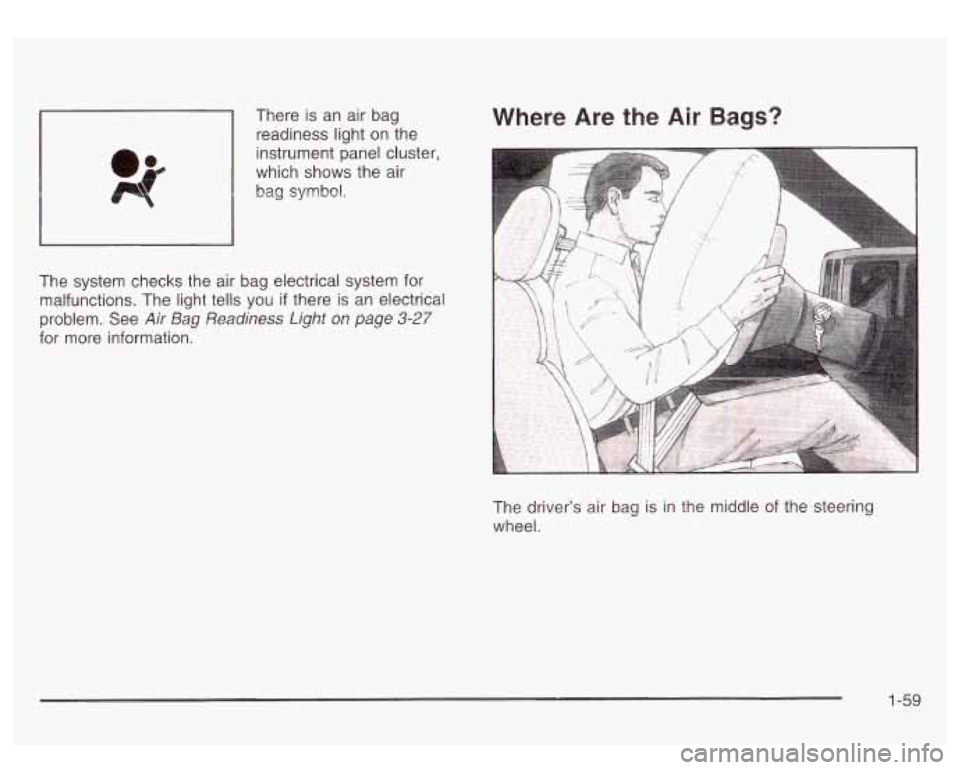
Where Are the Air Bags?
The system checks the air bag electrical system for
malfunctions. The light tells you
if there is an electrical
problem. See
Air Bag Readiness Light on page 3-27
for more information.
The driver’s air bag is in the middle of the steering
wheel.
1-59
Page 67 of 428
If something is between an occupant and an
air bag, the bag might not inflate properly or
it
might force the object into that person causing
severe injury or even death. The path of an
inflating air bag must be kept clear. Don’t put
anything between an occupant and an air bag,
and don’t attach or put anything on the
steering wheel hub or on or near any other air
bag covering.
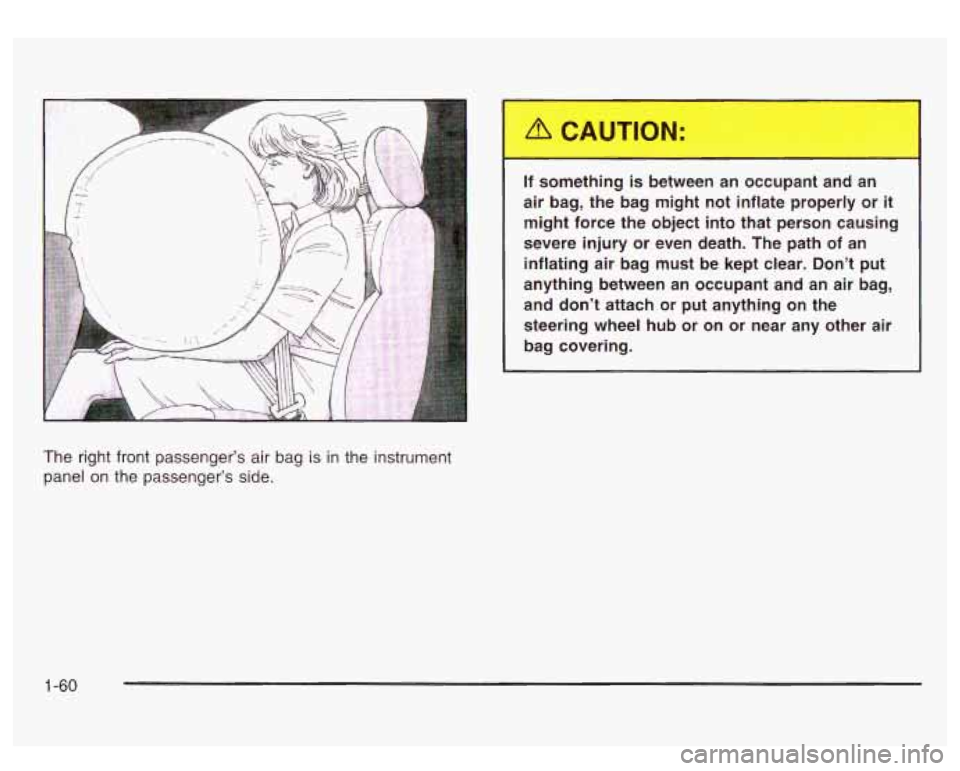
The right front passenger’s air bag is in the instrument
panel
on the passenger’s side.
1-60