2003 GMC SIERRA DENALI spare tire
[x] Cancel search: spare tirePage 84 of 428
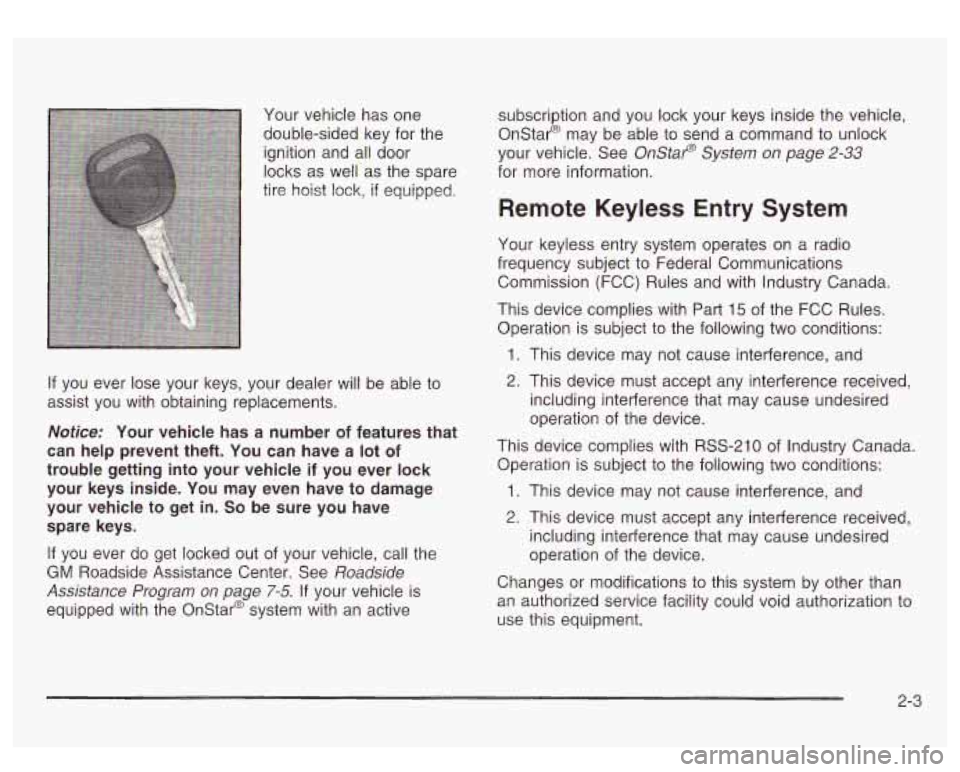
Your vehicle has one
double-sided key for the
ignition and all door
locks as well as the spare
tire hoist lock,
if equipped.
If you ever lose your keys, your dealer will be able to
assist you with obtaining replacements.
Notice: Your vehicle has a number of features that
can help prevent theft. You can have a lot
of
trouble getting into your vehicle if you ever lock
your keys inside. You may even have to damage
your vehicle to get in.
So be sure you have
spare keys.
If you ever do get locked out of your vehicle, call the
GM Roadside Assistance Center. See Roadside
Assistance Program
on page 7-5. If your vehicle is
equipped with the Onstar@ system with an active subscription
and you lock your keys inside the vehicle,
OnStar@ may be able
to send a command to unlock
your vehicle. See
OnStap System on page 2-33
for more information.
Remote Keyless Entry System
Your keyless entry system operates on a radio
frequency subject to Federal Communications
Commission (FCC) Rules and with Industry Canada.
This device complies with Part
15 of the FCC Rules.
Operation is subject to the following two conditions:
1. This device may not cause interference, and
2. This device must accept any interference received,
including interference that may cause undesired
operation of the device.
This device complies with
RSS-210 of Industry Canada.
Operation is subject
to the following two conditions:
1. This device may not cause interference, and
2. This device must accept any interference received,
including interference that may cause undesired
operation
of the device.
Changes or modifications
to this system by other than
an authorized service facility could void authorization to
use this equipment.
2-3
Page 225 of 428
While driving on a surface with reduced traction, try
your best to avoid sudden steering, acceleration
or braking (including engine braking by shifting to a
lower gear). Any sudden changes could cause the tires
to slide. You may not realize the surface is slippery
until your vehicle
is skidding. Learn to recognize warning
clues
- such as enough water, ice or packed snow
on the road to make a “mirrored surface”
- and slow
down when you have any doubt.
Remember: Any anti-lock brake system (ABS) helps
avoid only the braking skid.
Operating Your All-Wheel-Drive
Vehicle
Off Paved Roads
Many of the same design features that help make your
vehicle responsive on paved roads during poor
weather conditions
- features like the locking rear axle
and all-wheel drive
- help make it much better
suited for off-road use than a conventional passenger
car. Its higher ground clearance also helps your vehicle
step over some off-road obstacles. But your vehicle
doesn’t have features like special underbody shielding
and a transfer case low gear range, things that are
usually thought necessary for extended or sever off-road
service. This guide
is for operating your vehicle off
paved roads.
Also, see Braking on page 4-6.
Off-road driving can be great fun. But it does have
some definite hazards. The greatest of these is
the terrain itself.
“Off-roading” means you’ve left the great North American\
road system behind. Traffic lanes aren’t marked.
Curves aren’t banked. There are no road signs.
Surfaces can be slippery, rough, uphill or downhill. In
short, you’ve gone right back to nature.
Off-road driving involves some new skills. And that’s
why it’s very important that
you read this guide.
You’ll find many driving tips and suggestions. These will
help make your off-road driving safer and more
enjoyable.
Before You Go Off-Roading
There are some things to do before you go out. For
example, be sure to have all necessary maintenance
and service work done. Check to make sure all
underbody shields (if
so equipped) are properly
attached.
Is there enough fuel? Is the spare tire fully
inflated? Are the fluid levels up where they should be?
What are the local laws that apply to off-roading
where you’ll be driving?
If you don’t know, you should
check with law enforcement people in the area. Will you
be on someone’s private land? If
so, be sure to get
the necessary permission.
4-1 6
Page 271 of 428
Section 5 Service and Appearance Care
Tires .......................................................... 5-61
Inflation
.. Tire Pressure ................................ 5.62
Tire Inspection and Rotation
........................... 5.62
When It
Is Time for New Tires ....................... 5-64
Buying New Tires
......................................... 5-64
Uniform Tire Quality Grading
.......................... 5-65
Wheel Alignment and Tire Balance
.................. 5.67
Wheel Replacement
...................................... 5.67
Tire Chains
.................................................. 5-68
If a Tire Goes Flat ........................................ 5.68
Spare Tire
................................................... 5.85
Changing a
Flat Tire
.................. ............ 5.69
Appearance Care
............................................ 5.86
Cleaning the Inside of Your Vehicle
................. 5-86
Care of Safety Belts
...................................... 5-88
Weatherstrips
........................................... 5-88
Cleaning the Outside of Your Vehicle
.. .... 5-88
Sheet Metal Damage ..................................... 5-91
Underbody Maintenance
................................ 5-91
Chemical Paint Spotting
............................... -591
Vehicle Identification
...................................... 5-94
Vehicle Identification Number (VIN)
................. 5-94
Service Parts Identification Label
..................... 5-94
Electrical System
............................................ 5-95
Add-on Electrical Equipment
.......................... 5-95
Windshield Wiper Fuses
................................ 5-95
Fuses and Circuit Breakers
............................ 5-95
Capacities and Specifications
........................ 5-104
Normal Maintenance Replacement Parts
......... 5-105
Finish
Damage
............................................. 5-91
GM Vehicle Care/Appearance Materials
........... 5-92
Power Windows and Other Power Options
....... 5-95
5-2
Page 331 of 428
Inflation - Tire Pressure
The CertificationKire label, which is on the rear edge of
the driver’s door, shows the correct inflation pressures
for your tires when they’re cold. “Cold” means your
vehicle has been sitting for at least three hours or driven
no more than
1 mile (1.6 km).
Notice: Don’t let anyone tell you that underinflation
or overinflation is all right. It’s not. If your tires
don’t have enough air (underinflation), you can get
the following:
Too much flexing
Too much heat
Tire overloading
Bad wear
Bad handling
Bad fuel economy
If your tires have too much air (overinflation), you
can get the following:
Unusual wear
Bad handling
Rough ride
Needless damage from road hazards
5-62
When to Check
Check your tires once a month or more.
Also, check the tire pressure of the spare tire
How to Check
Use a good quality pocket-type gage to check tire
pressure. You can’t tell
if your tires are properly inflated
simply by looking at them. Radial tires may look
properly inflated even when they’re underinflated.
Be sure to put the valve caps back on the valve stems.
They help prevent leaks by keeping out dirt and
moisture.
Tire Inspection and Rotation
Tires should be rotated every 7,500 miles (12,500 km).
Any time you notice unusual wear, rotate your tires
as soon as possible and check wheel alignment.
Also
check for damaged tires or wheels. See When It Is Time
for New Tires on page 5-64 and Wheel Replacement
on page
5-67 for more information.
Make sure the spare tire
is stored securely. Push, pull,
and then try to rotate
or turn the tire. If it moves,
use the wheel wrench and jack handle extensions to
tighten the cable. See
Changing a Flat Tire on
page
5-69.
Page 332 of 428
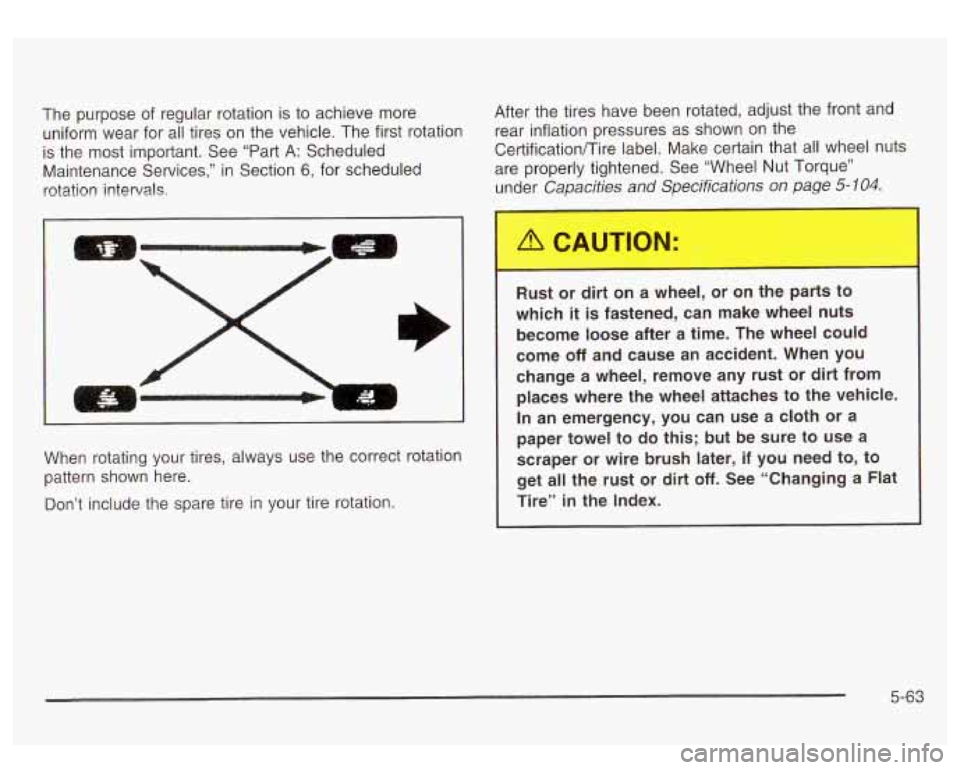
The purpose of regular rotation is to achieve more
uniform wear for all tires on the vehicle. The first rotation
is the most important. See “Part A: Scheduled
Maintenance Services,” in Section
6, for scheduled
rotation
intervals;
After the tires have been rotated, adjust the front and
rear inflation pressures as shown on the
CertificationEire label. Make certain that all wheel nuts
are properly tightened. See “Wheel Nut Torque”
under
Capacities and Specificatiol on ge 5-104.
When rotating your tires, always use the correct rotation
pattern shown here.
Don’t include the spare tire in your tire rotation. Rust or dirt on a
wheel, or on the parts to
which
it is fastened, can make wheel nuts
become loose after a time. The wheel could
come
off and cause an accident. When you
change a wheel, remove any rust or dirt from
places where the wheel attaches to the vehicle,
In an emergency, you can use a cloth or a
paper towel to do
this; but be sure to use a
scraper or wire brush later,
if you need to, to
get all the rust or dirt
off. See “Changing a Flal
Tire”
in the Index.
5-63
Page 334 of 428

Mixing tires could cause you to lose control
while driving.
If you mix tires of different sizes
or types (radial and bias-belted tires), the
vehicle may not handle properly, and you
could have a crash. Using tires of different
sizes may also cause damage to your vehicle.
Be sure to use
the same size and type tires on
all wheels.
If your vehicle has 17 inch road
tires (those originally installed on your vehicle)
it is all right to drive with the 16 inch spare tire
that came with your vehicle. When new, your
vehicle included a spare tire and wheel assembly with
the same overall diameter as
your vehicle’s road tires and wheels. Because
this spare tire was developed for use on your vehicle,
it will not affect vehicle handling or
cause damage to your vehicle.
If yo^ Jse bias-ply tires on y--. ,chicle, the
wheel rim flanges could develop cracks after
many miles
of driving. A tire and/or wheel
could fail suddenly, causing a crash. Use only radial-ply tires with the wheels on your vehicle.
Uniform Tire Quality Grading
Quality grades can be found where applicable on the
tire sidewall between tread shoulder and maximum
section width. For example:
Treadwear 200 Traction AA Temperature A
The following information relates to the system
developed by the United States National Highway
Traffic Safety Administration, which grades tires by
treadwear, traction and temperature performance. (This
applies only to vehicles sold
in the United States.)
The grades are molded on the sidewalls of most
passenger car tires. The Uniform Tire Quality Grading
system does not apply to deep tread, winter-type
snow tires, space-saver or temporary use spare tires,
tires with nominal rim diameters
of 10 to 12 inches
(25 to
30 cm), or to some limited-production tires.
5-65
Page 339 of 428
L
Removing the Spare Tire and Tools
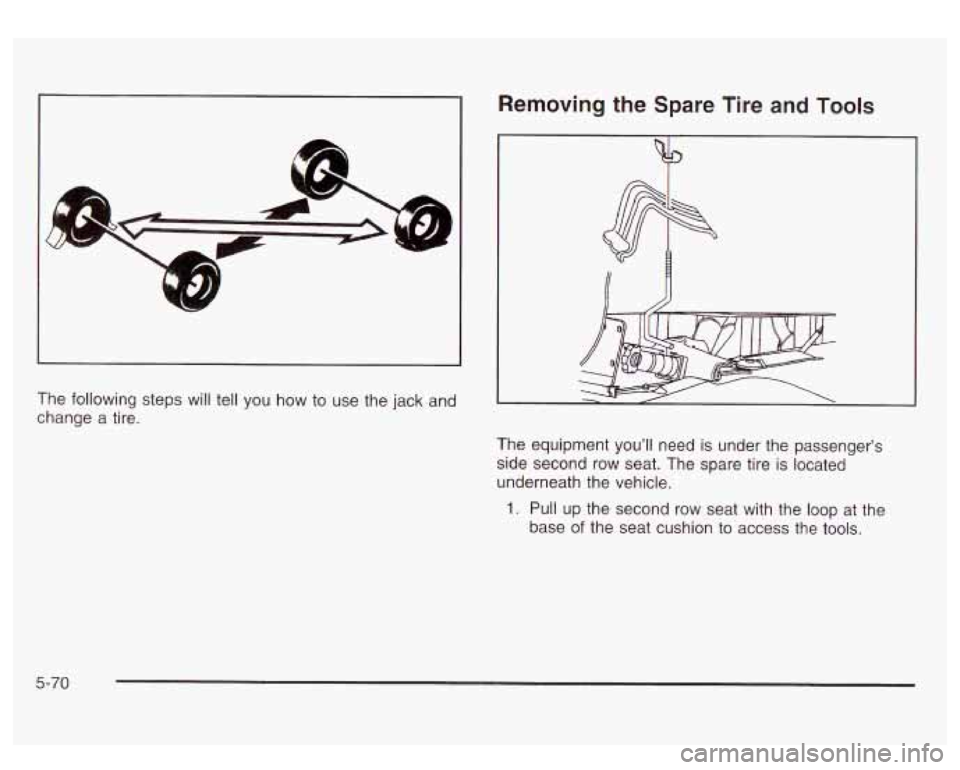
The following steps will tell you how to use the jack and
change a tire.
The equipment you’ll need is under the passenger’s
side second row seat. The spare tire is located
underneath the vehicle.
1. Pull up the second row seat with the loop at the
base
of the seat cushion to access the tools.
5-70
Page 340 of 428
2. The wheel blocks and the wheel block retainer can
be removed by turning the wing nut
counterclockwise.
3. To release the bottle jack from its holder, turn the
knob on
the bottle jack eotintercloekwise to lower
the jack head slightly.
4. There is also a wing nut used to retain the storage
bag and tools. To remove it, turn the wing nut
counterclockwise.
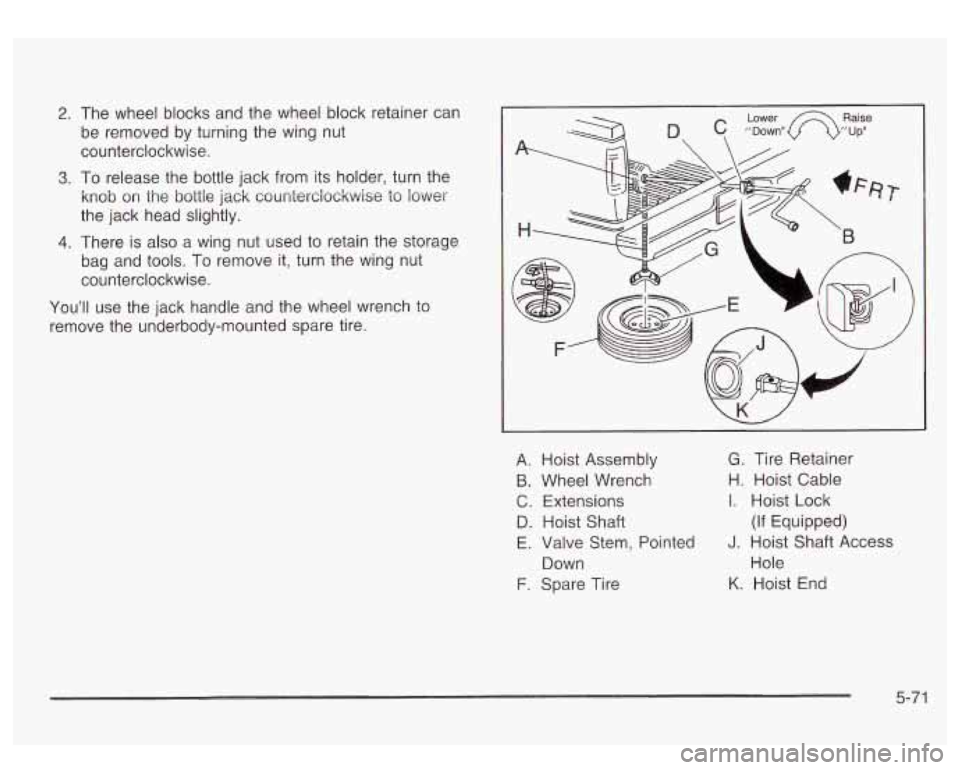
You’ll use the jack handle and the wheel wrench to
remove the underbody-mounted spare tire.
A. Hoist Assembly
B. Wheel Wrench
C. Extensions
D. Hoist Shaft
E. Valve Stem, Pointed
Down
F. Spare Tire
G. Tire Retainer
H. Hoist Cable
I. Hoist Lock
(If Equipped)
J. Hoist Shaft Access
Hole
K. Hoist End
5-71