2003 GMC SIERRA DENALI instrument panel
[x] Cancel search: instrument panelPage 169 of 428
Trip Information Button
Use the trip information button to scroll through the
SEASON ODOMETER, PERSONAL TRIP ON/OFF,
BUSINESS TRIP ON/OFF, HOURMETER, ANNUAL
LOG and TIMER.
If the personal trip and/or the business
trip are set to ON, you will also be able to scroll
through more messages. See
Personal Trip and
Business Trip next for more information.
If your vehicle is not equipped with the DIC steering
wheel buttons you can select the trip information
by pressing the trip odometer reset stem
on the
instrument panel cluster.
Personal Trip
If the PERSONAL TRIP is on (turn it on or off by
pressing the select button) you will also be able to scroll
through the following:
e
e
e
PERSONAL: XX MI - This shows the current
distance traveled since the last reset for the
personal trip odometer in either miles or kilometers.
PERSONAL: XX.X MPG
- This shows the amount
of fuel used for the personal trip.
PERSONAL: AVG ECONOMY
- This shows how
many miles per gallon of fuel your vehicle is
getting for the personal trip based on current and
past driving conditions.
PERSONAL: AVG MPH - This shows the vehicle’s
average speed for the personal trip.
PERSONAL: % ANNUAL - This shows the ratio of
personal trip miles to annual miles as a percent.
You can reset the personal trip odometer by pressing
and holding the trip odometer reset stem.
Business Trip
If the BUSINESS TRIP is on (turn it on or off by
pressing the select button) you will also be able
to scroll
through the following:
e
e
e
BUSINESS: XX MI - This shows the current
distance traveled since the last reset for the
business trip odometer in either miles or kilometers.
BUSINESS: XX.X MPG
- This shows the amount
of fuel used for the business trip.
BUSINESS: AVG ECONOMY
- This shows how
many miles per gallon
of fuel your vehicle is
getting for the business trip based on current and
past driving conditions.
BUSINESS: AVG MPH
- This shows the vehicle’s
average speed for the business trip.
BUSINESS:
Yo ANNUAL - This shows the ratio of
business trip miles to annual miles as a percent.
3-44
Page 170 of 428
To reset the personal or business trip information, do
the following: press and hold select button for two
seconds while in one of the personal or business trip
modes. This will reset all of the information for the
personal or business trip, or
if your vehicle does not
have the DIC steering wheel control buttons, press the
reset stem on the instrument panel cluster.
You can also reset the PERSONAL:
XX MI, or
BUSINESS:
XX MI, while they are displayed by pressing
the reset stem on the cluster.
If you press and hold
the reset stem or select button for four seconds,
the display
will show the distance traveled since the last
ignition cycle for the personal or business trip.
Season Odometer
Press the trip information button, or the trip odometer
reset step, until SEASON ODOMETER appears on
the display. This shows the total distance the vehicle has
been driven in either miles or kilometers. Pressing the
reset stem located on the instrument cluster with
the vehicle
off will also display the season odometer.
Hourmeter
Press the trip button to scroll to the hourmeter. The
hourmeter shows the total number of hours the engine
has run. Pressing the reset stem on the instrument
cluster will also display the hourmeter after the season
odometer is displayed.
Annual Log
Press the trip button, or the reset stem on the instrument
panel cluster, to scroll to the annual
log. The annual
log shows the mileage accumulated since
it was
last reset.
Po reset the annual log, press and hold the
select button, or the trip odometer reset stem for
approximately two seconds.
Timer
The DIC can be used as a stopwatch. Press the select
button, or the trip odometer reset stem, while TIMER
is displayed to start the timer. The display will show the
amount of time that has passed since the timer was
last reset (not including time the ignition is
off). Time will
continue to be counted as long as the ignition is on,
even
if another display is being shown on the DIC. The
timer will record up to 99 hours, 59 minutes and
59 seconds (99:59:59) after which the display will roll
back to zero.
To stop the counting of time, press the select button
briefly while TIMER is displayed.
To reset the timer to zero, press and hold the select
button, or the trip odometer reset stem, while TIMER is
displayed.
3-45
Page 220 of 428
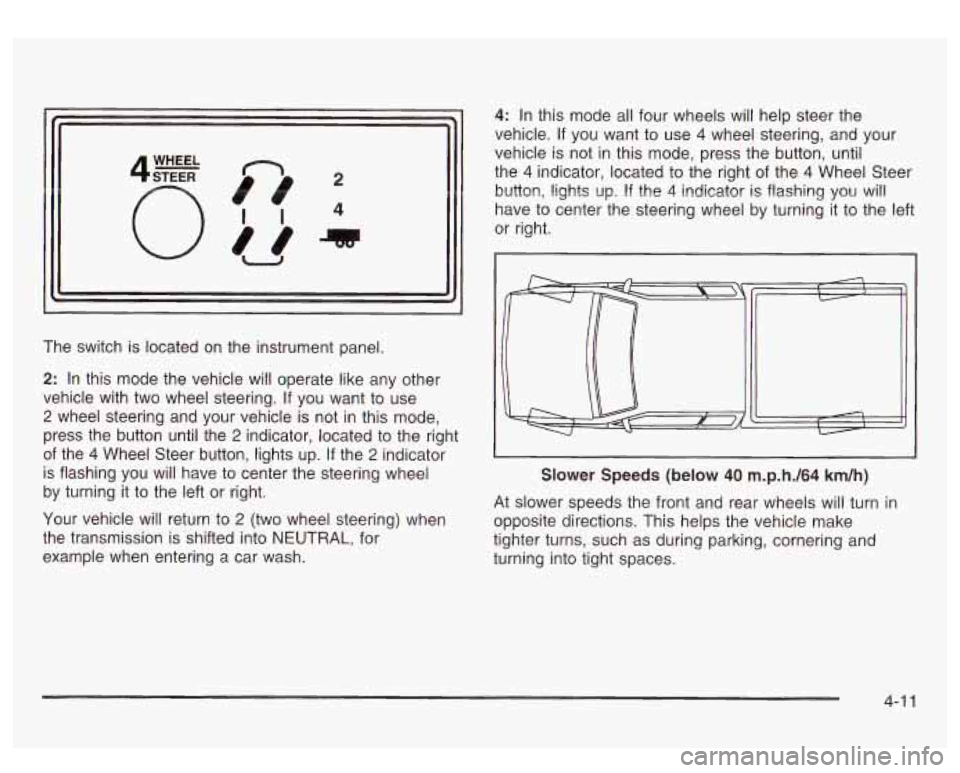
The switch is located on the instrument panel.
2: In this mode the vehicle will operate like any other
vehicle with two wheel steering. If you want to use
2 wheel steering and your vehicle is not in this mode,
press the button until the
2 indicator, located to the right
of the
4 Wheel Steer button, lights up. If the 2 indicator
is flashing you will have to center the steering wheel
by turning it
to the left or right.
Your vehicle will return to
2 (two wheel steering) when
the transmission is shifted into NEUTRAL, for
example when entering a car wash.
4: In this mode all four wheels will help steer the
vehicle.
If you want to use 4 wheel steering, and your
vehicle is not in this mode, press the button, until
the
4 indicator, located to the right of the 4 Wheel Steer
button, lights up.
If the 4 indicator is flashing you will
have to center the steering wheel by turning it to the left
or right.
I
I
Slower Speeds (below 40 m.p.h./64 km/h)
At slower speeds the front and rear wheels will turn in
opposite directions. This helps the vehicle make
tighter turns, such as during parking, cornering and
turning into tight spaces.
1
4-1 1
Page 221 of 428
I
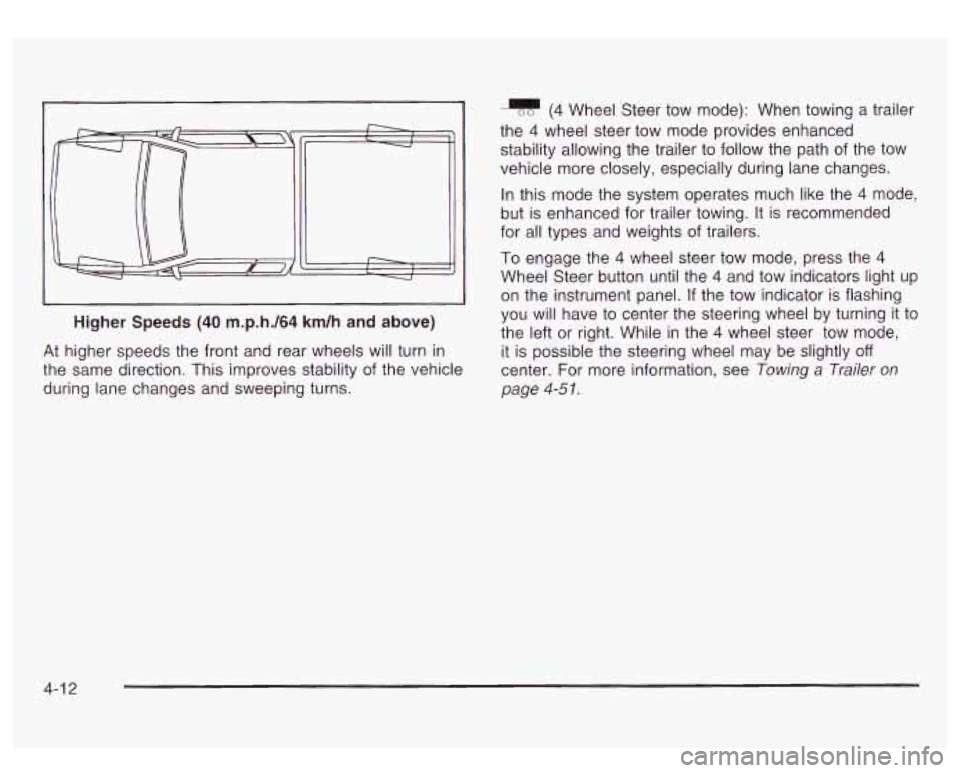
Higher Speeds (40 m.p.h./64 km/h and above)
J
At higher speeds the front and rear wheels will turn in
the same direction. This improves stability of the vehicle
during lane changes and sweeping turns.
(4 Wheel Steer tow mode): When towing a trailer
the
4 wheel steer tow mode provides enhanced
stability allowing the trailer to follow the path of the tow
vehicle more closely, especially during lane changes.
In this mode the system operates much like the
4 mode,
but is enhanced for trailer towing. It is recommended
for all types and weights
of trailers.
To engage the
4 wheel steer tow mode, press the 4
Wheel Steer button until the 4 and tow indicators light up
on the instrument panel.
If the tow indicator is flashing
you will have to center the steering wheel by turning it to
the left or right. While in the
4 wheel steer tow mode,
it is possible the steering wheel may be slightly
off
center. For more information, see Towing a Trailer on
page
4-5 I.
4-1 2
Page 261 of 428
Then, during the first 500 miles (800 km) that you
tow a trailer, don’t drive over
50 mph (80 km/h)
and don’t make starts at full throttle. This helps your
engine and other parts of your vehicle wear in at
the heavier loads.
You can tow in DRIVE (D). You may want to shift
the transmission to THIRD
(3) or, if necessary, a
lower gear selection
if the transmission shifts
too often (e.g., under heavy loads and/or hilly
conditions).
Three important considerations have to do with weight:
the weight of the trailer,
the weight of the trailer tongue
and the weight on your vehicle’s tires.
Tow/HauI Mode
Tow/haul is a feature that assists when pulling a heavy
trailer or a large or heavy load. The purpose
of the
tow/haul mode is to:
Reduce the frequency and improve the predictability
of transmission shifts when pulling a heavy trailer or
a large or heavy load.
Provide the same solid shift feel when pulling a
heavy trailer or a large or heavy load as when
the vehicle is unloaded.
Improve control of vehicle speed while requiring
less throttle pedal activity when pulling a heavy
trailer or a large or heavy load.
Your vehicle may be equipped with a switch at the end
of the shift lever which when pressed enables
tow/haul. When the switch is pressed, a light on the
instrument panel will illuminate to indicate that tow/haul
has been selected. Tow/haul may be turned
off by
pressing the switch again, at which time the indicator
light on the instrument panel will turn
off. The vehicle will
automatically turn
off tow/haul every time it is started.
4-52
Page 266 of 428
Making Turns
Stay at least twice as far behind the vehicle ahead as
you would when driving your vehicle without a trailer.
This can help you avoid situations that require
heavy braking and sudden turns.
Passing
You’ll need more passing distance up ahead when
you’re towing a trailer. And, because you’re a good deal
longer, you’ll need to go much farther beyond the
passed vehicle before you can return to your lane.
Backing Up
Hold the bottom of the steering wheel with one hand.
Then, to move the trailer to the left, just move that hand
to the left. To move the trailer to the right, move your
hand to the right. Always back up slowly and,
if possible,
have someone guide you.
Your vehicle is equipped with four-wheel steering and
if
you use it while backing your trailer the same rules
apply. However, with four-wheel steering your rig will
respond more quickly and it may take additional practice
to get used to backing up with four-wheel steering.
Notice: Making very sharp turns while trailering
could cause the trailer to come in contact with the
vehicle. Your vehicle could be damaged. Avoid
making very sharp turns while trailering.
When you’re turning with a trailer, make wider turns
than normal.
Do this so your trailer won’t strike
soft shoulders, curbs, road signs, trees or other objects.
Avoid jerky or sudden maneuvers. Signal well in
advance.
Turn Signals When Towing a Trailer
The arrows on your instrument panel will flash whenever
you signal a turn or lane change. Properly hooked up,
the trailer lamps will also flash, telling other drivers
you’re about to turn, change lanes or stop.
When towing a trailer, the arrows on your instrument
panel will flash for turns even
if the bulbs on the trailer
are burned out. Thus, you may think drivers behind
you are seeing your signal when they are not. It’s
important to check occasionally to be sure the trailer
bulbs are still working.
4-57
Page 296 of 428
Coolant Surge Tank Pressure Cap
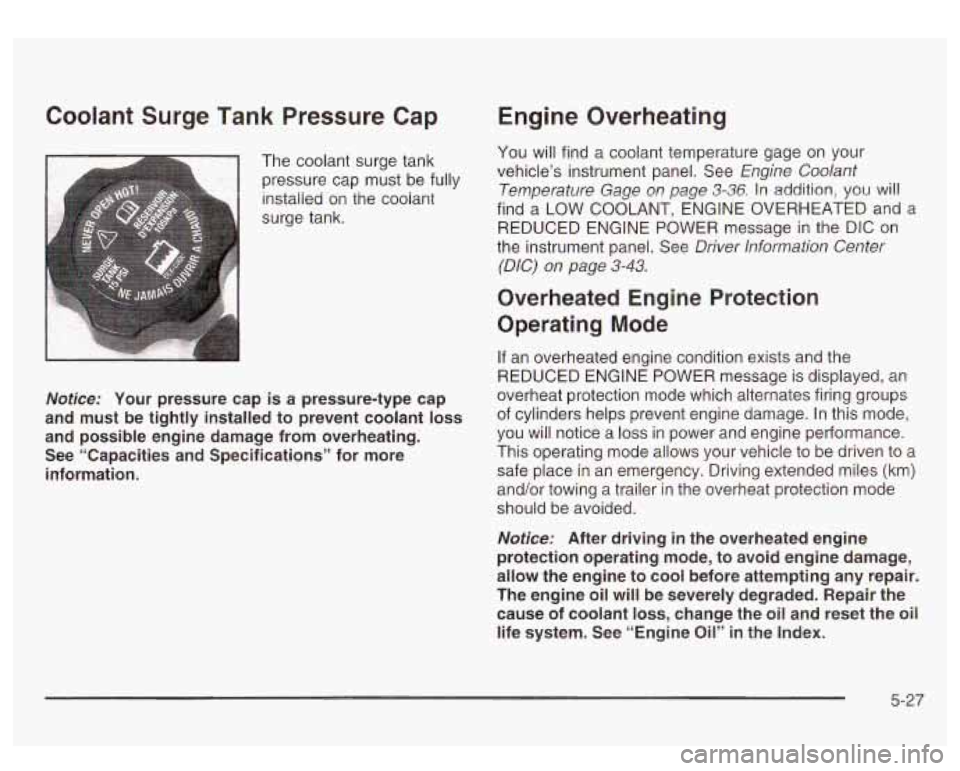
The coolant surge tank
pressure cap must be fully
installed on the coolant
surge tank.
Nofice: Your pressure cap is a pressure-type cap
and must be tightly installed to prevent coolant loss
and possible engine damage from overheating. See “Capacities and Specifications” for more
information.
Engine Overheating
You will find a coolant temperature gage on your
vehicle’s instrument panel. See
Engine Coolant
Temperature Gage
on page 3-36. In addition, you will
find a LOW COOLANT, ENGINE OVERHEATED and a
REDUCED ENGINE POWER message in the DIC on
the instrument panel. See
Driver lnformation Center
(DIC)
on page 3-43.
Overheated Engine Protection
Operating Mode
If an overheated engine condition exists and the
REDUCED ENGINE POWER message is displayed, an
overheat protection mode which alternates firing groups
of cylinders helps prevent engine damage. In this mode,
you will notice a
loss in power and engine performance.
This operating mode allows your vehicle to be driven to
a
safe place in an emergency. Driving extended miles (km)
and/or towing a trailer in the overheat protection mode
should be avoided.
Nofice: After driving in the overheated engine
protection operating mode, to avoid engine damage,
allow the engine to cool before attempting any repair.
The engine oil will be severely degraded. Repair the
cause of coolant
loss, change the oil and reset the oil
life system. See “Engine
Oil” in the Index.
5-27
Page 356 of 428
FabricKarpet Leather
Your dealer has cleaners for the cleaning of fabric and
carpet. They will clean normal spots and stains
very well.
You can get
GM - approved cleaning products from
your dealer. See
GM Vehicle Care/Appearance
Materials
on page 5-92.
Here are some cleaning tips:
Always read the instructions on the cleaner label.
Clean up stains as soon as you can - before
they set.
0 Carefully scrape off any excess stain.
Use a clean cloth or sponge, and change to a clean
area often.
A soft brush may be used if stains are
stubborn.
If a ring forms on fabric after spot cleaning, clean
the entire area immediately or it will set.
Vinyl
Use warm water and a clean cloth.
Rub with a clean, damp cloth to remove dirt. You
may have to do this more than once.
Things like tar, asphalt and shoe polish will stain if
you don’t get them off quickly. Use a clean cloth
and vinyl/leather cleaner. See your dealer for
this product. Use a
soft cloth with lukewarm water and a mild soap or
saddle soap and wipe dry with a soft cloth. Then, let
the leather dry naturally.
Do not use heat to dry.
For stubborn stains, use a leather cleaner. See your
dealer for this product.
Never use oils, varnishes, solvent-based or abrasive
cleaners, furniture polish or shoe polish on leather.
immediately.
If dirt is allowed to work into the finish,
it can harm the leather.
Soiled or stained leather should be cleaned
Top of the Instrument Panel
Use only mild soap and water to clean the top surfaces
of the instrument panel. Sprays containing silicones
or waxes may cause annoying reflections in the
windshield and even make it difficult to see through the
windshield under certain conditions.
Interior Plastic Components
Use only a mild soap and water solution on a soft cloth
or sponge. Commercial cleaners may affect the
surface finish.
Wood Panels
Use a clean cloth moistened in warm, soapy water (use
mild dish washing soap).
Dry the wood immediately
with a clean cloth.
5-87