2003 GMC SIERRA DENALI wheel
[x] Cancel search: wheelPage 129 of 428
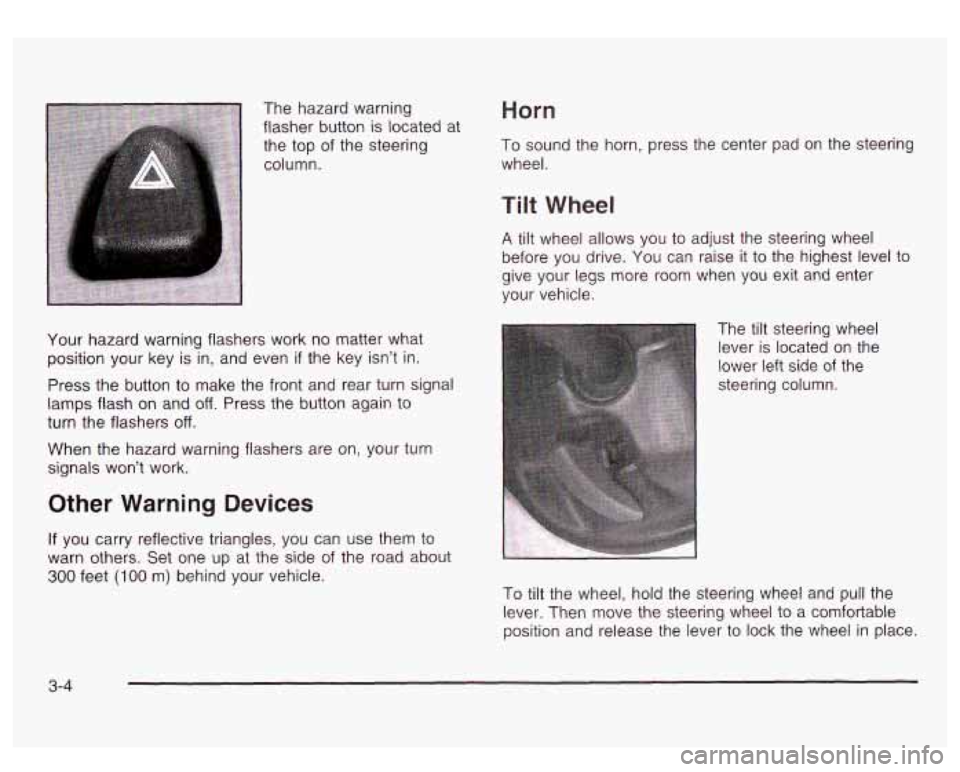
The hazard warning
flasher button is located at
the top
of the steering
column.
Horn
To sound the horn, press the center pad on the steerin?
wheel.
Your hazard warning flashers work no matter what
position your key is in, and even
if the key isn’t in.
Press the button to make the front and rear turn signal
lamps flash on and
off. Press the button again to
turn the flashers
off.
When the hazard warning flashers are on, your turn
signals won’t work.
Other Warning Devices
If you carry reflective triangles, you can use them to
warn others. Set one up at the side
of the road about
300 feet (100 m) behind your vehicle.
Tilt Wheel
A tilt wheel allows you to adjust the steering wheel
before you drive. You can raise
it to the highest level to
give your legs more room when you exit and enter
your vehicle.
The tilt steering wheel
lever is located on the
lower left side
of the
steering column.
To tilt the wheel, hold the steering wheel and pull the
lever. Then move the steering wheel to a comfortable
position and release the lever to lock the wheel in place.
3-4
Page 133 of 428
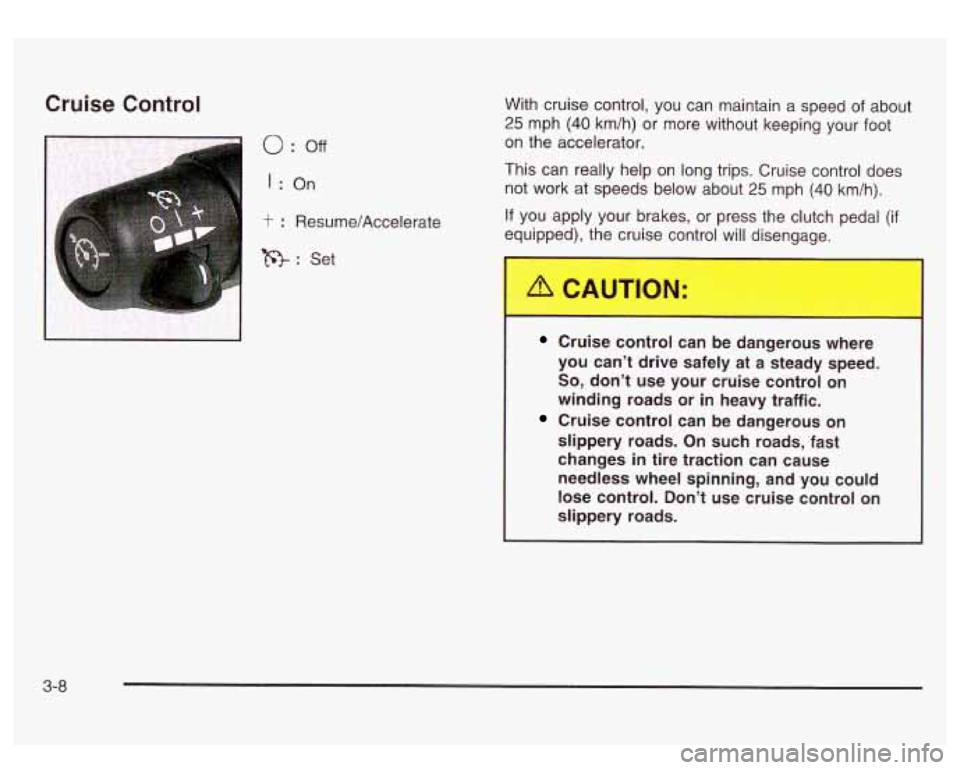
Cruise Control
0 : off
I : On
t : Resume/Accelerate
R: Set With cruise control,
you can maintain
a speed of about
25 mph (40 km/h) or more without keeping your foot
on the accelerator.
This can really help on long trips. Cruise control does
not work at speeds below about
25 mph (40 km/h).
If you apply your brakes, or press the clutch pedal (if
equipped), the cruise control will disengage.
Cruise control can be dangerous where
you can’t drive safely at a steady speed.
So, don’t use your cruise control on
winding roads or in heavy traffic.
Cruise control can be dangerous on
slippery roads. On such roads, fast
changes
in tire traction can cause
needless wheel spinning, and you could
lose control. Don’t use cruise control on
slippery roads.
3-8
Page 140 of 428
Front Reading Lamps Interior Lamps
Instrument Panel Brightness Control
-g-: This feature controls the brightness of the
instrument panel lights.
The thumbwheel for this feature is located next
to the
exterior lamp control.
Turn the thumbwheel up to adjust the instrument panel
lights and return the radio display to full brightness
when the headlamps or parking lamps are on. To turn
on the dome lamps, with the vehicle doors closed,
turn the thumbwheel all the way up.
Exit Lighting
With exit lighting, the interior lamps will come on when
you remove the key from the ignition. The lamps
will not come on
if the dome override button is pressed
in.
Entry Lighting
Your vehicle is equipped with an illuminated entry
feature.
When a door is opened, the dome lamps and puddle
lamps will come on
if the dome override button is in the
out position. If the dome override button is pressed
in, the lamps will not come on. Your
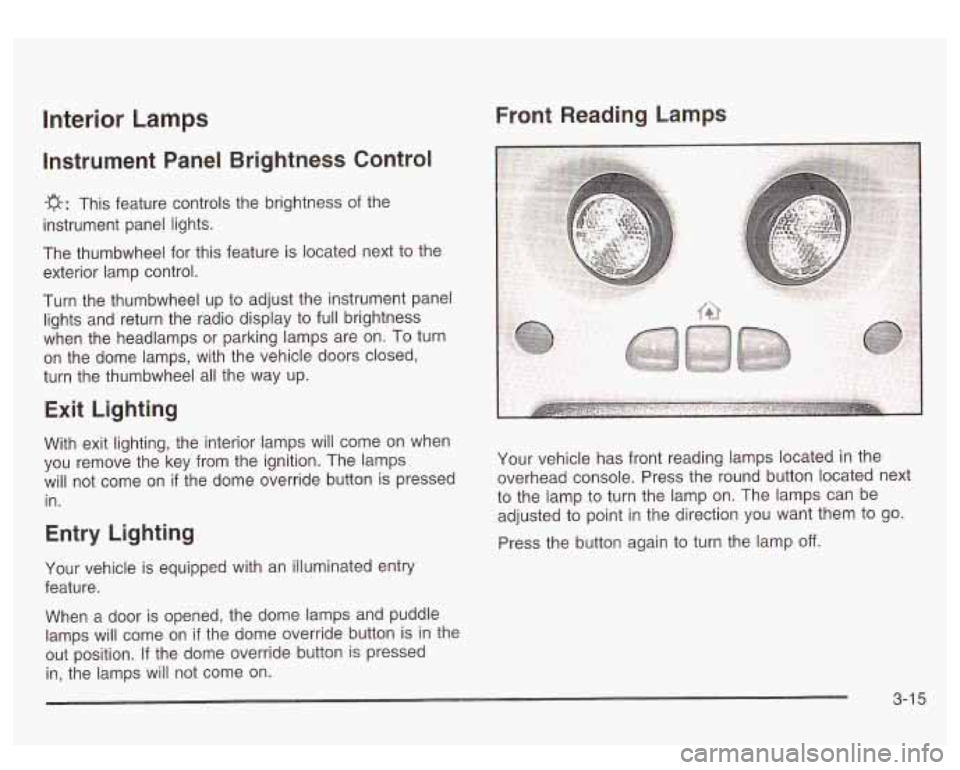
vehicle has front reading lamps located in the
overhead console. Press the round button located next
to the lamp to turn the lamp on. The lamps can be
adjusted to point in the direction you want them to go.
Press the button again to turn the lamp
off.
3-1 5
Page 141 of 428
Dome Lamps
The dome lamps will come on when you open a door
and the dome override button is
in the out position.
You can also turn the dome lamps on by turning
the thumbwheel, located next to the exterior lamps
control, all the way up. In this position, the dome lamps
will remain on whether the doors are opened or
closed.
*: You can use the dome override button, located
below the exterior lamps control, to set the dome lamps
to come on automatically when the doors are opened,
or to remain
off. To turn the lamps off, press the button
to the
in position. With the button in this position, the
dome lamps will remain
off when the doors are open. To
return the lamps to automatic operation, press the
button again and return the button to the out position.
With the button
in this position, the dome lamps
will come on when you open a door.
Battery Run-Down Protection
This feature shuts off the dome, reading, glove box, and
underhood lamps
if they are left on for more than
10 minutes when the ignition is turned off. The cargo
lamp will shut
off after 20 minutes. This will keep
your battery from running down.
Accessory Power Outlets
With accessory power outlets you can plug in auxiliary
electrical equipment such as a cellular telephone or
other devices designed to operate with vehicle electrical
systems.
Your vehicle is equipped with several accessory power
outlets. The front outlet is located next to the floor
console. Lift up on the door to access the outlet.
The second outlet is located
in the center console. Press
the button on the side
of the console door to access
the outlet. See
Center Console Storage Area on
page 2-39 for more information.
There is also one accessory power outlet located on the
rear of the center console. Lift up on the doors to
access the outlets.
3-1 6
Page 148 of 428
Outlet Adjustment Operation Tips
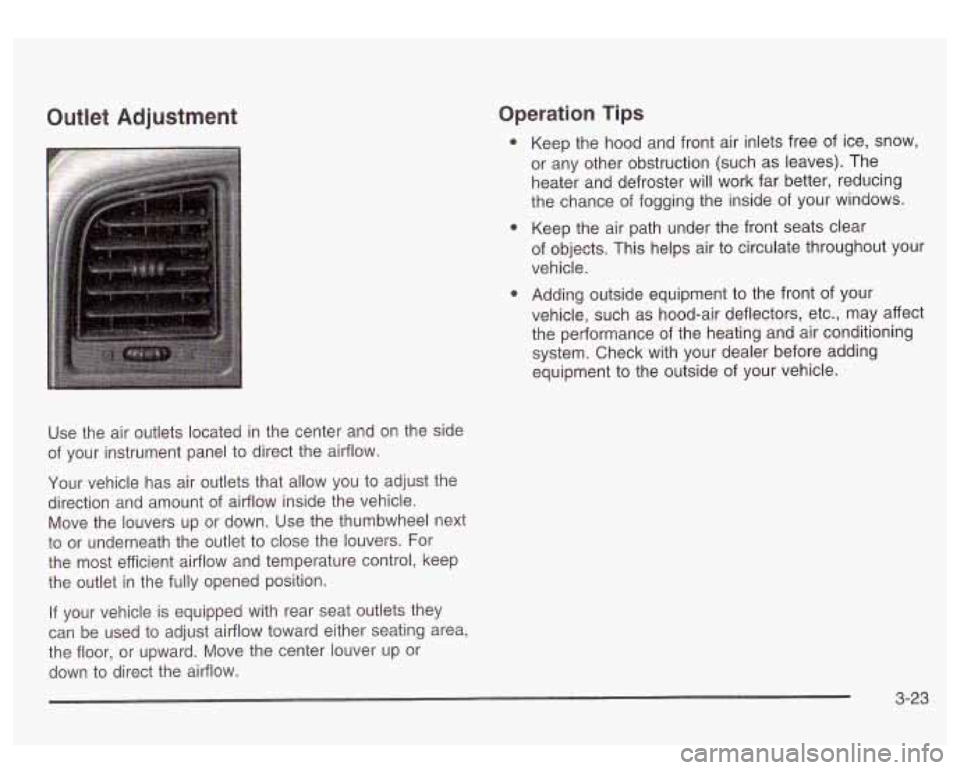
Use the air outlets located in the center and on the side
of your instrument panel to direct the airflow.
Your vehicle has air outlets that allow you to adjust the
direction and amount of airflow inside the vehicle.
Move the louvers up or down. Use the thumbwheel next
to or underneath the outlet to close the louvers. For
the most efficient airflow and temperature control, keep
the outlet in the fully opened position.
If your vehicle is equipped with rear seat outlets they
can be used
to adjust airflow toward either seating area,
the floor, or upward. Move the center louver up or
down
to direct the airflow. Keep
the hood and front air inlets free
of ice, snow,
or any other obstruction (such as leaves). The
heater and defroster will work far better, reducing
the chance of fogging the inside of your windows.
Keep the air path under the front seats clear
of objects. This helps air
to circulate throughout your
vehicle.
Adding outside equipment
to the front of your
vehicle, such as hood-air deflectors, etc., may affect
the performance
of the heating and air conditioning
system. Check with your dealer before adding
equipment
to the outside of your vehicle.
3-23
Page 168 of 428
Driver Information Center (DIC)
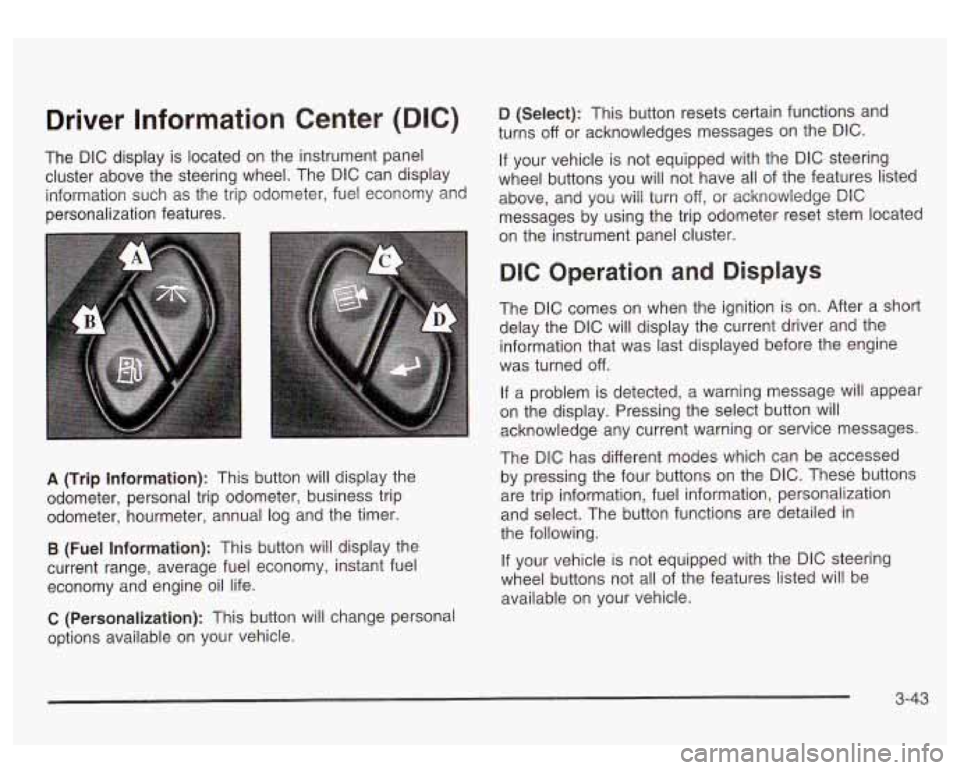
The DIC display is located on the instrument panel
cluster above the steering wheel. The DIC can display
information such as the trip odometer, fuel economy and
personalization features.
A (Trip Information): This button will display the
odometer, personal trip odometer, business trip
odometer, hourmeter, annual log and the timer.
B (Fuel Information): This button will display the
current range, average fuel economy, instant fuel
economy and engine oil life.
C (Personalization): This button will change personal
options available on your vehicle.
D (Select): This button resets certain functions and
turns
off or acknowledges messages on the DIC.
If your vehicle is not equipped with the DIC steering
wheel buttons you will not have all of the features listed
above, and you will turn off,
or acknowledge DIC
messages by using the trip odometer reset stem located
on the instrument panel cluster.
DIC Operation and Displays
The DIC comes on when the ignition is on. After a short
delay the DIC will display the current driver and the
information that was last displayed before the engine
was turned
off.
If a problem is detected, a warning message will appear
on the display. Pressing the select button will
acknowledge any current warning or service messages.
The DIC has different modes which can be accessed
by pressing the four buttons on the DIC. These buttons
are trip information, fuel information, personalization
and select. The button functions are detailed in
the following.
If your vehicle is not equipped with the DIC steering
wheel buttons not all of the features listed will be
available on your vehicle.
3-43
Page 169 of 428
Trip Information Button
Use the trip information button to scroll through the
SEASON ODOMETER, PERSONAL TRIP ON/OFF,
BUSINESS TRIP ON/OFF, HOURMETER, ANNUAL
LOG and TIMER.
If the personal trip and/or the business
trip are set to ON, you will also be able to scroll
through more messages. See
Personal Trip and
Business Trip next for more information.
If your vehicle is not equipped with the DIC steering
wheel buttons you can select the trip information
by pressing the trip odometer reset stem
on the
instrument panel cluster.
Personal Trip
If the PERSONAL TRIP is on (turn it on or off by
pressing the select button) you will also be able to scroll
through the following:
e
e
e
PERSONAL: XX MI - This shows the current
distance traveled since the last reset for the
personal trip odometer in either miles or kilometers.
PERSONAL: XX.X MPG
- This shows the amount
of fuel used for the personal trip.
PERSONAL: AVG ECONOMY
- This shows how
many miles per gallon of fuel your vehicle is
getting for the personal trip based on current and
past driving conditions.
PERSONAL: AVG MPH - This shows the vehicle’s
average speed for the personal trip.
PERSONAL: % ANNUAL - This shows the ratio of
personal trip miles to annual miles as a percent.
You can reset the personal trip odometer by pressing
and holding the trip odometer reset stem.
Business Trip
If the BUSINESS TRIP is on (turn it on or off by
pressing the select button) you will also be able
to scroll
through the following:
e
e
e
BUSINESS: XX MI - This shows the current
distance traveled since the last reset for the
business trip odometer in either miles or kilometers.
BUSINESS: XX.X MPG
- This shows the amount
of fuel used for the business trip.
BUSINESS: AVG ECONOMY
- This shows how
many miles per gallon
of fuel your vehicle is
getting for the business trip based on current and
past driving conditions.
BUSINESS: AVG MPH
- This shows the vehicle’s
average speed for the business trip.
BUSINESS:
Yo ANNUAL - This shows the ratio of
business trip miles to annual miles as a percent.
3-44
Page 170 of 428
To reset the personal or business trip information, do
the following: press and hold select button for two
seconds while in one of the personal or business trip
modes. This will reset all of the information for the
personal or business trip, or
if your vehicle does not
have the DIC steering wheel control buttons, press the
reset stem on the instrument panel cluster.
You can also reset the PERSONAL:
XX MI, or
BUSINESS:
XX MI, while they are displayed by pressing
the reset stem on the cluster.
If you press and hold
the reset stem or select button for four seconds,
the display
will show the distance traveled since the last
ignition cycle for the personal or business trip.
Season Odometer
Press the trip information button, or the trip odometer
reset step, until SEASON ODOMETER appears on
the display. This shows the total distance the vehicle has
been driven in either miles or kilometers. Pressing the
reset stem located on the instrument cluster with
the vehicle
off will also display the season odometer.
Hourmeter
Press the trip button to scroll to the hourmeter. The
hourmeter shows the total number of hours the engine
has run. Pressing the reset stem on the instrument
cluster will also display the hourmeter after the season
odometer is displayed.
Annual Log
Press the trip button, or the reset stem on the instrument
panel cluster, to scroll to the annual
log. The annual
log shows the mileage accumulated since
it was
last reset.
Po reset the annual log, press and hold the
select button, or the trip odometer reset stem for
approximately two seconds.
Timer
The DIC can be used as a stopwatch. Press the select
button, or the trip odometer reset stem, while TIMER
is displayed to start the timer. The display will show the
amount of time that has passed since the timer was
last reset (not including time the ignition is
off). Time will
continue to be counted as long as the ignition is on,
even
if another display is being shown on the DIC. The
timer will record up to 99 hours, 59 minutes and
59 seconds (99:59:59) after which the display will roll
back to zero.
To stop the counting of time, press the select button
briefly while TIMER is displayed.
To reset the timer to zero, press and hold the select
button, or the trip odometer reset stem, while TIMER is
displayed.
3-45