Page 3079 of 4378

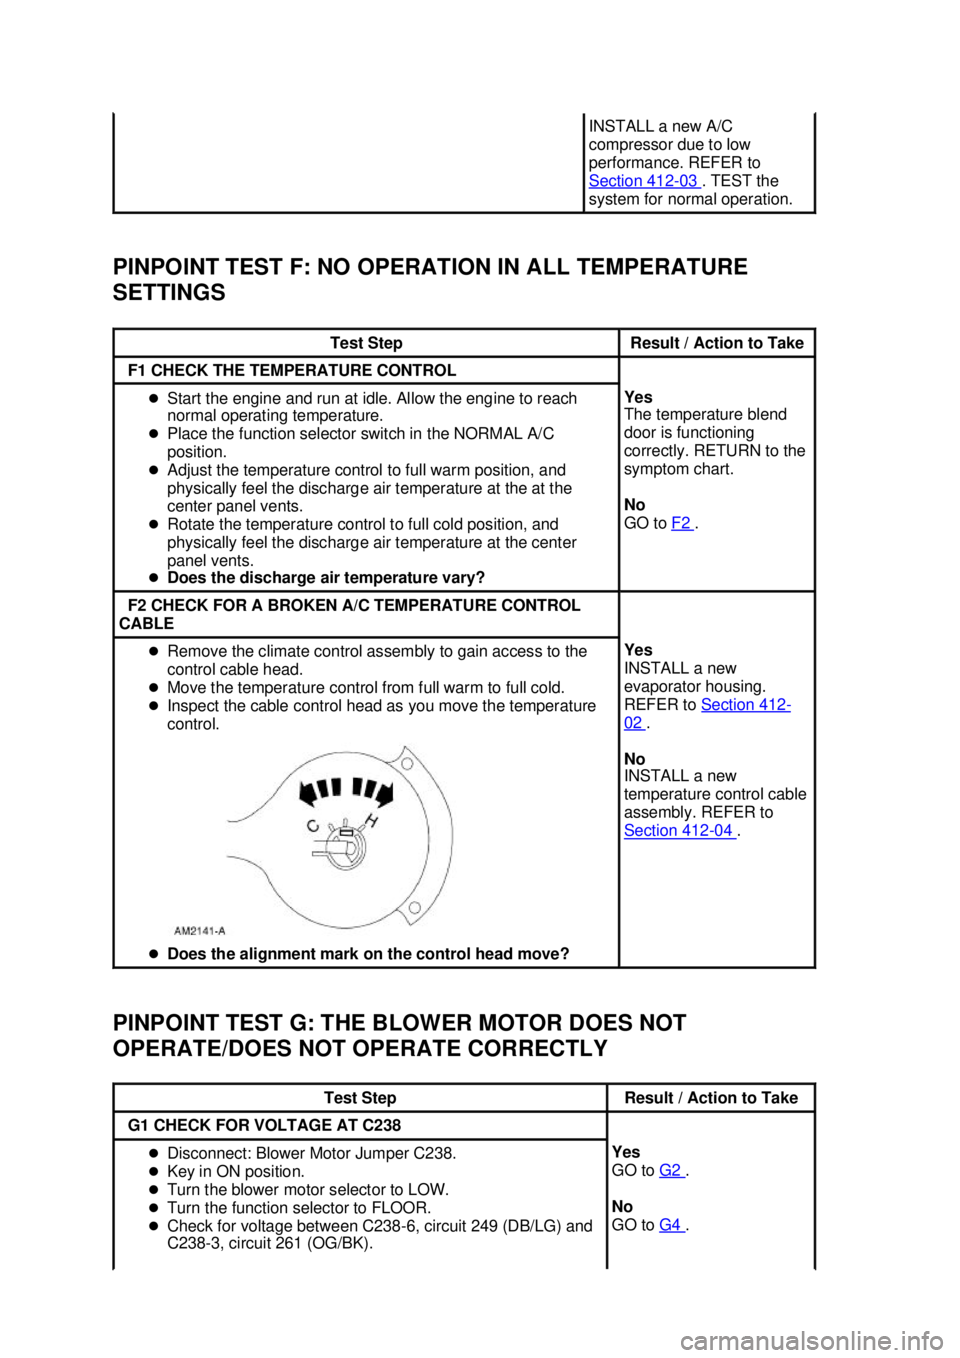
PINPOINT TEST F: NO OPERATION IN ALL TEMPERATURE
SETTINGS
PINPOINT TEST G: THE BLOWER MOTOR DOES NOT
OPERATE/DOES NOT OPERATE CORRECTLY INSTALL a new A/C
compressor due to low
performance. REFER to
Section 412
- 03 . TEST the
system for normal operation. Test Step Result / Action to Take
F1 CHECK THE TEMPERATURE CONTROL
�z
Start the engine and run at idle. Allow the engine to reach
normal operating temperature.
�z Place the function selector switch in the NORMAL A/C
position.
�z Adjust the temperature control to full warm position, and
physically feel the discharge air temperature at the at the
center panel vents.
�z Rotate the temperature control to full cold position, and
physically feel the discharge air temperature at the center
panel vents.
�z Does the discharge air temperature vary? Yes
The temperature blend
door is functioning
correctly. RETURN to the
symptom chart.
No
GO to
F2 .
F2 CHECK FOR A BROKEN A/C TEMPERATURE CONTROL
CABLE �z
Remove the climate control assembly to gain access to the
control cable head.
�z Move the temperature control from full warm to full cold.
�z Inspect the cable control head as you move the temperature
control.
�z Does the alignment mark on the control head move? Yes
INSTALL a new
evaporator housing.
REFER to
Section 412 -
02 .
No
INSTALL a new
temperature control cable
assembly. REFER to
Section 412 - 04 .
Test Step Result / Action to Take
G1 CHECK FOR VOLTAGE AT C238
�z
Disconnect: Blower Motor Jumper C238.
�z Key in ON position.
�z Turn the blower motor selector to LOW.
�z Turn the function selector to FLOOR.
�z Check for voltage between C238- 6, circuit 249 (DB/LG) and
C238- 3, circuit 261 (OG/BK). Yes
GO to
G2 .
No
GO to G4 . �K�l�j . 30 �b�a
412003 Mustang Workshop Manual
18. 11. 2011file:///C:/Ford/2000 - 2004/tsocache/SHEF_2308/S3B~us~en~ ...
Page 3091 of 4378

GENERAL PROCEDURES
Air Conditioning (A/C) System Check —
Retail Procedure
NOTE: This Retail Procedure is not eligible for claiming on Ford paid repairs (warranty and ESP).
NOTE: The engine should be run at idle for 10 minutes with the air conditioning on and set to MAX A/C
before carrying out this retail procedure.
NOTE: Read and follow all of the Warnings, Cautions and Notes at the beginning of this section before
continuing.
1. Visual inspection
Open the hood and visually inspect the heating and air conditioning systems for the following:
�zCoolant reservoir for correct coolant level
�z Heater hoses for deterioration or loose connections
�z Radiator and condenser for debris or damaged fins restricting airflow, loose mounting or
connections
�z Accessory drive belt(s) and cooling fan(s) for wear or physical damage
�z Refrigerant lines and connections for physical damage or loose connections
�z Compressor for physical damage or loose connections
�z Suction accumulator/drier for physical damage or loose connections
�z Wiring and connectors for excessive wear, loose or damaged connections, or incorrect
routing
2. A/C refrigerant analysis
�zCarry out air conditioning refrigerant analysis. For additional information, refer to
Refrigerant Identification Testing in this section.
�z If the refrigerant fails the analysis, discontinue diagnosis and make recommendations for
repairs.
�z If the refrigerant passes the analysis, carry out the air conditioning system check.
3. Air conditioning system check
�zConnect manifold gauge set or charging station with gauges to refrigerant system.
�z With the vehicle in park, parking brake set, thermometer installed in center panel vent,
and air conditioning system on and set to MAX A/C, start the engine.
�z Record air refrigerant system pressures while running the engine at 1,500 rpm and allow
engine to return to idle.
�z Operate the blower motor in all control positions and check for correct blower speed
changes.
�z With the blower motor on HI, operate air discharge mode selector in all positions and
check for correct airflow in each position.
�z Operate the temperature blend selector in all positions and check for correct change in
discharge temperature. Check the air discharge temperature with the selector in the
coolest position and the air conditioning on and set to MAX A/C to determine if the air
discharge temperature is acceptable for the current ambient air temperature.
�z Carry out the EATC self- test (if applicable).
If the refrigerant system pressures were low, carry out the refrigerant system leak test.
SECTION 412-
00: Climate Control System - General Information 2003 Mustang Workshop Manual �K�l�j . 1 �b�a
22003 Mustang Workshop Manual
18. 11. 2011file:///C:/Ford/2000 - 2004/tsocache/SHEF_2308/S3B~us~en~ ...
Page 3093 of 4378
GENERAL PROCEDURES
Spring Lock Coupling
Disconnect
1. Remove the A/C tube lock coupling clip (19E746), if equipped.
2. Fit the special tool to the spring lock coupling.
3. Push the tool into the cage opening to release the female fitting from the A/C tube lock coupling spring (19E576).
SECTION 412-
00: Climate Control System - General Information 2003 Mustang Workshop Manual Special Tool(s)
Remover, Refrigerant Coupling
Set
412-
039 (T84L-19623- B) �K�l�j . 1 �b�a
62003 Mustang Workshop Manual
18. 11. 2011file:///C:/Ford/2000 - 2004/tsocache/SHEF_2308/S3B~us~en~ ...
Page 3099 of 4378

GENERAL PROCEDURES
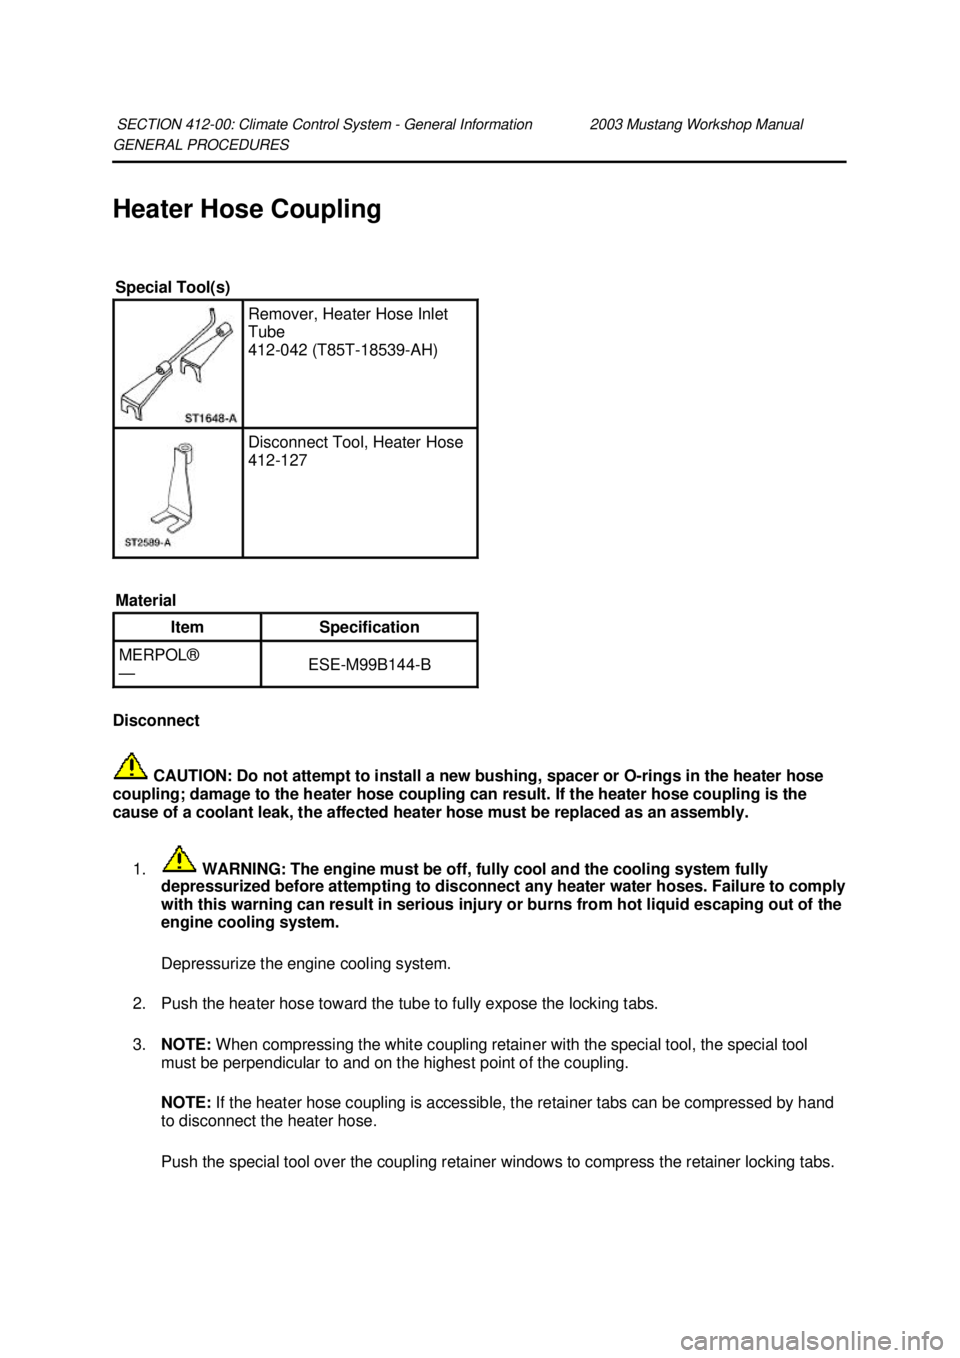
Heater Hose Coupling
Disconnect
CAUTION: Do not attempt to install a new bushing, spacer or O- rings in the heater hose
coupling; damage to the heater hose coupling can result. If the heater hose coupling is the
cause of a coolant leak, the affected heater hose must be replaced as an assembly.
1. WARNING: The engine must be off, fully cool and the cooling system fully
depressurized before attempting to disconnect any heater water hoses. Failure to comply
with this warning can result in serious injury or burns from hot liquid escaping out of the
engine cooling system.
Depressurize the engine cooling system.
2. Push the heater hose toward the tube to fully expose the locking tabs.
3. NOTE: When compressing the white coupling retainer with the special tool, the special tool
must be perpendicular to and on the highest point of the coupling.
NOTE: If the heater hose coupling is accessible, the retainer tabs can be compressed by hand
to disconnect the heater hose.
Push the special tool over the coupling retainer windows to compress the retainer locking tabs.
SECTION 412-
00: Climate Control System - General Information 2003 Mustang Workshop Manual Special Tool(s)
Remover, Heater Hose Inlet
Tube
412-
042 (T85T-18539- AH) Disconnect Tool, Heater Hose
412-
127
Material Item Specification
MERPOL®
—
ESE-
M99B144- B �K�l�j . 1 �b�a
32003 Mustang Workshop Manual
18. 11. 2011file:///C:/Ford/2000 - 2004/tsocache/SHEF_2308/S3B~us~en~ ...
Page 3102 of 4378
GENERAL PROCEDURES
Air Conditioning Line (Peanut) Fitting
Disconnect
1. CAUTION: Support the female fitting with a wrench to prevent the tubes from
twisting.
Remove the nut from the peanut fitting.
2. Pull the peanut fitting apart.
3. CAUTION: Do not use metal tools to remove the O- ring seal. They can cause axial
scratches across the O- ring seal groove, resulting in refrigerant leaks.
Remove the O- ring seal with a non- metallic tool.
SECTION 412-
00: Climate Control System - General Information 2003 Mustang Workshop Manual �K�l�j . 1 �b�a
32003 Mustang Workshop Manual
18. 11. 2011file:///C:/Ford/2000 - 2004/tsocache/SHEF_2308/S3B~us~en~ ...
Page 3105 of 4378

GENERAL PROCEDURES
Refrigerant System Tests
1. Connect the R- 134a Manifold Gauge Set. For additional information, refer to Manifold Gauge Set Connection in this section.
2. Adjust the climate controls for maximum cooling. �zStart the engine.
�z Select MAX A/C operation.
�z Set the blower motor speed to maximum.
3. Stabilize the in- vehicle temperature at 21- 27°C (70-80°F).
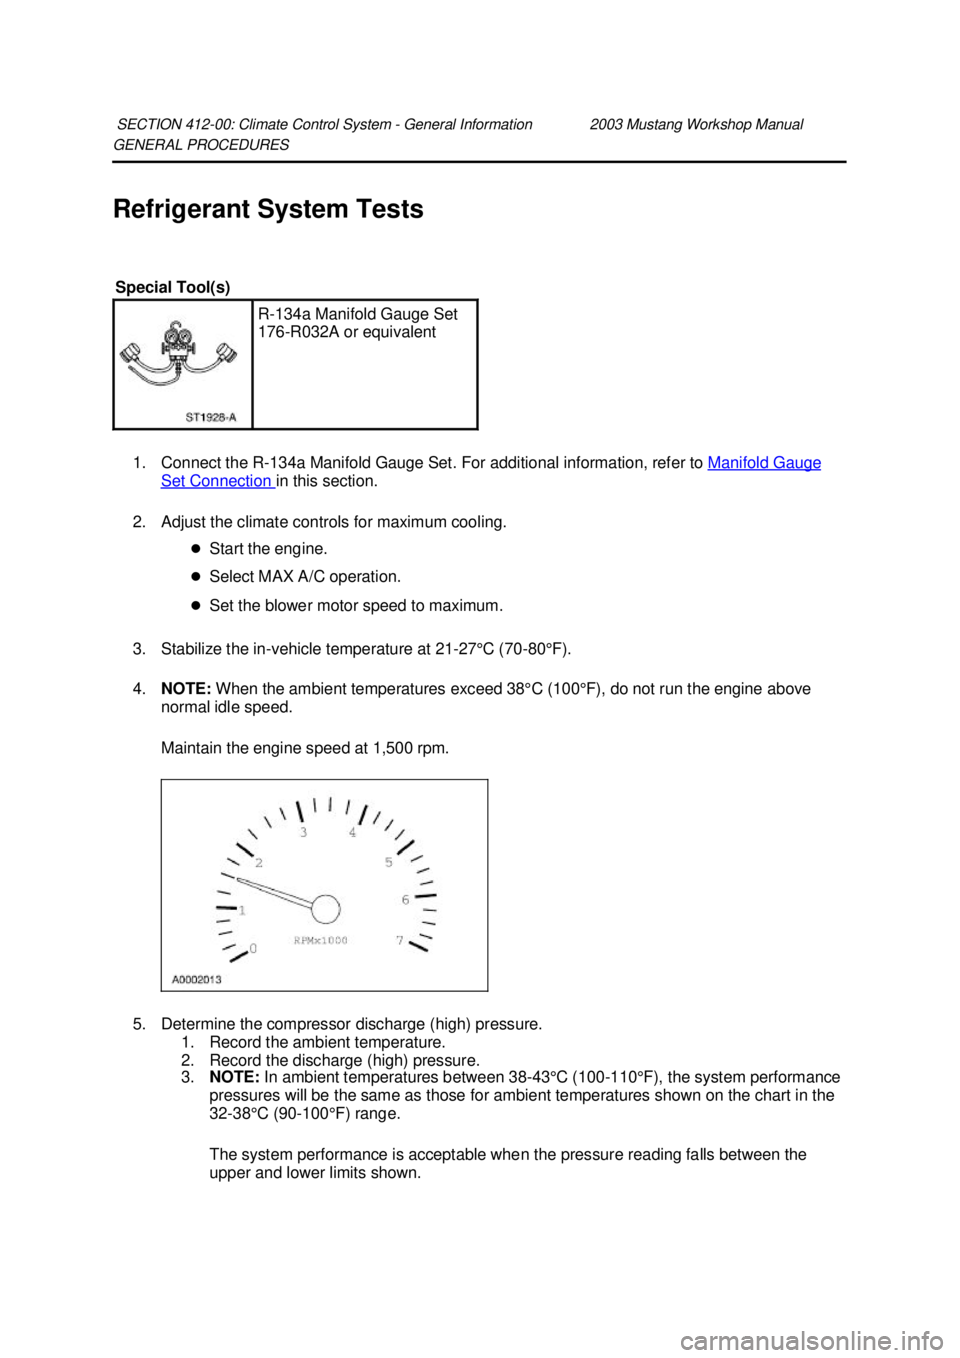
4. NOTE: When the ambient temperatures exceed 38°C (100°F), do not run the engine above
normal idle speed.
Maintain the engine speed at 1,500 rpm.
5. Determine the compressor discharge (high) pressure. 1. Record the ambient temperature.
2. Record the discharge (high) pressure.
3.NOTE: In ambient temperatures between 38- 43°C (100-110°F), the system performance
pressures will be the same as those for ambient temperatures shown on the chart in the
32- 38°C (90- 100°F) range.
The system performance is acceptable when the pressure reading falls between the
upper and lower limits shown.
SECTION 412-
00: Climate Control System - General Information 2003 Mustang Workshop Manual Special Tool(s)
R-
134a Manifold Gauge Set
176- R032A or equivalent �K�l�j . 1 �b�a
42003 Mustang Workshop Manual
18. 11. 2011file:///C:/Ford/2000 - 2004/tsocache/SHEF_2308/S3B~us~en~ ...
Page 3109 of 4378
GENERAL PROCEDURES
Air Conditioning (A/C) Clutch Air Gap Adjustment
1. Check the A/C clutch air gap at three equally- spaced places between the A/C clutch hub (2884)
and the A/C clutch pulley (2E884).
2. Remove the A/C clutch. Add or remove spacers between the A/C clutch and the compressor shaft until clearance is within specification. For additional information, refer to Section 412 - 03 .
SECTION 412-
00: Climate Control System - General Information 2003 Mustang Workshop Manual �K�l�j . 1 �b�a
12003 Mustang Workshop Manual
18. 11. 2011file:///C:/Ford/2000 - 2004/tsocache/SHEF_2308/S3B~us~en~ ...
Page 3110 of 4378
GENERAL PROCEDURES
Manifold Gauge Set Connection
1. Turn both valves on the R- 134a Manifold Gauge Set clockwise to close the low- and high-
pressure hoses to the center manifold and center hose.
2. Remove the A/C charging valve cap (19D702) from the low- pressure service gauge port valve.
3. Remove the A/C charging valve cap from the high- pressure service gauge port valve.
SECTION 412-
00: Climate Control System - General Information 2003 Mustang Workshop Manual Special Tool(s)
R-
134a Manifold Gauge Set
176- R032A or equivalent �K�l�j . 1 �b�a
32003 Mustang Workshop Manual
18. 11. 2011file:///C:/Ford/2000 - 2004/tsocache/SHEF_2308/S3B~us~en~ ...