Page 3894 of 4378

REMOVAL AND INSTALLATION
Motor —
Windshield Wiper
Removal
CAUTION: The internal permanent magnets used in the windshield wiper motor are made
of a glass- like material. To avoid damaging the magnets, do not strike the motor with a hammer
or any other object.
NOTE: The windshield wiper motor is not a repairable item. If worn or damaged, install a new wiper
motor.
1. Park the windshield wipers in the full upright position. This will allow for easy access to the retaining clip on the wiper motor output shaft.
2. Remove the cowl top vent panels.
3. Disconnect the negative battery cable.
4. Disconnect the mounting arm and pivot shaft linkage from the wiper motor output shaft. 1. Remove the clip.
2. Disconnect the mounting arm and pivot shaft linkage.
5. Remove the wiper motor. 1. Disconnect the electrical connector. 2. Remove the bolts. SECTION 501-
16: Wipers and Washers 2003 Mustang Workshop Manual �K�l�j . 1 �b�a
32003 Mustang Workshop Manual
18. 11. 2011file:///C:/Ford/2000 - 2004/tsocache/SHEF_5108/S3B~us~en~ ...
Page 3895 of 4378
Installation
1. NOTE: Install the retaining clip onto the mounting arm and pivot shaft linkage prior to the
installation of the wiper motor.
Install the wiper motor
1. Install the bolts.
2. Connect the electrical connector.
2. Snap the mounting arm and pivot shaft linkage onto the wiper motor output shaft.
3. NOTE: When the battery is disconnected and reconnected, some abnormal drive symptoms
may occur while the vehicle relearns its adaptive strategy. The vehicle may need to be driven
16 km (10 miles) or more to relearn the strategy.
Reconnect the negative battery cable.
4. Cycle the wiper motor to the park position.
5. Install the cowl top vent panels. �zAdjust pivot arms as necessary. Refer to Wiper Blade and Pivot Arm Adjustment . �K�l�j . 2 �b�a
32003 Mustang Workshop Manual
18. 11. 2011file:///C:/Ford/2000 - 2004/tsocache/SHEF_5108/S3B~us~en~ ...
Page 3944 of 4378
REMOVAL AND INSTALLATION
Convertible Top Material
Removal
1. Remove the rear exterior trim mouldings.
2. Remove the clips.
3. Remove the 13 Torx® screws and the seal compression panel.
4. Remove the staples.
5. Remove the staples from the number one bow.
SECTION 501-
18: Convertible Top 2003 Mustang Workshop Manual �K�l�j . 1 �b�a
132003 Mustang Workshop Manual
18. 11. 2011file:///C:/Ford/2000 - 2004/tsocache/SHEF_5108/S3B~us~en~ ...
Page 3956 of 4378
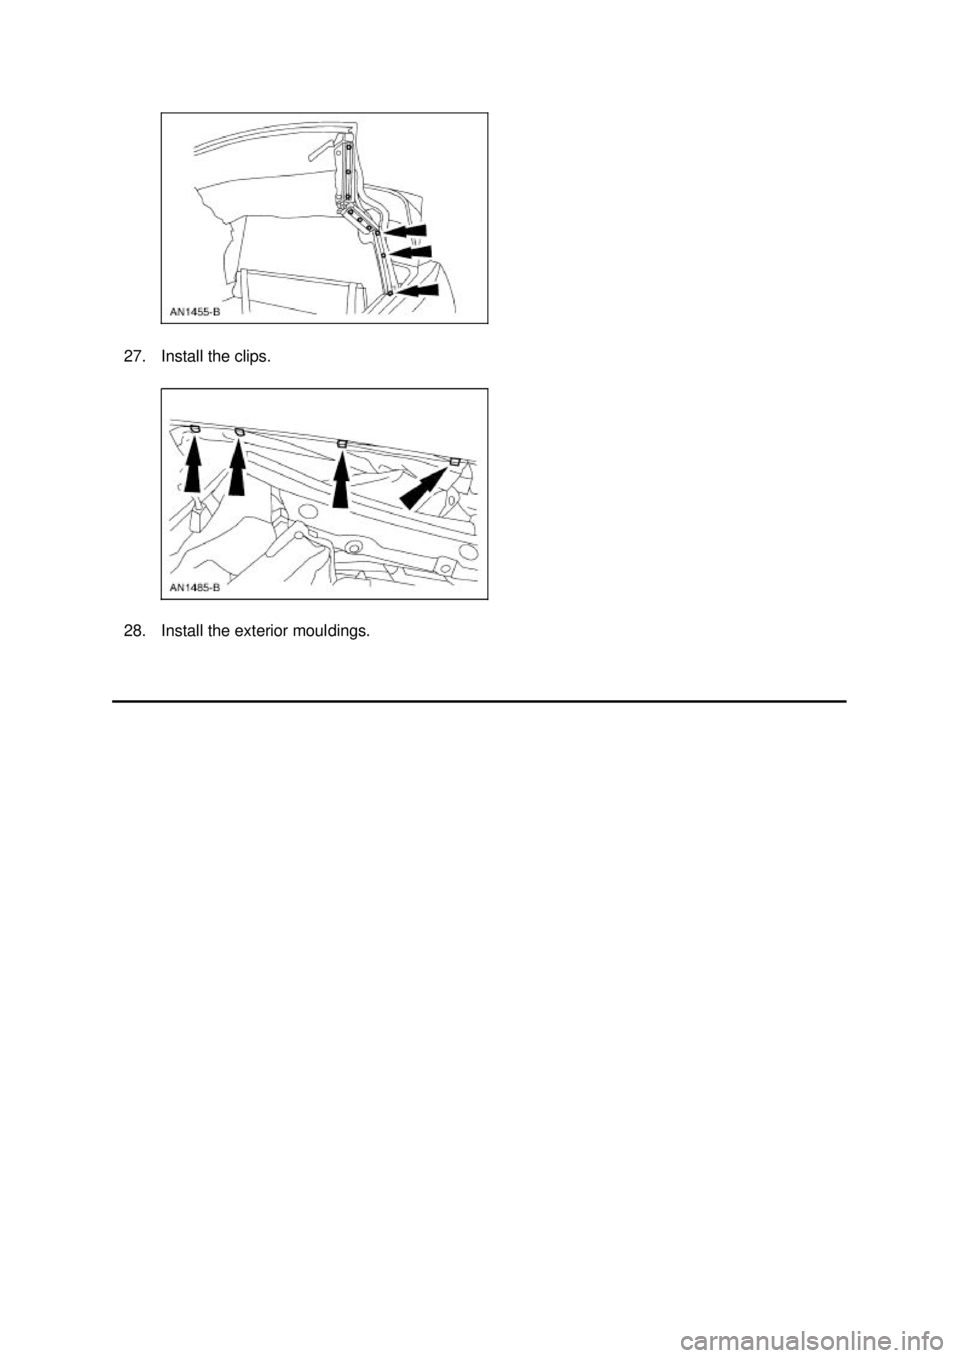
27. Install the clips.
28. Install the exterior mouldings. �K�l�j . 13 �b�a
132003 Mustang Workshop Manual
18. 11. 2011file:///C:/Ford/2000 - 2004/tsocache/SHEF_5108/S3B~us~en~ ...
Page 3960 of 4378
REMOVAL AND INSTALLATION
Convertible Top Switch
Removal and Installation
1. Remove the floor console. For additional information, refer to Section 501 - 12 .
2. Remove the convertible top switch. 1. Disconnect the electrical connector.
2. Release the clips.
3. To install, reverse the removal procedure.
SECTION 501-
18: Convertible Top 2003 Mustang Workshop Manual �K�l�j . 1 �b�a
12003 Mustang Workshop Manual
18. 11. 2011file:///C:/Ford/2000 - 2004/tsocache/SHEF_5108/S3B~us~en~ ...
Page 3970 of 4378
5. Remove the four headlamp mounting clips.
6. Disconnect the parking lamp and the headlamp electrical connectors (two each) and remove the
two headlamps.
7. Remove the pin- type retainers. 8. If equipped, remove the pin - type retainers. �K�l�j . 2 �b�a
32003 Mustang Workshop Manual
18. 11. 2011file:///C:/Ford/2000 - 2004/tsocache/SHEF_5108/S3B~us~en~ ...
Page 3994 of 4378
Installation
NOTE:
Make sure the retractor tongue faces inboard.
NOTE: Make sure the safety belt is not twisted.
1. The shipping clip must remain attached prior to the installation of the retractor into the vehicle.The clip must be removed after the retractor is installed.
2. Position the safety belt anchor. Using the special tool, install the safety belt bolt.
3. Install a new mastic seal around the safety belt retractor before installing the retractor in the vehicle.
4. Position the safety belt retractor. Using the special tool, install the bolt. �K�l�j . 2 �b�a
42003 Mustang Workshop Manual
18. 11. 2011file:///C:/Ford/2000 - 2004/tsocache/SHEF_5108/S3B~us~en~ ...
Page 3997 of 4378
REMOVAL AND INSTALLATION
Retractor —
Front Seat Safety Belt, Convertible
Removal 1. Remove the quarter trim panel (31012). For additional information, refer to Section 501 - 05 .
2. Remove the nut and bolts and safety belt retractor.
Installation
NOTE: Make sure the safety belt is not twisted.
1. The shipping clip must remain attached prior to the installation of the retractor into the vehicle. The clip must be removed after the retractor is installed. 2. Position the safety belt retractor. Install the nut and bolts. SECTION 501-
20A: Safety Belt System 2003 Mustang Workshop Manual Special Tool(s)
Torx Bit, Safety Belt Bolt
501-
010 (T77L-2100- A) �K�l�j . 1 �b�a
22003 Mustang Workshop Manual
18. 11. 2011file:///C:/Ford/2000 - 2004/tsocache/SHEF_5108/S3B~us~en~ ...


 and remove the
two headlamps.
7. Remove the pin- type retainers. 8. If e")

. For additional information, refer to Section 501 - 05 .
2. Remove the")