Page 1650 of 4378
Manual transmission vehicles
10. Install the clutch release cable and install the two screws.
11. Raise and support the vehicle. For additional information, refer to Section 100 - 02 .
12. Connect the clutch release cable to the clutch release fork.
13. Install the dust shield and the screw. �K�l�j . 7 �b�a
82003 Mustang Workshop Manual
17. 11. 2011file:///C:/Ford/2000 - 2004/tsocache/SHEF_4464/S3B~us~en~ ...
Page 1658 of 4378
IN-
VEHICLE REPAIR
Engine Front Cover
Removal
All vehicles 1. Remove the air intake scoop bracket. For additional information, refer to Section 303 - 12 .
2. Remove the RH valve cover. For additional information, refer to Valve Cover RH in this section.
3. Remove the Hydro- Boost brake booster. For additional information, refer to Section 206 - 07 .
Manual transmission vehicles
4. Remove the two clutch release cable retaining screws.
All vehicles 5. Remove the LH ignition coil cover bolts and the cover.
SECTION 303-
01D: Engine — Mach I 4.6L (4V) 2003 Mustang Workshop Manual Material
Item Specification
Metal Surface Cleaner
F4AZ-
19A536- RA or equivalent WSE-
M5B392-
A Silicone Gasket and Sealant
F7AZ-
19554- EA or equivalent WSE-
M4G323-
A4 SAE 5W-
30 Premium Synthetic
Blend Motor Oil
XO- 5W30-QSP or equivalent WSS-
M2C153-
G �K�l�j . 1 �b�a
212003 Mustang Workshop Manual
17. 11. 2011file:///C:/Ford/2000 - 2004/tsocache/SHEF_4464/S3B~us~en~ ...
Page 1664 of 4378
27. Remove the drain plug and drain the oil.
�zInstall the drain plug when finished.
28. Remove the front four oil pan bolts.
Manual transmission vehicles 29. Remove the bolt and the clutch release cable shield.
30. Disengage the clutch release cable from the clutch release fork. �K�l�j . 7 �b�a
212003 Mustang Workshop Manual
17. 11. 2011file:///C:/Ford/2000 - 2004/tsocache/SHEF_4464/S3B~us~en~ ...
Page 1670 of 4378
8. Install the LH valve cover and loosely install the bolts.
9. Tighten the LH valve cover bolts in the sequence shown.
10. Raise and support the vehicle. For additional information, refer to Section 100 - 02 .
Manual transmission vehicles 11. Connect the clutch release cable to the clutch release fork. �K�l�j . 13 �b�a
212003 Mustang Workshop Manual
17. 11. 2011file:///C:/Ford/2000 - 2004/tsocache/SHEF_4464/S3B~us~en~ ...
Page 1677 of 4378
Manual transmission vehicles
36. Install the clutch release cable screws.
All vehicles 37. Install the RH valve cover. For additional information, refer to Valve Cover RH in this section.
38. Install the Hydro- Boost brake booster. For additional information, refer to Section 206 - 07 .
39. Install the air intake scoop bracket. For additional information, refer to Section 303 - 12 .
40. Fill the crankcase with clean engine oil. �K�l�j . 20 �b�a
212003 Mustang Workshop Manual
17. 11. 2011file:///C:/Ford/2000 - 2004/tsocache/SHEF_4464/S3B~us~en~ ...
Page 1710 of 4378

IN-
VEHICLE REPAIR
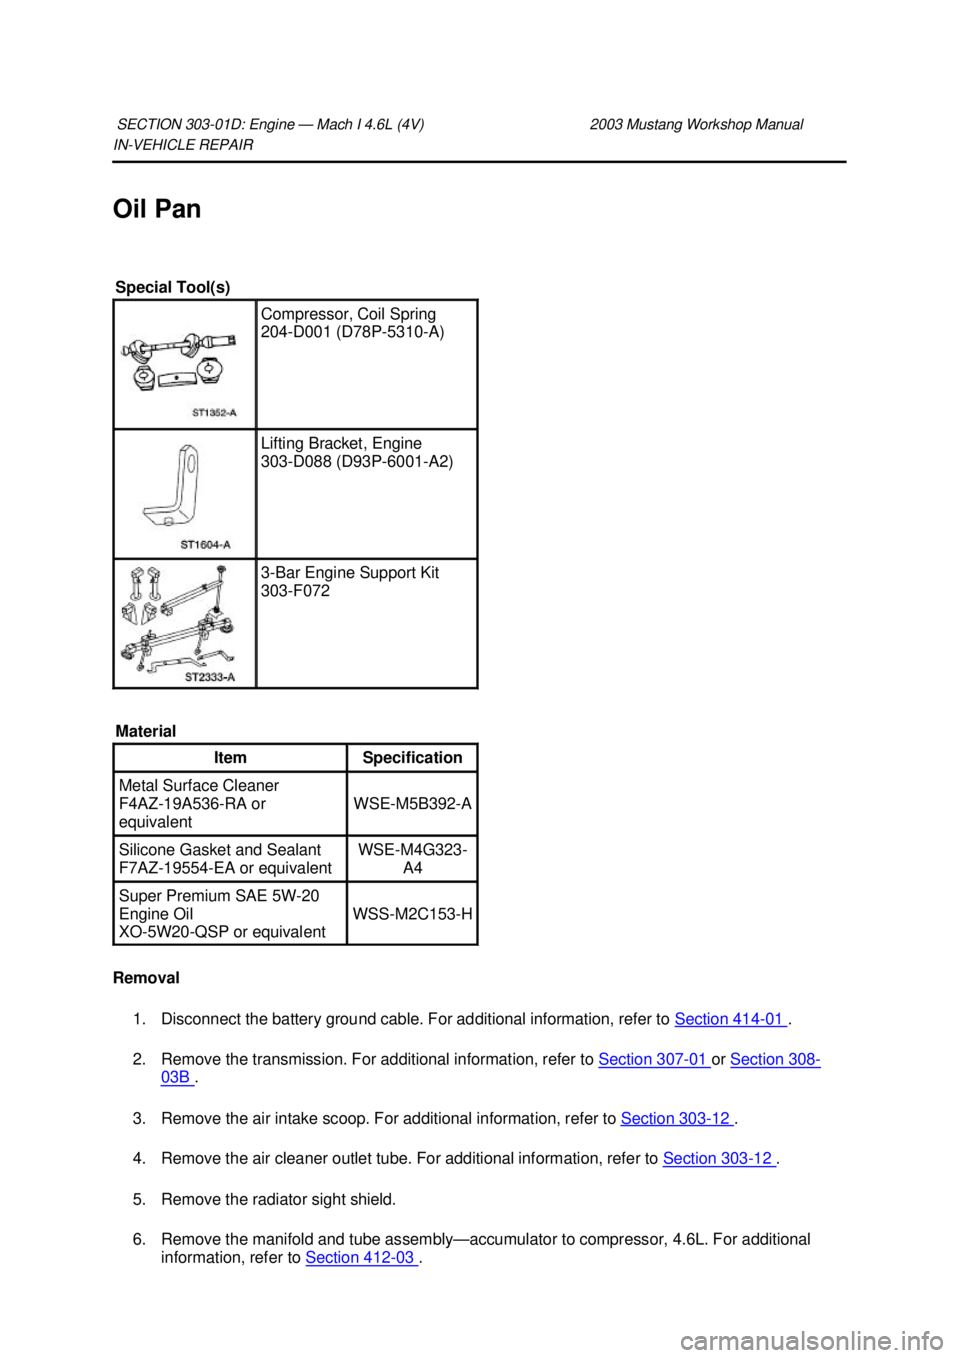
Oil Pan
Removal 1. Disconnect the battery ground cable. For additional information, refer to Section 414 - 01 .
2. Remove the transmission. For additional information, refer to Section 307 - 01 or
Section 308 -
03B .
3. Remove the air intake scoop. For additional information, refer to Section 303 - 12 .
4. Remove the air cleaner outlet tube. For additional information, refer to Section 303 - 12 .
5. Remove the radiator sight shield.
6. Remove the manifold and tube assembly— accumulator to compressor, 4.6L. For additional
information, refer to Section 412 - 03 .
SECTION 303-
01D: Engine — Mach I 4.6L (4V) 2003 Mustang Workshop Manual Special Tool(s)
Compressor, Coil Spring
204-
D001 (D78P-5310- A) Lifting Bracket, Engine
303-
D088 (D93P-6001- A2) 3-
Bar Engine Support Kit
303- F072
Material Item Specification
Metal Surface Cleaner
F4AZ-
19A536- RA or
equivalent WSE-
M5B392- A Silicone Gasket and Sealant
F7AZ-
19554- EA or equivalent WSE-
M4G323-
A4 Super Premium SAE 5W-20
Engine Oil
XO- 5W20- QSP or equivalent WSS-
M2C153- H �K�l�j . 1 �b�a
112003 Mustang Workshop Manual
17. 11. 2011file:///C:/Ford/2000 - 2004/tsocache/SHEF_4464/S3B~us~en~ ...
Page 1719 of 4378
18. Install the two engine mount nuts.
19. Install the transmission. For additional information, refer to
Section 307 - 01 or
Section 308 - 03B .
20. Lower the vehicle.
21. Fill the engine crankcase with clean engine oil.
22. Install the A/C line. For additional information, refer to Section 412 - 03 .
23. Install the manifold and tube assembly— accumulator to compressor, 4.6L. For additional
information, refer to Section 412 - 03 .
24. Install the radiator sight shield.
25. Install the air cleaner outlet tube. For additional information, refer to Section 303 - 12 .
26. Install the air intake scoop. For additional information, refer to Section 303 - 12 .
27. Install the battery ground cable. For additional information, refer to Section 414 - 01 .
28. Start the engine and check for leaks. �K�l�j . 10 �b�a
112003 Mustang Workshop Manual
17. 11. 2011file:///C:/Ford/2000 - 2004/tsocache/SHEF_4464/S3B~us~en~ ...
Page 1721 of 4378
IN-
VEHICLE REPAIR
Flexplate 1. Remove the transmission. For additional information, refer to Section 307 - 01 .
2. Remove the bolts in the sequence shown, and remove the flexplate.
3. To install, reverse the removal procedure.
SECTION 303-
01D: Engine — Mach I 4.6L (4V) 2003 Mustang Workshop Manual �K�l�j . 1 �b�a
22003 Mustang Workshop Manual
17. 11. 2011file:///C:/Ford/2000 - 2004/tsocache/SHEF_4464/S3B~us~en~ ...