2003 BMW Z4 2.5I change time
[x] Cancel search: change timePage 33 of 106
At a glance
Controls
Driving tips
Mobility
Reference
33
For vehicles without an alarm system:
Tilt the small lever forward.
Interior and exterior mirrors with
automatic dimming feature*
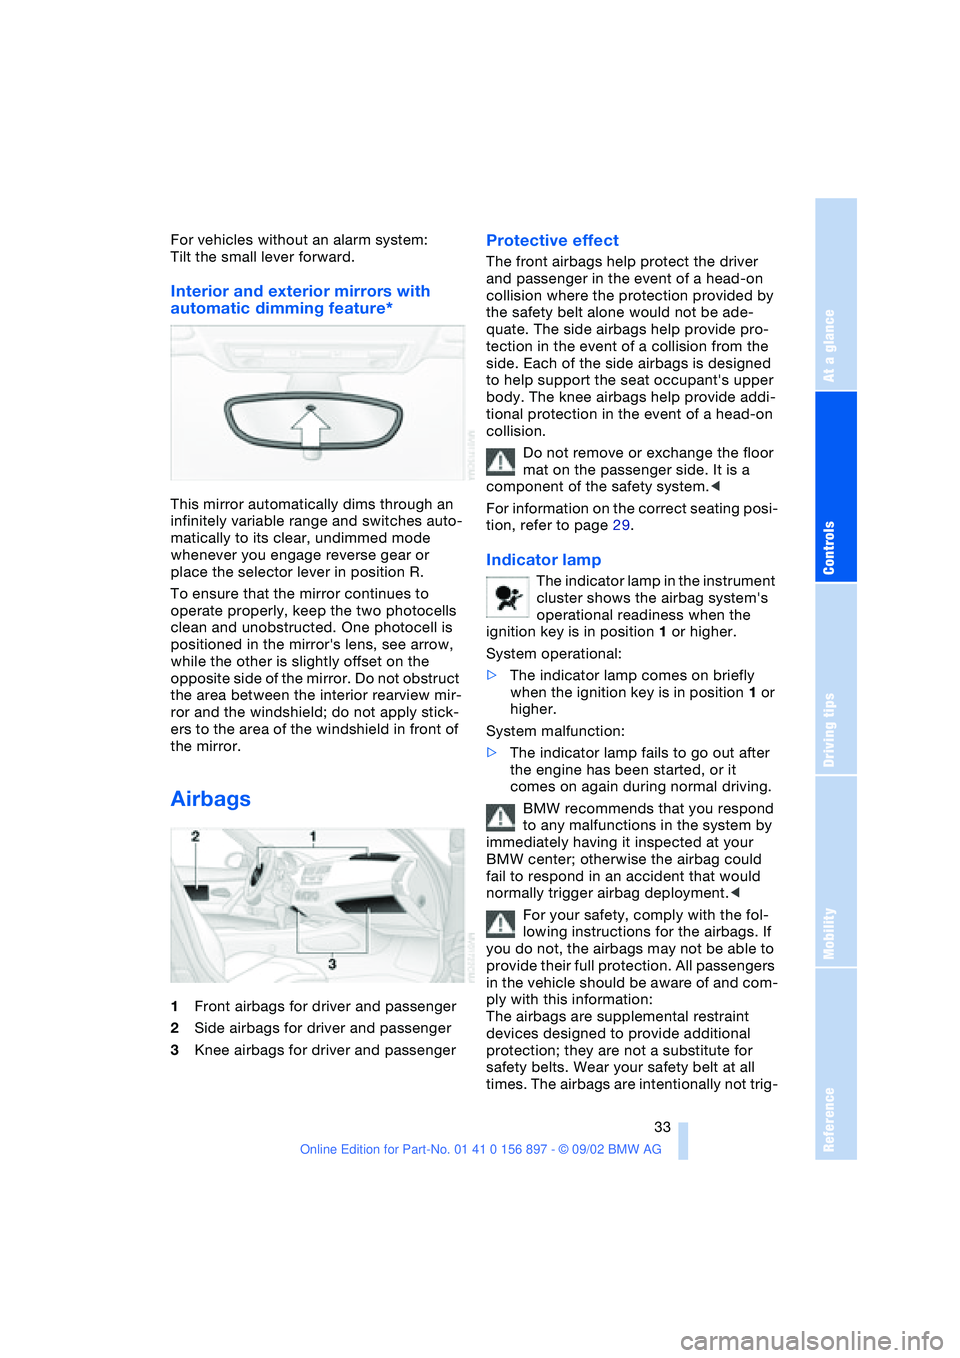
This mirror automatically dims through an
infinitely variable range and switches auto-
matically to its clear, undimmed mode
whenever you engage reverse gear or
place the selector lever in position R.
To ensure that the mirror continues to
operate properly, keep the two photocells
clean and unobstructed. One photocell is
positioned in the mirror's lens, see arrow,
while the other is slightly offset on the
opposite side of the mirror. Do not obstruct
the area between the interior rearview mir-
ror and the windshield; do not apply stick-
ers to the area of the windshield in front of
the mirror.
Airbags
1Front airbags for driver and passenger
2Side airbags for driver and passenger
3Knee airbags for driver and passenger
Protective effect
The front airbags help protect the driver
and passenger in the event of a head-on
collision where the protection provided by
the safety belt alone would not be ade-
quate. The side airbags help provide pro-
tection in the event of a collision from the
side. Each of the side airbags is designed
to help support the seat occupant's upper
body. The knee airbags help provide addi-
tional protection in the event of a head-on
collision.
Do not remove or exchange the floor
mat on the passenger side. It is a
component of the safety system.<
For information on the correct seating posi-
tion, refer to page 29.
Indicator lamp
The indicator lamp in the instrument
cluster shows the airbag system's
operational readiness when the
ignition key is in position 1 or higher.
System operational:
>The indicator lamp comes on briefly
when the ignition key is in position 1 or
higher.
System malfunction:
>The indicator lamp fails to go out after
the engine has been started, or it
comes on again during normal driving.
BMW recommends that you respond
to any malfunctions in the system by
immediately having it inspected at your
BMW center; otherwise the airbag could
fail to respond in an accident that would
normally trigger airbag deployment.<
For your safety, comply with the fol-
lowing instructions for the airbags. If
you do not, the airbags may not be able to
provide their full protection. All passengers
in the vehicle should be aware of and com-
ply with this information:
The airbags are supplemental restraint
devices designed to provide additional
protection; they are not a substitute for
safety belts. Wear your safety belt at all
times. The airbags are intentionally not trig-
Page 37 of 106
At a glance
Controls
Driving tips
Mobility
Reference
37
Vehicle Memory,
Key Memory
How the system functions
You have probably frequently wished that
you could configure individual functions of
your vehicle to reflect your own personal
requirements. In engineering your vehicle,
BMW has incorporated a number of
options for personal adjustment that can be
programmed into your vehicle at your BMW
center.
The available configuration data fall into
two categories, according to whether their
primary orientation is the vehicle – Vehicle
Memory, or the individual – Key Memory.
You can have up to four different basic set-
tings adjusted for four different persons.
The only requirement is that each person
uses his or her own remote control key.
When your vehicle is unlocked with the
remote control, the vehicle recognizes the
individual user by means of a data
exchange with the key, and makes adjust-
ments accordingly.
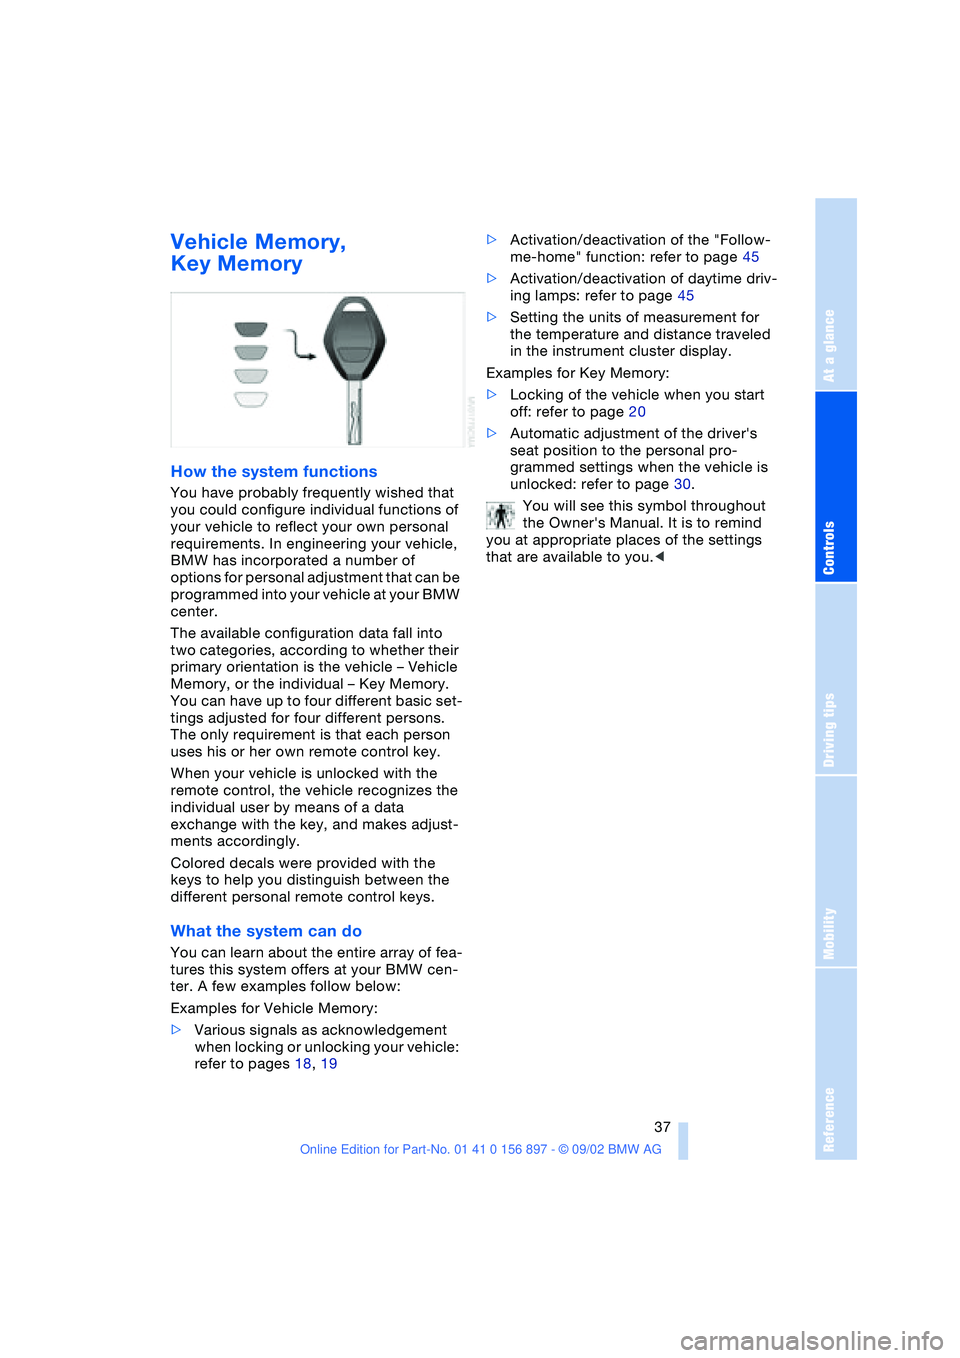
Colored decals were provided with the
keys to help you distinguish between the
different personal remote control keys.
What the system can do
You can learn about the entire array of fea-
tures this system offers at your BMW cen-
ter. A few examples follow below:
Examples for Vehicle Memory:
>Various signals as acknowledgement
when locking or unlocking your vehicle:
refer to pages 18, 19>Activation/deactivation of the "Follow-
me-home" function: refer to page 45
>Activation/deactivation of daytime driv-
ing lamps: refer to page 45
>Setting the units of measurement for
the temperature and distance traveled
in the instrument cluster display.
Examples for Key Memory:
>Locking of the vehicle when you start
off: refer to page 20
>Automatic adjustment of the driver's
seat position to the personal pro-
grammed settings when the vehicle is
unlocked: refer to page 30.
You will see this symbol throughout
the Owner's Manual. It is to remind
you at appropriate places of the settings
that are available to you.<
Page 40 of 106
Driving
40 The brake lamps do not come on when the
parking brake is engaged.<
Vehicles with manual transmission:
Always engage the parking brake
when parking on slopes and inclined sur-
faces, since shifting into 1st gear or reverse
may not provide adequate resistance to
rolling. Vehicles with automatic transmis-
sion: place the selector lever in
position P.<
To avoid corrosion and one-sided
braking, apply the parking brake
lightly from time to time when coasting to a
standstill – at a traffic signal, for example –
provided that it is safe to do so.<
Manual transmission
6-gear transmission*
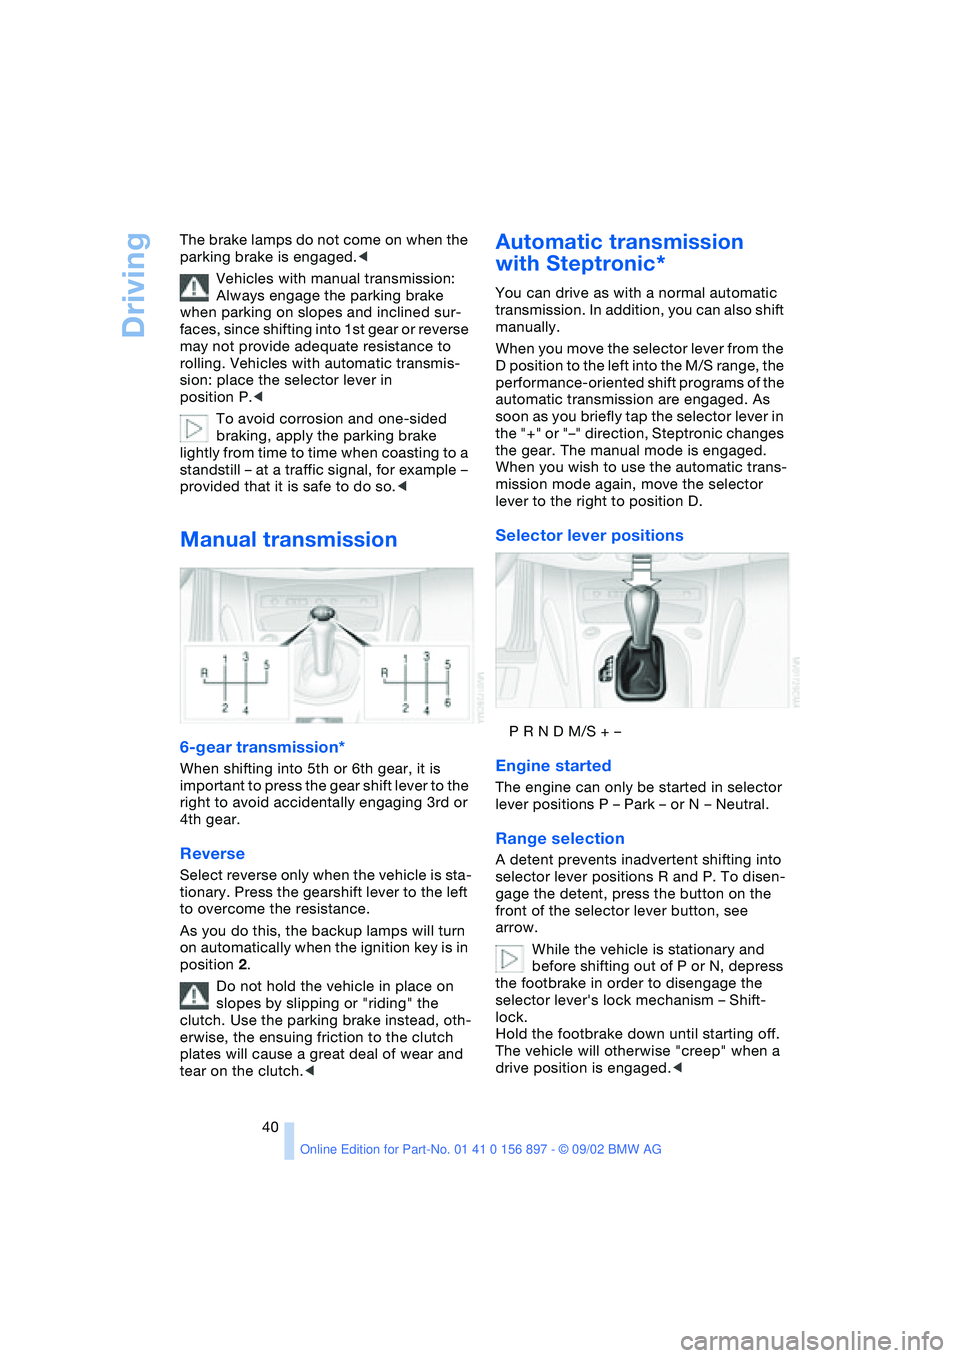
When shifting into 5th or 6th gear, it is
important to press the gear shift lever to the
right to avoid accidentally engaging 3rd or
4th gear.
Reverse
Select reverse only when the vehicle is sta-
tionary. Press the gearshift lever to the left
to overcome the resistance.
As you do this, the backup lamps will turn
on automatically when the ignition key is in
position 2.
Do not hold the vehicle in place on
slopes by slipping or "riding" the
clutch. Use the parking brake instead, oth-
erwise, the ensuing friction to the clutch
plates will cause a great deal of wear and
tear on the clutch.<
Automatic transmission
with Steptronic*
You can drive as with a normal automatic
transmission. In addition, you can also shift
manually.
When you move the selector lever from the
D position to the left into the M/S range, the
performance-oriented shift programs of the
automatic transmission are engaged. As
soon as you briefly tap the selector lever in
the "+" or "–" direction, Steptronic changes
the gear. The manual mode is engaged.
When you wish to use the automatic trans-
mission mode again, move the selector
lever to the right to position D.
Selector lever positions
P R N D M/S + –
Engine started
The engine can only be started in selector
lever positions P – Park – or N – Neutral.
Range selection
A detent prevents inadvertent shifting into
selector lever positions R and P. To disen-
gage the detent, press the button on the
front of the selector lever button, see
arrow.
While the vehicle is stationary and
before shifting out of P or N, depress
the footbrake in order to disengage the
selector lever's lock mechanism – Shift-
lock.
Hold the footbrake down until starting off.
The vehicle will otherwise "creep" when a
drive position is engaged.<
Page 45 of 106

At a glance
Controls
Driving tips
Mobility
Reference
45
Lamps
Parking lamps/Low beams
Parking lamps
The front, rear and side vehicle
lighting is switched on. You can use
the parking lamps to signal the
position of the vehicle when it is parked.
For information on lighting on one side of
the vehicle for parking, which is available
as an additional feature, refer to page 46.
Low beams
When you switch off the ignition
with the low beam headlamps on,
only the parking lamps will remain
on.
Follow me home lamps:
When you activate the headlamp flasher
after parking the vehicle and switching off
the lights, the low beams will come on for a
brief period.
You can also have this function acti-
vated/deactivated if you wish.<
Defective bulbs
The defective bulb indicator lamp
lights up:
At least one bulb of the vehicle's
exterior lighting has failed.
For replacing bulbs: refer to page 84.
LIGHTS ON warning
Whenever you open the driver's door after
having turned the ignition key to position 0,
you will hear an acoustic signal for a few seconds to remind you that the lamps have
not been switched off
.
Daytime driving lamps*
If you wish, the light switch can be left in
the second position. When the ignition is
switched off, the external lighting is also
switched off.
You can have the activation settings
for the daytime driving lamps pro-
grammed on your vehicle.<
Automatic headlamp control*
When the switch is set to this posi-
tion, the system automatically
switches the low beams on and off
in response to changes in ambient light – in
tunnels, at dusk, etc. – as well as to rain and
snow.
The vehicle's external lights remain
on constantly when you switch on the
front fog lamps after the headlights have
come on automatically.<
Automatic headlamp control cannot
serve as a substitute for the driver's
judgement in determining when the vehicle
lights should be switched on. For example,
the sensors are not able to detect fog. To
avoid safety risks, you should respond to
these kinds of low-visibility situations by
switching the headlights on manually.<
You can have the sensitivity of your
vehicle's automatic headlamp control
adjusted.<
Page 49 of 106
At a glance
Controls
Driving tips
Mobility
Reference
49
4.Press button 1 repeatedly until the
required minutes are set
5.Press button 2 to confirm the settings.
The set time of day is transferred to the car
radio display or appears in the instrument
cluster display.
Display mode
In ignition key position 0:
Press button 1.
The time of day is displayed for several
seconds.
Computer*
Mode selection
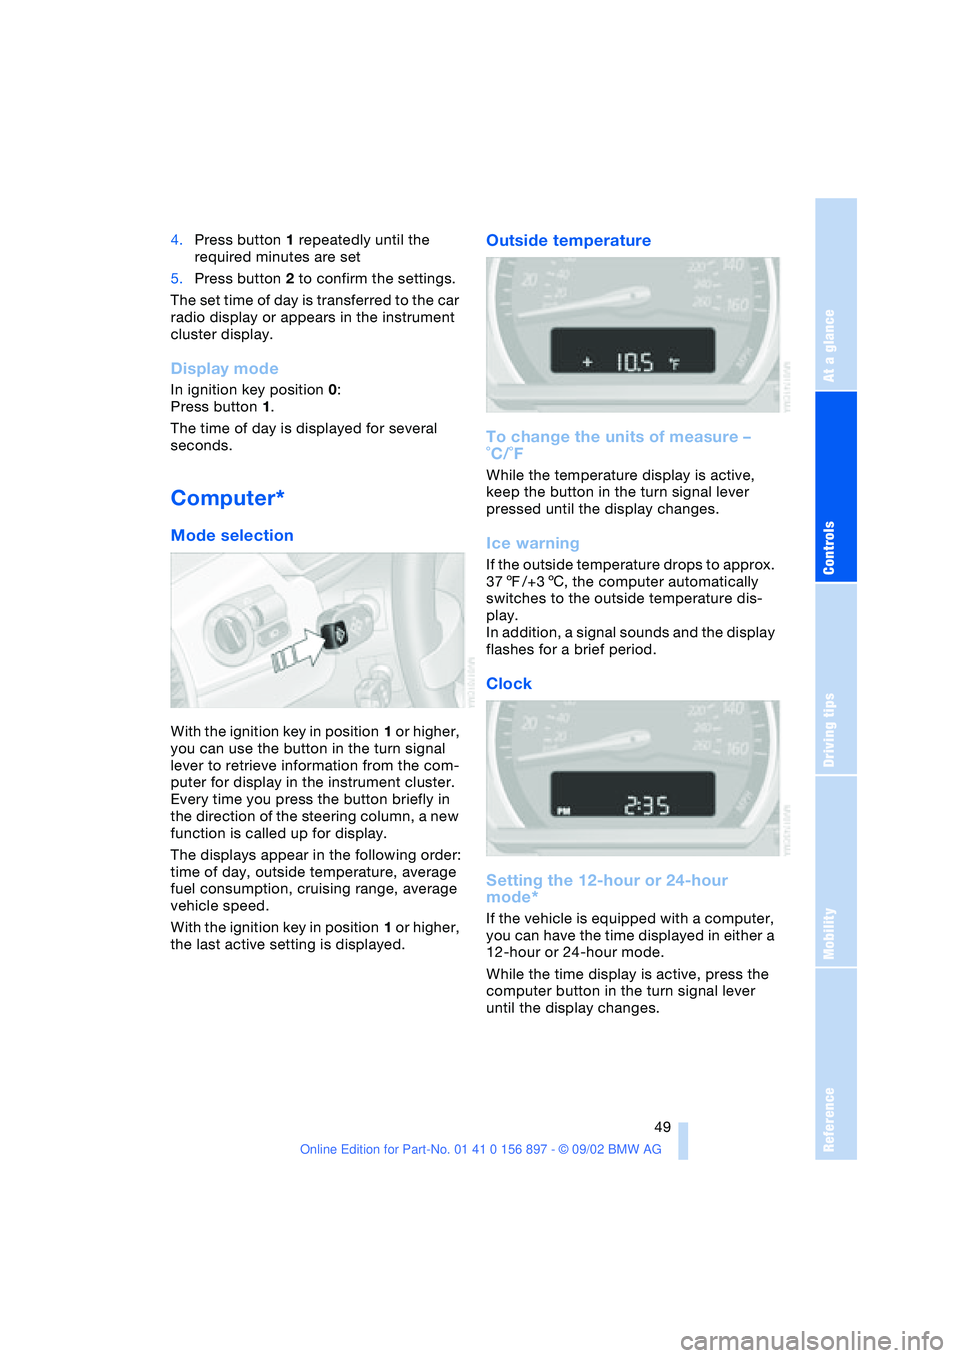
With the ignition key in position 1 or higher,
you can use the button in the turn signal
lever to retrieve information from the com-
puter for display in the instrument cluster.
Every time you press the button briefly in
the direction of the steering column, a new
function is called up for display.
The displays appear in the following order:
time of day, outside temperature, average
fuel consumption, cruising range, average
vehicle speed.
With the ignition key in position 1 or higher,
the last active setting is displayed.
Outside temperature
To change the units of measure –
˚C/˚F
While the temperature display is active,
keep the button in the turn signal lever
pressed until the display changes.
Ice warning
If the outside temperature drops to approx.
377/+36, the computer automatically
switches to the outside temperature dis-
play.
In addition, a signal sounds and the display
flashes for a brief period.
Clock
Setting the 12-hour or 24-hour
mode*
If the vehicle is equipped with a computer,
you can have the time displayed in either a
12-hour or 24-hour mode.
While the time display is active, press the
computer button in the turn signal lever
until the display changes.
Page 54 of 106
Technology for safety and driving convenience
54
System malfunction
The indicator lamp lights up yellow:
There is a malfunction or fault in the
Flat Tire Monitor.
In the event of this, please contact your
BMW center.
Initializing the system
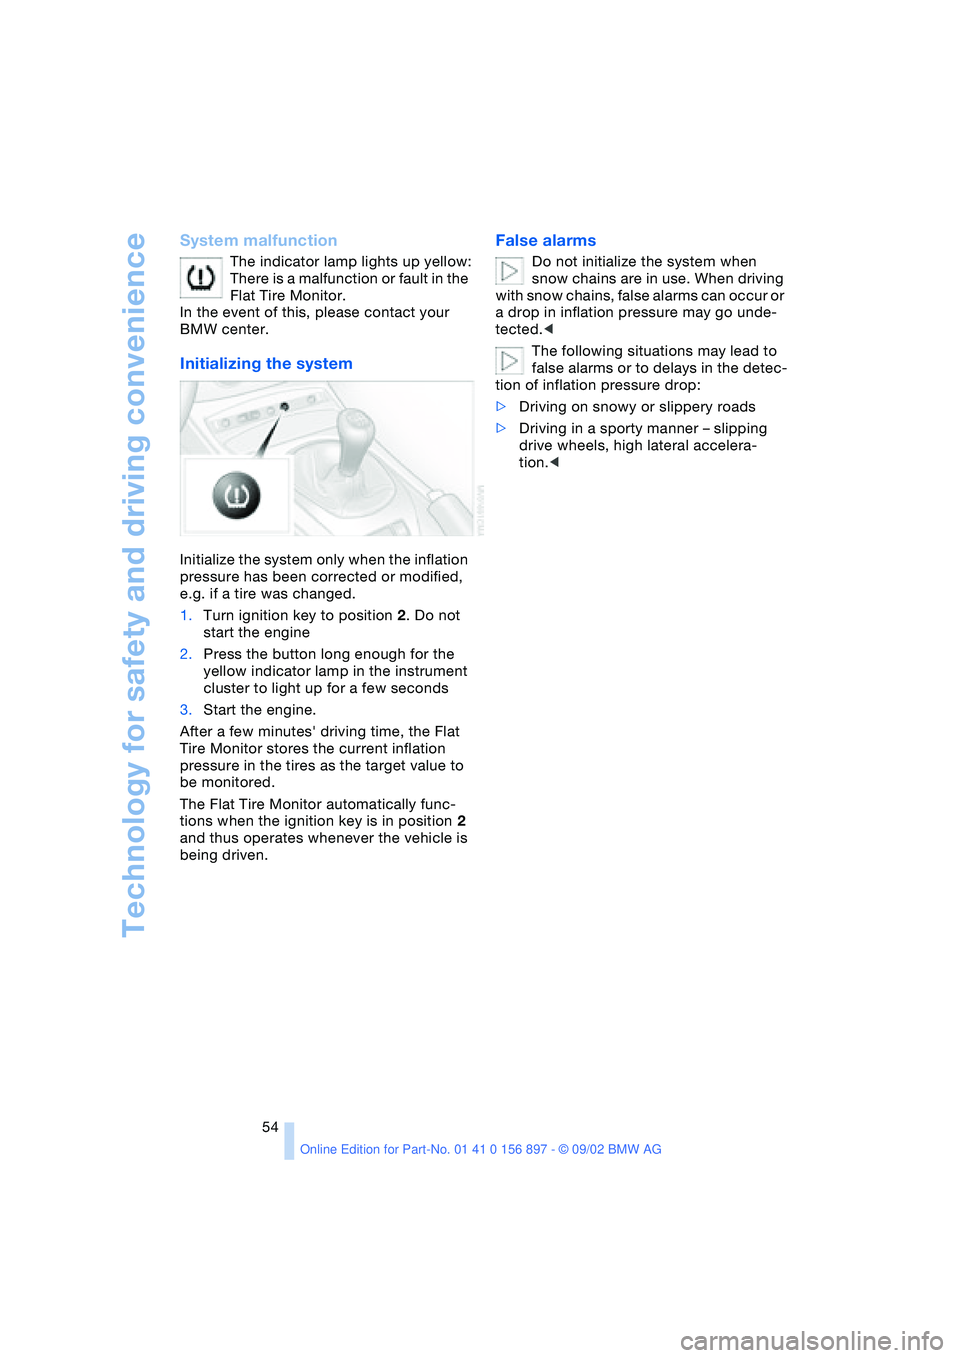
Initialize the system only when the inflation
pressure has been corrected or modified,
e.g. if a tire was changed.
1.Turn ignition key to position 2. Do not
start the engine
2.Press the button long enough for the
yellow indicator lamp in the instrument
cluster to light up for a few seconds
3.Start the engine.
After a few minutes' driving time, the Flat
Tire Monitor stores the current inflation
pressure in the tires as the target value to
be monitored.
The Flat Tire Monitor automatically func-
tions when the ignition key is in position 2
and thus operates whenever the vehicle is
being driven.
False alarms
Do not initialize the system when
snow chains are in use. When driving
with snow chains, false alarms can occur or
a drop in inflation pressure may go unde-
tected.<
The following situations may lead to
false alarms or to delays in the detec-
tion of inflation pressure drop:
>Driving on snowy or slippery roads
>Driving in a sporty manner – slipping
drive wheels, high lateral accelera-
tion.<
Page 58 of 106
Controlling the climate for pleasant driving
58
Tips for pleasant driving
Use the automatic system – switch on with
AUTO button 6. Select the desired interior
temperature.
Detailed setting options are described for
you below.
Automatic air distribution and
supply
The AUTO program assumes the
adjustment of the air distribution
and air supply for you and in addi-
tion adapts the temperature to
external influences – summer, winter – to
meet preferences you can specify.
Individual air distribution
You can also direct air flow onto
the windows , toward the
upper body and into the foot-
well as you require. The arrow
lights up. The automatic air supply remains
unchanged. All intermediate settings are
possible. By pressing the AUTO button,
you can reactivate the air distribution.
Temperature
The interior temperature that
appears on the display panel is a
general figure intended for refer-
ence purposes. When you start
the vehicle, the system ensures that the
selected temperature is reached as quickly
as possible. It then maintains this tempera-
ture, regardless of the season.
Air supply/blower
You can set the blower through
an infinitely variable range of
speeds. This shuts off the auto-
matic air supply. The arrow lights
up. The automatic air distribution remains
unchanged. You can reactivate the auto-
matic air supply by pressing the AUTO but-
ton.
When you turn the rotary control toward
zero: the blower, heating and air condi-
tioner are switched off, and the air supply is stopped. You can reactivate the system by
turning the control toward the right again.
To defrost windows and remove
condensation
This program quickly removes ice
and condensation from the wind-
shield and the side windows.
Maximum cooling
This program gives you maximum
cooling within a short period of
time.
The temperature is set to the lowest possi-
ble value. The system switches into the
recirculated air mode and air flows at max-
imum blower speed from the air outlets
only. Therefore, the air outlets must always
be open when you select this program.
Air conditioning
The air is cooled and dehumidi-
fied and – depending on the tem-
perature setting – rewarmed.
Depending on the weather, the
windshield may fog over briefly when the
engine is started.
The air conditioning system is automati-
cally switched on when you use the AUTO
program.
Condensation forms during operation
of the air conditioning system, which
then exits under the vehicle. Traces of con-
densed water on the ground underneath
the vehicle are thus normal.<
Outside air/Automatic recirculated
air control AUC/recirculated air
mode
You can respond to unpleasant
external odors or pollutants by
temporarily stopping the flow of
outside air. The system then
recirculates the air currently within the
vehicle.
By repeatedly pressing the button, you can
select one of three different operating
modes.
Page 76 of 106
Wheels and tires
76
Winter tires
Choosing the right tire
BMW recommends Run Flat winter tires –
M+S – for operation under inclement winter
driving conditions. While all-season tires
with the M+S identification mark do indeed
possess better winter traction than summer
tires that have the H, V, W, Y and ZR speed
ratings, they generally do not provide the
same levels of performance as true winter
tires.
In the interests of sure tracking and safe
steering response, mount winter tires
which are made by the same manufacturer
and which have the same tread configura-
tion on all four wheels.
Your BMW is equipped with Run Flat tires.
Please consult your BMW center if you
wish to replace the tires of your BMW or
change from summer to winter tires, or vice
versa.
When replacing tires or changing from
summer to winter tires – or vice versa –
use only Run Flat tires since a spare tire will
not be available in the event of a flat tire.<
Comply with recommended speed
Never exceed the maximum speed for
which the winter tires are rated.
Unprofessional attempts by laymen to ser-
vice tires can lead to damage and acci-
dents.
Have this work performed by skilled pro-
fessionals only. Any BMW center has the
required technical knowledge and the
proper equipment and will be happy to
assist you.<
Tire condition, tire pressure
Once the tire wears to below 3/16 in /
4 mm, winter tires display a perceptible
decrease in their ability to cope with winter
driving conditions, and should be replaced
in the interest of safety.
Comply with the specified tire inflation
pressures – and be sure to have the wheel
and tire assemblies balanced every time
you change the tires.
Storage
Store tires in a cool, dry place, protecting
them against light whenever possible. Pro-
tect the tires from contact with oil, grease
and fuel.
Snow chains*
Only certain types of snow chains have
been tested by BMW, classified as road-
safe and approved. Consult your BMW
center for more information. BMW recom-
mends using only approved fine-link snow
chains.
Their use is only permitted in pairs on the
winter tires on the rear wheels. Comply
with all manufacturer's safety precautions
when mounting the chains.
You cannot mount snow chains on the fol-
lowing tires:
245/40 R 17
255/35 R 18
Do not exceed a speed of 30 mph /
50 km/h when using snow chains.<
Do not initialize the Flat Tire Monitor
after snow chains have been
mounted.
When driving with snow chains, it may be
useful to deactivate the DSC briefly. Refer
to page 51.<